When you have a beloved iTunes music collection that you’ve carefully curated for years, you definitely don’t want to leave it behind, and you may not want to re-download everything one album at a time from your Apple Account, either. While iCloud can help with smaller transfers, it’s not really conducive to moving your entire iTunes library.
Fortunately, Apple has a tool specifically designed to move data from one computer to another, especially when you just got a new computer and are updating: It’s called Migration Assistant, and it’s your best option for a smooth iTunes transition. You don’t have to download an extra app, because Migration Assistant is included in MacOS natively. If you are transferring iTunes to a Mac, you can use it. Here’s how to begin:
Step 1: Consolidate your files
Update everything on both computers so they are running the latest version of the operating system and iTunes. Then make any data backups that you may need. Prepare your iTunes library by opening iTunes, selecting File, going to Library, and choosing Organize Library.
Here you will see an option to Consolidate files. Select it to give your iTunes library a quick clean up so everything is prepared.
Step 2: Start Migration Assistant
Since the advent of MacOS Sierra, all you need is for both computers to be on the same wireless network for Migration Assistant to work. However, for a faster connection, you may want to use an Ethernet cable instead. Either way, make sure both are connected and ready to get to work.
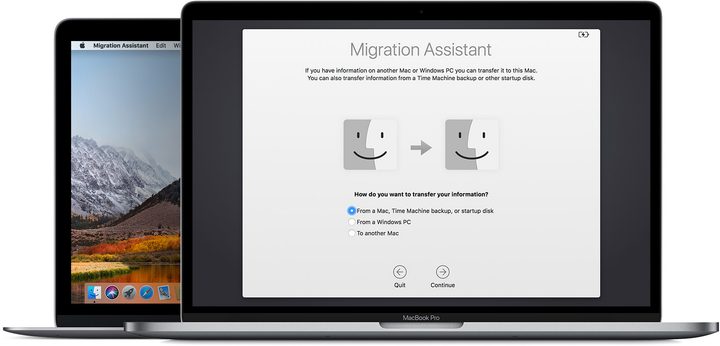
Go to your new Mac computer and head to the Applications folder, which you can find in the Dock. Select Utilities, and then choose Migration Assistant. After confirming you want to start the process, Migration Assistant will ask if how you want to transfer information. You will want to make sure you have select From a Mac, Time Machine backup, or startup disk. Then choose Continue.
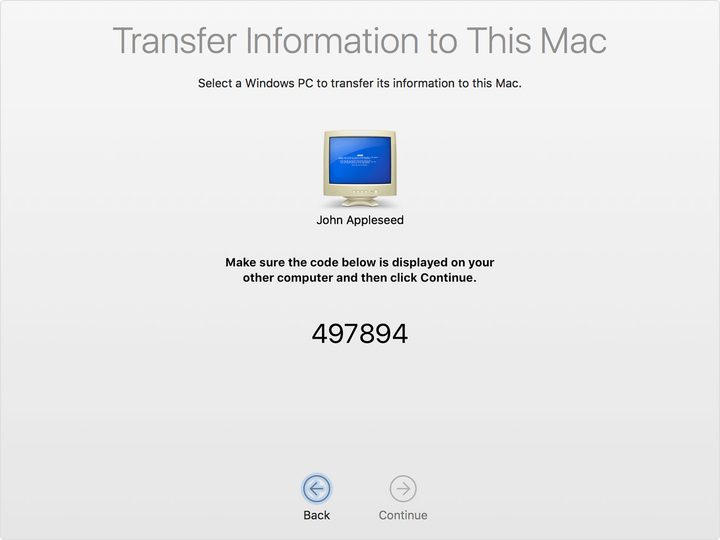
You can also use Migration Assistant to move iTunes files from a PC to a Mac (this doesn’t work with particularly old Windows computers, but as long as you have Windows 10 you should be fine). When Migration Assistant asks how you want to transfer information on your new Mac, make sure you choose the option that says From a Windows PC.
Step 3: Migrate on your old Mac
Now head over to your old Mac and open Migration Assistant there as well with the same process. However, at the Migration Assistant screen, choose “To another Mac” when asked how you want to transfer information. Then select continue.
Go back to your new Mac once again. Migration Assistant should next ask if you want to transfer information from a Mac, Time Machine backup, or a specific startup disk. Here you should select the Mac option, and choose continue. Apple may give you a security code to confirm on both computers at this point, so make sure the code appears correctly before you move on.
Step 4: Select your data to transfer
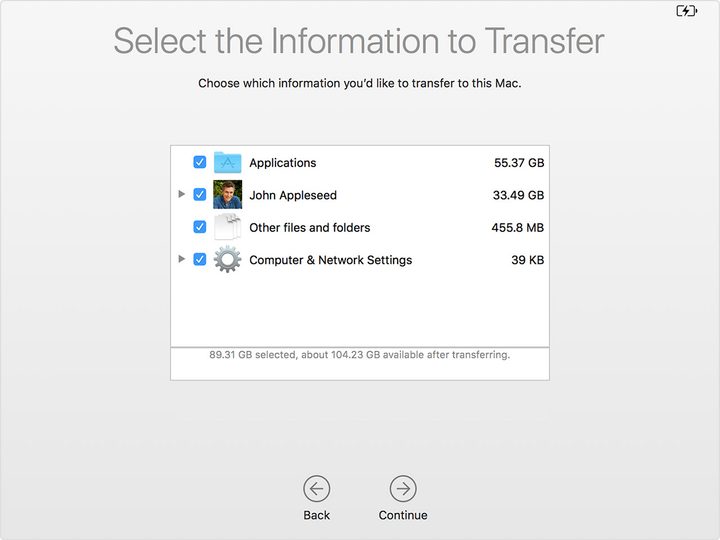
Once you choose a specific source to migrate data from, the Assistant will ask you to Select the Information to Transfer. If this is a brand new computer, you’ll probably want to transfer almost everything, so selecting all options is a good idea. If you are on a used Mac and only want to transfer iTunes, click on your user profile and select your Music folder to get started. When you’re ready to begin, select continue. The transfer process may take a while, especially if you are moving a lot of data, so stay patient!
When finished, log into your new Mac and check to make sure all your iTunes content is there. You will probably have to authorize the computer to use your iTunes content before you can play it.
Alternatively, use an external hard drive
Don’t feel like messing around with the Migration Assistant? You could always hook up an external hard drive and transfer your music files manually from one computer to another. If you are moving files between a Mac and a PC, you should also make sure that the drive is partitioned correctly for your needs.
This option may take a little longer and requires enough space on an external hard drive. However, it may be your best choice if you are gathering music files from a diverse number of places and even formats, and moving as many as you can to one iTunes account.
This is also one of the best options if you are transferring from PC to PC or from Mac to PC, where Migration Assistant can’t help you out.