
I have a newfound respect for the workers of Apple’s Foxconn factory. And I’m not even an iOS user.
Let’s backtrack for a bit. In June, Lomography unveiled a new hipster dream toy with the Konstruktor, a 35mm SLR camera that requires user assembly – kind of like those plastic model airplanes from when you were a kid. The company even threw an opening party, complete with construction hats, caution tapes, and Bob the Builder-esque decor. A few weeks later, the Lomography Konstruktor set landed on my desk and I couldn’t wait to own a SLR camera that wasn’t as heavy as my trusty old Topcon. Then, I started “konstrukting.”
Setup
 When you open up the Lomography Konstruktor set, all you might want to do is leave it as is and display the box as home decoration. Just look at the intricacies behind a full SLR camera! Did you know that the shutter alone takes at least four different parts to operate?
The assembly instruction is much like those of plastic toy models. The set comes with the main body of the camera, mirror glass, back pieces, and two sets of smaller parts that act as the camera mechanics.
As with all excitements that come with new toys, you might want to rush through the assembly to get a functioning camera going. Patience, my friends. If you cringe at the thought of putting together Ikea beds, you’re on my boat. The assembly process is going to be something like this:
- 15 minutes in: I wonder how someone with larger hands deals with these tiny screws. Good thing there are several extras in case you misplace one.
- 30 minutes: Hey, this isn’t so bad. Look, screw S2 in between P8 and B9. Reads like English.
- 45 minutes: I don’t know if this bubble that’s starting to grow on the underside of my finger is worth this trouble, but at least this is starting to look like a camera.
- 1 hour: I can’t believe people get paid $5 a day to do stuff like this all day, everyday.
- 1 hour, 15 minutes: Done! It’s so beautiful! Wait, what is that one spring doing outside of the camera? Did I skip a ste… FFFFFF.
- 1 hour, 30 minutes: Really done, really proud, holy crap it’s like I just gave birth to a beautifully distorted baby.
Easy peasy (ish). The set comes with leather stickers to jazz up your Konstruktor, and although the body has lugs for a camera strap, said strap does not come included.
Using the camera
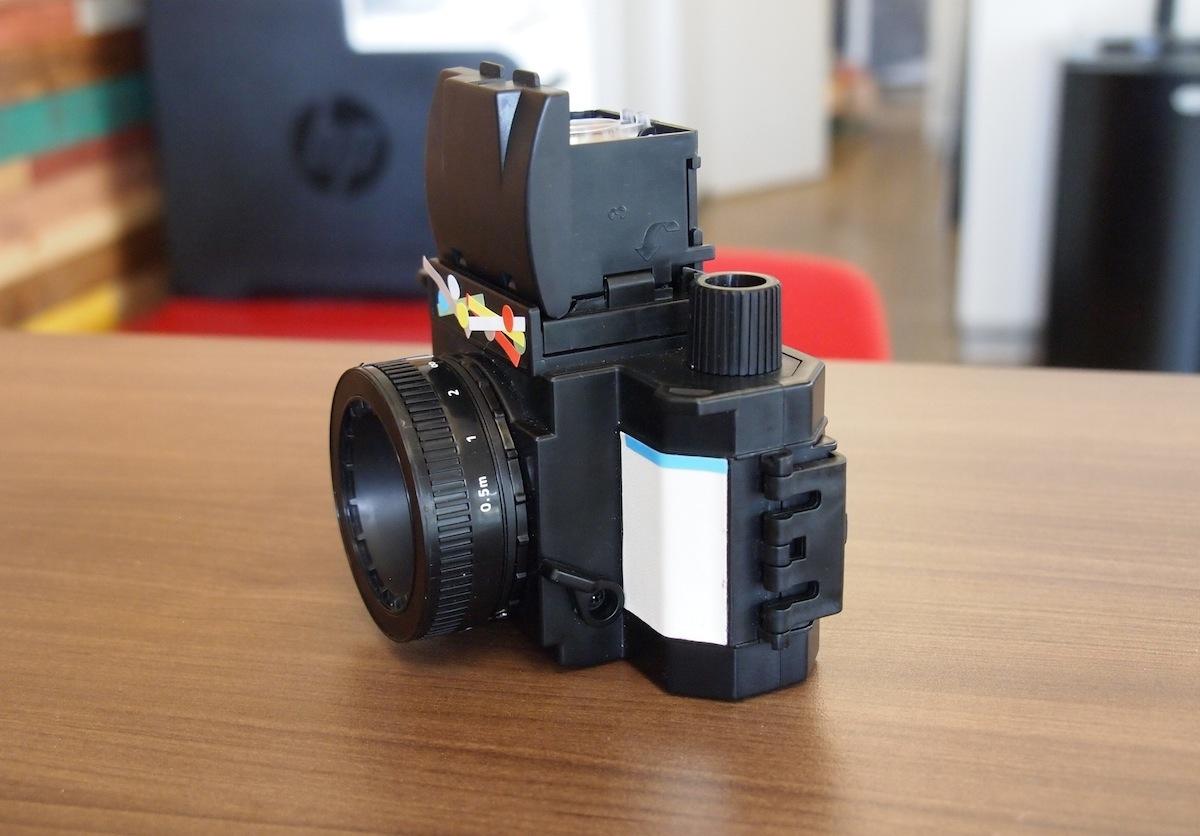
If you are familiar with SLR cameras, you might have already noticed the lack of a traditional viewfinder window. Instead, the Konstruktor requires users to look in from the top-down viewfinder. Conveniently it comes with that magnifier you snapped in earlier to help focus. With the included fixed 50mm F10 lens, you’ll seldom need to adjust the focus too much unless you’re really trying for a macro look.
Because you have a fixed aperture lens, you will want to use 100 to 400 ISO films for best results. Load the film like you would with traditional cameras and advance the film forward two shots. You’ll need to hit the shutter, press the Mirror Reset knob, and advance again to get this done.
Thanks to the plastic body, the Konstruktor is extremely lightweight and portable. When you’re not using the camera, keep the top viewfinder window closed to prevent dust collection. Don’t turn the film advance knob or reset the mirror until you’re ready to shoot the next photo. You don’t want that going off prematurely in your bag.
At the front of the camera, you have the option of “N” or “B,” which stand for regular or long exposures, so depending on the mode you may need to stand particularly still for the effect. Luckily the Konstruktor body comes with a tripod screw in case you need to mount the camera. When you’re ready to shoot, frame the image and press the shutter next to the film advance knob.
This is weird…
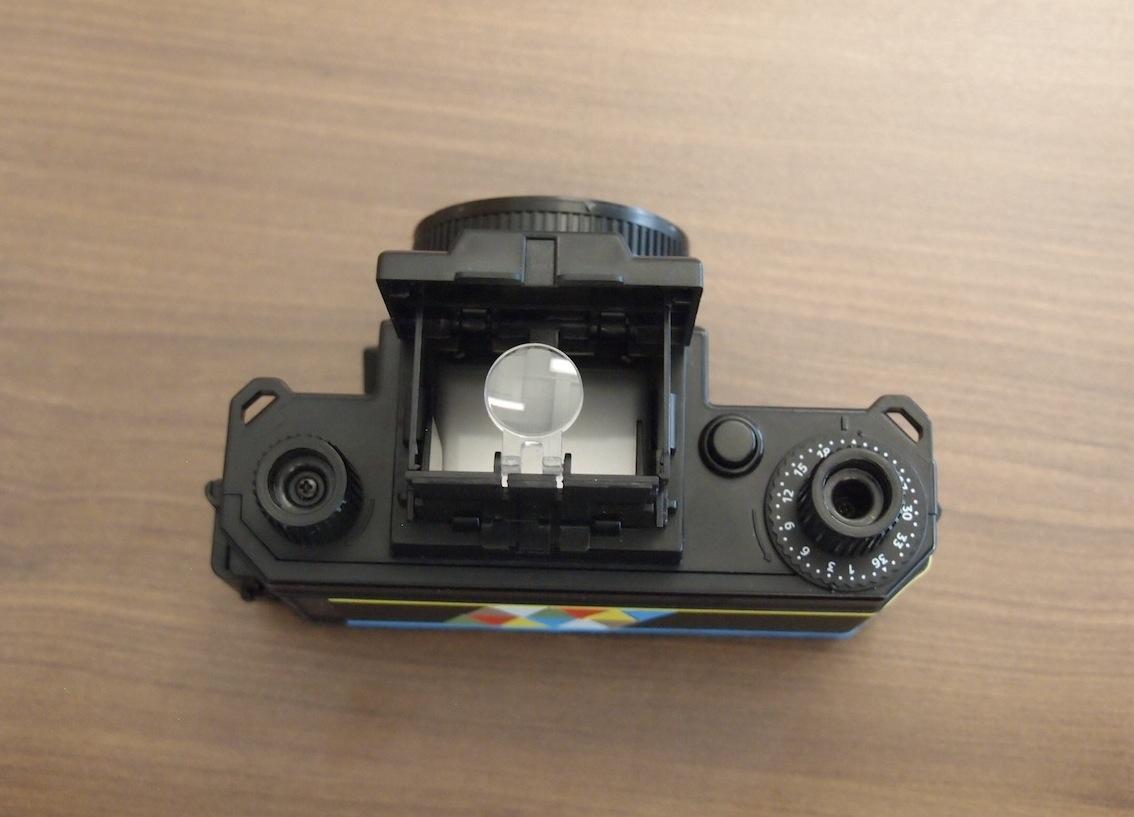
One thing we noted during our time with the Konstruktor is that the film counter doesn’t like to stay in place. Either we assembled this incorrectly or it’s a matter of poor design, but you can easily turn the number wheel around without advancing the film. This made it extremely difficult to keep track of what exposure you’re on, so you just have to keep going until the film advance refuses to turn further. That’ll indicate that you’ve run out of film, so it’s time to rewind with the knob on the left. You should bring an extra roll of film in case this happens in the middle of a good photo day so you’re not unexpectedly out of shots. Sadly, this issue made us lose a couple of exposures, resulting in just 19 out of the 27 shots in a roll.
Another small gripe is the manual opening for the top-down viewfinder. It takes a couple of seconds to open the top flap, turn the left and right windows open, then pop up the middle flap with the magnifier. This makes it difficult to snap shots on the fly, so unless you have the viewfinder open and ready to go, you might end up missing some truly great candids while fumbling to open the camera.
One last thing – the lens can overall be a pain. Twist it too hard during focusing and you risk removing the lens entirely. It also doesn’t have any cap to block out specks of dust.
Results
To test the full Lomography effect, I used two different rolls of film: An expired Konica Minolta VX 200 and a fresh Kodak UltraMax 400. The Konstruktor obviously comes with no flash, so I took photos in mostly bright settings, with the exception of a few shots around the sunset hour.

For a budget, DIY SLR, the Konstruktor is surprisingly good at picking up smaller, finer details. When standing still to take a photo, the picture comes out fairly sharp. If you snap a pic and draw the camera down right away, you risk the chance of a slightly blurry photo. Not recommended for those with nervous hands.


- 1. 0.5m focus
- 2. Infinity focus
- 3. Double exposure
- 4. Odd light effect?
To my surprise, the sloppy assembly did nothing to the film in regards to light leaks. However, with the expired Konica roll, the Konstruktor apparently picked up a lot of light and screwed around with the questionable film condition. Most of the photos had a pinkish hue, which is unsurprising with aged film. But the shot of One World Trade Center (a.k.a., Freedom Tower) with a bright green overlay threw me off-guard. Those who like to experiment with Lomography may find this unintended effect endearing. A quick fix in Photoshop can easily adjust the contrast on the photo for a better view of the tower itself.
The benefits of a manual advance is how easy it is to purposely create a double exposure. In the days of disposable cameras, you had to smack the side of the cam to force the flash and shutter to go off. With the Konstruktor, just reset the mirror and take another shot without advancing the film. You’ll want a friend to help you take double exposed portraits, as selfies are basically impossible with this camera.
Should you buy it?
For a $35 film camera, the Lomography Konstruktor isn’t a bad deal at all. The quality of the photos turned out quite well, and managed the dream-like state you’re probably wanting to achieve by buying from Lomography. It’s not the easiest camera to use, and framing can be hard if you’re not used to top-down viewfinders. Assembly can also be rough if you’re not into hobby-type projects, but Lomography says it will soon sell preassembled versions for those who want to skip role-playing Bob the Builder.
Compared to other Lomography cameras in the same price range, the Konstruktor is able to pick up sharper details than, say, the popular Holga or Diana toy cameras. The Konstruktor is also a great tool for film photography beginners, as it teaches the importance of exposure, film type, and focusing. It’s cool to learn how a camera functions by building it yourself. You also can’t mess up too terribly when there are only four focus levels.
All in all, the Konstruktor is a cheap toy for a little bit of vintage fun, and should please hipsters hopping on the film photography trend. Film connoisseurs will have already known this wasn’t for them the moment the price tag was announced.
The Lomography Konstruktor is available now.


