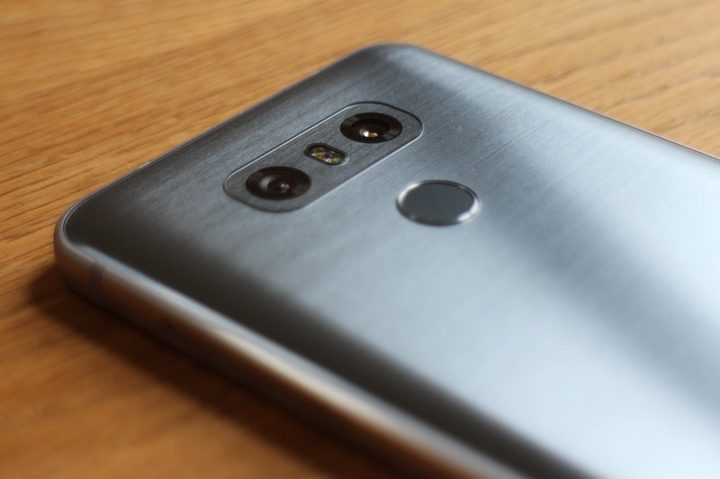
The LG G6 continues the company’s tradition of phones featuring excellent cameras, with a dual-lens wide-angle rear camera as well as a wide-angle selfie cam on the front. The G6’s other party piece, its 5.7-inch, 18:9 aspect ratio screen, also enhances the camera experience through a special app, and some additional features.
While it’s not hard to just pick up the LG G6 and go shoot some excellent pictures, it’s worth taking the time to understand its intricacies, so we’ve put together a guide to help you really make the most of this great camera phone.
Wide-angle rear camera

The main camera app is the one you’ll use most of the time, but the interface is quite busy, so it’s a good idea to learn the various controls. Holding the phone in landscape orientation, at the top centre of the display are two buttons, each showing little tree icons. The left button with a single tree icon is for the standard-angle lens, but tap the button next to it with three tree icons, and it activates the wide-angle lens. Alternatively, you can use pinch-to-zoom and switch between the two lenses. Pinch your fingers together to move from standard to wide angle views.
Camera roll preview

On the right-hand side of the display are the buttons for the camera shutter release, and the video mode, plus a preview of the last photo taken. On the far left-hand side of the screen, thanks to the 18:9 aspect ratio display, there’s a vertical preview of the last four photos taken, which can also be scrolled through with a swipe. It’s a handy alternative to jumping out of the camera app and into the Gallery app. If you feel this makes the screen look too busy, you can turn off the preview. This is found by tapping the Settings cog icon, and toggling the switch for Camera Roll.
Settings and manual mode

While you’re under Settings, it’s here that the HDR mode can be force activated, the resolution for photos and video selected, along with handy features such as a grid for the viewfinder — activate this to make composing shots easier — and geolocation tagging for your pictures. In the interests of privacy, we’d suggest turning the latter off.
The G6’s camera defaults to auto mode, but if you want to experiment with manual mode — where you can adjust many aspects of the camera — tap the Auto button on the left-hand side of the screen, and select Manual. There are two manual modes, one for the still camera and another for video. Also found in this menu is a mode for taking square, 1:1 ratio pictures, for easy sharing on apps like Instagram.
Panorama, Food, Popout, and other modes


Other camera modes can be found by tapping the Mode button on the left-hand side of the screen. A basic panorama mode is accompanied with a 360-degree panorama mode, and an enhanced image mode for taking pictures of food. More unusually, there’s LG’s Popout, which produces psychedelic images with different effects, by splitting the image into separate areas. Give it a try, it’s a very unusual look.
Also on the left hand side of the screen is a filter button, which looks like three overlaid circles. Tap this and choose from nine different effects, which handily show up live on the viewfinder. The filter icon on the left is shown in color when a filter is active, so you won’t forget about it.
Selfies
Flip the camera around using the button on the left of the camera viewfinder, or simply swipe up or down the screen for the same result. The front camera on the G6 also has a wide-angle mode, and it’s activated in the same way as the rear camera, except the icons have little images of people instead of trees. Be careful when in wide-angle mode, it’s easy for a finger or your palm to invade the shot if you hold the phone in an awkward way.
There are three new modes available when shooting selfies, which are adjusted using buttons running down the right hand side of the viewfinder. They’re labeled Filter, Lighting, and Skin Tone. The filters adjust the look of the entire scene, and are shown live on the screen, just like with the rear camera. Lighting and Skin Tone only affects your face, acting like a beauty mode. Mess around with both using the on-screen slider controls to get the look that suits you best.
Editing

When viewing photos in the LG G6’s gallery, there’s an Edit button at the bottom of the screen, which unusually doesn’t open LG’s own image editing suite, but Google Photos. If it doesn’t do the job, consider installing an app such as Snapseed, which will then appear in the options when you tap the Edit button.
Square Camera


Square Camera makes clever use of the G6’s 18:9 (or 2:1) aspect ratio screen, by splitting the camera view into two perfect squares, and using each one differently. If you’re looking for a Square Camera app and can’t find it, don’t panic, it’s actually a widget and may have been hidden away on your phone. To get it working, hold down an empty area of home screen until you get a helicopter view of all your apps and screens, then select widgets from the menu running across the bottom of the screen. Scroll through the widgets available until you find Square Camera, then tap it to add it to a home screen.
Holding the phone in portrait here, the same method for switching between front and rear cameras applies: A swipe or a tap of the button. Also, the wide-angle mode is activated in the same way, along with the majority of controls for taking a picture. Tap the Square button in the top right to select manual mode for video or stills, and the filter button for live filter effects. To find Square Camera’s special modes, tap the Mode button along the top of the screen. There are four, and if you’re unsure which one to choose, tap the Question mark icon for a quick introduction.
Here’s how to get the best from them.
Snap Shot
This is Square Camera at its most basic. The viewfinder is in the top square, and when you take a photo, a preview appears in the lower square. There’s a quick delete button, or if you drag the social button — it usually defaults to a Facebook icon — across the screen, you can share it on your choice of social network, without jumping out the app.
Match Shot
Match Shot takes two shots in quick succession of each other, and presents them side-by-side. These shots can both be from the same camera, or one from the front and the other from the rear, or be video rather than stills. It’s controlled using the icon that shows two boxes over each other, with the numbers 1 or 2 inside.
When the icon shows 1 and 2, you can take two pictures at different times. When it shows 1 and 1, two photos are taken at the same time. Alternatively, look for the Gallery icon when shooting in 1/2 mode, and choose an image from the phone’s gallery to insert into one of the squares.
Guide Shot
A fast, easy way to take a photo with the same composition as another. This is a little confusing to use at first, but it’s easy once you get the hang of it. Like the G6’s other camera modes, the viewfinder appears in the top square, and all the usual modes and features apply, including switching lenses and from the front and rear camera.
The lower square shows previews of other shots you’ve taken, or some standard ones included by LG. These confuse the situation, and if you want to remove them from the preview screen, long press and select Delete. Look for the big square with a “+” in it and tap it, then choose Take Photo, and snap away. The result will appear as a new Guide Shot for use later on. Tap it to select it, the use the transparency slider to adjust how much the ghost image shows on the viewfinder. Using this, you can compose the same shot over and over, in many different situations.
In our tests, the simpler the composition, the easier it is to align the two images. Try anything too busy, and it gets very hard to match the two together.
Grid Shot
The final Square Camera mode may be the most fun. The lower square is split into four, each ready to be filled with either a still image or a 3-second video. Tap in square number one and take a photo. It should appear in the square, and automatically move on to square number two. To take a video here, and watch for the 3-second countdown in the top right of the viewfinder to help compose the clip. Add a still or video to squares three and four to complete your collage. If you want to retake one image, just tap on it again.
Our advice here is to think about the order before you start taking the shots, because you can’t rearrange them later on. It’s fun to make little stories with Grid Shot, and they’re easily shared on Facebook and Twitter, when the video clips play automatically in the post.
Gallery
When you take shots in Square Camera, they can all be seen in the standard LG Gallery app. Open it and tap the icon that looks like three stacked lines in the top left of the screen. Look down the list and find Camera Mode, then tap it. Each Square Camera mode gets its own album.
That’s it, we hope you enjoy using the LG G6 and its superb wide-angle camera — both front and back.