
How to remove a Nest thermostat from the wall

Your Nest thermostat is one of the easiest pieces of smart home tech you can install in your home. If you have central air, central heating, or both, a smart thermostat is a great way to maintain the temperature in your home. It’s also smart enough to learn your habits and even save you a little money. Sometimes though, it has to go.

Maybe you’re painting the room, and you want to paint around it. Maybe you’re moving house, and you want to take it with you. Whatever the case, it’s easy to remove your Nest thermostat from the wall. You will need a Phillips head screwdriver to complete this process, so be sure to have one on hand. We’ll walk you through it step by step.

Step 1: Turn off the power

The Nest thermostat comes with installation instructions in the box.
Image used with permission by copyright holder

It’s very important to turn off the power to your Nest thermostat to ensure that you don’t get a short circuit. Your Nest thermostat is being fed power from a live wire, and if that wire touches any of the other wires connected to your thermostat, it could cause a short circuit and/or damage your system.

You can turn off the power in one of two ways. First, look on the side of your HVAC system and see if there is a light switch. If there is, turn it off. That light switch probably serves power to your thermostat, so turning it off will kill the power. Otherwise, you can shut down your entire HVAC system by turning off the breaker. 

Step 2: Pull it off

to remove the nest from the wall, press the levers and pull the wires out.
Image used with permission by copyright holder

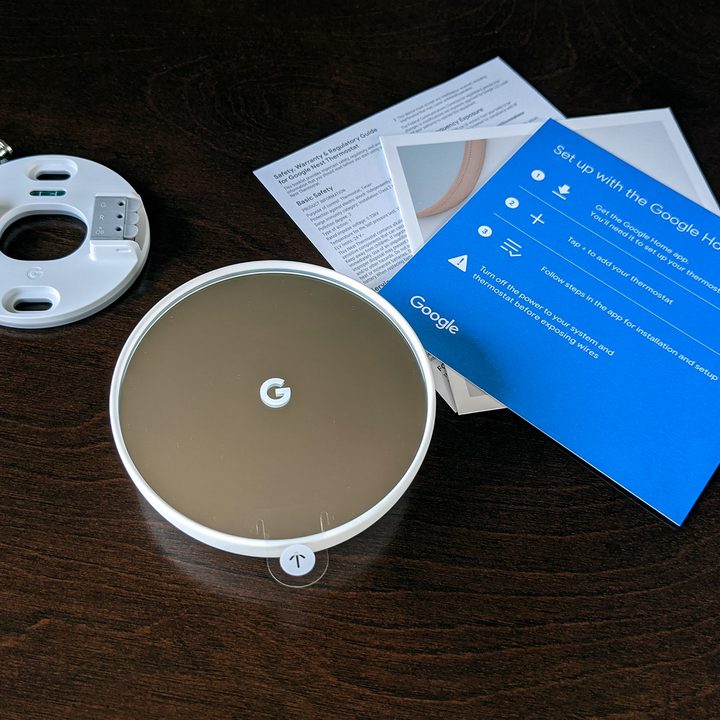
Once power has been turned off, it’s really easy to remove the Nest thermostat from the wall. Just pull. The Nest thermostat is held by four plastic clips around the periphery of the Nest ring. A simple pull will disconnect the Nest from the wall, leaving behind the base with the aforementioned wires. There are also two screws attaching the Nest base plate to the wall. We’ll talk about those in a moment.

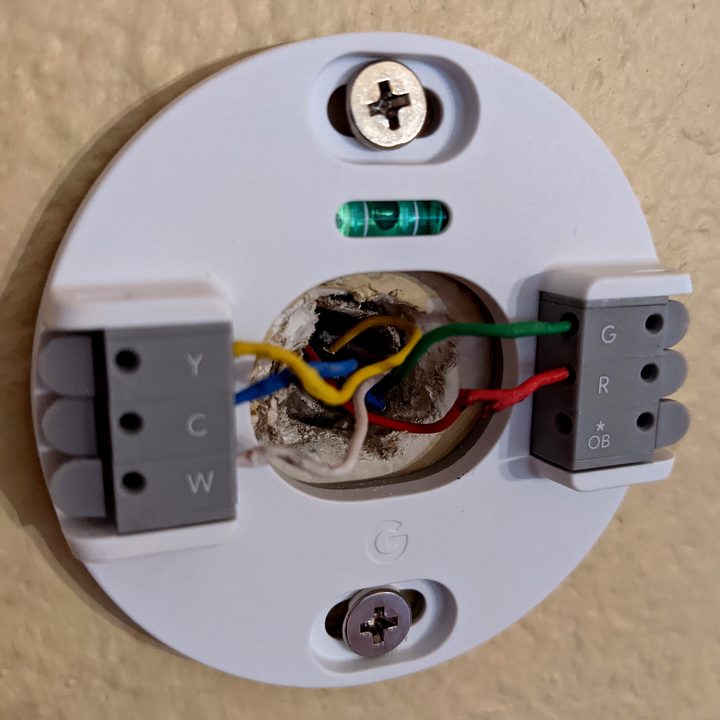
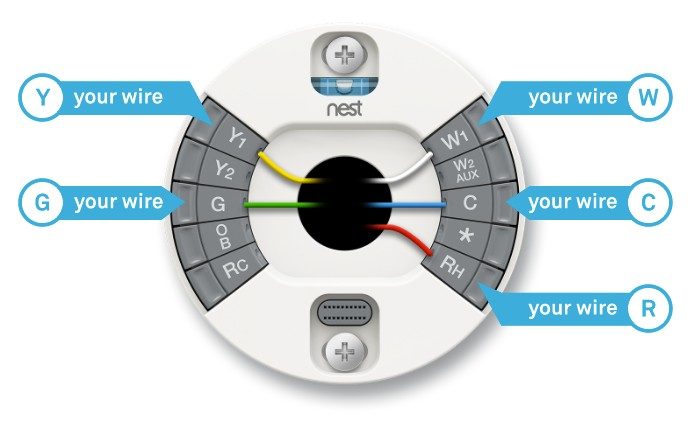
Before you do anything else, take a photo of the wires and the places where they’re attached. The wiring of a thermostat is critical to its proper function, so when you replace the thermostat back on the wall, it’s important to know what goes where. Alternatively, you can screenshot your wiring diagram before you disconnect the Nest from the wall. Open the Nest app, tap the Settings cog in the upper-right corner, then select Equipment > Wiring.

Step 3: Disconnect the wires and unscrew the base

It's important to get the wiring correct.
Image used with permission by copyright holder

Once you have saved your wiring diagram, you can disconnect the wires from the base plate. For each connection, use your finger or screwdriver to press the lever and pull each wire from the connector. Once all the wires have been disconnected, you can unscrew the screws attaching the base to the wall. Once those are unscrewed, you can pull the base from the wall, and you are all set.

When you want to replace the thermostat, just reverse the steps. The Nest thermostat base has a level built into it so you can make sure your Nest base plate is level when tightening the screws.  Then, reconnect the wires to the base, being careful to connect them to the same places. Make sure any excess wire is pushed and flattened as much as possible, then just place your Nest ring back onto the base, and give it a firm but gentle push.

Editors' Recommendations

Topics
Adam Doud
Former Digital Trends Contributor
Adam had been writing in the tech space for nearly a decade. When not hosting the Benefit of the Doud podcast, he can be…
Best coffee maker deals: Cuisinart, Ninja, Mr. Coffee starting at $20
The Mr. Coffee 5-cup coffee maker on a kitchen stand.

That first cup of coffee in the morning can be one of the most important moments of the day. Having quick access to coffee in general is very important. That's where a coffee maker or espresso machine can come in really handy since it lets you brew a cup of your favorite beverage with minimal hassle. Not only that but depending on your budget, you can get some really fancy features, from delayed brewing to machines that can make a brew for both a carafe and a mug at the same time. Either way, we've gone out to find our favorite deals to save you the hassle, and we've collected all of the ones we think will give you the best return on your investment below.
Mr. Coffee 5-cup coffee maker -- $20, was $40

This coffee maker makes up to 25 ounces of coffee at a time, which is just right for two 12-ounce cups. Its compact design fits nicely into small spaces, making it a great consideration for apartment renters and small offices. This is also a good coffee maker if you find yourself in a constant hurry in the morning, as it has an auto-pause feature that lets you grab a cup before brewing is finished and a two-hour auto shut-off that turns off the coffee maker so you don’t have to.

Read more
How to clean the Ecovacs Deebot X2 Combo
Ecovacs X2 Combo under a bed.

While the Ecovacs Deebot X2 Combo handles most of its own maintenance, there are still a few tasks you'll have to perform manually. Thankfully, these tasks only take up a few minutes of your time, and they don't need to be carried out frequently. From checking that the robot's sensors aren't blocked to cleaning roller brushes and the dirty water tank, here's a look at how to clean the Ecovacs Deebot X2 Combo.
Wipe down the robot vacuum sensors

The robot vacuum that comes with your X2 Combo works best when its external sensors are clean. After scurrying around a dirty house, there's a good chance dust has accumulated on the clear cover that houses all its sensors. Check this after each cleaning cycle and wipe it down with a dry cloth. If it's really dirty, a slightly damp rag can be used before drying it with a towel.
Give a thorough rinse to the dirty water tank
Emptying the dirty water tank is arguably the worst part of owning a robot vacuum. But if you're staying on top of things, it should never get too funky. Consider emptying the dirty water tank before it's full and giving its interior walls a good scrubbing to remove buildup. If you don’t do this, your dirty water tank will get remarkably smelly and slowly accumulate more gunk.

Read more
How to fix the most common Blink Mini 2 problems
The Blink Mini 2 placed on two books.

The Blink Mini 2 is a great security camera that won't break your budget. The tiny device costs just $40, and it's quickly become a popular security device that competes with products at much higher price points. But while there's much to love about the Blink Mini 2, the new camera isn't without a few issues.

Thankfully, fixing the most common Blink Mini 2 problems is usually a simple process that requires just a few minutes of your time. From getting rid of a red LED light to adjusting motion settings, here's a look at frequently reported Blink Mini 2 issues and what you can do to resolve them.
How to improve Blink Mini 2 video quality

Read more