Apple Pay is one of Apple's features designed to make your life easier. The wallet-like app can be used just about anywhere except Walmart, and reduces the burden of needing to carry around payments cards, gift cards, loyalty cards, and even coupons with you wherever you go.
Apple Pay works on all of the best iPhones and iOS devices and, when fully set up, is relatively seamless to use. But, if you're new to the software, it can be somewhat confusing to use. Or, when learning how to set up Apple Pay, you may wonder if you've missed some extra features that could boost its functionality even more.
Don't worry, here, we'll guide you through the process of setting up Apple Pay on all of your devices, including adding cards to it, and then how to use them to purchase things.
Apple Pay is supported by most U.S.-based financial institutions and credit card companies. Apple provides an up-to-date list of all financial institutions that accept Apple Pay.
Apple Pay is supported by hundreds of brands and websites, including 7-Eleven, GameStop, Etsy, Staples, and Fandango, with more being added all the time. You can find the current list of supported retailers here or visit our exhaustive list of companies that accept Apple Pay here. Many third-party apps also allow you to use Apple Pay. You can check out some of them here. Of course, if you buy apps or other digital items from Apple, you can always use Apple Pay to purchase music, movies, apps, books, and more.
How to add cards to the iPhone and iPad
You can add 12 cards to Apple Pay if you have the iPhone 8 or later, or 8 cards for prior versions. If you want to use Apple Pay with more than one device, you need to add your card information separately to each device. Note that you must have Touch ID, Face ID, or a passcode operative to set up Apple Pay. If you don't, you will be asked to do that setup first before you can continue with the steps below.
Step 1: On your iPhone or iPad, open the Wallet app via Settings > Wallet & Apple Pay.

Step 2: Tap the Plus sign to start adding your credit or debit card to Apple Pay.

Step 3: Next, tap Add credit or debit card.

Step 4: A new pane will appear, and you must tap Continue.

Step 5: To add the card, position your card in the frame. The app automatically scans the front of your card to get your number and records it on the card details page. Tap Next.

Step 6: Record your card's expiration date, and type in the security code and any other information requested. This may take a series of screens.

Step 7: The Adding Card screen appears as Apple Pay communicates with your bank to verify your card.

Step 8: A Card Verification page appears, showing your email address and phone number. When it's done, you get a Terms and Conditions page where you have to agree.

Step 9: You have a choice of verifying your card by phone or completing verification later. If you do so immediately, you'll get a verification code via email to input. You may be prompted to contact your bank to complete the verification process. Verification may involve a short call to your bank and a conversation with a human, which will come up in the app.
It took us less than five minutes to add a debit card in Apple Pay and on a watch. A notice will appear on your watch once the verification is confirmed.

Step 10: Once verification is complete, tap Next, and you're all set to use Apple Pay.

How to add cards to your Mac
To add a card to Apple Pay on your Mac, you'll need a Mac with Touch ID. However, on models without built-in Touch ID, you can still use Apple Pay via a linked iPhone.
Step 1: On your iPhone, go to Settings > Wallet & Apple Pay.

Step 2: Tap Allow payments on Mac, and toggle the control on.

How to add cards to your Mac with Touch ID
You don't need to use the iPhone as an intermediary if you have a Mac with a Touch ID.
Step 1: Go to System preferences > Wallet & Apple Pay.

Step 2: Tap Add card. Then, follow the steps to add a new card.

How to add cards to Apple Watch
Adding a new card to your watch is essentially the same as the steps outlined above for your iPhone. The app stores your card number and asks for the expiration date and security code.
Step 1: To add a card to your Apple Watch, open the Watch app on your iPhone. Go to the My watch tab and select the watch you're going to use with Apple Pay. Tap Wallet & Apple Pay > Add card.


Step 2: You may be asked to set up a passcode, or if you already have done so, type it in. You can opt for a simple four-digit passcode, or you can choose to unlock the watch with your iPhone as long as you are wearing it.
An Erase data toggle wipes your watch after 10 false passcode tries. Wrist Detection locks your watch when you're not wearing it to secure your data.


Step 3: Follow the on-screen instructions to add your card, or enter the security code associated with the card you already use with your phone or Mac. Tap Next and your information will be verified. You'll be asked to approve Terms and Conditions. Tap Agree.


Step 4: The Card Verification sheet appears, and you can dial your bank to complete the process or complete the verification later.
In some cases, your bank may need more information. To verify, check Call bank and tap Next. Or, your bank may automatically verify your account and send you a verification code to enter immediately.


Step 5: After your information is verified, tap Next once again to finish the setup process. You'll get a notice that your card is now ready for use on your watch.
How to add rewards cards
You can add various rewards cards to the Wallet app to use with Apple Pay. Instead of choosing Add credit or debit card, you can add it as a pass.
You cannot add passes directly within Wallet, except for QR-enabled passes. If there's no QR code, you must add the pass via an associated app, an email, AirDrop, or a web link. You must have more than one pass for the Edit passes button to appear.
Step 1: Open the Wallet app and tap the Get button.

Step 2: Tap either Scan code or Find apps for Wallet.

Step 3: The App Store presents a long list of apps to choose from.

Step 4: Once added, you can have the rewards card appear automatically in a store by opening the Wallet app, tapping the Card and more icon, and turning on Automatic selection.


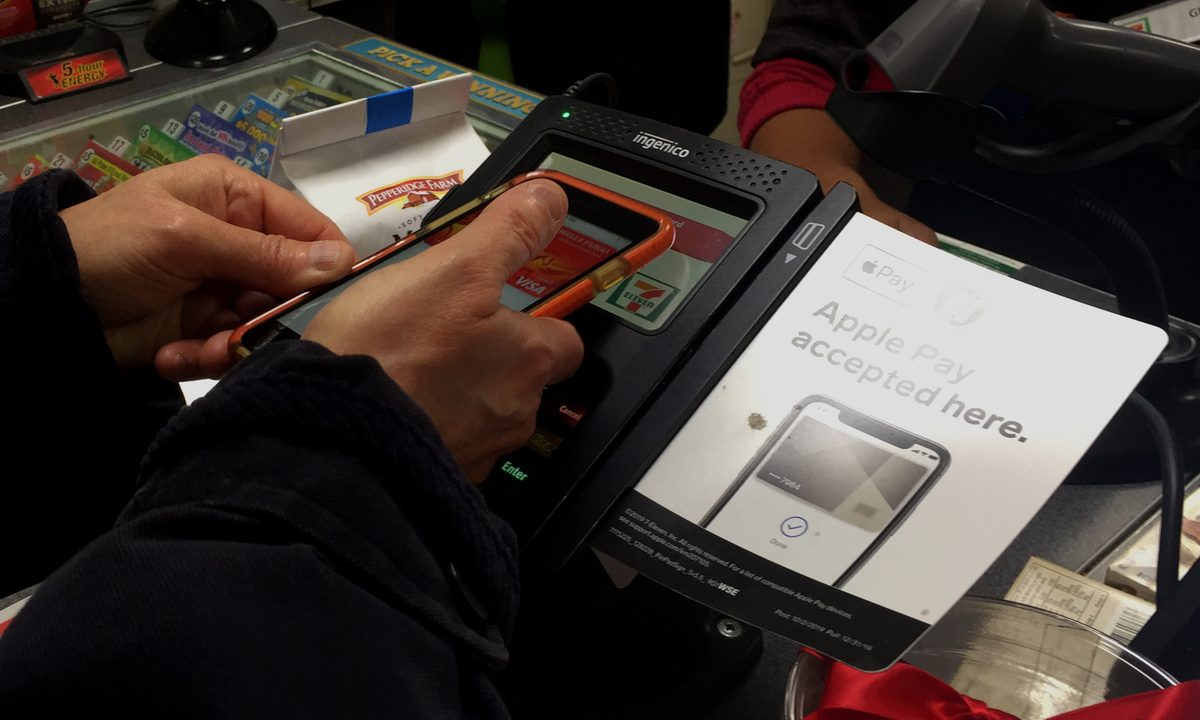
How to use Apple Pay in stores
It's easy to spot retailers that accept Apple Pay. Apple Pay-friendly stores have a logo on the door or at the register near the contactless reader. To use Apple Pay in stores, you need to have your iPhone or Apple Watch available. You can use Apple Pay with your passcode if you don't have Touch ID or Face ID set up.
If you're prompted to choose between credit or debit, choose credit. If you're asked for the last four digits on the card, use your Device Account Number instead. To find this on your iPhone, open the Wallet app, tap your card, and then tap the More button. For the Apple Watch, open the Watch app on your iPhone, then tap Wallet & Apple Pay > Your card.
Step 1: If you have an iPhone with Touch ID, place your finger on the Touch ID scanner and hold the phone within 1 inch of the reader until you see "done" and a check mark. To use a different card, tap the default card when it appears before you authenticate.
For iPhone X and later models with Face ID, double-tap the side button and glance at your phone. Hold your phone close to the contactless reader until you see "done" and a check mark. To use a different card, hold your phone near the reader. When your card appears, you can tap it to swap with another card in your wallet.
What if you're wearing a face mask? With iOS 15.4, you can unlock your iPhone and use Apple Pay without needing an Apple Watch.
Step 2: To pay using your Apple Watch, double-click the side button and hold the watch near the reader until you see the word "done" and the check mark.
To change cards on the Apple Watch, double-click the side button before holding it near the reader. When your default card appears, swipe left or right to change cards. Hold your watch near the reader to complete your payment.
How to use Apple Pay in apps
A growing number of apps accept Apple Pay. You will know if you can use the service when you see the button while checking out or when Apple Pay is one of the optional payment methods.
Step 1: To pay, tap whichever button appears within checkout, or simply select Apple Pay as your preferred checkout method. If you want to pay with a different card, just tap the Right arrow icon next to your default card.

Step 2: On your iPhone or iPad, rest your finger on Touch ID to confirm the payment, or double-click the side button to use Face ID (depending on your model).
Step 3: On the Apple Watch, double-click the side button. When the payment process is complete, you will see the same "done" confirmation and a check mark.

Pay using an iPhone, iPad, or a MacBook with Touch ID
If you have an Apple device with a Touch ID, here are the easy ways to use it to pay for your purchases with Apple Pay.
Step 1: On your iPhone, tap the Apple Pay or the Buy with Apple Pay button.
Double-check your billing, shipping, and other information. To use a different card on an iPhone or iPad, tap the Right arrow symbol next to the selected card. You can also use your passcode.

Step 2: On iPhone and iPad, when you’re ready to confirm your purchase and pay, rest your finger on the Touch ID Sensor. If payment is accepted, you will see “done” and a check mark.

Step 3: On the MacBook, you will need to follow a series of steps on the Touch Bar. Rest your finger on the Touch ID Sensor, as you would normally on an iOS device. If Touch ID is disabled, tap the Apple Pay icon, and enable the feature. When your payment is complete, you will see a confirmation message and a check mark.
To use a different payment option on the MacBook, press the Up or Down arrows next to the current number.

Pay using an iPhone, iPad, or a MacBook without Touch ID
Using Apple Pay on a MacBook without Touch ID requires a few extra steps, but nothing too difficult.
To get everything set up, first sign in to the iCloud account associated with your iPhone, iPad, or Apple Watch and enable Bluetooth. This allows your Mac to find your iOS device or Apple Watch so that you can use any credit or debit card you have on those devices.
Step 1: Tap the Buy with Apple Pay or Apple Pay button, just as you would with any device you purchase from.
Step 2: To make a payment, place your finger on your iPhone’s Touch ID Sensor or double-click the side button for Face ID (depending on the iPhone model).
Step 3: On an Apple Watch, double-click the side button. A check mark along with a confirmation message will appear, signaling that your transaction is complete.
Frequently asked questions
Does Apple Pay charge a fee?
Apple Pay is a feature of the iOS ecosystem and does not charge a fee for its main services. Some features, like Instant Transfer, will incur a 1.5% fee, but these are edge cases. Standard functionalities of Apple Pay are free or, if you wish to be more cynical, built into the price of your phone.
Why do people prefer Apple Pay?
People prefer Apple Pay for its simplicity. The "phone, keys, wallet" checklist you run through before running out the door can be simplified to just include your phone and keys, especially if you get a MagSafe Wallet case to store your ID on your phone case.
Can I use Apple Pay on my watch without my phone?
One of the nice things about getting Apple Pay set up on your Apple Watch is that you don't have to carry your phone with you to use it. So, if you stop for juice or a bottle of water on your run, you don't have to carry a bulky wallet or purse with you to get the goods.