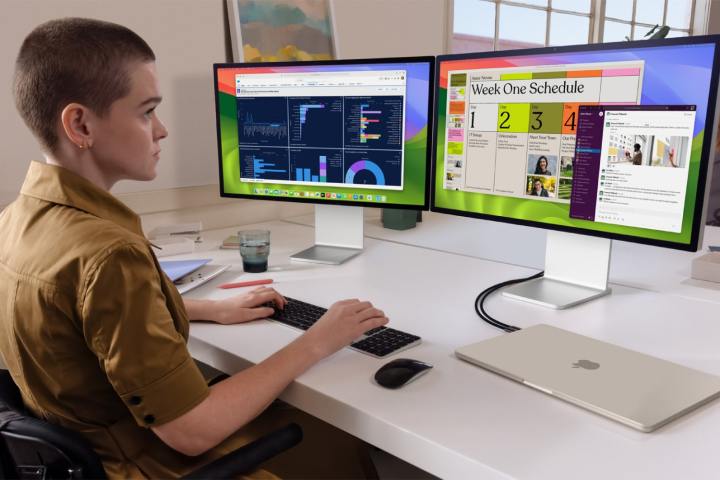
Using more than one monitor with your laptop can massively extend your workspace and make work and play much more pleasant. But for most modern MacBook Air laptops, hooking up more than one external display can be a tricky business, and there are plenty of problems you can come across.
Luckily, there are several ways to get the multiple-monitor setup you want. If you have an M3 MacBook Air, the whole process is quite simple. Things get a little more complicated with M1 and M2 models -- you’ll need a docking station and a software workaround -- but it’s still quite doable.
What are docking stations, you ask? They’re hubs you connect to your computer that offer a ton of extra ports and connectivity. Make sure you look for one with multiple display connectors (like USB-C, HDMI or DisplayPort) and ensure you have the right cables to connect it to your Mac and your monitors. You’ll also want to check what resolutions and refresh rates it supports, and how fast its transfer speeds are (Thunderbolt 4 offers 40Gbps, for example, but USB4 might only hit 20Gbps).
You also need to be aware that if you use a software workaround, macOS updates could break their functionality and you’ll need to check for app updates to get things working again.
With that out of the way, it’s time to start connecting some displays to your MacBook Air. Let’s see how it’s done.

Connecting displays to the M3 MacBook Air
In March 2024, Apple announced that the M3 MacBook Air would be able to connect to two external displays -- instead of the usual one -- as long as you close its monitor. That makes it a lot simpler to hook up multiple displays than on the M1 or M2 models, and you don’t need any software workarounds to get things working.
Closing the laptop’s lid is an essential part of the formula. If you open its lid while two displays are connected, one will disconnect. You also need to connect an external mouse or trackpad and keyboard, as you won’t be able to access those of your MacBook Air while its lid is closed. Finally, note that your MacBook Air must be running macOS Sonoma 14.3 or later for this method to work.
Step 1: First, connect your keyboard and external mouse or trackpad and ensure they’re working properly. If they connect over Bluetooth, open the System Settings app and select Bluetooth in the sidebar. Press your mouse or keyboard’s pairing button (if required) and it should appear in your Mac’s list of Bluetooth devices. Select Connect and wait for it to pair.
Step 2: It’s a good idea to connect your MacBook to power. If your external monitor provides power to your laptop (you can check this with the display’s documentation), you shouldn’t need to hook up your MacBook to a power adapter.
Step 3: Connect your first display to your MacBook. This will work up to 6K resolution and a 60Hz refresh rate (or 4K at 144Hz).
Step 4: Now, close your MacBook Air’s lid.
Step 5: You can now connect the second display. This will work up to 5K resolution and a 60Hz refresh rate (or 4K at 100Hz). You should now have both displays running with your MacBook Air.
How to use connect two displays to a M1 or M2 MacBook Air using InstantView
Officially, neither the M1 nor the M2 MacBook Air support multiple displays, and the company’s documentation says they are limited to one display running at up to 6K resolution and a 60Hz refresh rate. Apple also cautions that “docks don’t increase the number of displays you can connect.”
That’s the official stance, at least. But unofficially, you can get multiple monitors working with M1 and M2 MacBook Air laptops. This requires a couple of workarounds, but it can be done.
First, you’ll need a third-party docking station. These devices make extra ports available to your Mac, and that can include display connectors. Be sure to check your dock manufacturer’s website to see if their products support running external displays with the MacBook Air -- many do, but some don’t.
Secondly, you’ll need a software solution that can compress your Mac’s video output and send it to an external monitor. Here, we’ll show you how it’s done with an app called InstantView.
Step 1: Download and install the InstantView app from developer SiliconMotion’s download page. Some docking stations might also come bundled with this software. During the installation process, you’ll be asked to grant it permission to record your display. Don’t worry, the app isn’t actually recording or saving anything. It just needs to capture what is shown on your display, compress it, and send it to the external display.
Step 2: Back to the installation. On the prompt, select the button to open System Settings. Alternatively, open System Settings separately and go to Privacy & Security > Screen & Audio System Recording. Either way, you’ll need to enable the toggle next to macOS InstantView. Once you’ve done that, select Quit & Reopen in the resulting pop-up window. InstantView will now relaunch.
Step 3: Plug your docking station into your Mac, then connect your external monitors to the station.
Step 4: Your Mac’s on-screen content should now be shown across all of your connected monitors.
Step 5: Open the InstantView app to view its user interface. You should see either Mirrored Display or Extended Display -- select this to change the mode to mirror or extend your MacBook Air’s screen contents onto your external displays. You can also access these controls from your Mac’s menu bar.
How to connect two displays to a M1 or M2 MacBook Air using DisplayLink
If InstantView doesn’t work on your Mac or you want to use a different app, you can try DisplayLink instead. This is a very similar app that works just as well -- like InstantView, it compresses your video feed to enable you to connect multiple external monitors.
Step 1: Install DisplayLink Manager from the developer’s website. Some docking stations might also come bundled with this software. As with InstantView, you’ll need to allow screen recording. Open the System Settings app and go to Privacy & Security > Screen & Audio System Recording. Enable the toggle next to DisplayLink Manager.
Step 2: Once DisplayLink Manager has been installed, open the app. Its menu bar icon automatically opens.
Step 3: Tick the checkbox next to Launch automatically after login.
Step 4: Now connect any external displays you want to use to your docking station. You might need to select Allow in a system prompt at this point.
Step 5: Your monitors should now connect properly.

If you have an M3 MacBook Air, connecting two external displays is pretty straightforward. If you have an M1 or M2 model, the above workarounds should get past the restrictions on running multiple monitors.
However, it’s important to note that some content with copyright protections (such as that shown on Netflix or Disney+) might not work with displays connected using InstantView or DisplayLink. Because these apps use screen recording, the copyright guards used by the streaming services think that content is being pirated, which prevents it from displaying properly on your monitor. If the copyright protection detects InstantView or DisplayLink, it prevents playback on all monitors, not just the one connected using this software.
To restore content playback, try disconnecting any monitors that are using InstantView or DisplayLink. Alternatively, try watching the content using a web browser like Firefox. This type of content blocking works over Safari and Chrome, but might not on other browsers. In Safari and Chrome, disabling hardware acceleration could help. In Chrome, go to Settings > System and disable the graphics acceleration option.
Alternatively, disconnect the docking station and try watching the content on your MacBook Air’s built-in display or on a monitor connected directly to your laptop.
Once your displays are connected, you can arrange them in macOS. This ensures that your mouse moves correctly across your displays. For instance, if you have one monitor placed above the other, you want to make sure that moving the mouse upwards from the bottom screen makes it appear on the top monitor. To arrange your displays, open the System Settings app and go to the Displays section. Select the Arrange button and drag your monitors into their correct positions. If you’re not sure which monitor is which in the System Settings app, go to the Displays section, hold the Option key and choose the Identify button (this button says Night Shift when you let go of the Option key).
Note that if you have two displays connected to an M3 MacBook Air and you open its lid, the second display will go blank or disconnect. If you disconnect the first display and then open your MacBook Air’s lid, the second monitor will become your primary display in macOS.


