Anamnesis Anyder follows in the footsteps of one of Final Fantasy XIV’s jazziest dungeons. The second of what we expect to be many Anyder-suffixed instances, it’s a fountain of knowledge that’s used to deliver another story revelation in an expansion that’s hardly short of them already. In case you’re not willing to go in blind and embarrass yourself by falling flat on your face in each boss fight, this Anamnesis Anyder boss guide will see you through the story with barely a scratch to show for it.
If you’ve been slacking in your duties as a Warrior of Light *ahem* Darkness, your average item level will need to be 455 or above to head into battle. Unlike the 5.1 story dungeon, there is a lot of subtext to get through before you unlock this. Just keep plodding through the main story until you get there.
Unknown

No, my video footage didn’t disintegrate on me. That’s this thing’s actual name (or lack of).
First off, get acquainted with Fetid Fang. That’s your tank buster. Right after this hits, Unknown will scream to the skies and start its next skill: Scrutiny. You’ll have three safe spots to choose from around the center to avoid the numerous explosive orbs, but what you need to do is hopefully avoid being in whichever slot Unknown chooses to physically strike as they go boom. So long as you’re topped off and not getting hit by multiple things, you’ll be fine. Avoid the linear Luminous Ray and you’ll reach the next phase.
Unknown then summons another of its kind right as it sets up Scrutiny yet again. The tank gets a stack marker from the new monster’s Ectoplasmic Ray, so it’s up to the team to crowd onto one of the safe spots together. Top up after the hit and it shouldn’t matter whether the original Unknown hits your position or not. Inscrutability then deals raid-wide damage, which should be enough to warn you to kill the weaker of the two before things get tough — which should be the original Unknown. Until they die, expect the two to cast their various beams, Unscrutability, and introduce Clearout and Setback; the former being a frontal cleave and the latter a rear. It’s just a matter of bursting the original down before things get a bit too hectic. Down both for the victory.
Kyklops

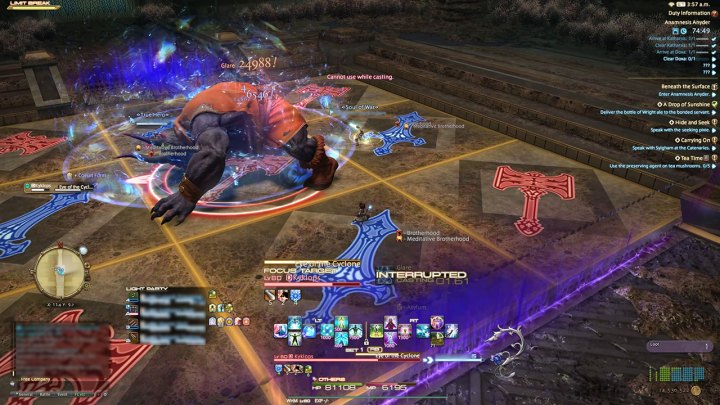
This is the one you might have seen on the patch website. Kyklops looks daunting, but the real enemy is panic. Keep your cool and take each mechanic as they come.
He starts things off with a tank buster and The Final Verse- raid-wide blast. There’s nothing you can do about those. Hell-bent on showing you everything he’s got, Kyklops then introduces Eye of the Cyclone as a donut strike on the outer edges (get in for this), Terrible Hammer, and Terrible Blade. These two mechanics paint hammers and blades onto the arena tiles. Whichever set spawn first with explode first. Get in for another Eye of the Cyclone, then reposition quickly to a safe square before sliding to the next as it blows.
Kyklops then brings out the classic moves. There is the Raging Glower eye beam and a powerful frontal cleave. Tanks can (and should) move through the boss to avoid said swipe as it charges. It hurts. At that point, you’ve seen everything. Just deal with raid-wides, know when to hug the boss, and keep your cool during hammer/blade sequences.
Kukshs Dheem

Known as the Merciless Matriarch, the story prepped you for the context you’ll need to hate yourself a little after this brawl. This one is a test of your beliefs for sure.
This chubby fish kicks things off by whacking the tank with Bonebreaker before casting Seabed Ceremony, dealing raid-wide damage and summoning a line of water in the middle of the arena. Death Grip then summons hands from the pool to slap the area they face in sequence while Falling Water drops on two players, and Rising Tide blasts anyone who isn’t on the boss’ diagonals. There are a few ways you can dodge what’s going on here, but avoid a hand and think nothing of the rest.
Then the Sastasha remix begins to make sense. The bubbling grates. One less mob will spawn for every bubbling grate a player positions themselves on, so you can cut this issue in half with the right mentality. The boss is immune while the mobs are on the field, so just burst them down and get on with the job. She will still cast Bonebreaker during this — tanks and healers beware.
Then the arms come back — this time four on each side. The real way to avoid these is to walk with them and back up again, but you can eat one with enough HP if you’re all about that top DPS. The last real trick in her book is when she combines the hands and her fish babies. Each hand can only strike one half of the total arena width. With their layout in this phase, you can avoid them by just being at the max distance of one. No biggie. Then it’s just the case of a stack marker and a few red markers before it’s rinse and repeat.
Editors' Recommendations
- Final Fantasy 7 Rebirth: all piano sheet music locations and rewards
- The best ways to farm Gil in Final Fantasy 7 Rebirth
- The best armor in Final Fantasy 7: Rebirth
- Square Enix commits to release more games on Xbox, starting with Final Fantasy XIV
- The best skills in Final Fantasy 16


