This is it: The final NieR raid of the FFXIV Shadowbringers expansion. The unusual circumstances surrounding the arrival of androids 9S and 2B reveal themselves in a gripping conclusion that’s sure to have obstacles along the way. As with the previous two raids in the series, these bosses hit hard, fast, and in bewildering ways.
If you’re smart enough to understand why reading up on your enemy is better than launching into battle unprepared, read on find out how to beat the Knaves of Hearts, Hansel and Gretel, the Red Girl, and the secret final boss. Here are all the Tower at Paradigm’s Breach boss strategies you’ll need, in a handy written format that you can refer back to as you face each new mechanic.
Further reading:
- Final Fantasy XIV patch 5.5 quest locations guide: How to get started
- Restore glory to mankind with this FFXIV Copied Factory Raid Guide
- Ruin Yoko Taro’s day by mastering The Puppets’ Bunker with this FFXIV raid guide
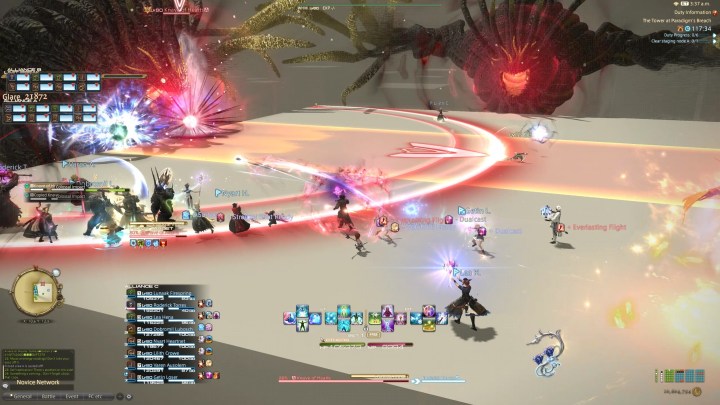
Tower at Paradigm’s Breach boss strategy guide
Knave of Hearts

Move list
- Roar: Inflicts AoE damage
- Colossal Impact: Causes damage from center (open mouth) or both sides (closed fists)
- Magic Artillery Beta: Tank Busters
- Magic Artillery Alpha: Places AoE markers above non-tanks
- Replicate: Creates clones on either side of the arena
- Stacking the Deck: Assigns attack orders to each clone
- Speroids: Summons spheres to slowly travel the battlefield
- Light Leap: Slams the center of the arena, creating solid blocks
- Lunge: Pushes the entire raid team away from the boss’ casting location
The Knave of Hearts shows you its cards very early into the fight. After introducing its raid-wide area attack and teaching you to avoid its open mouth or closed fists when it casts Colossal Impact, it’ll soon use Replicate to create a clone to your right, then another to the left as the fight progresses.
These clones execute the same attacks as the main boss in a sequence, denoted by the number of dice in front of each clone while Stacking the Deck is being cast. Note the order in which each enemy will execute their chosen move, and you’ll soon know where to stand to avoid each one.
Once you’ve been introduced to the key mechanics of Replicate and Stacking the Deck, new moves like the Spheroid/Magic Artillery Alpha combo will be weaved in. This particular setup is nothing more than a team-separating challenge seen in other bosses. Avoid the bullets, then avoid each other.
Once you see Light Leap being cast not long after this, go hug the boss’ usual position: It’s about to come slamming down in the center. With the impact come a few raised structures that essentially upgrade the dance you need to do during the next use of Stacking the Deck.

Lunge is the new sequenced mechanic here. Rather than use the blocks to break your line of sight with the incoming strike, you want to position yourself so that you’re pushed into a block instead, avoiding the doom of dropping off the arena. Once you survive this, position yourself to avoid the replica’s various attacks (like Colossal Impact) until they settle down.
Things only shake up a little more as the fight goes on, with red orb attacks like Spheroids and Magic Artillery Alpha creating the need to sidestep linear strikes while avoiding the dreaded balls. The whole fight is simply a case of taking things step by step. Pay attention to the attacks each replica plans to cast and when, and you’ll waltz right through it.
Hansel and Gretel

Move list
- Wail: Deals heavy area damage to the whole team
- Crippling Blow: Deals heavy damage to the tank
- Tandem Assault – Bloody Sweep: Initiates 180-degree sweep from each enemy around their front
- Tandem Assault – Passing Lance: Cuts through two areas of the arena and sends lasers firing out from the center turrets
- Tandem Assault – Breakthrough: Triggers a rush from both enemies, starting at opposite sides and leaving safe spots at the far northern and southern points
- Seed of Magic: Places area attack markers on all non-tanks
- Riot of Magic: Places area attack markers on all tanks
- Wandering Trail: Summons damaging discs that travel around the arena, dealing continuous damage to those who make contact
Rather than incorporating the split-damage mechanic of other bosses that dictates which teams can attack which target, only Hansel or Gretel can be damaged at any one time, leaving the other to simply attack without consequence. Their vulnerability changes frequently, so keep an eye out to know when to switch targets.

The main gimmick of this fight is Tandem Assault, which causes both targets to use the same attack with multiple variations from two points on the arena. Outside of that, both Hansel and Gretel attack simultaneously with separate moves, creating agonizingly stressful moments for healers to watch out for. Wail and Crippling Blow is a noteworthy combo that hits the team hard and slams a tank even harder.
After the first instance of this heavy raid-wide damage, Hansel and Gretel shoot off to cast Tandem Assault. They’ll share their next move (usually Bloody Sweep) to cleave the arena’s front and flanks, leaving a safe spot in the center and south for the team to hug.

They’ll swap this out with other positional strikes as the fight goes on, like Passing Lance (which leaves safe spots on the far sides where there are no central laser turrets) and Breakthrough. That last one is particularly scary, but just hug the northern or southern points to avoid it.
As the fight progresses, you’ll need to contend with laser discs from Wandering Trail cutting your path options down even further. It pays to catch each attack early, as they are cast. The more time you have to react, the better off you’ll be.
Red Girl

Move list
- Cruelty: Deals heavy damage to the whole raid
- Shockwave: Places a colored area attack marker on some DPS players
- Generate: Barrier: Creates colored walls that can be used to protect against attacks of the same color
- Manipulate Energy: Places area attack markers on each tank
- Child’s Play: Forces chained targets to run in the indicated direction
Red Girl introduces the black/white mechanic you’ll need to know for the next battle. Simply put, same colors are safe from themselves and opposites are not. Red Girl summons black and white barriers through the fight that won’t protect you from attacks of the opposite color. That’s worth bearing in mind.
Before all that, though, she’ll slam the team with Cruelty, letting you know that she can still heavily damage the group regardless of their ability to outsmart her colored attacks. Shortly after comes the first instance of Shockwave on the DPS and the colored barriers that they can damage with these markers as they detonate. Colored arrows will then litter the outside of the arena. Get behind a wall of the same color to avoid a hard hit.
When Red Girl attempts to set up a square of barriers in the center of the area, break out anyone caught inside by dropping a colored marker on an opposite-colored wall. Get behind any remaining cover to avoid the meteor crashing down.

The next major thing to watch for is Replicate, littering seven smaller Red Girl enemies around the field. Each one casts Diffuse Energy, which they’ll rotate with to shower the arena in 180-degree increments. Pay close attention to their starting position and travel direction to identify a spot. If three are interlocked from the start, you’ll probably only need to change position once to avoid the lot.
At half HP, you’ll be tossed into a hacking minigame where you’ll need to use your two new abilities to toggle between white and black to deal and avoid damage. To avoid an attack, switch to the same color. To attack, switch to the opposite color of your target.
Once you’re free from the hacking minigame, Red Girl gets big. Really big. The last major thing to contend with now is Child’s Play. Like Forced March in a few other boss battles, anyone chained to Red Girl will be made to move in the direction she chooses along half of the arena. Position yourself so that you’ll land out of an attack marker or rotating attack from her clones if chosen. Targets not chosen should take their own markers to the further side of Red Girl’s arrow to avoid clipping the chained party members.

And that’s it for this fight. Things will repeat until she’s down. Just be mindful of the colored attacks and shed the idea that opposites attracting is generally a good thing. It’s not when you need a barrier to protect yourself from a big attack.
False Idol

Move list
Phase one: False Idol moves
- Screaming Score: Deals heavy damage to the whole raid
- Made Magic: Generates a central laser attack that travels clockwise or counterclockwise
- Lighter Note: Places attack markers above certain players that split off and travel in the direction of their arrows after use
- Darker Note: Places area attack markers above each tank
- Rhythm Rings: Fires lasers across the arena as red orbs line up with the rings in front of the boss
Phase Two: Her Inflorescence moves
- Recreate Structure: Pulls a building up through half of the available arena space
- Mixed Signals: Signals trains to travel across the arena through green-signaled crossing lights
- Heavy Arms: Strikes the boss’ flank when her arms are wide or the area to her front and rear if her arms are down
- Distortion: Places a colored ring around each player that should be turned to face rings of the same color as they drop onto the arena
Phase one: False Idol strategy
False Idol quickly slams the team with Screaming Score before attempting to burn what’s left of your HP with Made Magic. This second move originates from a wheel and fires a laser down the center of the arena before traveling to the left or right based on which way it spins. It’s a subtle strike for sure. Lighter Note comes out shortly after, a similar attack dropped on each tank that splits off and travels across the arena in a signaled direction.

She’ll soon begin to channel her love of music, using Rhythm Rings to blast the arena with lasers. This works by having red orbs drop into the rings in front of her, so you’ll see where a laser is about to fire before it goes off.
These sequences of events will repeat until False Idol hits 50% HP, at which point she’ll transform into Her Inflorescence. She’ll fight on the arena itself from now on like most other bosses.
Phase two: Her Inflorescence strategy

In this phase, Her Inflorescence attacks from all angles — including below — while also using most of the attacks from her previous phase. She’ll use Recreate Structure first, turning the ground transparent so that you can see where the building she summons below will strike as it’s pulled up. Mixed Signals attacks by running train carriages through the arena. Walk into the path of the stop signals to avoid that one. A little later on, the train will pull in on one side of the arena, letting out multiple Red Girls who’ll attack with red orbs.
Before the Red Girls show up in droves, though, you’ll likely have to deal with Heavy Arms. If she stretches out her rocky arms, get behind or in front of her. If she holds them down, do the opposite. After this, she tends to use Pillar Impact, summoning large boulders on opposite corners. Note which comes first and hug it close to be knocked back to the next, narrowly avoiding a trip off the arena. Things aren’t safe even after this. The formations will eventually tilt in a random direction. Steer clear before they fall.

The last major mechanic to watch for is Distortion. Keeping up with the theme of Rhythm Rings, each player gains a ring consisting of both black and white halves. Based on this, turn to face your ring against the ring of the same color coming down into the center of the arena, ensuring to turn to match them as they change.
This last phase will simply repeat until Her Inflorescence falls, spelling the end of The Tower at Paradigm’s Breach and the NieR raid trilogy as a whole.
Editors' Recommendations
- When will Final Fantasy 7 Rebirth be on PC?
- Square Enix commits to release more games on Xbox, starting with Final Fantasy XIV
- Final Fantasy XVI State of Play: How to watch and what to expect
- Final Fantasy XVI turns accessibility options into equippable gear
- Crisis Core: Final Fantasy VII: tips and tricks for beginners