Thanks, in part, to a lull in shooter releases right now, along with myriad other reasons, Splitgate has exploded in popularity — going from 65,000 to 160,000 concurrent players in just a couple weeks. This remarkable influx of players crowded the Splitgate servers to the point of the queue times being over 90 minutes long. Developer 1047 Games has since addressed this issue, and you can now get in with no issues, which is ideal for a game with so many players.
Since Splitgate has gotten so popular, many are likely jumping in for the first time. The nice thing about this game is that it’s easy to pick up and play, even if you aren’t the most experienced at FPS games. It feels like a mixture of Halo and Portal, which is a fantastic combination that just feels good to play. Though, it can be just as complex if you’re willing to learn about the game’s intricacies.
With that in mind, we’ve compiled a list of tips and tricks for players of all skill types to help you get ahead in Splitgate.
You can deal more melee damage if you have enough momentum
Much like Halo and other arena shooters, Splitgate features a melee attack — though it won’t eliminate a player (at full health) in one hit. By default, melee attacks only deal 50 damage, so you can’t rely on them to get fast, back-to-back kills. The one exception to this rule is that you can actually deal 100 damage with a melee attack if you have enough momentum. With smart portal placement (more on that below), you can quite literally drop in on enemies and land on top of them with a melee attack that will instantly eliminate them. This is an effective strategy for players who are about to challenge multiple enemies at once, as you can save your precious ammo for other engagements. Check out the clip above to see what we mean.
Experiment with weapon swapping to maximize your fire rate
One of Splitgate’s quirks is that certain weapons have a slow rate of fire, meaning it’s actually faster to swap to a secondary than it is for the next shot to come out of the first weapon. It’s a complicated premise on paper, but in practice, it’s simple. If you’re using something like the Carbine, which has a slow fire rate, you can shoot once, and as soon as your shot connects, swap to the other weapon and finish the opponent off. That way, you’re maximizing your fire rate. If you were to keep shooting with the Carbine, you’d probably do alright, but the time between shots could cost you the gunfight. And keep in mind, this strategy isn’t always applicable. For instance, if your secondary is an SMG and your opponent is across the map, you should probably keep your Carbine out.
Enemies cannot see through your portals

Let’s get into some portal tips because you’ll be at a major advantage if you know how they work. For starters, enemies cannot see through your portals. That means you can position one in a high-traffic area and shoot through it without totally giving away your exact location. It’s not recommended to stay in one spot as you shoot through your own portal because eventually, your enemies will figure out where you are — but it’s a great way to secure a few eliminations before moving on. Your opponents won’t know what hit them.
Grenades don’t deal damage to players
Grenades function differently in Splitgate than they do in most other games. They don’t actually damage other players. Instead, they’re used to destroy enemy portals. This is the only way you can destroy an opponent’s portal, so keep that in mind if you see one around you. It’s also good to know that grenades don’t deal damage so you don’t waste your time throwing one at an enemy — doing so could cause you to get killed since the throwing animation takes some time. Just remember, to throw a grenade, press down on the D-pad.
Use your portals to block enemy portals
If there’s a spot the enemy keeps coming out of, destroy their portals and throw some of your own on that very wall. This will present a roadblock for them and could give you a slight upper hand in certain situations. Of course, your opponents can certainly destroy your portals as well, but this takes extra time and could be used as a distraction. In short, your enemies cannot place a portal on top of yours, so use this as an effective means of defense.
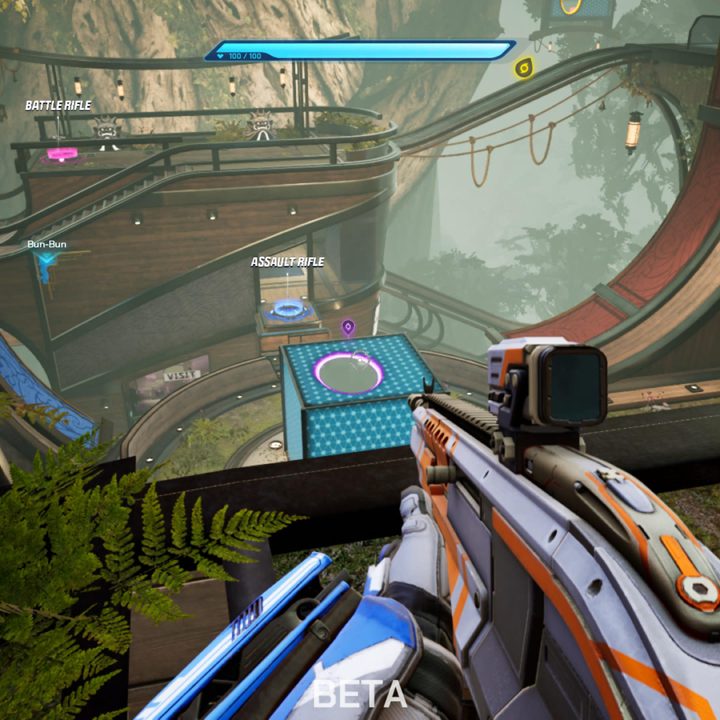
Pick up power weapons around the map
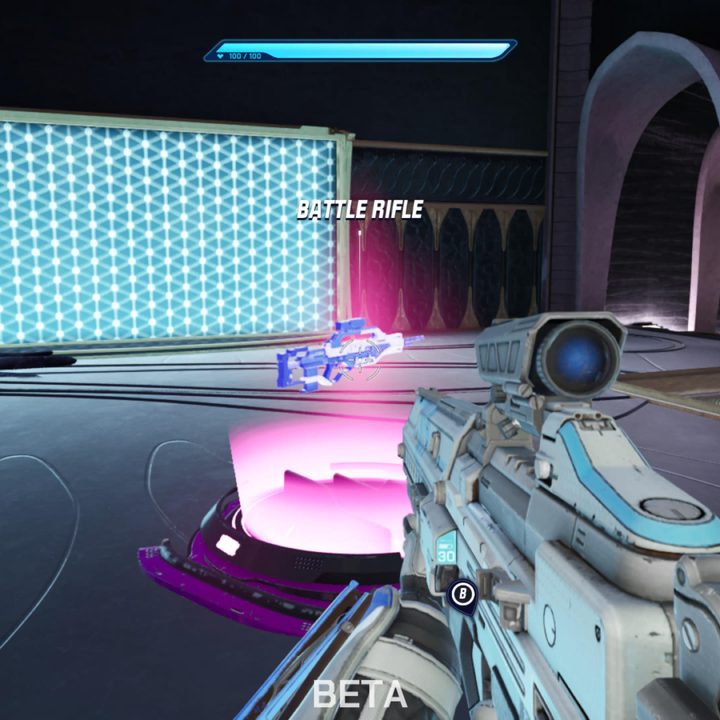
Depending on the game mode, certain power weapons will appear around the map — as is typical for an arena shooter. For whatever reason, players often ignore these weapons, but doing so puts them at a severe disadvantage. The Battle Rifle is one of the best that appears around the map, and those of you who are familiar with Halo will be right at home with this weapon. Or perhaps you’re more of a fan of rocket launchers. The point is that most of the power weapons that spawn around the map are absolutely worth picking up. In fact, depending on the flow of the match and how close the score is, it’s sometimes worth waiting for these weapons to spawn, though evaluate those situations on a case-by-case basis.
Maximize portal efficiency
Much like the 2007 game, Portal, you can maximize your portal usage in Splitgate by using them as platforms. The process is simple. Shoot a portal and then stand halfway across it while ensuring your screen isn’t blurry. If you notice the blur, step forward slightly until it looks clear. Then shoot a portal of the same color at a different wall and step back. You’ll now come through the second portal without having to actually run over to it. This process can be chained together to get across the map in creative ways, which can be key to coming out ahead. In the video above, you can see a simplified version of this strategy performed slowly. If you can learn to do this quickly, you’ll be unstoppable.
Try some races to get better at using portals
From the main menu, you can tab over to the Training menu, followed by Races to practice your skills getting around each map. The cool thing is that you’ve got free rein to explore these levels as you see fit, so you can take as much time as you need getting through. Eventually, you’ll develop a sense of rhythm and be able to zip around quickly if you practice these stages enough. Doing so will also likely teach you new strategies or sweet spots that you might not have known about otherwise. Just keep your eye out for the glowing orbs to know where to go next!
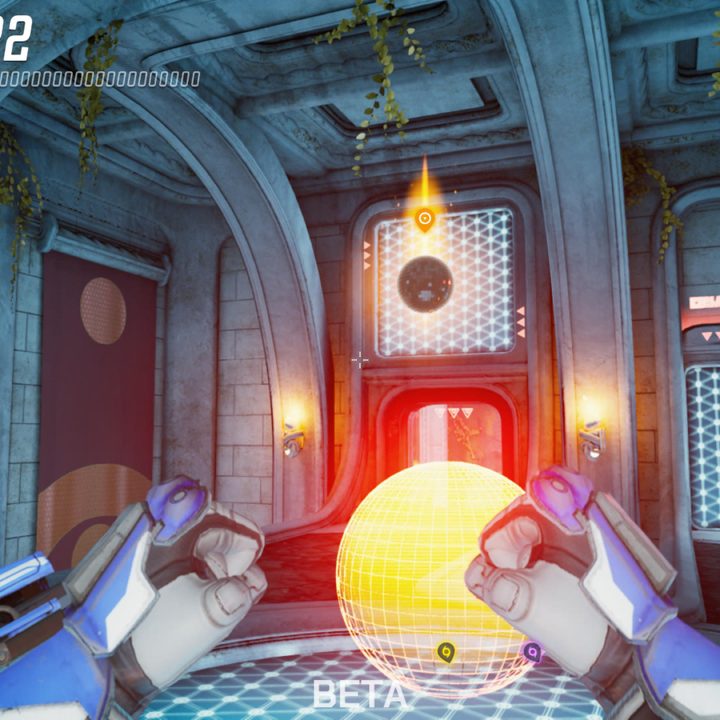
Close your portals!
Earlier we covered a strategy of using your own portals to block your opponents. While that is a useful strategy, you should also be aware of when to close your portals since they also block your teammates. It can be frustrating if you’re in the middle of a firefight and need to shoot a portal to either escape or secure an elimination — only to have to quickly adjust those plans due to a teammate who hasn’t closed their portals. You shouldn’t always close your portals, though. For instance, if you’re actively using them and have a plan laid out, then by all means — keep them open. But otherwise, close them so your teammates can use the wall space. Remember, press left on the D-pad to close the left portal, and right on the D-pad for the right portal.
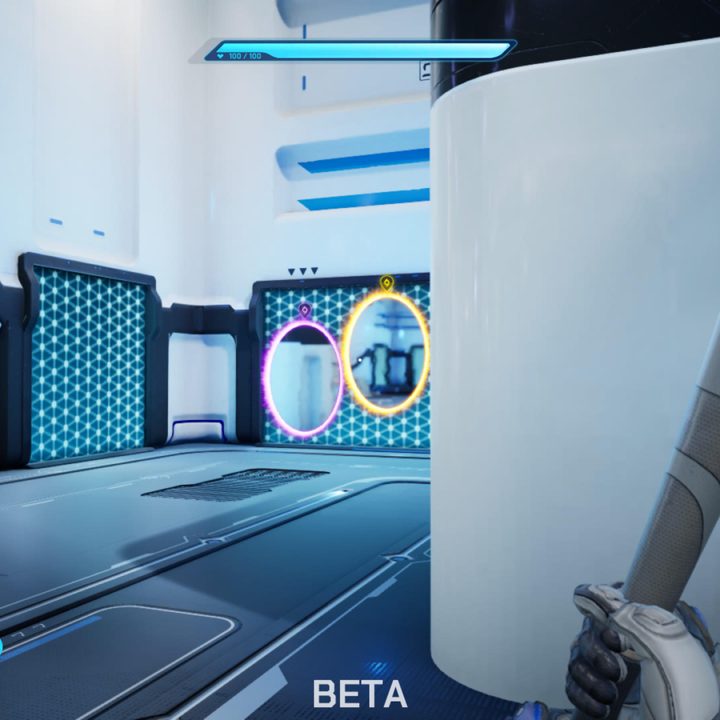
Try to always be aware of the nearest portal-able walls
Sometimes, you can inadvertently put yourself in sticky situations that can be hard to get out of. The easiest advice is to avoid this, but sometimes that isn’t an option. To help matters, you should always be aware of where the closest blue wall or surface is so you can make your escape. Not all walls accept a portal — only the blue surfaces as shown in the image above will work. Having a clear getaway can save your life and make it easier to get around with minimal damage. At first, this might be tough, but if you play often and practice on the racecourses, you’ll get the hang of portal placements in no time.