
One of the most useful features of today’s smart speakers is using voice commands to control the smart devices around your home. Nothing beats giving commands like, “Alexa, turn off the TV and turn on the dining room light,” or “Hey Google, set the heat to 70 degrees.”
Alexa, Google Assistant, and Siri can all handle these tasks, but you have to connect your home devices to the speaker first. Here’s how to set up your voice assistant speaker as a smart home hub, and what setup options you have.
Connecting smart devices with Alexa

Alexa voice commands are available on all the Amazon Echo devices, as well as a number of other smart home devices that include speakers and Alexa integration—which means you have a lot of control options for this voice assistant.
Step 1: First, check to see if your smart device is compatible with Alexa. The smart device should have a list of compatible voice assistants, and most devices will mention up front what they work with.
Step 2: Set up your smart home device, and connect it to the same network that your Alexa device is on. Make sure everything is updated.
Step 3: Open up the Alexa, go to the menu and select the Skills section. Search the skills for your device by name, and you should find a skill to link it to Alexa. Enable that skill, and follow any additional instructions for setting up the connection.
Step 4: Say, “Alexa, discover my devices,” and see if the voice assistant recognizes the new device. If Alexa is having trouble, go back into the Alexa app menu and choose Devices. Then select the option to Add Device and add your smart device manually (the Alexa app should be able to detect it). Now you should be able to give Alexa commands for that specific device’s name, i.e. “turn kitchen light on.”
Note: Alexa is very versatile in how you can connect devices. Some versions of the Echo, like the Show and Plus, allow you to connect Zigbee devices directly as well. Zigbee is an older smart home connection protocol that some devices still prefer to use today. For developers and tinkerers, you’ll probably be interested in the Alexa Connect Kit.
Connecting smart devices with Google Assistant
Google Assistant can help control your smartphone from a variety of devices, including Google Home, Nest security cams, and the Lenovo Smart Clock. Of course, Google Assistant also works right from compatible smartphones, so you don’t necessarily need a voice assistant speaker for this one.
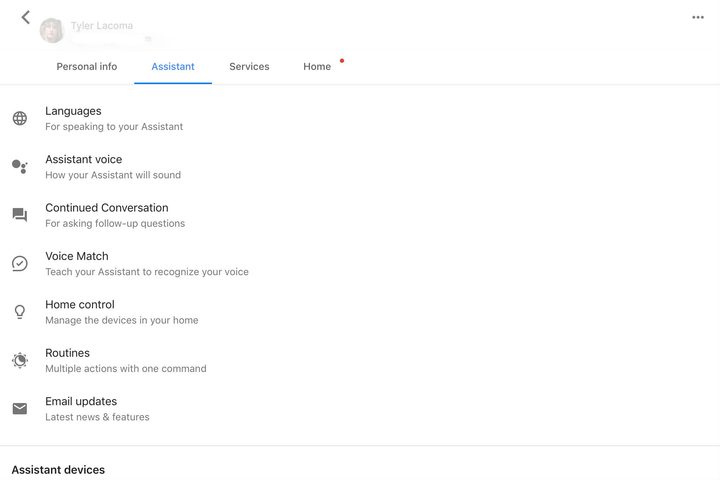
Step 1: Set up your smart device and make sure it is on, as well as connected to the same network as your Google Assistant device. Open up the Google Assistant app and go to the Settings option—you should be able to get their by clicking your Google Account icon on the upper right of the app. Once there, go to Assistant, and select Home control from the list.
Step 2: You should see two section here, Devices and Rooms. Make sure you are in the Devices section, and then click the big plus sign that says Add your smart devices.
Step 3: Assistant will now take you to a very long list of all the smart devices it supports. You can look through the list alphabetically for your device, or search for it using the search function. Select the right device.
Step 4: Google will now take you through connection steps, depending on the device you have chosen. It first typically asks you to sign into your account on the smart device platform, and takes charge of things from there. When you get an option to select Done, select it to finish up.
Step 5: It’s also a good idea to head into the Assistant section again, find your device, and give it a nickname that you prefer to call it when talking to Google Assistant. You can also assign devices to specific rooms for even easier commands. Fo more information, here’s some of the many ways Google Home can control your devices.
Connecting smart devices with Siri
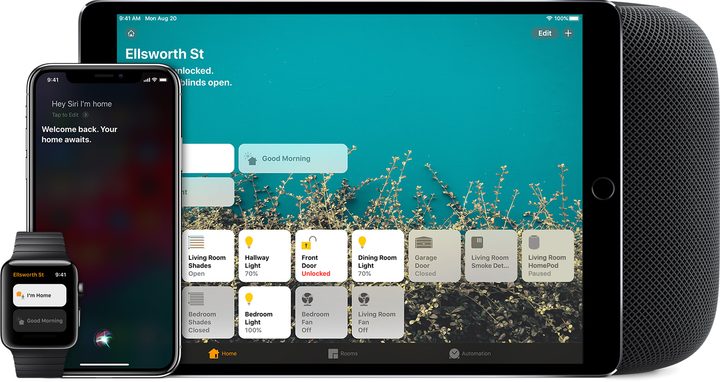
Besides Apple mobile devices, the main smart speaker that works with Siri right now is the HomePod (other speakers have Siri-enabled music commands, but that doesn’t mean you can control smart devices with them). Here’s how to set up your devices with Siri.
Step 1: Siri controls devices through HomeKit, Apple’s smart device platform. Your smart device must be compatible with HomeKit in order to work with Siri, so check that first. If it works with HomeKit, set up your device and connect it to your home network to get ready.
Step 2: To add accessories, make sure you have the Home app available on an iOS device (the Home app also integrates with the HomePod, so this sets up devices for that speaker as well). Open up the app and choose Add Accessory, the plus sign icon.
Step 3: Use the camera on your iOS device to scan the HomeKit code on your smart device (it’s 8 digits and should be labeled). Some devices may use a QR code instead. Older iPhones may connect with NFC, so holding those phones near the device should work.
Step 4: Look at your app until the accessory model shows up, and select. The Home app may asked to Add Accessory to Network, so may sure you allow that as well.
Step 5: Name your accessory an easy, memorable name, and assign it to a room if you desire. When finished with everything, select Done. You should now be able to give Siri a number of device commands, depending on your accessory.


