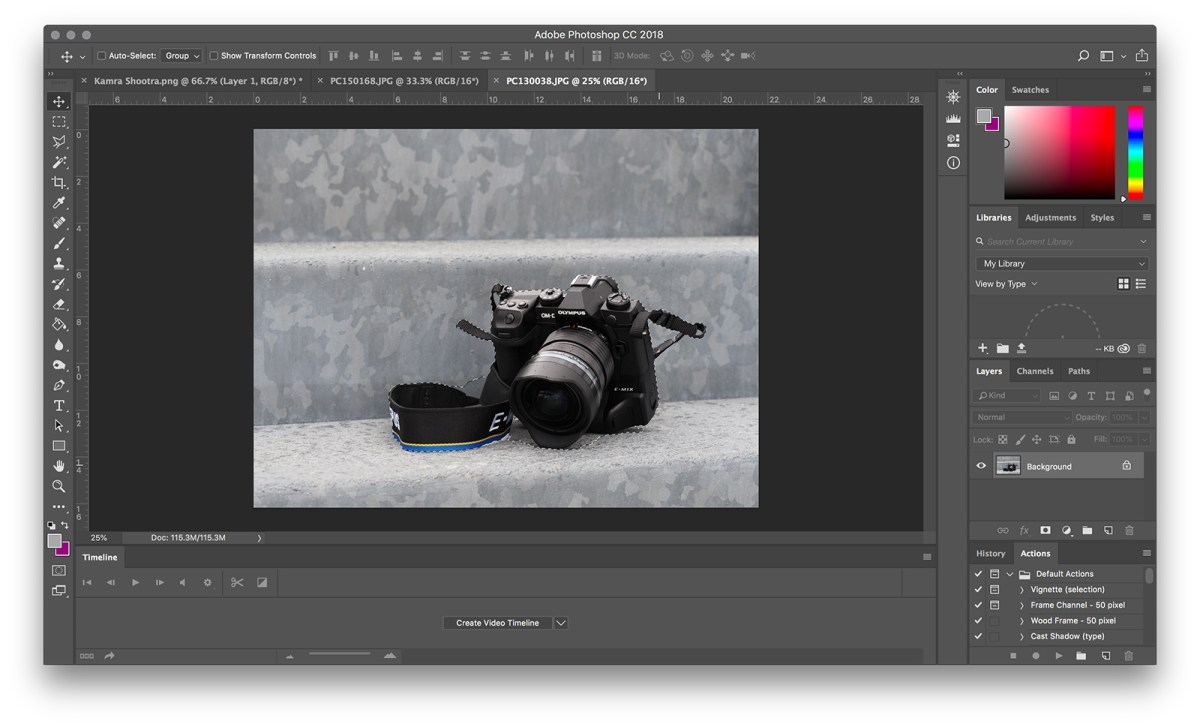
From product photography to web design, sometimes an image is just better without the background. But attempting to tackle the task without the right tools can make even the most skilled photographers frustrated. Thankfully, recent updates to Adobe Photoshop make the process simple. Sometimes, it just takes a few clicks.
- The quick and dirty way to remove a background in Photoshop
- How to manually remove in Photoshop
- 1. Go To Select > Select Subject
- 2. For complex subjects, use Select and Mask to refine the selection
- 3. Turn your selection into a layer
- 4. Continue refining with lasso tools and the eraser
- 5. Delete the background
- 6. Save as a PNG
A new feature in Photoshop 2020 can automatically remove a background. The process uses artificial intelligence to help determine which parts of the image to keep and which to remove. A.I. is never as skilled as a human editor, however, and for complex images, manual background removal may be necessary using Photoshop’s range of different selection tools.
Don’t have Photoshop? Here are some other ways to remove a background from an image.
The quick and dirty way to remove a background in Photoshop

Photoshop 2020 comes with a new background removal shortcut that’s powered by the Select Subject tool. The shortcut won’t get it right every time, but works well for simple images, and for others, can easily be refined. Before you start, make sure you have Photoshop 2020, version 21.0.0 or later — if not, you’ll need to update the software first.
Start by copying the background layer in order to create the type of layer Photoshop needs to use the tool. Select the entire photo (command + A on MacOS or Control + A on Windows) and copy and paste. In the layers panel, click on the eye icon next to the background layer in order to hide the background. From here, you’ll be working only with the new layer you just created.
In the Properties panel on the right, navigate to the Quick Actions section. If you don’t see the Properties Panel, click on the icon that looks like this:

Under Quick Actions, click on Remove Background. You’ll need to wait a few minutes for the program to find the subject and remove the background. Once the program is finished, you should see the subject on a transparent background (designated by the checkered pattern). If you don’t see that transparent background, make sure your background layer is hidden.

This quick method works great for some photos, with laughable results for others. If it doesn’t work for you, move on to the manual method below. If the result is close, but not quite perfect, click on the mask that Photoshop created automatically (the black-and-white image in the layers panel). With the mask selected, use a white paintbrush to add to the subject, and the black paintbrush to erase any pieces of the background that were not removed.
Once you are happy with the results, you can delete the background layer and save the file as a PNG in order to maintain the transparency, or as a PSD in order to come back and make more adjustments later.
How to manually remove in Photoshop
Choosing a Photoshop selection tool
Making a background transparent involves selecting what you want to keep and deleting what you don’t. But which one of Photoshop’s several selection tools is best for the task? That depends on the image. If you are working with an image on a background with a lot of contrast, such as a dark object on a light background or a single-color logo, the selection process is a bit simpler.
For this tutorial, we’re assuming you’re working with something a little more difficult — because if you can remove a busy background, you can remove any background, and even if you are working with a white or solid color background, you can save some time by familiarizing yourself with Photoshop’s different selection tools.


1. Go To Select > Select Subject

Photoshop’s Select Subject tool offers an easy start to background removal. Go to Select > Select Subject. The process takes a few seconds, but Photoshop will then roughly select the subject of the photo using artificial intelligence. The tool usually doesn’t get it perfect, but that’s okay — you can refine the selection in the next step.
Alternately, if the photo has more than one subject and you only want to select one object, you can use the Select Object tool. In the toobox, choose the Select Object tool (Photoshop 21.0.0 and later), it’s tucked in with the Magic Wand tool. Draw a box around the object and Photoshop will select the object for you. Again, you can refine the selection in the next step, so don’t worry if the object isn’t perfectly selected.
If the Select Subject tool isn’t working for you (or you are using an older version of Photoshop), skip to the next step and start the selection from scratch.
If the Select Subject tool works perfectly (it happens!), skip ahead to step four.
2. For complex subjects, use Select and Mask to refine the selection

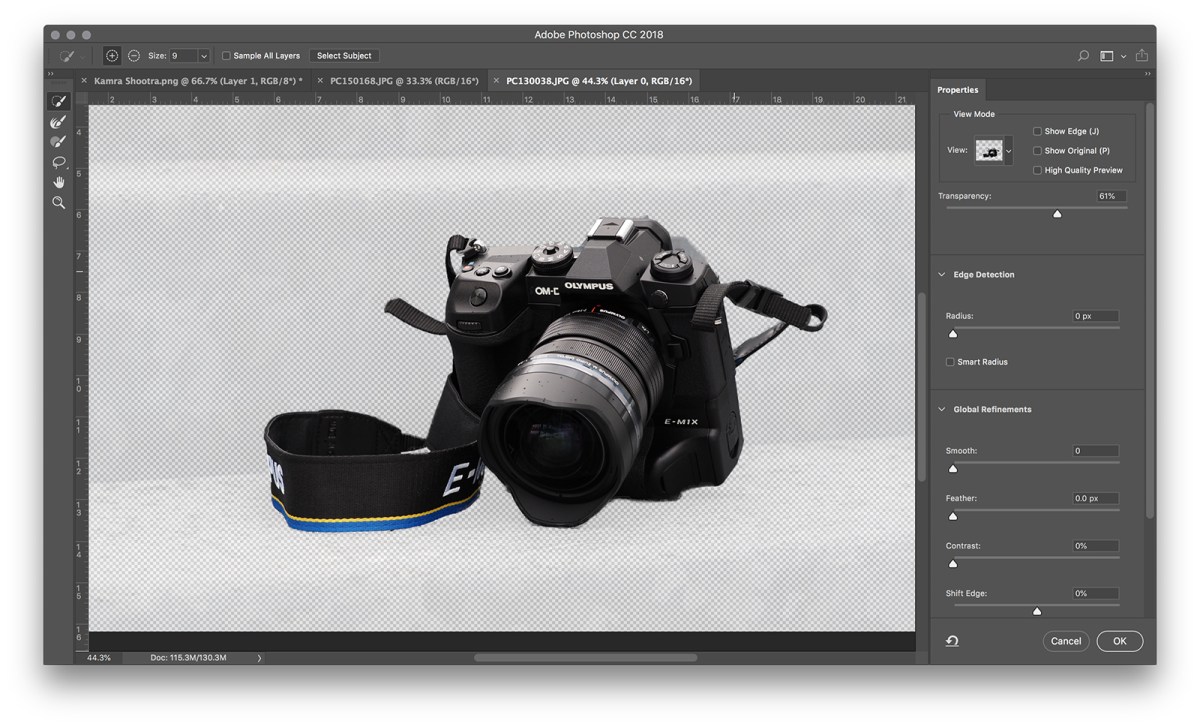
Chances are, your selection isn’t quite perfect. If you are working with an object with well-defined edges, the magnetic lasso tool is probably the easiest route, so go ahead and skip to the next step. For objects with less defined edges, texture, and wildly irregular shapes, however, the Select and Mask tool often produces the best results. For objects with both, like the image of the camera used in this tutorial, you can use a mix of both methods.
Fine-tune the selection by heading to Select > Select and Mask. In the Select and Mask window, refine the selection. Use the brush tool from the toolbar on the left and select the plus icon in the top toolbar, then brush over anything that should be included in the selection but isn’t. Or, click the minus icon at the top to brush over pieces that shouldn’t be part of the selection. Remember, the goal is to select the subject, leaving the background that you want to remove unselected.
If the brush is selecting too much, zoom in and use a smaller brush size (located right next to the plus and minus icons at the top) and lower the radius in the properties toolbar. If the brush isn’t selecting enough, use a larger brush size and increase the radius.

Get the selection as good as you can using the Select and Mask tool, but don’t sweat if it’s not perfect yet. Make sure to err on the side of selecting too much — if you leave something out, it’s tougher to go back later. Click okay once you’ve refined the selection as well as possible.
Before moving on to the next step, zoom in on all the edges and make sure you didn’t leave any of the selection out. If you did, just reopen the Select and Mask tool and select that area.
3. Turn your selection into a layer
Save what you’ve selected so far on a new layer, even if it’s not quite perfect yet — just make sure you haven’t left out anything that should be selected. With those “marching ants” still indicating your selection, copy (Control or Command + C) and paste (Control or Command + V) the selection. The pasted selection will automatically show up as its own layer. Alternatively, you can also go to Layer > New > Layer Via Copy.
In the layers panel, click the eye icon next to the original background layer. That will allow you to see your transparent background, but don’t delete the background just yet.
4. Continue refining with lasso tools and the eraser

Photoshop has about a dozen different selection tools, and while Select and Mask works well with objects that are difficult to select (like people with hair), the magnetic lasso tool can be faster for well-defined edges. Continue refining your selection after Select and Mask, or jump right to this step if you are cutting out an object with well-defined edges.
Select the magnetic lasso tool. The lasso tools are the third from the top in the default toolbox, but there’s more than one — click and hold, then choose the magnetic lasso tool from the dropdown (it’s the icon with a magnet in the corner). If your object has both well-defined and straight edges, the polygonal lasso tool may be the easier choice, but it doesn’t work with curves.
Click around the outer perimeter of the object to choose any extra background areas you want to eliminate. The magnetic lasso will fasten to the object’s sides, but make sure you are frequently clicking to help it stay on track. Once you’ve chosen a part of the background, hit the delete key.
A different way to do this is to use the eraser in the toolbox to remove sections of the background; this is a great way to perform a final cleanup after you’re done with the lasso tool.
5. Delete the background
Finally, you’ll need to select the background layer under the Layers panel. After you remove this layer, you’ll only see the selection you made at the start. If you prefer, you can add a new background layer and have fun experimenting with various color schemes, effects, images, and designs to preview how your selection will appear. You’re also able to retain a transparent background—just leave everything the way it is, and refrain from adding a new background.
6. Save as a PNG
When you save your photoshop file, you’ll be able to select from a few distinct file types. Remember to pick PNG if you need to keep your image’s transparency. If you choose another option like JPEG, be aware that you’ll lose all transparency. Go to File > Save As and select PNG from the drop-down menu. We highly recommend always saving a second copy as a PSD file to modify later if necessary.
Editors' Recommendations
- How to photograph fireworks and capture the colors of Independence Day
- The best Photoshop alternatives
- How to transfer photos from an iPhone to a computer
- How to add and edit text in Adobe Photoshop
- Photoshop for iPad finally has Edge Detection — here’s how to use it


