

April showers bring May flowers. But that’s not all they bring. In many parts of the world, spring storms are also the catalyst for incredible displays of lightning — a challenging subject to photograph, but one well worth the reward if you have patience and a little bit of luck on your side.
Safety
Before we dive into what you’ll need to shoot lightning and how to shoot lightning, let’s get something important out of the way. Lightning isn’t to be taken lightly.
It’s estimated by the National Weather Service that in the United States alone, roughly 300 people a year get struck by lightning with an average of 30 of those strikes being fatal. If you can hear the thunder from the lightning, you can be struck. So get the shot you need, but be extremely careful and vigilant while doing so.
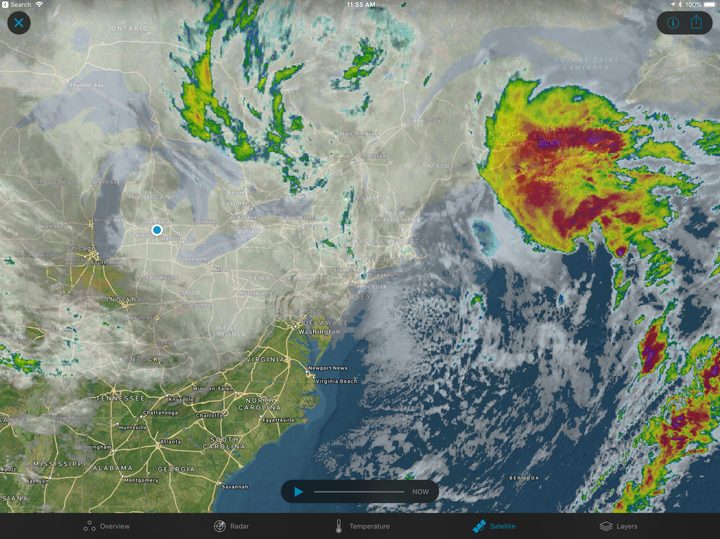
A good way to stay on top of things is to keep an eye on your local forecast via your smartphone or tablet. Apps like Weather Underground (Free: iOS, Android) and RadarScope ($10: iOS) are great for not only planning out your path along the storm, but making sure you don’t get caught off-guard if things get more serious.
Gear/Tools
Here’s the shortlist of the bare minimum items you’ll need to effectively capture lightning strikes:
- Camera (with a manual shutter speed mode, preferably with a bulb “B” setting)
- Cable or wireless shutter release
- Tripod
There are also dedicated lightning triggers, which automatically trip you camera’s shutter when they detect lightning, but such devices can be a tad expensive. It might be worth the investment if you do a lot of lightning photography, but when it comes down to it, the above listed items are all you truly need. That said, where there’s thunder there also tends to be rain, so it might be a good idea to include a plastic bag or cover for your camera so it doesn’t get soaked while trying to get the shot.
Taking the shot
First and foremost, find a good location. The variables are effectively infinite, so there’s no definitive right or wrong way to go about it. Just make sure you’re in a spot where you can get to safety in a hurry if things take a turn for the worst.
When settled on a location, set up your camera on a tripod and get the composition you want. Once you’re happy with the composition, connect the shutter release. Now it’s on to exposure settings.
As with any shoot, many variables will dramatically affect what your settings should be. That said, there are a few general setups that will point you in the right direction.

First up, set your shutter speed to bulb mode. This mode is usually displayed as a “B” in your camera’s menu or on a shutter speed dial. In bulb mode, the shutter will stay open as long as you hold the shutter release, maximizing the likelihood of capturing a bolt of lightning. Remember, when it comes to lightning, the strike itself is short enough that you don’t have to worry about a fast shutter speed. (Bulb mod works great at night, but is not recommended for daytime photography as your image will be overexposed.)
Next, set your ISO. More often than not, your best bet is to use a low ISO, somewhere around 100 or 200. Since you’ll be holding the shutter open for an extended period of time, keeping the ISO low should help reduce the issue of long-exposure noise. Plus, lightning bolts are bright, so you don’t want to overexpose the entire scene when you do capture one.
Finally, set your aperture. Since you’ll be holding your shutter open for an extended period of time, it’s a good idea to choose an aperture that provides a correct exposure over the course of a 10 or 15 second shot. That way, you can hold the shutter open for an extended period of time to increase your chances of capturing a lightning strike. It’s also a good idea to use a small aperture to ensure the image is sharp from front to back. So long as you’re stopped down to f/5.6 or higher and focused on the horizon, you shouldn’t have any issues there, but if you do have close foreground elements, you may want to push that to f/11 or f/16.
Once your settings are in place, it’s little more than a waiting game with Mother Nature. Be patient, be consistent, and don’t lose hope if you end up with only one good shot in a hundred. Lightning photography is a game of numbers.

It goes without saying that you should shoot in RAW. Lightning — and storms in general — are unpredictable, so what might be a great exposure one shot could prove to be a disaster the next. By shooting RAW, you’ll have more leniency in post-production to dial up the shadows or bring down the highlights around the lightning strike.
Wrapping up
If you’re serious about lightning photography or have a little bit of cash burning a hole in your pocket, you may want to check out one of the aforementioned lightning triggers, which will take a lot of the guesswork out of the equation. Again, these are far from necessary, so don’t feel discouraged if you can’t afford or don’t care to buy an automatic trigger.
What’s most important is being patient and putting in the time. You may not get it right on your first night out. Just keep going out there, have fun, and be safe.


