Whether you’re interested in creating a fun tutorial for people to try at home, live streaming your favorite games, or even sharing your best jokes with a live audience, there’s a lot to love about creating content on YouTube.
When you want to directly interact with your audience in real-time, you can always set up a livestream, and the Open Broadcaster Software (OBS) tool is usually the best way to make it happen.
Get your YouTube stream key
Step 1: Create a YouTube account if you haven’t already.
Step 2: You can’t participate in YouTube live streaming until you verify the account with a linked mobile number. Head to the verification page, log in to your account, and follow the on-screen instructions.
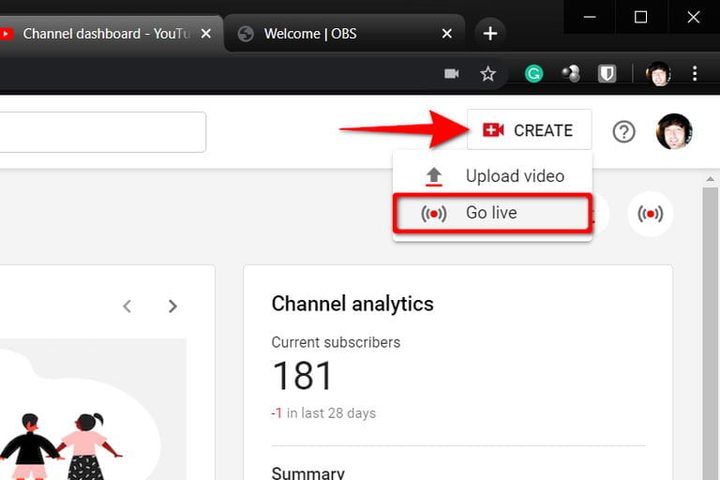
Step 3: Once verified, it’s time to head to YouTube Studio. Select the Camera icon on the top right-hand side of the main YouTube page and then select Go Live.

Step 4: Now select Schedule Stream, and check to make sure that all the settings are correct and that the video is properly titled and described (this is great for video SEO and important if you want maximum visibility). The video should always be set to Public.
Step 5: When ready, select Create Stream.
Step 6: With your stream created, a control panel will provide a preview window and tabs for stream settings, analytics, and stream health.
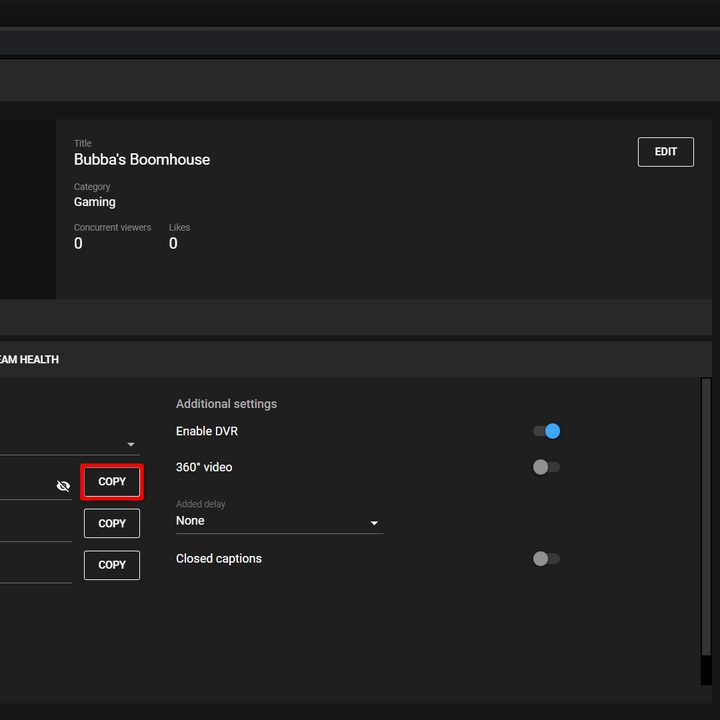
The Stream Settings tab is open by default. Look directly under the label to find the stream key you need for OBS. Click Copy to send the long string of characters to the clipboard. You can also click the Show Stream Key eyeball button to expose the string for 10 seconds and enter them manually in OBS.
Whatever you do, keep this number secret. You don’t want anyone else to have it since they could stream on your account without your permission.
Link OBS to YouTube
Step 1: Download OBS from the official website and install it as you would any other program. Run it as an administrator, and head into the Settings panel using the relevant button located in the bottom right corner.

Step 2: On the following pop-up screen, use the Video and Output tabs to select your chosen frame rates, resolution, and bit rate — they control your audio quality. To see the ideal settings for YouTube, check out Google’s relevant support page.
Step 3: Go to the Stream tab using the left-hand menu and select YouTube -RTMPS from the Service drop-down menu.
Step 4: In the Stream Key field, type or paste your YouTube stream key. That links OBS with YouTube so the software streams straight to your channel.
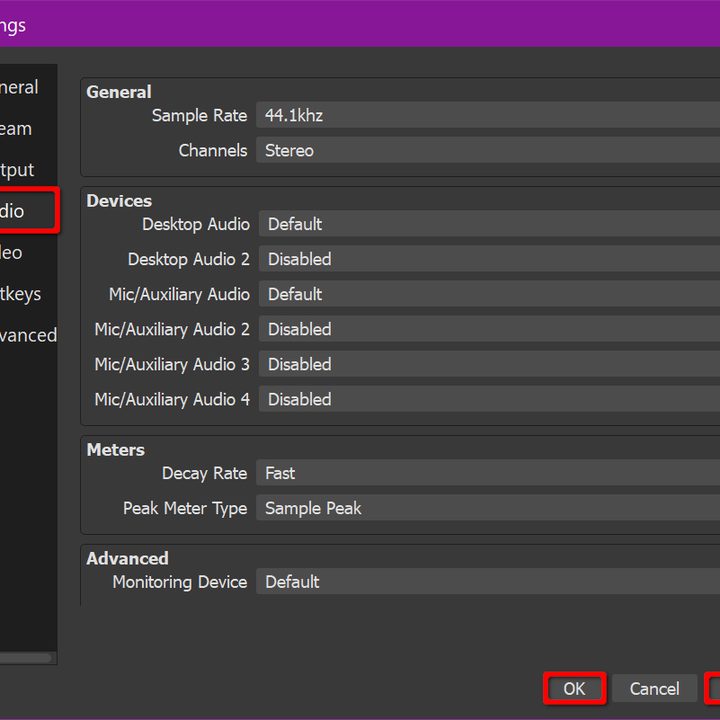
Step 5: Click Audio on the left-hand menu. Each audio device on that page represents one potential audio source in your livestream. If you want viewers to hear in-game or desktop audio, set one of the Desktop Audio settings to your system’s audio output. If you want your viewers to hear you, select your microphone from the drop-down next to Mic/Auxiliary Audio.
Step 6: Exit the settings panel by clicking Apply > OK.
Step 7: In the main window, click the Plus icon under the Sources heading toward the bottom. If you want to stream game footage, click Game Capture listed on the pop-up menu.
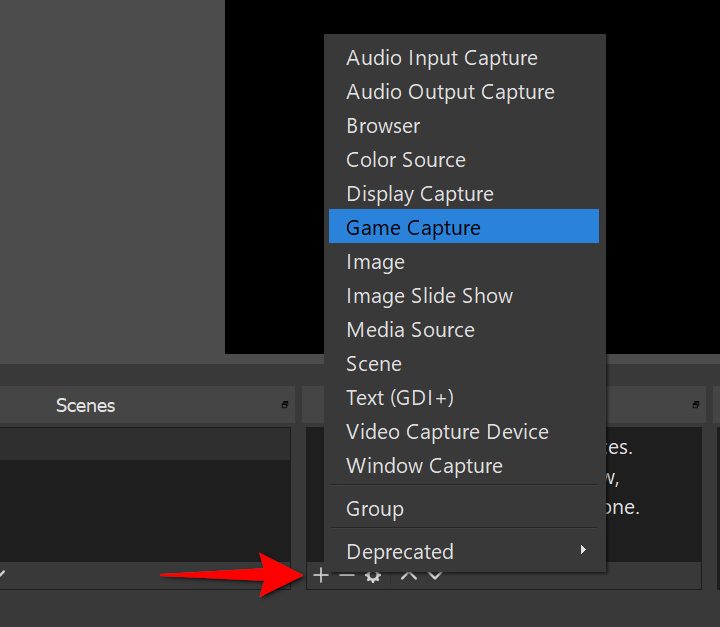
You have a few different options for capturing your footage. You can capture any full-screen application, a specific window, or a foreground window. You can also allow transparency, capture third-party overlays, and more. Click OK to complete.
Want to add your headshot using an external camera? Click the Plus icon under Sources again, but this time, select Video Capture Device. Select your camera from the list of options under the Device drop-down and decide on its quality and FPS. When finished, click OK.
Start streaming
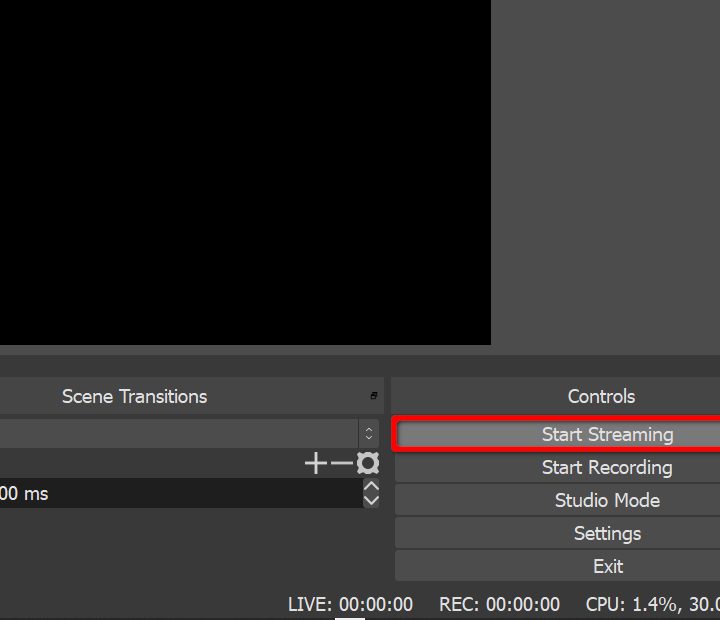
With all of the above settings in place and your YouTube channel configured to accept your stream, there’s only one thing to do: Start live streaming! If you want to start right away, click the Start Streaming button located in the bottom right corner.
Now it’s time to start streaming. To begin, click the Go Live button in the top left corner of your YouTube dashboard. Once the OBS establishes the connection to YouTube, the broadcast will be visible in the preview pane. Keep in mind that there is a 20-second delay between your live stream and the public page where your viewers are watching.
Once you say goodbye to your viewers, you’ll need to end your broadcast. You can do this by selecting Stop Streaming in OBS. Then click End Stream on your YouTube dashboard.
Stream issues
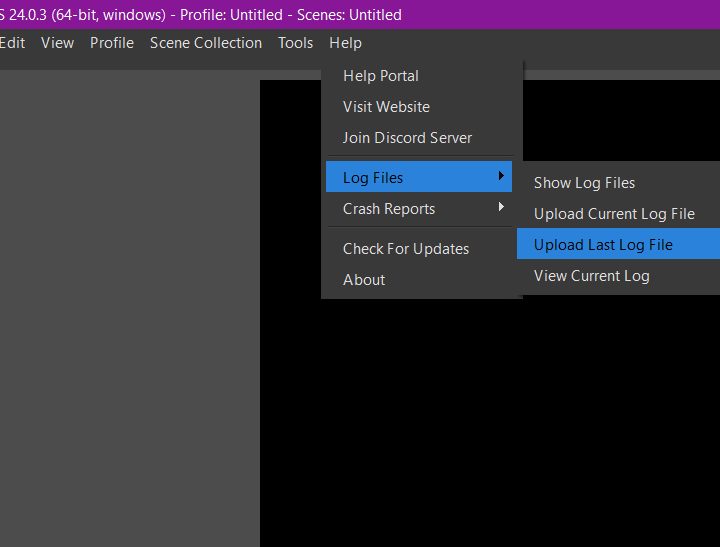
You might encounter issues with your YouTube live stream due to problems with PC or internet performance. OBS allows you to open a log to find a solution to your problems. You can find this log by clicking Help, then choosing Log Files from the drop-down menu. Then, from the following menu, select either Upload Current Log File or Upload Last Log File. You’ll see a new window giving you a URL for the uploaded log file. Make sure to copy the URL to your clipboard before clicking OK to finish.
Your log file becomes a resource employed by the OBS Log Analyzer to execute diagnostics on any issues you might be experiencing with your stream that need resolving. Open the analyzer and paste the URL into the text field. You can click on the Log Analyzer’s Analyze button to get a detailed analysis of your streaming activity along with suggestions on how to resolve performance problems. For example, your stream might be low-quality due to your game’s FPS. Alternatively, your PC resolution may be set too high, which would overload the GPU.
Here is a list of tools and services that will help you maintain sharp visuals on your stream: