The BlackBerry Key2 features tweaks to the Android operating system that put an emphasis on security and privacy, and one of the most unusual features is called Locker. It’s designed to keep certain photos and files completely private, and hidden away from anyone who may also use your phone, like your kids. It’s also useful for keeping sensitive materials safe should you lose your phone.
It’s a standard feature on the BlackBerry Key2 and the BlackBerry KeyOne. Using it is simple, and here’s how to get it up and running.
Set up Locker

- First, find the Locker app on your phone and open it. Grant the permissions as needed, and then enter a password when prompted. While Locker works with your fingerprint, it still needs a password to be set up.
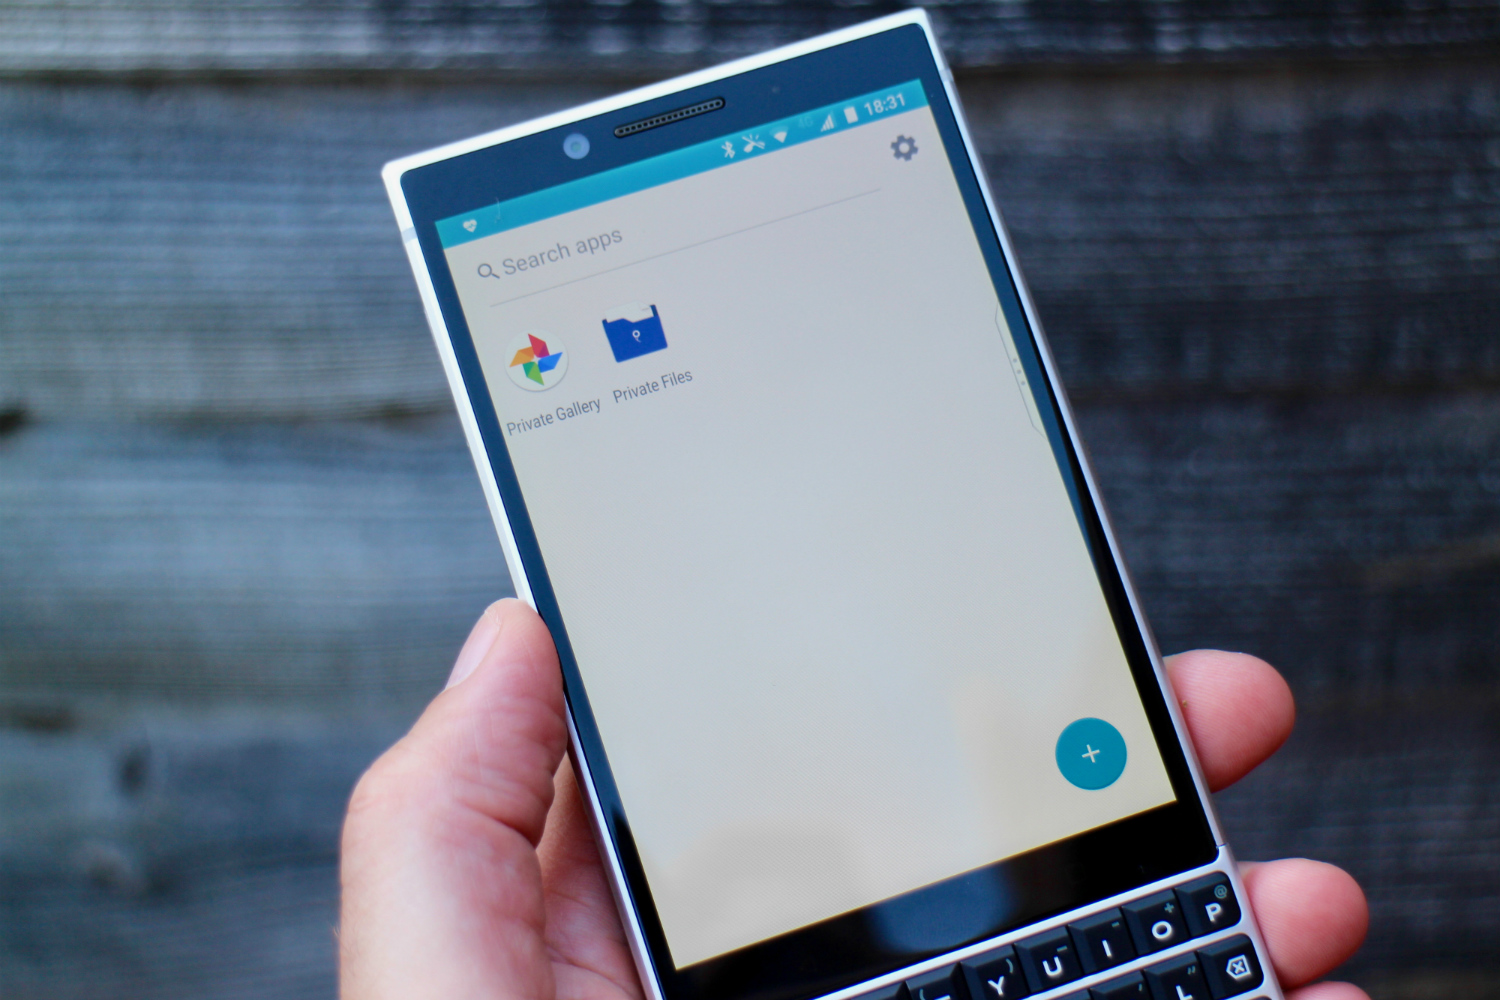
- There are two folders already inside Locker — Private Gallery and Private Files. Tap the Plus icon to add existing files or photos to these folders, or to add apps. The hidden apps still appear in your app list, but require fingerprint authorization to open. This also applies to the Locker app once it’s all set up.

- If you’d rather the app didn’t show up in the app list, open Locker and tap the Gear icon at the top right of the screen, then tick the box marked Hide Private Apps. The apps will disappear from the list, and are either opened in Locker or by using a previously assigned keyboard shortcut.
- You can also hide Locker itself. To do this, tap the Gear icon in Locker and then Advanced Settings, and tick the box on Hide Locker in Launcher.
Secure your photos with Locker
- The final option under the Plus icon menu is Private Capture. Tap this and the camera app will open and each photo that’s taken is automatically placed into the Private Gallery. Photos do not appear in the primary Google Photos album at all and aren’t uploaded to its cloud storage either.
- There is another way to take private photos without opening Locker first. Open the camera app and instead of using the shutter button, use the space bar to capture your photo. However, it’s really important not to actually press the space bar, just touch the fingerprint sensor. It takes a second to register, so have patience.
- The photo taken will be placed into the Locker. If you accidentally press down the space bar, the camera will take a photo and it will be viewable in the regular Google Photos album. You may want to check after taking the photo, just in case.
- To view your photos, go back to the Locker app and open it. All those taken using Private Capture, or the fingerprint sensor in the camera app, are in the Private Gallery.
Secure your files with Locker
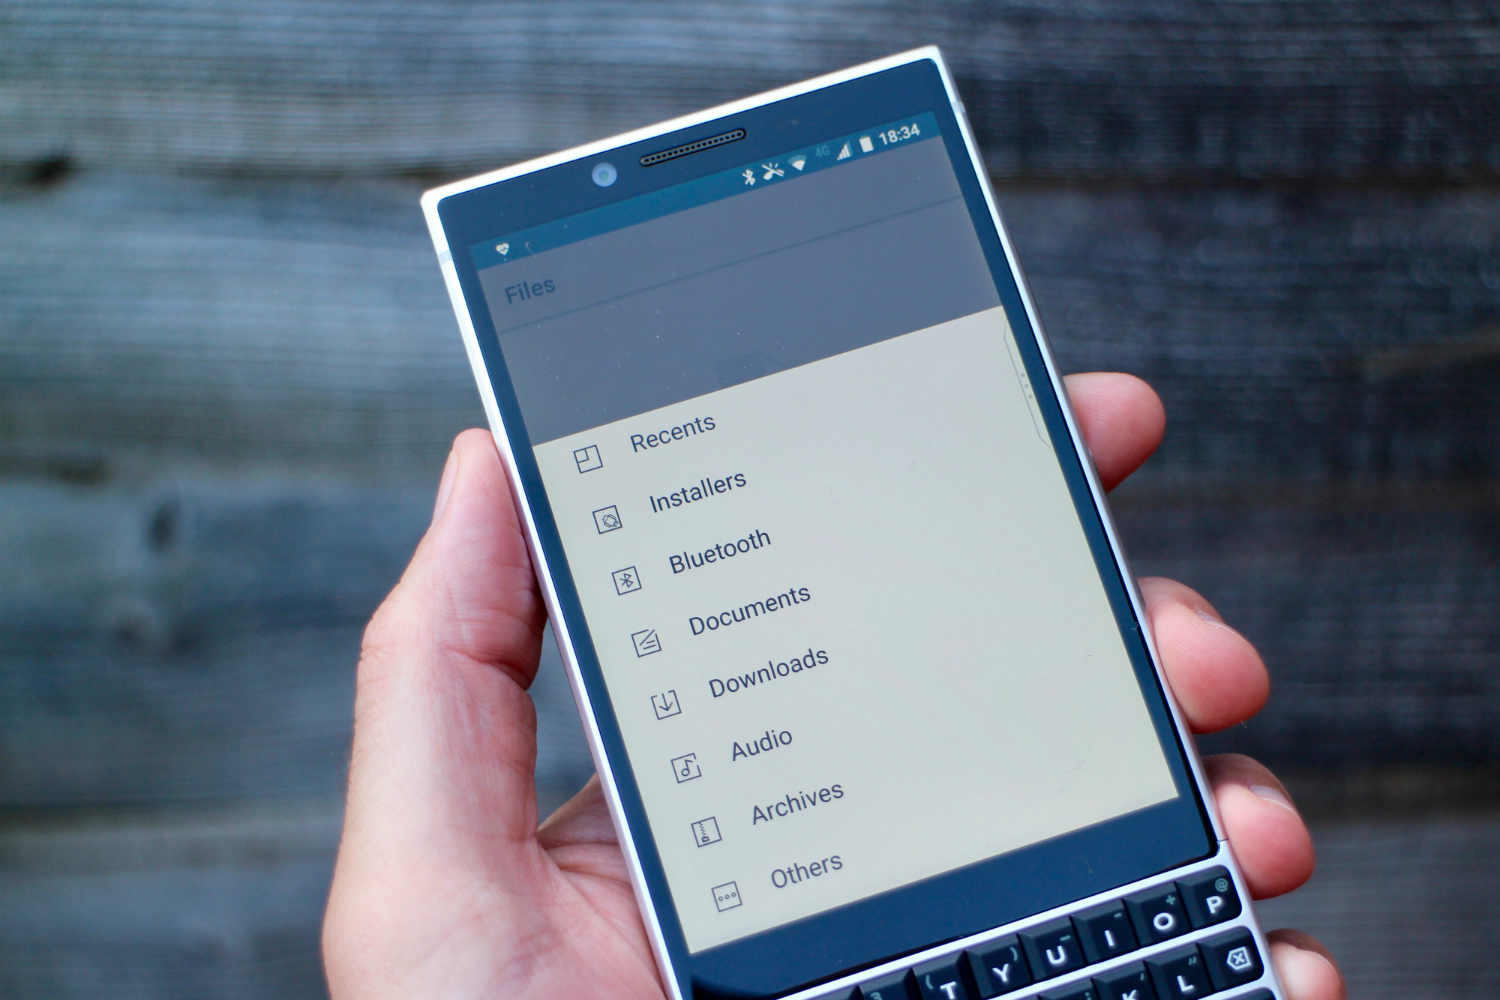
- Documents downloaded onto your phone can also be stored in Locker. Open the Locker app, then open Private Files, and tap the Plus icon. The top icon lets you navigate through different apps to find files to secure, ranging from Downloads, Bluetooth, Documents, and Audio. When you’ve found the right file, tap it and then tap the tick at the top right of the screen to add it to Locker. The file will be removed from its original location.
- To view the file, open Locker with your fingerprint, then open Private Files.
- If you want to remove a file from Locker and return it to its original location, navigate to the file in Locker, then tap the square icon with an arrow in it, located at the top right of the screen. Select the file or files you want to move, then look for another square-and-arrow icon at the top right of the screen.
- Tap it, and the file is removed and placed in the Public folder. It’s now visible to everyone who uses your phone.
That’s all there is to using Locker on your Android BlackBerry phone, whether it’s the KeyOne, the Key2, or the BlackBerry Motion.
Editors' Recommendations
- BlackBerry trailer depicts the rise and fall of the iconic phone
- A new BlackBerry with a keyboard is still on the schedule for 2022
- BlackBerry rises from the grave: New 5G phone with a keyboard coming in 2021
- BlackBerry Key2 LE: Everything you need to know