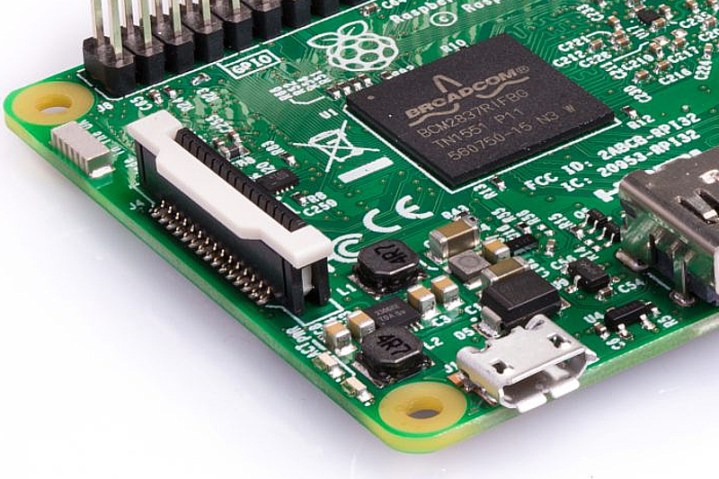
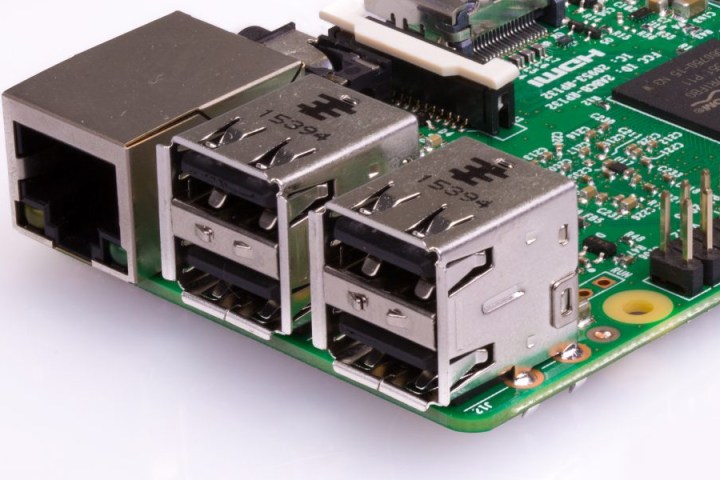
You may have never used Raspberry Pi or Arduino, but chances are you’ve heard of them. Raspberry Pi has been the bestselling British computer for years now, and Arduino has been transforming the DIY community one board at a time. There’s no shortage of options designed to provide you with a little electronic control over your projects. Still, the budget-friendly Raspberry Pi and the plethora of solutions under the Arduino brand are undoubtedly two of the most popular.
But comparing the two can be like judging a lineup of cats and dogs. They’re both animals that lick themselves, but they each dig holes for very different reasons. We’ve saved you the trouble and pitted Arduino versus Raspberry Pi to help you identify what’s best to purchase for your next project.
Say hi to Raspberry Pi
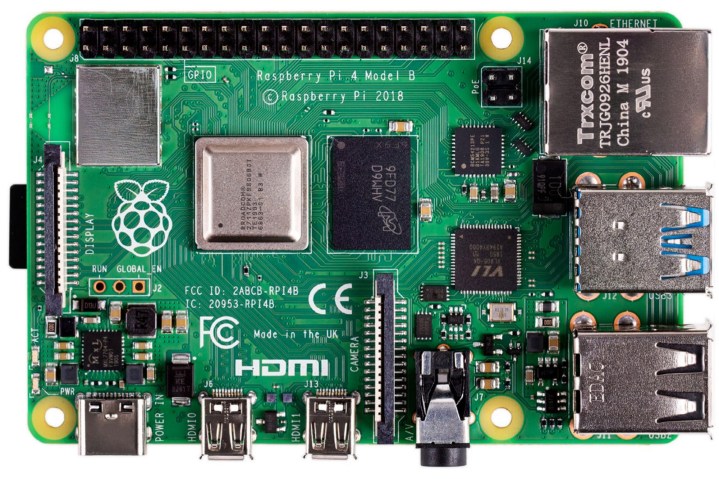
The Raspberry Pi is a fully functional computer and the brain of your project. For example, the Piper Computer Kit we reviewed in 2016 was a Linux-based laptop powered by the Raspberry Pi 3, as was Kano’s Computer Kit Complete in 2017 that kids could assemble to create a Linux-based all-in-one PC.
As those two examples show, a Raspberry Pi board has all the trappings of a PC with a dedicated processor, memory, and a graphics driver for output through HDMI. It can even run an optimized version of the Linux operating system called Raspberry Pi OS. Most Linux software is easy to install and lets you use the Raspberry Pi as a functioning media streamer or video game emulator with a small amount of effort.
Though the Raspberry Pi doesn’t offer built-in onboard storage, you can use microSD cards to store whatever operating system you choose, whether it’s Raspberry Pi OS, Ubuntu Mate, or even the Internet of Things version of Windows 10. You can also install different operating systems on different microSD cards for swapping platforms, testing updates, and debugging software. And because some models include Wi-Fi and Ethernet-based connectivity, you can also set it up for access via SSH, or transfer files to it using FTP.
Technically, there are ten versions of the Raspberry Pi board: Seven full-size boards, two miniature boards, and a microcontroller board:
- Raspberry Pi 4 Model B — starting at $35
- Raspberry Pi 3 Model A+ — $25
- Raspberry Pi 3 Model B+ — $35
- Raspberry Pi 3 Model B — $35
- Raspberry Pi 2 Model B — $30-$35 (discontinued)
- Raspberry Pi 1 Model B+ — $30
- Raspberry Pi 1 Model A+ — $20-$25 (discontinued)
- Raspberry Pi Zero W — $10 and $14 (with headers)
- Raspberry Pi Zero — $5
- Raspberry Pi Pico — $4
As an example, here are the specifications for the Raspberry Pi 4 Model B board:
| Processor: | 4-core Broadcom BCM2711 |
| Memory: | 2GB, 4GB, or 8GB |
| Storage: | 1x microSD card slot |
| Connectivity: | Wi-Fi 5 Bluetooth 5.0 BLE Gigabit Ethernet |
| Ports: | 2x USB-A 3.2 2x USB-A 2.0 2x micro HDMI |
| Other: | 40 pin GPIO header 2-lane MIPI DSI display port 2-lane MIPI CSI camera port 4-pole stereo audio and composite video port 5V DC via USB-C connector (minimum 3A) 5V DC via GPIO header (minimum 3A) |
| Dimensions: | 3.34 x 2.20 inches |
In addition to kits you can purchase, there’s a large community that can steer you in the right direction to build projects from start to finish, such as a Game Boy Zero, a working miniature Macintosh, the Pip-Boy from Fallout 4, and more.
You can purchase Raspberry Pi through third-party partners like Adafruit, Micro Center, and others. The Raspberry Pi Foundation does not sell these products directly.
Meet Arduino
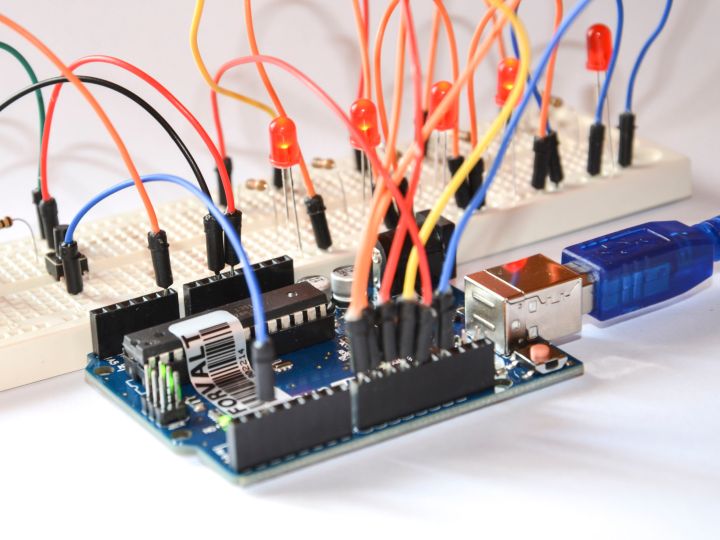
Unlike Raspberry Pi, Arduino boards are micro-controllers, not full computers. They don’t run an entire operating system but simply execute written code interpreted by their firmware. You lose access to the essential tools an operating system provides, but on the other hand, directly running simple code is more manageable and is accomplished with no operating system overhead.
Arduino Integrated Development Environment (IDE) is open-source software for writing code and uploading it to any Arduino board. The software runs on Windows 7 and newer, Linux, and MacOS 10.10 or newer — there’s a Windows 10 app, too.
Individual boards and kits are split into four groups: Entry Level ($11-$92), Enhanced Features ($20-$42), Internet of Things ($18-$72), and Education ($110 to $2,100). For instance, the Arduino UNO Rev3, which the current version of Arduino’s basic board, costs $23 and allows a USB connection between your PC and the board for easy use and programming.
The primary purpose of the Arduino board is to interface with sensors and devices, so it’s great for hardware projects in which you simply want things to respond to various sensor readings and manual input. That might not seem like a lot, but it’s a very sophisticated system that allows you to manage your devices better. It’s great for interfacing with other devices and actuators, where a full operating system would be overkill for handling simple read and response actions.
But because Arduino isn’t the “brain” of your project, solutions aren’t locked to a handful of boards. Instead, there are more than 40 solutions for entry-level products, advanced devices, Internet of Things projects, education, wearables, and 3D printing. They all have processors, memory, and in some cases, storage, but they’re primarily designed to serve as controllers, not miniature computers.
Great examples of Arduino projects can be found here. One project is the Arduino Servo Catapult that fires off a bowl full of food when a cat walks onto a pressure sensor mat seated under its dish. Another project transforms a Nerf Vulcan gun into a sentry turret that can track its enemies. Arduino devices can even do things like adding a fingerprint scanner onto a garage door opener. Many robot kits for kids you can buy on Amazon are based on the Arduino software and hardware platform.

Arduino vs. Raspberry Pi: Power
The two systems have very different power requirements. For starters, the Raspberry Pi 4 Model B board uses 3.4 watts when idle and up to 7.6 watts when a monitor, keyboard, and mouse are connected. The smaller Raspberry Pi Zero W consumes 0.5 watts of power when idle, and 1.75 watts when a monitor, keyboard, and mouse are attached.
Both Raspberry Pi boards require five volts to remain on, so you need a wall adapter or rechargeable battery pack with a higher voltage. For instance, both Raspberry Pi-based kits we reviewed provided an internal rechargeable battery that connected directly to the board. These batteries included an additional Micro USB port for recharging via a wall adapter or using the device like any other electrically tethered PC.
Meanwhile, Arduino devices begin executing code when turned on, and stop once you pull the plug. To add functionality, you either wire directly into the pins on the Arduino board, or stack chips called “shields” on top of the base unit. There are hundreds of shields, each designed to perform a different task, interface with specific sensors, and work with one another to build a complete control unit.
Thus, for Arduino, you merely need a battery pack that keeps the voltage above a certain level, along with a primary shield to manage the power. Even if the power drops on the Arduino, you won’t end up with a corrupt operating system or other software errors: It will just start running code when it’s plugged back in.
For Raspberry Pi, you must shut it down within the operating system like any other computer, or else risk corruption and software problems.

Arduino vs. Raspberry Pi: Networking
The Raspberry Pi 4 Model B has both a built-in Ethernet port and Wi-Fi 5 connectivity, which allows easy access to any network with little setup. Once you’re connected, you can use the operating system to connect to web servers, process HTML, or post to the internet. You can even use it as a VPN or print server.
Unfortunately, Arduino devices typically aren’t built for network connectivity directly out of the box. Though it’s possible, they require a bit more tinkering to set up a proper connection. You’ll need an extra chip (shield) outfitted with an Ethernet port, and you’ll need to do some wiring and coding to get everything up and running just right, which is enough of a process in itself that some vendors sell comparable Arduino devices with a built-in Ethernet component.
Arduino vs. Raspberry Pi: Sensors
While Raspberry Pi and Arduino devices have several interface ports, connecting analog sensors to Arduino devices is a more straightforward process. The micro-controller can easily interpret and respond to a wide range of sensor data using the code you put on it, which is excellent if you intend to repeat a series of commands or react to sensor data as a means of making adjustments to servos and devices.
Raspberry Pi boards, on the other hand, require software to interface with these sorts of devices, which isn’t always what you need if you’re just trying to water plants effectively or keep your beer cold. Using both in a project isn’t all that uncommon. The Arduino device could act as a control board that executes commands issued by the Raspberry Pi’s software before the sensor information is fed back for recording or acknowledgment.
Which solution is your match made in DIY heaven?

After our testing, we believe the Raspberry Pi board is the superior choice for anyone whose project involves tasks that best fit a personal computer. The board helps make operations simpler and projects easier to manage. It’s a great choice whether you want to check out different media, connect to the internet, read data, or link to an external display.
A Raspberry Pi board is great for tackling various networking tasks. The device functions as a VPN, processes HTML, adds posts to the internet and communicates with web servers. In addition to all of those functions, the board also features Wireless N connectivity and a built-in Ethernet port.
We do want to point out that, while the Raspberry Pi does seem to be the overall best choice, the two products excel at different tasks. We recommend you consider running them side by side. For example, the Raspberry Pi can provide client-side access to your code and settings, while Arduino can handle device actuation and data gathering.
You have the option of connecting the two products in a variety of ways; A USB, a local private network, or running I/O ports on the Arduino device into the Raspberry Pi would all likely be successful methods.
Editors' Recommendations
- Google Drive vs. Dropbox: which is best in 2024?
- ChatGPT allows this nightmarish AI typewriter to talk to you
- Dell XPS 15 vs. Razer Blade 15: which to buy in 2022
- Slack vs. Microsoft Teams
- What is a Raspberry Pi and what can I do with it in 2022?
