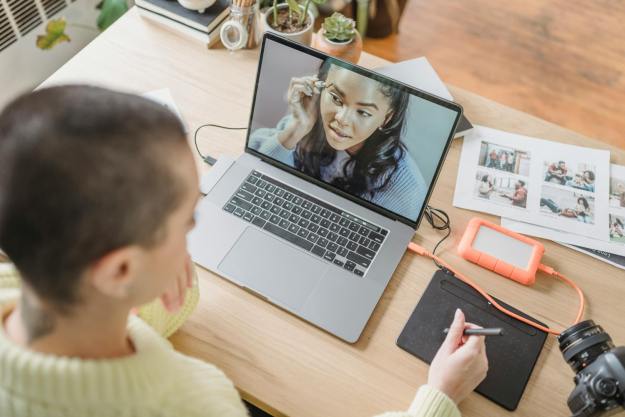
Of all the features that Adobe Photoshop has introduced in the last few years, the one that's making the biggest splash is Generative Fill. It's one of Photoshop's new features that is using AI for incredible effects, and this particular tool works almost like magic. It makes it easy to expand an image and fill in portions that aren't in the original data, plus easily remove unwanted elements like stripping out distracting backgrounds or unnecessary text.
The Generative Fill tool is a game changer for photo editing, and one of the best things about this feature is that you don't need to be an expert to use it. In fact, it makes it possible for casual users to perform the kind of editing that would have required a skilled professional before, and thought its ability isn't limitless, there is a ton of fun and useful ways to make use of this tool that we'll show you below.
How to download PhotoShop Generative Fill
The Generative Fill feature and its respective functions are all hidden in PhotoShop's beta branch, so you'll need to download that before you get started.
Step 1: If you don't have an Adobe account and PhotoShop subscription currently, you can use the free trial.
If you do have an account, open up the Creative Cloud app and select Beta apps from the left-hand menu.
Step 2: Look for "Photoshop (Beta)" and select the Install button.
Step 3: When the beta is installed, select Open to launch the app.
Step 4: When the beta launches, a pop-up will tell you about the new Generative Fill feature. If you want Photoshop to help you learn how to use generative fill, select the Try now button to download the necessary assets.
Follow the on-screen instructions for a quick breakdown of what the new AI feature can do, and how to use it. Alternatively, we have some sections below that explain how to use it in more specific cases.
What does the generative fill toolbar do?
The Photoshop generative fill toolbar has a number of options you can use to enhance or expand your images. The main icons include the following:
- Select subject: This uses the power of AI to intelligently figure out what is the most important element in the scene -- the "subject." It then automatically selects it for you, helping you to remove the background, make copies of your subject, or enhance that object specifically.
- Remove background: With this quick tool, Photoshop can automatically remove the background from an image.
- Transform image: This can flip your image horizontally or vertically, depending on how it is natively oriented.
- Add an adjustment layer: These are some presets with different filters applied to tweak how an image looks.
- Taskbar appearance: Changes how you want the generative fill toolbar to appear.
- Properties panel: This shows or hides the properties panel for the image you're working on, as well as any of its generative layers.
These buttons can do a lot by themselves, and it's worth playing around with them to see what kind of uses you can find for them. There are also some more specific ways to use generative fill, though, often to even greater effect.
Use AI to expand your images
If you wish your image was bigger, that it fit a wider or taller aspect ratio, or just had more in it, the generative fill command is super handy. Just take any picture, select where you want the tool to generate new content, and hit the button. You can even give it a text prompt to help explain what you want to see.
Step 1: Open an image that you want to expand, then use the crop tool, or Image > Canvas size, to increase the physical dimensions of the image, leaving a black or white background behind the new space.
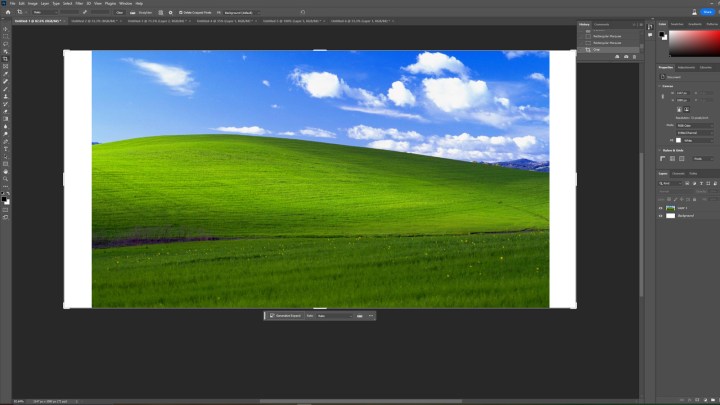
Step 2: Use the selection tool — second from the top in the toolbar — to select the black areas that you want to fill, as well as any areas that you want Photoshop to sample from to create the new content.
Step 3: Select Generative fill.
Step 4: If you want something specific to fill those spaces — besides more of the same — then input that into the text box; otherwise, leave it blank and select the Generate button.

Step 5: Wait for the process to finish and you should have a newly expanded image that looks very much like the original.

Add new objects to a scene
Photoshopping people or objects into scenes and having the correct lighting, reflections, color tone, and proportions can be a real headache and is something often best left to professionals. But not anymore. With generative fill, you can bring all kinds of elements into a scene with just a few clicks and taps of your mouse and keyboard.
Step 1: Select a portion of the image that you want to add new elements to.
Step 2: Select Generative fill, then type whatever it is you want to appear into the box. In this case, we're using the same Windows XP backdrop, but we want to add a sinkhole to its rolling hills, so I input "Sinkhole in the grass."
Step 3: Once it's done, you can select the left/right arrows next to the "1/3" to try out one of the three versions of your prompt that generative fill created to find your favorite.
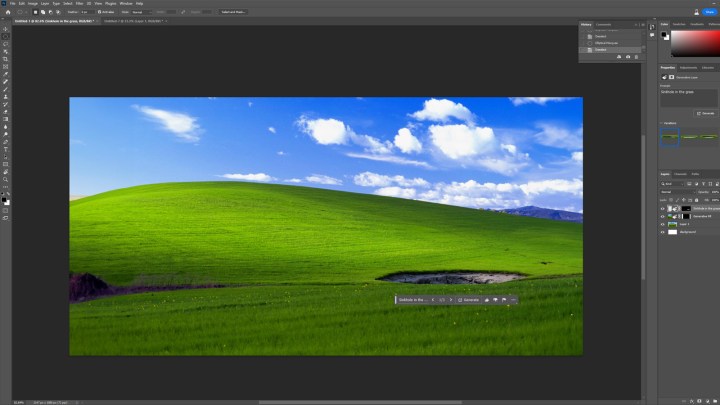
Step 4: For fun, let's add something else. A "Big tree on the hill."

Step 5: This one isn't perfect, but it still looks good. You might have to redo the fills a few times to get the feel of what you want by adjusting your text prompt.
Remove elements the quick and easy way
Would you rather remove something problematic from a scene? You can use generative fill for that, too.
Step 1: Open an image that you want to remove an element from, and use your preferred selection tool to select an area roughly around the object you want to replace. Then select Generative fill followed by Generate. This will tell Photoshop to replace what's there with a generated background that matches the pixels around it. If you want it to put something there instead, add it to the text prompt before hitting Generate.
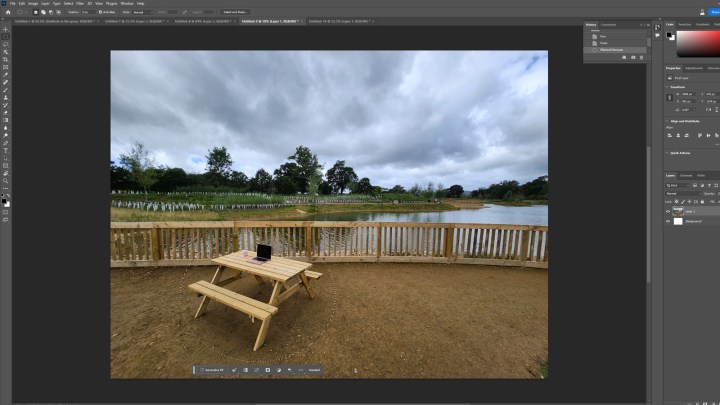
Step 2: Your object should then be removed from the image. It can do complicated stuff, too. Look at this image, where the bench has been removed, but the ground and the slatted fence are maintained, even if there's a slightly odd texture to them. The lighting reflection in the water beyond is slightly different, but good luck telling this was a Photoshopped image at first glance.

Which Photoshop version has generative fill?
To make use of generative fill, you will need Adobe Photoshop version 25 or above. If you need to check which version of Photoshop you are running, you can go to the menu bar and select Help, then select System Info. This will display information about your software, including the version of Photoshop that you are running.
The uses for this tool are potentially endless in the right hands. Have a play around and see what you can come up with. Want to see what else AI can do these days? Have a conversation with ChatGPT. You'll be surprised how realistic it is.
Editors' Recommendations
- How to build your own GPT chatbot without coding
- How to get GPT-4 for free
- Adobe Photoshop free trial: Get a month of editing for free
- Stability AI’s music tool now lets you generate tracks up to 3 minutes long
- ChatGPT AI chatbot can now be used without an account