In Final Fantasy XIV, in the case of Eden’s Verse, the third fight is where things take a noticeable difficulty bump. While taking cues from some other matches throughout the game, The Idol of Darkness likes to use portals to turn ordinary attacks into mind games similar to the clock mechanic in the battle that introduced Gaia back in 5.0. Fitting, right?
The Idol of Darkness can be confusing and somewhat complicated when going in blind, but with a proper understanding of the mechanics, you can take each bit of information as it comes and piece it together by the time the damage starts to go out.
Phase 1 – Words of Motion

After a brief time of dormancy, The Idol of Darkness casts Empty Wave for heavy raid-wide damage. It then tethers itself to a tank for Unshadowed Stake, a linear tank buster the target will need to aim away from the group.
Taking inspiration from that fight in Mt. Gulg, Words of Motion summons four lots of these paper birds to sweep across corresponding lanes on the battlefield. As usual, the first to arrive will be the first to sweep, so it’s just a case of sliding from the second to the first spot as the first two swarms jet off. This is the major mechanic of the fight, so get comfortable reading their spawn times.
Right after this, blue and red portals will arrive in the middle and edges of the arena. Scan for these and take them in. Words of Motion will be used again. If a portal occupies the attack’s path, it’ll exit through the same colored portal.
This is like a second use of the attack. The Words of Motion will wait to emerge from their corresponding portals just like the do without them, so a two-attack sequence becomes a four-attack sequence with the same pacing. Take note of where each will go, when, and where they’ll emerge later. You’ll have one more mechanic to throw into this mix soon.
To make this first one easier, you can hide behind a portal and then run to a spot without a portal. The next set won’t have a center portal, however, so don’t rely on that trick too much.
Phase 2 – Words of Night
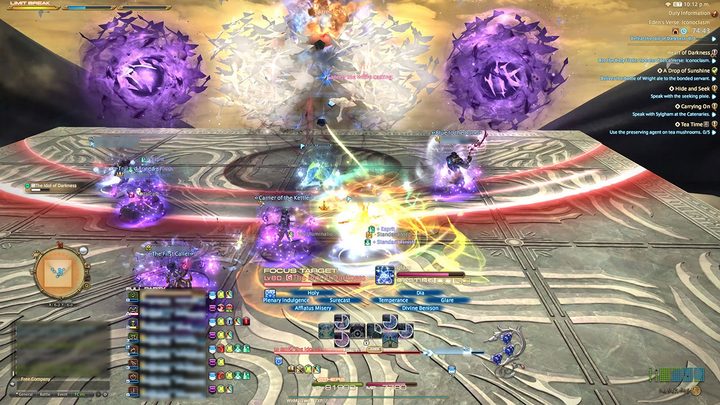
Phase two begins when Voidgates appear underneath your feet. You’ll teleport to the right of where you’re facing when it resolves, so position yourself whenever you won’t get thrown off the arena. False Twilight will then put red markers beneath every player, so get ready to run away and then back in for a 4/4 stack split, another Empty Wave, and an Unshadowed Stake on the tank.
Next comes the Unjoined Aspect mechanic, turning Words of Motion into Words of Night, adding light and dark elements to the attack. Watch your buff bar for a light or dark buff and aim to get hit by the opposite Words of Night color. This will swap the buff for the other, so get ready to do the same on the next set. Taking the same color hit as your buff will hurt.
Phase 2.5 – Idolatry Intermission
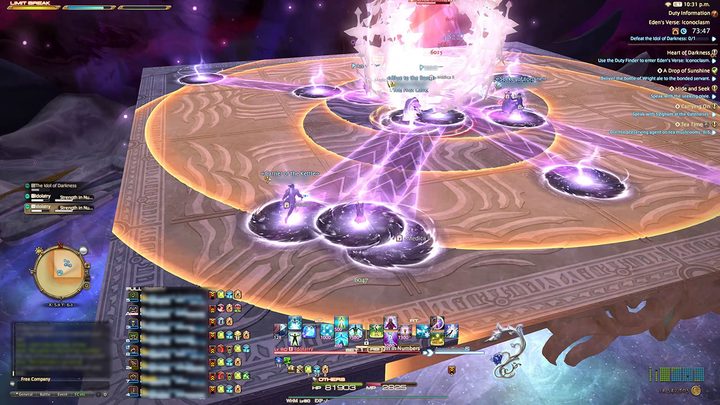
The boss splits into two Idolatry, which should be picked up by both tanks and brought into the center. Voidgates then try to mess with your footing; position yourself to land either in the middle or near a corner and you should be good to avoid the donut AoEs each Idolatry throws out right after. If both mobs aren’t in the middle at this point, expect a panic.
Spread out and away from the mobs to position Silver Shot drops and their own melee AoEs and burst the two down. Pile in and shield/buff up for the Seraphic Illumination and you’ll move into phase 3.
Phase 3 – Words of Night and Voidgates

Now that you’ve seen Words of Motion paired with Voidgates, it’s time to deal with Words of Night and Voidgates. Just remember that all Words of Night blasts travel at the same time, so there’s not as much side-stepping here as you might think — just a pause before they all come flying back through whichever Voidgate they entered. Remember to aim for the opposite Words of Night color with each. Watch where they go and work out where they’ll show up again.
After that, Away with Thee is cast, mixing underfoot Voidgates and meteor stacks together. Only one person needs to end up in each stack, but the more the merrier, really. Survive the raid-wide damage and tank buster after this, and you’ll push The Idol of Darkness into a panic.
Like the tail-end of any Eden fight thus far, the last 10-20% of HP means putting up with a bit of everything. Expect a Words of Night/Voidgates/False Twilight/Stacks sequence or Words of Night/Away with Thee until either the boss or team kicks the bucket.