
Clobber Innocence with this FFXIV: Shadowbringers Crown of the Immaculate guide

It’s been a long time coming. The final showdown against Lord Vauthry. Or, as he has called himself, Innocence. Like Titana, this is a multi-phase fight. No great battle is complete without a fancy transformation sequence, after all. If you’re hoping to carry on the new storyline, this FFXIV: Shadowbringers Crown of the Immaculate Normal Mode guide will teach you the strategy and tactics needed to endure the brawl against the final Sin Eater.

Phase One

Image used with permission by copyright holder

Innocence will introduce Realmrazer, its raid-wide AoE, before summoning a bunch of adds to its side. Each of these can cast Scold’s Bridle to chip down party HP further. Healers should prep for any which might slip through if DPS is a tad slow. Daybreak then targets each DPS with large circular AoEs. These should naturally clump together after the add pack placement and shouldn’t cause much trouble.

After a fit of anger, four drop points will spawn around the arena. Have someone stand in each of these as they fall and be sure to turn away from Innocence to avoid the confusing gaze of Enthrall. If someone is caught out, heal through whoever they end up attacking.

Then it’s time for another Heavenly Host add pack. A Forgiven Venery joins in here with Holy Sword, a minor tank buster. They also gain Vauthry’s Blessing, presumably buffing their attack power. Just burn them down as usual, and watch for bursts of incoming damage and AoE spots. After another Realmrazer and at about 20% HP, Innocence will then begin blasting the party periodically as it shifts into phase two at around 10%.

Phase Two

Image used with permission by copyright holder

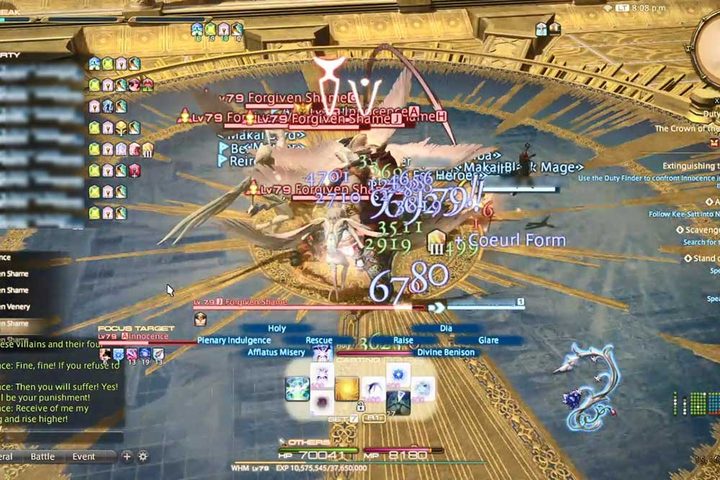
Now the version of Innocence we were introduced to in the previews, Vauthry has embraced the Sin Eater within and transformed into the god he sees within himself.

After a few auto-attacks, Innocence casts its tank buster, Righteous Bolt. Winged Reprobation will target each DPS, sending blades across the arena twice over, while the second cast of the skill will require players to rotate around the arena to avoid the curved shower of spears.

Teleporting to the center of the arena, Rightful Reprobation is next. It’s a fast linear strike across each main and sub cardinal direction which linger after firing and come back the same was following the next Righteous Bolt. Shadowreaver follows for raid-wide damage.

To close out phase three, a DPS race in order. Innocence blips back to the outer edge and summons Immaculate Authority in the center with four Forgiven Shame adds around the edge. Rather than splitting off to kill them as Authority’s meter builds up, you want to focus on whichever is tethered to it. If you don’t kill a tethered mob in time, expect a massive burst of raid-wide damage that can quickly end the team. With those down, turn your attention to Immaculate Authority and end it before it has a chance to max out its meter. Healers will need to prep for another large hit for the phase three transition.

Phase Three

Image used with permission by copyright holder

Now absolutely insane, Innocence will rattle off large AoEs like it’s nobody’s business. Stay on your toes and get in line for Light Pillar.

Now both versions of Winged Reprobation will come out, requiring you to run around the arena while dodging flying spears. Tanks and healers will have another Righteous Bolt to deal with here, so players will need to keep some distance from the rotating tank. Move to the far east/west to limit the hit of Beatific Vision and heal up.

From there, you’ve more or less seen it all. Just keep moving and take each skill combo as it comes. Burst until victory and be ready for the story to reach fever pitch.

Editors' Recommendations

Josh Brown
Josh Brown is a UK-based freelancer with devoted interests in video games, tech, film, and anime/manga. Just don't talk to…
The best skills in Final Fantasy 16
Clive summons lightning in Final Fantasy XVI.

It was made clear from the start that Final Fantasy 16 would feature a much more action-oriented battle system than any other entry in the series. While not quite on the level of a Devil May Cry or Bayonetta, the battle system is fast-paced, deep, and allows for tons of experimentation and expression through the various mechanics and skills. While many of the typical JRPG systems have to take a back seat for this new focus, leveling up and learning new skills certainly has not, but instead has changed shape. You will still earn Ability points by leveling up but now spend them as you wish on the various abilities in your menu. There are standard abilities, as well as some tied to your Eikons, and each can be upgraded multiple times to make them more effective. No matter how much you do, you won't be able to master them all in a single playthrough, so here are the best skills to invest in Final Fantasy 16.
Lunge

If you're familiar with the Stinger move in other character-action games, Lunge will instantly be familiar. This move, performed by hitting X and Square at the same time, will cause Clive to lunge forward with his sword toward your target enemy. This is a great way to initiate a battle, or move between targets quickly and while dealing damage. To make it even better, if you interrupt an enemy in the process of attacking you with a Lunge, you can also parry them.

Read more
All Wall of Memories curiosities in Final Fantasy 16
Final Fantasy 16's cover showcasing its protagonist infront of two demon summons.

Clive is a more sentimental guy than you might expect from looking at him. Even though he puts on a tough face, it's clear he still cares deeply for those around him in Final Fantasy 16. This is most obvious once you unlock the Wall of Memories where he will store all the trinkets and items he finds to display. These curiosities are the main collectibles you will be picking up throughout Final Fantasy 16, but only the first is handed to you. The remaining ones will be off the main path and take a little more work. If you want to fully stock Clive's Wall of Memories with every collectible, here's where you can find them in Final Fantasy 16.
All curiosities

There are a total of 22 curiosities to find to fill up your Wall of Memories in Final Fantasy 16, but you could really say 21 since the first is given to you as part of the story. Here's where to get them all so you can unlock the For the Hoard trophy.
The Oath
Automatically obtained once you reach the "Cid the Outlaw" main quest.
Ambrosia's Tack
Rewarded to you after completing "The White-Winged Wonder" sidequest.
Martelle Apples
Rewarded to you after completing "The Fruits of Her Labors" sidequest.
Cid's Goblet
Rewarded to you after completing the "Payback" sidequest.
Guardians Scarf
Rewarded to you after completing "The Flames of War" sidequest.
Continental Censer
Rewarded to you after completing the "An Eye for an Eye" sidequest.
Hanged Man Signboard
Rewarded to you after completing the "For Great Justice II" sidequest.
Martha's Rest Signboard
Rewarded to you after completing the "Rekindling the Flame II" sidequest.
Crimson Caravans Signboard
Rewarded to you after completing the "Trading Places II" sidequest.
Charred Sparring Sword
Rewarded to you after completing the "More than Words" sidequest.
Scholar's Bonnet
Rewarded to you after completing the"An Inconvenient Truth" sidequest.
Stolas Quill
Rewarded to you after completing the "A Tail to Tell" sidequest.
Model Airship
Rewarded to you after completing the "Aiming High" sidequest.
Winter Mead
Rewarded to you after completing the "Silver Linings" sidequest.
Rusted Battlehelm
Rewarded to you after completing the "Where There's a Will" sidequest.
Snow Daisy Garland
Rewarded to you after completing the "Priceless" sidequest.
The Triunity Accord
Rewarded to you after completing the "Three's Company" sidequest.
Briar's Kiss Signboard
Rewarded to you after completing the "Lines in the Sand II" sidequest.
Clayhearth Signboard
Rewarded to you after completing the "Duty Undying II" sidequest.
Veil Signboard
Rewarded to you after completing the "Under New Management II" sidequest.
Medicine Chest
Rewarded to you after completing the "Back to Their Origin" sidequest.
The Circle of Malius
Rewarded to you after completing all of the trails in every chronolith.

Read more
All Chronolith locations and rewards in Final Fantasy 16
A chronolith trial pillar glowing in the sunlight.

Every Final Fantasy game changes up the battle system in one way or another. Final Fantasy 16 isn't the first to have real-time, action-focused combat, but is by far the most polished and refined one. The story is by no means secondary, but for the first time players are able to really express themselves through the various combos and abilities you can pull off. Square Enix recognized this and included special combat trails called Chronolith Trials. These are somewhat similar to the special missions you can find in games like Devil May Cry 5 where you are faced with a unique challenge for a reward. As tough as these challenges are to beat, finding them is also a bit of a chore. Hop on your Chocobo and follow our lead to find all the Chronolith locations in Final Fantasy 16. 
What are Chronolith Trials?

Chronolith Trials are unique combat trails that put you into an arena that spawns waves of enemies. There will always be three rooms that each spawn three waves of enemies, plus a boss at the end. You're on a timer, and can only use a designated Eikon with predetermined abilities. By pulling off Battle Techniques, including Precision Dodge and Ability Finishes, you can extend your time. If you're quick enough to beat all the enemies without running out of time, you'll earn a special accessory as a reward. There are seven in total, and completing them all will also unlock the final Wall of Memory item you need to complete that collection.
All Chronolith Trial locations
Phoenix
In Greensheaves in Rosaria, fast travel to Martha's Rest and exit to the north. Follow the path east and you will find it just before the path leading to Rhiannon's Ride.

Read more