Horde 3.0 not only brings new enemies and maps, but a completely new player class system and the ability to build various types of defenses. As you can imagine, these systems totally change how you should approach the game: Each class has its own strengths, and building defenses to fortify strong map positions is now essential. There’s also a completely new leveling, credits, and card pack system that, although difficult to navigate, is important to success.
It’s worth getting to know all the intricacies of Horde “3.0” if you ever want to make it to wave 50, which is why we’re going to clarify things, setting the stage for your team’s next winning run.
Getting to know “Horde 3.0”

Before we dig into the nitty gritty of the new systems in Horde 3.0, we have some general tips to keep in mind as you play.
Prepare for battle: If you’re used to the old Horde modes you may be tempted to hurtle through the menus and lobby as quickly as possible to get started, but there are a few extra steps in Horde 3.0. First pick the class that best suits your play style (bottom left option in the lobby screen); next assign a skill in the one skill slot you have unlocked to start (bottom middle of the screen); lastly choose a bounty (bottom right) to help you level up.
There are five classes: engineer, heavy, scout, sniper, and soldier. Experiment at first to discover which you like (we’ll go in-depth on them in the next section) but it’s advisable to ultimately pick one and stick with it for a while, because leveling them up — crucial to be able to equip more skills — is excruciatingly slow.
Place your fabricator wisely: Horde 3.0 revolves around the fabricator, where you build defenses, purchase new guns and revive teammates. Place it carefully on each map in a spot that’s both defensible and escapable. Your defenses are invaluable in many situations, but don’t expect your fortifications to hold through the toughest waves (especially boss waves). You want long sight-lines and lots of cover, but also multiple approaches so you can bail if your team becomes overwhelmed.
Leave one enemy alive: All pickups, such as energy for your fabricator, ammo, and weapons, disappear at the start of each new round. As the waves intensify, you and your teammates will often find yourselves scrambling to pick up these valuable resources during the 30 seconds in between waves. Rather than running around and getting caught off-guard, keep one weak enemy alive near the end of a round so you can scavenge without a time limit.
Don’t always revive teammates: If your teammates are knocked down, always try to pick them up. If they’re killed outright you can bring them back to life by picking up their COG tags from where they fell and bringing them back to the fabricator. Bringing teammates back from the dead can be costly, though, and energy is precious. If a wave is almost over consider toughing it out without them.
Mark your enemies: Click the left thumbstick while pointing at enemies to mark them for teammates to see. This can help to point out strong enemies on the field, plus give players using the “heavy” class a damage bonus against them if they have the right skill equipped. Scouts can mark multiple enemies at a time (again, with the corresponding skill on). You can also mark weapons that are on the ground.
Save the big guns for the boss: In “Horde 3.0,” every tenth wave is a boss fight. Use weapon lockers (crafted using the fabricator) to store and recharge ammo for heavy weapons like the mulcher and tri-shot, and pull them out on boss waves. It’s OK to use them other times too, as the normal enemy waves get pretty intense — just make sure you have power weapons (and turrets) ready for every tenth wave.
Modifiers make it harder: After every boss wave a new modifier is added — first enemies get double health, then they become twice as accurate, then the damage each player takes gets doubled. Keep that in mind as you progress.
Use turrets: We have a whole section on building defenses later on, but there’s one essential thing about them that it couldn’t wait. Stationary turrets — the manned ones, not the auto sentries — will save your butts on higher waves. Make two or three and arrange them so they can see enemies coming from a mile away and cover one another’s flanks, but won’t all be destroyed by one unfortunate explosion.
Play with friends: Lastly and most importantly, play Horde 3.0 with friends. Succeeding, especially on higher difficulties, requires communication and teamwork that can’t generally be accomplished by five strangers without mics. If you don’t have friends, make some. Find a community online or even hop into matchmaking and invite whoever you get matched with to a chat party. If they don’t join, quit and try again! It’s that important.
Classes and Defenses
Classes

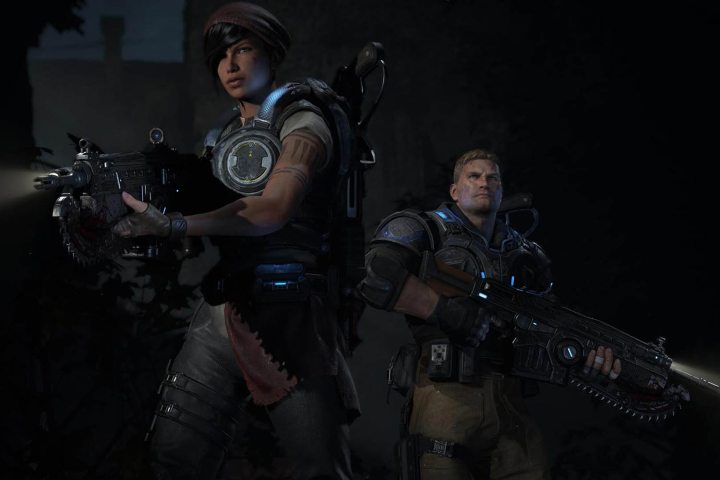
There are five classes in Gears of War 4’s “Horde 3.0.” Though none of them stray too far from Gears’ core running and gunning — there’s no medic, for example — each has its own strengths. There are definite advantages to planning your team makeup carefully, and you’ll want to consider each class’s fortes before diving in.
Soldier: The soldier is the class for players who don’t really want to deal with the class system. It’s the one that lets you play basically how you’d play if there was no class system — using whatever weapons you want, basically not changing your behavior at all. The soldier’s skills include things like extra ammo capacity, extra damage for grenades and assault rifles (like the lancer and hammerburst), and extra damage protection while in cover.
Sniper: The sniper is self-explanatory: if you like popping heads with the embar and longshot, the sniper is for you. Snipers can get extra headshot damage, extra ammo for precision rifles, and the ability to mark more enemies at a time, plus the ability to make enemies explode with headshots (at least for lucky players who get that rare skill card; more on that later).
Engineer: Although any team member can craft fortifications at the fabricator, your team should rely on the engineer to do so most of the time. This class gets discounts when building and can create stronger defenses, with better health and higher rates of fire for turrets. The engineer also spawns with an essential tool: a repair gun that can heal barriers and turrets, and replenish turrets’ ammo. Other players can buy the repair gun from the fabricator, but it’s expensive and that energy is best spent elsewhere, with repairs left to the engineer.
Heavy: The heavy is an expert in heavy weapons, including boomshots, mulchers and everything else that makes a big explosion or chews through Swarm flesh like bloody popcorn. This class gets better damage and reload speed on these weapons, plus special abilities like a mortar strike — if you’re lucky enough to get the rare skill card.
Scout: The scout is the trickiest class to play, but also one of the most essential, particularly for teams who plan to tackle all 50 waves on higher difficulties. The scout gets a bonus when depositing energy from fallen foes into the fabricator, which means this player spends most of their time running around behind enemy lines picking up energy and trying not to get killed. To help they get more health and faster movement, plus the abilities to regain health from shotgun and melee hits and see enemies through walls.
Defenses

Defenses are the other new addition to Horde 3.0, and learning their ins and outs is essential to success. Some types are more useful than others, but several different options will come into play during almost any Horde round. Be careful, though, because enemies will target and destroy your defenses if you let them.
Each fortification comes in multiple strengths, depending on the level of your fabricator, which levels up as you buy things from it. A barrier purchased from a level 3 fabricator, for example, becomes a level 3 barrier — it costs more, but is much stronger. Also, once your fabricator levels up you can pick up older fortifications around the map and upgrade them for a cost.
Barrier: Barriers slow enemies that walk over them and slowly take damage as your foes struggle to free themselves. Weaker enemies will often die outright when caught on a barrier. Barriers are useful when placed in choke points, but they’re easily destroyed as well.
Decoy: Decoys distract enemies and can take some of the heat off you and your teammates during waves where the sheer number of opponents can be overwhelming. They’re best placed near more valuable fortifications, like turrets and weapon lockers, to keep enemies from destroying your other defenses, or inside kill lanes where you’ve set up turrets to chew threw foes.
Machine gun sentry: Machine gun sentries are automatic turrets that detect and shoot at enemies within a certain radius in front of them. They’re great for watching stairs and choke points, particularly when paired with a barrier.
Shock sentry: Shock sentries have a more narrow field of view than machine gun turret and they slow enemies instead of damaging them.
Turret: Unlike sentries, turrets must be manned — a player takes the reigns and aims, holds the trigger down, and unleashes hellfire on every enemy in sight. Turrets are probably the single most valuable fortification you can build, as they absolutely shred most enemies. They’re easily overtaken since they’re stationary, but with the right defensive arrays they’re essential. They are often what will keep your team going through wave 50.
Weapon locker: Weapon lockers are also highly valuable. Weapons you store in them automatically and freely regenerate ammunition — so you grab a power weapon off the field, use almost all its ammo, then stick it in a locker for a round. That way you get a constantly rotating arsenal of heavy weapons. Upgrading the lockers even lets you store more than one weapon on each.
Card packs

Surprisingly, the Gears of War 4‘s new microtransaction system may be the most complex, intimidating new aspect of Horde mode. It’s actually simpler than it seems, though, and can be less intrusive — as long as you don’t mind advancing a little more slowly than those who cough up cash. No doubt this will prove a contentious point, but there are ways to navigate the card system one way or the other.
You can spend either real money or credits earned in-game on booster packs that contain a random assortment of cards. They’re pretty cheap, and the credits earned in-game seem to arrive at a steady clip, at least for the first several hours of playing. Once you have cards you can equip them, use duplicates to upgrade them, or dismantle them to earn “scrap,” which you can then use to craft specific cards.
These packs are divided by mode. For now we’ll talk about just the Horde booster pack cards, which contain both bounty and skill cards.
Skill cards: These cards allow you to equip class-specific abilities that provide your class’ unique strengths. A soldier, for example, can use “assault rifle damage” and “cover boost” (extra armor while in cover) cards. As we mentioned before, the Heavy can equip a card that makes them do more damage against marked enemies.
You have to pick and choose which to equip, especially early on when your skill card slots are limited. The classes don’t have these abilities naturally, but gain them when you equip the corresponding card, so picking the right ones is just as important as picking the class itself.
Bounty cards: These cards give you experience or credits for completing certain tasks, like beating wave 20 on hardcore difficulty or getting 100 kills with assault rifles. You equip them before the game starts, in the bottom right corner card slot. Pretty self-explanatory, and essential for leveling up, which, again, is a shockingly slow process.
Often after a lengthy Horde session you’ll head back to the menu and see you’ve earned enough credit to grab a new card pack, which is just icing at that point. Otherwise, if you have lots of cash and nothing better to spend it on, just buy as many as you want. You’ll get the bounties to level up your classes more quickly (which you’ll be very happy about) and the skills to beat wave 50, which even on normal difficulty is a serious challenge.
Here’s the best advice for “Horde 3.0:” keep trying. Even through failing you learn and improve, both in your skills as a player and within the class you’re playing as. Maybe unlocking a new skill slot for your heavy and getting a few more points of damage with turrets is all you need to win, or maybe you just need to stay up all night banging your collective heads against waves 48, 49 and 50 just to say you did it.
Either way, have fun.