Streaming to Twitch on an Xbox Series X or Series S is simple, even though Microsoft’s console doesn’t have Twitch integration like the PlayStation 5. Even though the process is simple, Microsoft doesn’t tell users how to stream on an Xbox Series X, much less how to do it outside of Twitch. Plus with Microsoft closing down its own streaming service, Mixer, you only really have the Twitch app or a dedicated capture card as streaming options.
That’s what we’re going to cover in this guide. No matter if you want to set up a simple stream through the Twitch app or get started with a capture card, here’s how to start streaming on your Xbox Series X or S.
More Xbox Series X
- 11 key settings to change on your Xbox Series X
- How to record gameplay on the Xbox Series X
- How to reset an Xbox Series X
How to stream on an Xbox Series X with the Twitch app
You can get started streaming on the Xbox Series X and Series S easily with the Twitch app. You can set up and start your stream directly from the app, no need for an external capture card or broadcasting software. There are a few settings you should adjust before starting your stream. However, if you’re already comfortable broadcasting, follow these steps:
- Open the Microsoft Store and download the Twitch app.
- Open the Twitch app and select Sign In.
- Connect your account on a PC or mobile device using the code provided.
- Select Broadcast again and customize your stream.
- Select Start Streaming to go live.
Step 1: Download the Twitch app and connect your account
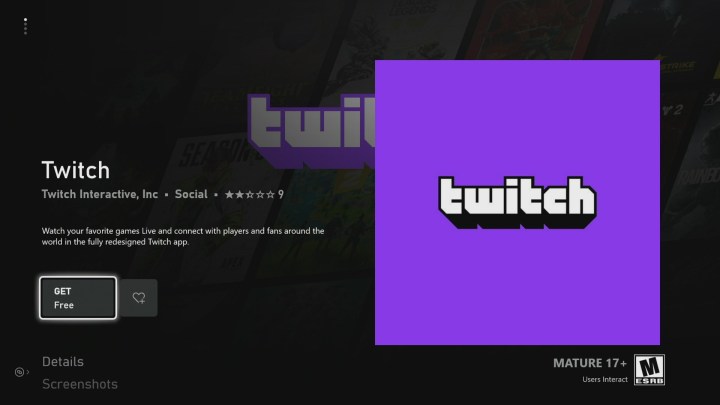
Unlike the PS5, you need to download the Twitch app on your Series X or Series S to get started. Head to the Microsoft Store by following My Games & Apps > Apps > Microsoft Store. In the store, select the Search icon, and search for Twitch. The first result is what you want to download (pictured above).
Once the download is complete, open the Twitch app and select Sign In from the top menu. The app will then provide you a code that you can use to log in on your computer or mobile device. Go to twitch.tv/activate and enter the code to link your accounts. It takes a few seconds, but after entering the code, your account will automatically show up on your Xbox.
Step 2: Customize your stream

Once you have your account linked, select the Broadcast tab in the Twitch app using the top menu. On the next screen, you’ll see all of your stream settings. The defaults are solid, so if you just want to test out the feature, select Start Streaming after giving your stream a title. Otherwise, here’s what each of the settings does:
- Title: Give your stream a name, fit with the game title.
- Language: Select the language of your stream.
- Destination: Select if you want to stream to Twitch or Lightstream (we’ll talk about Lightstream in a moment).
- Camera position: Select where you want your camera to show up on stream if you have one plugged in.
- Broadcast bar position: Select where you want the Twitch overlay — a blue bar showing your latency and viewers — to show up on your display.
- Microphone: The volume of your microphone on your stream, if you have one plugged in.
- Party chat: The volume of voice chat on your stream if you have a party on Xbox.
- Game: The volume of the game on your stream.
- Bitrate: Select Automatic next to this option to automatically adjust the bitrate based on your internet connection.
- Stream resolution: Select your stream resolution, usually 1080p.
Out of the options, the two you should pay attention to are Bitrate and Stream Resolution. Higher is better for both of these, but only if you have a solid internet connection. As you turn these settings up, your stream will become more choppy if you have spotty internet. That’s why we recommend selecting Automatic for the bitrate, but feel free to adjust this setting for better results.
Step 3 (optional): Connect Lightstream
For all of the settings the Xbox Twitch app gives you, it doesn’t allow you to customize your stream much. Outside of microphone volume and your camera position, you can’t change how your stream looks with the Twitch app alone. You can with Lightstream, however, which is an external tool that the Twitch app on Xbox Series X supports.
In short, Lightstream is a cloud-based broadcasting tool that allows you to customize your stream with scenes, transitions, text, graphics, and more without a capture card or external broadcast software. It’ll cost you, though. Lightstream runs anywhere from $8 per month to $50 per month, depending on the resolution and frame rate of your stream and other features you need access to (such as remote guests).
If you have a subscription, log in to your Lightstream account with Twitch on your computer and customize your stream. Then, simply select Lightstream under the Destination setting in the Twitch app on your Xbox Series X. Lightstream will handle all of the graphics and whatnot while you stream your normal gameplay to Twitch.
Step 4: Start streaming

Once you have everything set the way you like, select Start Streaming to go live. A small blue bar will show up, showing your microphone status — muted or not — as well as your stream latency and concurrent viewers. If you’re streaming solely on your Xbox Series X, make sure to download the Twitch app on iOS or Android. With it, you can monitor chat, donations, and more.
To stop your stream, head back to the Twitch app on your Xbox Series X, and select Broadcast, then End Stream.
How to stream on an Xbox Series X using a capture card
If you don’t want to stream to Twitch or simply want more options in how your stream appears, you’ll need a capture card. There are a lot of options when it comes to capturing devices, but you don’t want to go too cheap if you’re streaming with a Series X. Look for a capture card that can stream at 1080p at 60 frames per second at least, and one that includes 4K passthrough, such as the Razer Ripsaw or Elgato Game Capture HD60 S+.
Step 1: Hook everything up
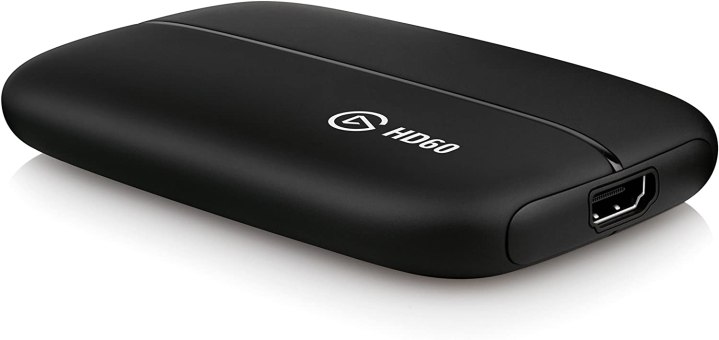
Hooking up a capture card is easy. Basically, it sits between your Xbox Series X and your display. Connect your console to the input of your capture card, then connect your TV to the output. If you’re using an external capture card, connect it to your computer using a USB cable. Some capture cards, such as the AverMedia Live Gamer Portable 2 Plus, can record gameplay directly to an SD card, too.
Once you’ve connected your capture card, make sure to download any relevant software and/or drivers according to the manufacturer’s instructions.
If your capture card doesn’t have broadcasting software, download OBS Studio or Streamlabs. Both are free and open source. For this guide, we’ll be using OBS Studio.
Step 2: Configure your broadcasting software and link accounts
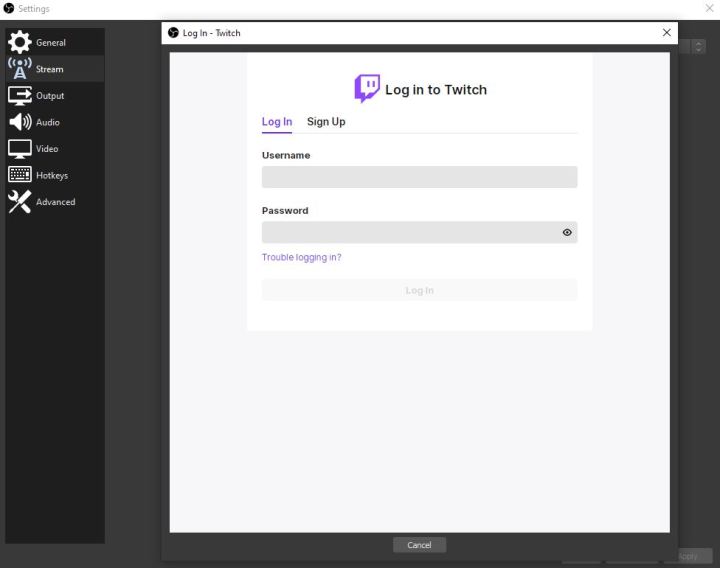
With your capture card connected, open OBS Studio and follow File > Settings, then select the Stream tab. Here, you can connect whatever platform you want to stream on to OBS. We’ll use Twitch for this example, but the process is similar for YouTube, Facebook, and Twitter.
In the Stream tab, select Twitch under the Service drop-down. Then, click the Connect Account button. This will bring up a separate window where you can log in to your Twitch account. Complete the login process, and you’re set. Alternatively, you can find the Stream Key in your Twitch Account page and paste it into OBS using the Use Stream Key button.
Step 3: Set up your stream
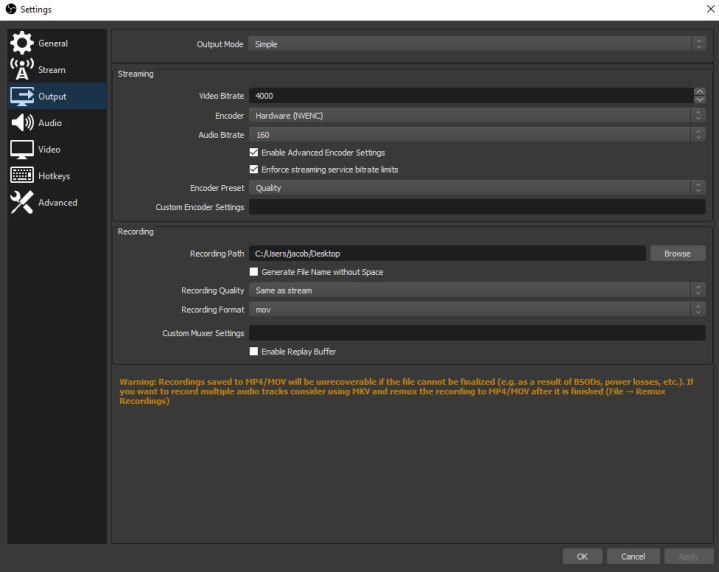
If you’ve been following our instructions, you won’t be able to actually see your game capture yet, but all of the pieces are in order. Delay your gratification a little longer and head to the Output tab in the Settings screen first. Here, make sure Output Mode is set to Simple and adjust your Video Bitrate. There are no hard rules for bitrate. The higher your resolution, however, the higher your bitrate needs to be, and the higher your bitrate is, the faster your internet needs to be.
You’ll likely need to experiment with your bitrate. For now, set it to 4,000 for a 1080p stream. Also, set Audio Bitrate to at least 160 and choose Hardware under the Encoding section if available. You’ll need a high-end graphics card for hardware encoding.
Next, head down to the Video tab. Set your Base (Canvas) Resolution to match the resolution of your capture card (4K in some cases, but usually 1080p). Then, set your Output (Scaled) Resolution to 1080p. You can stream in 4K, but that requires a beefy capture card, computer, and internet connection, so it’s best to stick to full HD.
Finally, use the final drop-down menu to select Common FPS Values and set the value to 60. If you’re using a Series S, set this value to 30.
There are a few other settings you can and should adjust over time, but they’re not mandatory. The Hotkeys tab is useful for quickly getting around, and the Audio tab has options for your microphone and game capture audio. For now, you can click Apply in the Settings screen to continue.
Step 4: Set up your scene and start streaming
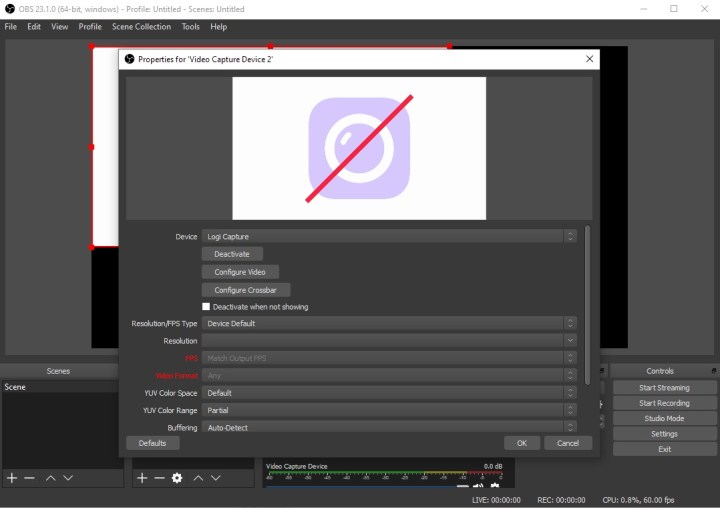
Back on the main OBS screen, delete everything under the Sources tab by selecting a source and clicking the Minus button at the bottom of the section. You should already have a scene by default, but if you don’t, select the Plus icon under the Scenes tab.
Select the Plus icon under the Sources tab next, then select Video Capture Device. Give the source a name, then click OK. OBS will then show you a menu where you can select your capture card and configure its output.
From this point, you can customize your stream however you see fit. Simply add new sources, move them around your preview window, and segment them into scenes to quickly switch between. When you have a setup you like, click Start Streaming to go live.
If you don’t care much for setting up your own scene, we recommend downloading Streamlabs OBS instead of OBS Studio. It comes with a number of templates that you can use to set up your stream in minutes.
Editors' Recommendations
- The best cozy games
- The best external hard drives for Xbox Series X
- Fallout 4 is finally getting free Xbox Series X and PS5 upgrades
- The best games on Xbox Game Pass for right now (April 2024)
- Dragon’s Dogma 2’s first updates will tackle its PC performance issues


