JRPGs have evolved a great deal since their early days. Where characters previously only got stronger by leveling up, the genre has gone on to include dozens of other factors in how strong a character can be with new weapons, armor, gear, clothing, and more. By the time we get to Xenoblade Chronicles 3 on the Nintendo Switch, you are going to be juggling multiple party members that all have their own loadouts to maximize if you want to stand a chance against the harsh monsters that stand in your way.
Aside from your normal levels and accessories, Xenoblade Chronicles 3 also has a very deep Gem system. This is a returning mechanic from previous games in the series but has been expanded and refined further in the latest game. Despite being slightly complex, this isn’t a system you can afford to ignore since the buffs these Gems provide can mean the difference between victory and crushing defeat against bosses. To make sure you’re wearing the most valuable Gems possible, here’s a full guide on how they work in Xenoblade Chronicles 3.
Further reading
- How long is Xenoblade Chronicles 3?
- Xenoblade Chronicles 3 beginner’s guide: 9 tips and tricks to get started
- The 10 best JRPGs of all time developed by Japanese studios
The basics of Gems
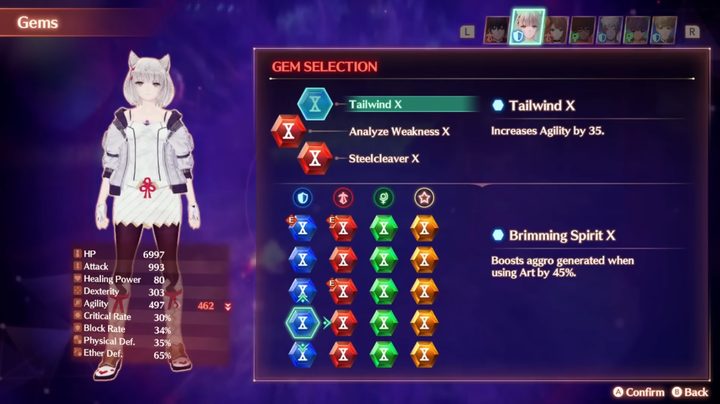
Gems are equipable items in Xenoblade Chronicles 3 that take up their own unique slots on each character. Characters start out with just one slot but gain a second upon reaching level 20 and a third and final slot at level 30. They come in four types: Attacker, Defender, Healer, and Specialty. Any character can use any Gem at any time, though it is obviously best to apply Gems with characters using their respective class, i.e. an Attacker class using Attacker Gems.
When you have a Gem, you can equip it in the Character section of your Pause menu. Each Gem can also be upgraded to a maximum of level 10. Also know that, despite it making no sense, even if you only have one Gem, it can be equipped by everyone in your party — no need to grind and make duplicates.
Gems need to be crafted with a character named Riku, who you meet in Chapter 2. This includes making a Gem as well as upgrading it, though they each use different materials.
Gem crafting guide

With the basics out of the way, let’s get crafting.
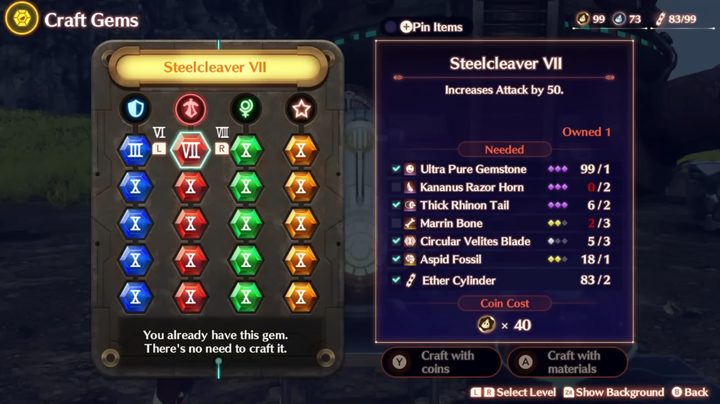
The first rule of crafting Gems in Xenoblade Chronicles 3 is that you can’t craft using materials of different ranks. All Gems require Cylinders and Crystallized Ether, so to use them to make a Gem, they would both need to be ranked 1 or 2, and so on for upgrading the Gem. The rank of the materials will dictate the level of the resulting Gem.
When you are ready to craft, you just need to go to your closest Rest Spot to access the menu. From there, you can pick which Gem you want to make from the four categories, then see what it does and which materials are required to make or upgrade it. Upgrading Gems will ask you to get other materials in addition to Ether Cylinders that change on every level. You never really know what materials you will need or what you will find while exploring, so it’s best to try and have a bit of everything.
However, if you really need an upgrade and don’t want to go out grinding for materials, you can bypass all the material requirements and spend Gold Nopon Coins instead. Be warned, though, that the price goes up very quickly for higher Gem levels.
All Gems and their effects
Every Gem type has five Gems you can craft and upgrade within its type. Here’s what all of them are called and what they do at their base level:
Attacker Gems
- Steelcleaver: increases Attack by 20.
- Accurate Grace: increases Dexterity by 20.
- Analyze Weakness: increases critical hit damage bonus by 20%.
- Swelling Scourge: boosts power of debuffs applied to enemies by 25%.
- Refined Incantation: extends duration of timers of debuffs applied to enemies by 25%.
Defender Gems
- Tailwind: increases Agility by 10.
- Steel Protection: increases Block Rate by 5%.
- Ultimate Counter: deals 80% of Attack damage when you take damage.
- Brimming Spirit: boosts aggro generated when using Art by 20%.
- Perilous Presence: start each battle with aggro.
Healer Gems
- Lifebearer: increases Healing by 20.
- Soothing Breath: when helping an incapacitated ally, revives them with 20% more HP; also raises Healing by 5.
- Lifesaving Expertise: boosts speed of ally revival by 20% and raises Healing by 5.
- Swelling Blessing: boosts power of buff effects issued by self by 25%.
- Refined Blessing: extends duration of buff effects issued by self by 25%.
Specialty Gems
- Ironclad: raises maximum HP by 100.
- Steady Striker: shortens auto-attack interval by 15%.
- Doublestrike: adds 15% chance to strike twice per auto-attack.
- Empowered Combo: when canceling, boosts damage dealt by 25%.
- Disperse Bloodlust: reduces aggro generated when using Art by 20%.