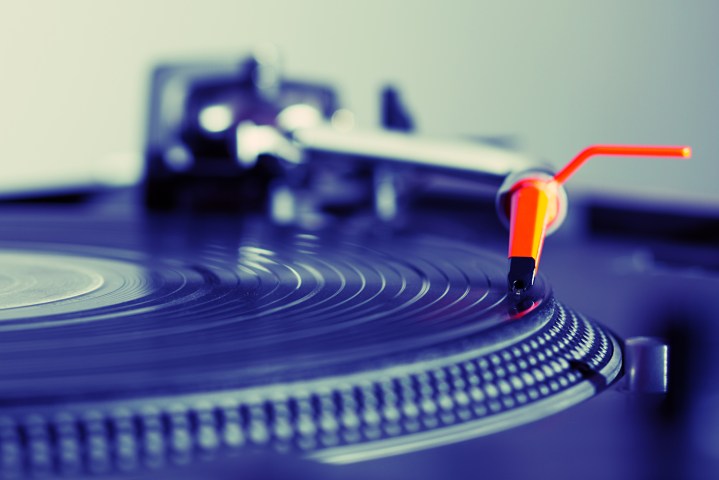
It doesn't matter one bit if your vinyl collection consists of just a single milk crate or if it fills several Ikea Kallax shelves and is slowly taking over your home — we can all agree that there's just something about vinyl.
Maybe it's the warm, uncompressed sound spinning off a solid turntable, or the feel of holding a physical piece of art in your hands while the record spins — it's a special experience that has regained much of its glory in a world dominated by digital streaming. The problem is, records are fragile, and crates full of them don't fit in your back pocket.
So why not digitize them? Not only will converting your vinyl records to a digital music format preserve that rare Beatles U.K. first pressing you're afraid to take out of its sleeve and protect it from further wear and tear, but you'll also have portable versions of your favorite records, including those you just can't find on streaming services, for you to enjoy anywhere.
Transferring your precious platters from grooves to sound waves is easier than you might think. From USB turntables and digital audio converters to the various software options and how to use them, we'll take you through all the steps you need for going digital in this article.
The hardware
There is no catch-all method for digitizing your vinyl collection, and the exact process depends on what kind of equipment you have. Some turntables come with built-in phono preamps — electronics that boost the typically low signal produced by the needle and cartridge alone before sending it to the receiver or set of powered speakers. Turntables without preamps will rely on a receiver with a phono input or a stand-alone phono preamp. Many modern turntables feature both a built-in preamp and a USB output, allowing you to quickly and efficiently convert that musty copy of Steely Dan’s Can’t Buy a Thrill with little effort.
That’s not to say you can’t convert your vinyl to a digital format without an integrated USB output, but opting for a turntable built with said output makes the process far easier, and likely at a better quality. Below is one such turntable we recommend.
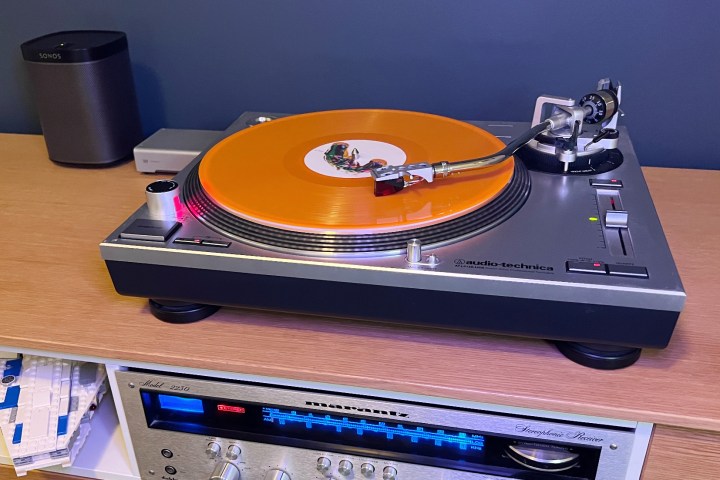
The turntable: Audio-Technica AT-LP120XUSB
If you’re deeply invested in a large collection of vinyl records, a high-quality player like the Audio Technica AT-LP120XUSB might be worth your money. A popular turntable among newbies and midlevel vinyl heads, the AT-LP120XUSB is outfitted with a pro-grade anti-resonance aluminum platter to seat your records, a balanced S-shaped tonearm, and variable pitch control with a quartz speed lock.
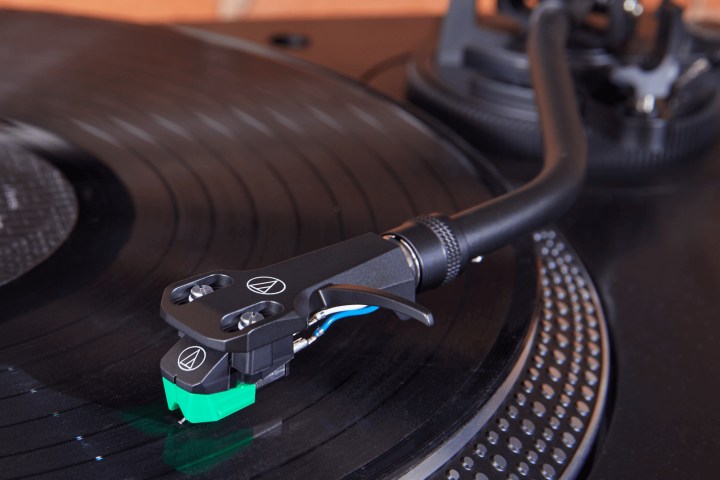
The included Audio Technica cartridge is fully capable and sounds great, but one of the best things about this deck is that it's easily upgradeable to higher-quality headshells and cartridges, too. The LP120XUSB's direct-drive motor might not be a silent as belt-driven turntables, but it has push-button operation and can switch between 45 and 33 1/3 RPM without annoyingly switching or moving a belt. But obviously, it’s the built-in USB output that makes it ideal for transferring your wax to zeroes and ones.

The software
Getting the signal from your turntable to your computer is only the first step. The second part of the process is finding the right software application to record the audio. Although there are several premium applications designed to help you rip audio from your turntable — like Pure Vinyl and Vinyl Studio — the open-source Audacity is the best choice for most users. This freemium application may not offer dedicated tools for converting vinyl into more accessible formats, but it can still record at sampling rates up to 192kHz, and export the resulting audio files as either an MP3, AIFF, FLAC, or WAV for playback on a slew of popular platforms. The interface may not be polished, either, but the software works with Windows-, Mac-, and Linux-based machines.
Regardless of which software you use, we recommend that you record at a minimum of 16 bits sampled at 44.1kHz. You can always create a compressed copy from a lossless one, but you can’t improve the quality of audio files without going through the recording process again. If you have a large library of vinyl — which seems likely, given that you’re here — that is a serious time commitment.
The process
Once you have the necessary gear and software in order, it’s time to start the digitization process. Although you’re more than welcome to digitize your vinyl wherever you see fit, we recommend choosing a space that’s relatively quiet and devoid of outside vibrations — i.e., passing trains, stomping children — that may cause rumbling or an unwanted needle skip. Remember, for all intents and purposes, this is a live recording. Anything your turntable's stylus picks up will appear on the digital file. This brings us to the first step in the process before you even record ...
Step 1: Clean your vinyl:Vinyl records have a knack for getting dirty. If you've ever seen a microscopic image of what it looks like inside the groove of a record, it's like a chasm between two mountain ranges in there — dust accumulates over time, fingers leave behind oils and other muck, and this can all be picked up by the stylus, so it’s best to clean your albums. Any imperfection, whether it stems from scratches or mere dust, will be recorded when digitizing. Consider buying at least a simple bristle or microfiber brush and some cleaning solution if you haven’t already, or something a bit more involved like a Spin Clean record washer for under $100.
Step 2: Connect your devices: If using a turntable with an integrated USB output, plug the USB cable into the corresponding USB port on your computer. For newer computers, especially Macs, you may need a USC-A to USB-C adapter.
If using a turntable without a USB output, things get a little trickier, but stay with us. A turntable with a built-in preamp can be connected directly to your computer's "line in" headphone port with an RCA-to-3.5 mm "Y" audio cable. But hear us out: On cheaper turntables, these phono preamps sometimes aren't the best, so you might want to connect to a better-quality preamp or A/V receiver anyway before it goes to your computer using the same RCA-to-3.5mm cable.
Lastly, however, if you wanted to go one step further and are concerned with having more control over the input and sound quality, you should consider connecting your turntable to a stand-alone analog digital converter (ADC), such as the Focusrite Scarlett 2i2, which has a higher quality of digital conversion and connects to your computer via USB. You can even use it for recording your own music, podcasts, or anything else you want to connect to it.

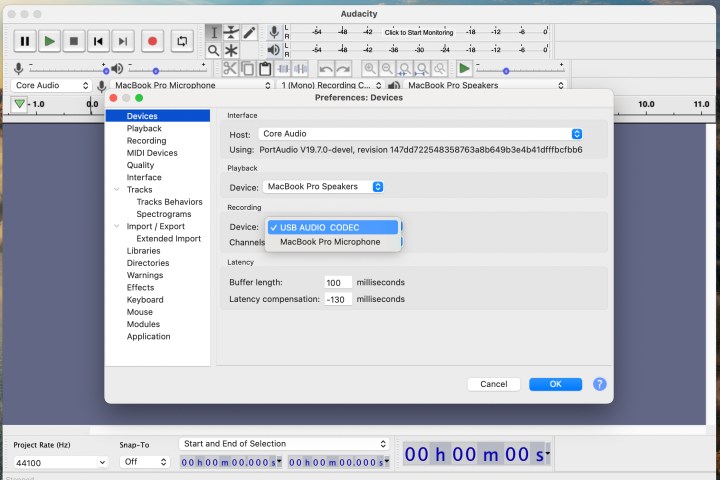
Step 3: Launch Audacity: Open Audacity, or your preferred audio-recording software, on your Mac or PC. You're first going to need to select the appropriate input source (be it your USB turntable, ADC, or direct line-in input) from the system preferences pane or a similar settings panel in the program. If using Audacity, click Edit > System Preferences before selecting "Line in" from the drop-down menu within the Recording section of the Devices pane. On a Mac, it will be Audacity > Preferences > Devices. Keep in mind you may have to additionally select the input source from within your computer's main sound panel.
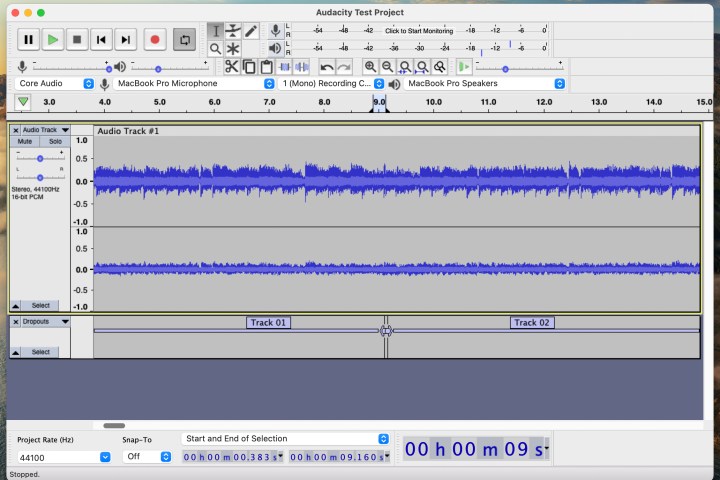
Step 4: Record: Click the Record button and play your record in its entirety, one side at a time, to capture every song on each side. You can either stop the recording after the side is done and resume again after you flip it, or just keep recording. You're going to separate all the audio tracks afterward anyway and you can edit out the gap.
As you record from your selected source, keep an eye on it to adjust the input levels to reduce clipping and subsequent distortion when needed.

Step 5: Split the tracks: If you're like most people, chances are you would rather split the entirety of the record into individual tracks. If using Audacity, click and drag your cursor to highlight the duration of a particular track. Afterward, click the Edit option within the toolbar, then click Labels, then select Add Label At Selection from the resulting drop-down menu and name the track appropriately. There are better tools for this process than Audacity (see: Perfect Tunes), but Audacity is free, which is nice.
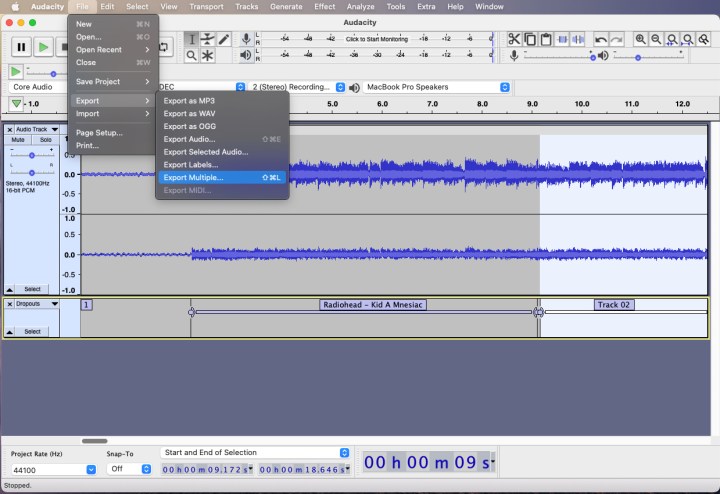
Step 6: Export: Once you have split and named each track, click File within the toolbar and select Export Multiple from within the drop-down menu. Afterward, choose your desired file format, save location, and enter any missing metadata in the resulting pop-up menu before clicking the Export button in the bottom-right corner.
Step 7: Enjoy!: Once finished converting, enjoy your newly digitized music in the media player of your choice!
There are definitely more ways than one to convert your records to digital format, including other recording software such as GarageBand, Pro Tools, and Logic, but we wouldn't suggest using these unless you're experienced with them. For our money (free!), Audacity has proven over the years to be the best and easiest way to do this. If you have little extra money to spend, Vinyl Studio is a bit easier and is dedicated to ripping vinyl, but the process is basically the same. Plus, you can try it our free first, with some saving restrictions. Happy converting!