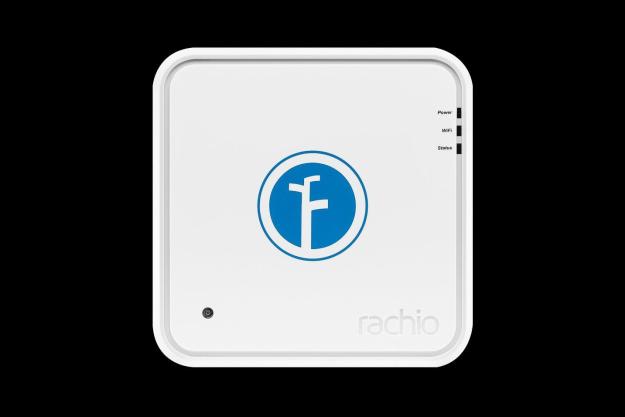
“The Rachio Iro is a fantastic product that's simple to use and belongs in any home in the modern age.”
- Simple to mount and install
- Simple software setup process
- Attractive look
- Great customer service
- Expensive
- No physical controls
Replace a sprinkler system? I’d sooner replace an arm.
Traditional systems are riddled with dials, buttons and programs — an alien language to those outside of the landscaping world. My house has a standard issue, 10-year-old Toro TMC-212 Series controller; it worked well when set up correctly, but it was incredibly complicated to figure out in the first place. In fact, I kept the installation guide tucked behind the unit just in case the power went out and I had to reprogram the system — not ideal to say the least. But the smart home category is taking off like a rocket thanks to innovators like Nest, Philips, Belkin, and others that are changing the way we interface with older platforms.
Why run your sprinkler on a schedule when there’s a good chance Nature will handle the problem for you?
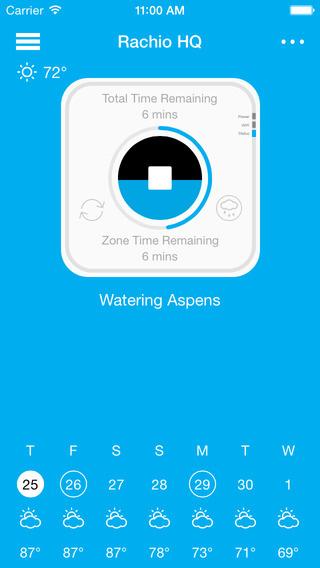
Rachio is one of a handful of companies to enter the space, utilizing your home Wi-Fi network and your smartphone. The key to success is to take a process and platform that has historically been complicated and distill it down to an interface that’s easy to control via your smartphone –something much harder to do than you would think.
Normally, I wouldn’t care about replacing the sprinkler controller, but a couple things changed my mind. First, I tired of re-programming my system every time the power went out. Second, the promise of saving money annually perked me up. Living in Oregon, we get plenty of rain as it is. Why run your sprinkler on a schedule when there’s a good chance Nature will handle the problem for you? With that all sitting at the front of my head, I decided to pry the old controller off the wall and give Rachio a try.
Installation & Setup
There are currently two models available from Rachio, an 8-zone and a 16-zone version. The Rachio Smart Controller comes in an attractively designed box with a small setup guide to get you going. After spotting the thin brochure, I thought “is this all there is?” Luckily it was. The process was brain-dead simple.

I cannot guarantee that your setup process will be just as easy, of course; you might have a complicated system or a much larger yard. My lot is about 8,000 feet and consists of shady grass in the front and back, a ton of shrubs both in the front and back (with a mix of fixed sprinkler heads and rotating heads), and planters in the back on a drip system. So my yard features a technically diverse system, the perfect environment for testing the Rachio or any new irrigation controller.
Before removing your old controller, write down your current settings: what times of the week and time of day you water, zone watering lengths, and so on. Then, when you open the panel to your zone access, take a picture of everything connected to your current controller. If you’re lucky, the wires will be color coded. If not, grab some tape and label them before you pull them from your existing controller.
In addition to your zone wires, there might be a Master/Pump Valve connection, a Common Wire, and a power connection. The Rachio uses a traditional AC power plug that connects on the side of the unit, so you will not need to connect a wire internally to your system as my old Toro did. I also did not have rain sensors connected to my Toro, so my Rachio system was also absent from those. The Rachio does have connectors for them, but you can’t purchase a rain sensor from the site and there is no mention of third-party support.
Use the included wall mount and screws to install the Rachio on your wall. I found the drywall anchors a little on the small side and would have preferred larger ones. Since I was replacing an older controller, I didn’t have the luxury of mounting the Rachio on a stud in the wall (the old controller cable was stapled in place and couldn’t be moved). Once in place, we connected our zone cables, plugged in the power and installed the iOS app (it’s also available for Android).
The Rachio does not support WPA2 Enterprise, so if you have that level of encryption turned on in your router (and you shouldn’t need it at home, right?), make sure you change it first. You’ll also need to have iOS 7.1 (or later) or Android 4.0 (or later) on your phone. Set up your sprinkler system and Wi-Fi through the phone app first, then use the system’s Blink Up procedure to transfer the Wi-Fi settings to the Rachio. Blink Up is a technology made by Electric Imp that allows you to transfer data onto a given device with a series of flashes — sort of like using Morse Code. Iro has a light sensor built in, so once you enter in the system settings and preferences on the accompanying smartphone app, you simply hold it up to the light sensor, and a series of flashes will send that data to the sprinkler controller. It’s really very clever.
Features & Use
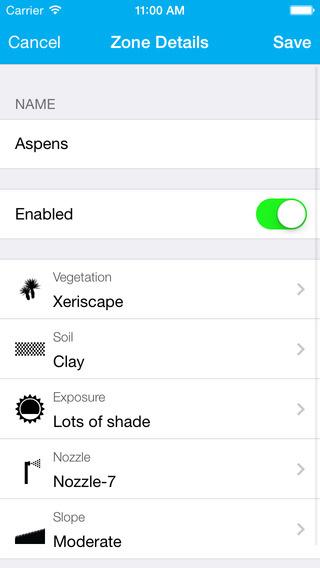
Zone setup through the app is really cool. You get to specify the grass type, number of shrubs, and shade or sun levels of every zone in addition to the sprinkler head type — rotating, fixed, drip system, and so on. This is important for a number of reasons. If the ground is clay as opposed to sandy soil, Rachio will intermittently water to prevent over saturation and run-off. If your grass gets a lot of shade, the system will water less frequently, conserving water and saving you money.
A good home sprinkler system should still also have an interface on the controller itself
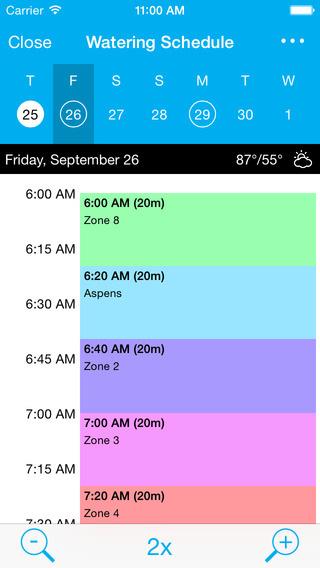
I recommend watching the system for a couple weeks and tweaking it to your liking. My front yard not only gets a lot of shade, but it doesn’t absorb water very well, so I wound up shortening the zone times for that area even further than what Rachio recommended. Technology is never perfect, and I am not using any rain sensors, so while my ZIP code might have received some precipitation, Rachio can never be 100 percent accurate.

During my first week of use, my Verizon FiOS router’s Wi-Fi stopped working (and if you have Verizon FiOS, you know what I’m talking about). I wasn’t able to restart it until I got home from work –but I did receive a notification via email and Rachio app that the system was offline and would resume operation with the last programmed setting. When I got home, I reset my router to fix the Wi-Fi issues expecting the Rachio to fire right back up. It didn’t. I had to re-program the Wi-Fi settings from scratch, which was a pain in the butt. It would be nice if the system remembered the SSID and password and reconnected on its own. On the bright side, I did receive a nice email from customer service noticing my system was offline and asking if I needed help. That’s definitely not something you see from most companies these days.
Conclusion
At the end of the day, do we really need to re-design every older system in our home? Sometimes a current platform just needs to be tweaked, not over-engineered to add features that aren’t necessary.
A sprinkler system is a good example of that. It should be a set-and forget product with a little intelligence sprinkled in. I don’t really need to get notifications of when my sprinkler zones have turned on, or how irrigated my lawn is and a smartphone interface isn’t necessary either — it’s a cool trick, but not a requirement in my book. A good home sprinkler system should still also have an interface on the controller itself.
I want a system intelligent enough to know the season, what the weather currently is, and how much water each zone needs.
If you are a person that likes to fine-tune the settings on your devices, consider the RainMachine Smart Wi-Fi Irrigation Controller. It has a capacitive glass touch screen on the controller itself, and lets you tweak to the smallest details. The system also uses historical data to give you forecasting, and the weather information is provided by NOAA.gov, so you know the forecast is accurate.
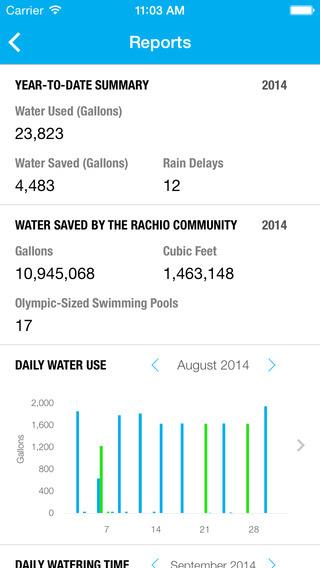
At $249 for the 8-zone controller and $299 for the 16-zone, the Rachio Smart Sprinkler Controller is a considerable investment; it’s well over $100 more than traditional controllers, but still in-line with other WiFi/smartphone irrigation controllers. For that price, the system should have physical controls for any third-party to access. You also need to ask yourself if you saving enough money over the life of the system to make your money back on the initial investment –and then saving even more on top of that?
I plan on installing the Rachio app on one of my kid’s iPads so that the landscaper can access the system if he needs to replace any sprinkler heads (I’m hoping that won’t be too much of a pain for him). I’m also hoping the system eliminates the swamp that forms in my front yard when it rains and the sprinkler runs anyway. Plus, I’m a tech addict that thinks it’s cool to be able to access my smart home via my smartphone. You probably are too, if you’re reading this review. The Rachio Iro is a fantastic product that’s simple to use and belongs in any home in the modern age.
I’ll keep this review updated as I spend more time with the Rachio system and the company continues to optimize and update their firmware and software.
**Update 10/27/2014 – According to Rachio, you can now give your landscaper access to your system through their web browser with the owners permission.
**Update 9/30/2015 – Updated the review to reflect compatibility with Android 4.0 and greater (instead of 4.3 and greater)
Editors' Recommendations
- Roborock S8 MaxV Ultra vs. Ecovacs Deebot X2 Combo: Which premium robot vacuum is best?
- The Narwal Freo X Plus is an entry-level robot vacuum loaded with premium features
- How to save Ring Doorbell video without a subscription
- iRobot Roomba Combo j9+ vs. iRobot Roomba Combo Essential: Which is better for you?
- Dyson’s new AR mobile app shows where you forgot to clean


