
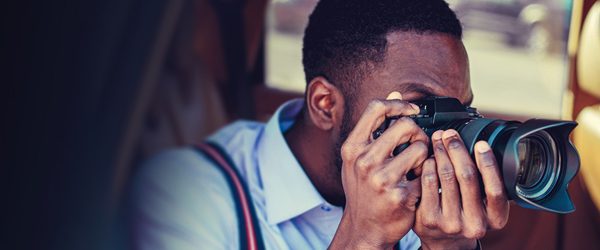
The Rule of Thirds. Sunny 16. Always shoot in RAW. The books are full of photography tips, some essential, others downright constrictive. But the photography tricks that border on life-changing often aren’t the ones picked up in books and blogs but from years of shooting and trial and error.
To get the most effective pointers, we went directly to the folks who use them day-in and day-out: Professional working photographers. Most pros like to assemble a field kit that includes some basic supplies and accessories that they always bring with them on location. And most remember where they came from, along with the little tricks that took them up the skill ladder.
We spoke with three pros — Caio Guatelli, Adrian Henson, and Scott Mead — to share their tried-and-true tips and a quick breakdown of the inexpensive gear they’ve used the most over the years. In addition, we added some of our own tips to the mix, lessons we’ve learned from years behind the lens.
The takeaway: A pricey camera with more megapixels doesn’t make you a better photographer, just someone who dabbles in higher resolution. But there’s more to photography gear than a good camera and a lens. In fact, some of the best pieces of photography gear aren’t specific to photography at all — and aren’t very expensive, either.
Use gaffer’s tape
offers infinite uses in the photography world — it’s the photographer’s duct tape, but better. It can be used to hold backdrops in place, modify lights, hold flash gels, and attach lights to small props, just to name a few. And unlike duct tape, it doesn’t leave a sticky residue, meaning you can actually stick it on your pricey camera.
To get some effective pointers, we went straight to professional working photographers.
“One of my most consistent uses [for Gaffer’s tape] is to cover the switches on my lenses,” says Adrian Henson, who photographs everything from senior portraits to commercial work. “Camera manufacturers have gotten much better about making switches on lenses with a low profile, but there are still plenty of lenses that have raised switches. I cover these with a small piece of gaffer’s tape so that they can’t inadvertently be switched away from your desired setting. Shooting a session with the lens set to manual focus when you thought it was in auto can be disastrous.”
Velcro the remote shutter release
A remote shutter release is a must when shooting from a tripod, says Scott Mead, a landscape and nature photographer based in Maui, Hawaii. But fumbling for a dangling cable or wireless remote can mean the difference between getting or losing a shot when the light is changing fast. “By attaching a piece of Buy at Walmart.com to the top of a tripod leg and the back of the remote, you’ll always know where your remote is, and it’ll be close at hand.”


Invest in gels and a good organizer
Henson often uses colored gels on his flashes. He will buy a few of the , for about $8 apiece, so that he has every color imaginable.
“The problem is that once you disassemble the swatchbook, the gels are impossible to keep up with. So to manage my gels, I write the color code on the gels with a fine point Sharpie and then use a business card organizer to store, protect, and organize them. I also pre-cut bits of gaffer’s tape to the size I use when attaching the gels to my speedlight [flashes] and stick it all over the outside of the organizer. This system ensures that I always have the gel color I want and the tape I need to attach it.”
Embrace the “less is more” philosophy
Photographers who shoot in dangerous or active situations have to sometimes move quickly, meaning their equipment must be light and easy to carry. Caio Guatelli recommends trying to figure out what you’re going to use during your shoot in advance, and to make a concise choice of lenses and other equipment. The Brazilian-born photographer specializes in shooting high-speed sports, namely Formula One racing and track and field. “I usually choose two lenses, a 35-mm and a telephoto zoom of 70-200mm. If the frame doesn’t fit the subject, I move backward or use a naturally-cropped frame. If the subject is too far for my lenses, I try to accept it at the size it appears, or simply wait for something better to shoot.”

Keep things at level ground
“When shooting on uneven terrain, it’s sometimes difficult to optically set a level horizon,” Mead says. “Acratech makes a neat that slides into the hot shoe of your camera, making leveling your camera an easy task.”
Download a few apps
Sometimes, the best photography accessory is already in your pocket — a smartphone. This isn’t because of the built-in camera, but rather the apps.
Most pros like to assemble a field kit.
“There’s a plethora of photography apps available for Apple and Android devices, but there’s one that’s a must for every nature photographer: The Photographer’s Ephemeris,” Mead says. “With its sun and moon calendar working with Google Maps, it gives photographers satellite views of their location, with overlays of the sun and moon’s path anywhere in the world. It’s a must for setting up a shoot, when getting to the site a day early to scout the location isn’t possible.”
For even more great apps, check our list of the best camera apps for iPhone users and the best photography apps for Android.
Take a load off
Early in his career, Henson realized how terrible wearing a camera around his neck made him feel, even after a short period of time. “When I began shooting weddings my gear got larger, heavier, and more abundant. One day after a wedding, my back was killing me and I felt horrible. That night I took my camera straps off and never put them back. It took some adjusting to and I have to think ahead and manage my gear better, but it was the best move I ever made.”

As a solution, he acquired a Buy Now . “It is a fantastic alternative to traditional camera straps. Mine holds two cameras, and I can wear it all day with both cameras on it and still feel great when we wrap up at the end of the session. Most days I just hand hold my camera, but when I need to carry two or need a place to put one when I am not shooting, a camera belt is definitely the way to go. Whatever you do, though, get that load off of your shoulders. Your back will thank you.”
Check out our hands-on review of Spider’s latest product, the SpiderLight.
Keep the elements out
Mead says shooting from a boat poses a few challenges, especially when it comes to keeping your camera dry. “There are a lot of waterproof camera sleeves available, but they’re pricy, and many nylon versions cover vital controls. Luckily, a couple affordable options are available. Buy at Walmart.com with a drawstring lens opening that easily accommodates pro DSLRs with a 100-400mm lens. Considering you get two per pack for about six bucks, it’s a great deal.”
“In a pinch, you can also use clear wastebasket bags. Just poke a hole in the bottom with your finger, and gently stretch the plastic to accommodate the end of the lens for a 15-cent solution,” Mead adds.
Embrace the histogram
Histograms put every pixel in the image on a graph, and looking at that chart is one of the best ways to determine if your exposure is off. The idea is to watch the peaks and avoid cutting off any of the rises and falls on the edges. If those pixels clip off on the left edge, the image is too dark. On the right? Too light. Of course, the histogram is for a proper exposure, so it doesn’t work for trying to intentionally over or underexpose an image to create a certain mood. That said, the histogram will tell you if you’re exposure is so far off that you can’t recover details in post. Check out our quick guide.
Resist the temptation to check the LCD screen
Checking a resulting shot on your camera’s LCD screen is an impulsive reaction, but this behavior can betray you, says Guatelli. Besides potentially missing a peak moment by glancing at the screen too often, the habit can also be misleading.
“Most outdoor photography is shot in lighting conditions where the camera’s screen doesn’t faithfully represent the tonal details, especially in the image’s shadows. Reflections on the camera’s screen or the surrounding lights or darkness can create the sensation of incorrect exposure. The photographer is betrayed by the misrepresentation of the shot and instantly adjusts the controls to make the scene lighter, exposing the image more than necessary.”
He recommends using a photometer while in spot-metering mode. “Choose the lighter side of the scene to set the metering. If you don’t have spot-metering mode, try underexposing by 2/3 and don’t follow your camera’s screen results. Wait to check it at your computer, inside a low-light room. The correct exposure gives the photograph more saturated color, better contrast, and has much more room to be processed, although an image like this almost doesn’t need any manipulation.”
Enable flashing highlights
The histogram can be tricky to learn, but most cameras have a highlight feature that will let you know if you’ve overexposed the image by flashing any areas that are overexposed. Photographers sometimes affectionally call this “the blinkies,” and the setting is usually located in the playback menu, though the exact location may vary with different camera models.
“I always want as much detail as possible in my images, and this requires that the exposure be as bright as possible without blowing the highlights,” Henson says. “While the histogram is useful information, I find that the flashing highlight feature in almost all cameras is more useful for attaining maximum detail in my shots.”
“I will generally push my exposures right to the point where the highlights start to flash, then back off my exposure 1/3 of a stop for my final shot,” Henson adds. “This creates a file with the most information possible for the scene at hand.”
Change your color settings
Getting good color is about more than achieving good white balance. Digital cameras will actually let you set a color profile, which adjusts the tones in an image to your personal taste and saves you a considerable amount of time in post processing. Most cameras will have a number of presets, too, such as standard and vivid, as well as several customization options.
“Before you start shooting, you can change the factory configurations of your camera,” Guatelli says. “Set your camera’s contrast, sharpness, saturation, and tonal adjustments. It’s almost the same thing that old-school photographers used to do when choosing a specific kind of film. Some used to have richer reds, others had more contrast, and others were grainy. Each situation requires a different set of contrast, saturation, etc. Getting used to it can push your creative possibilities.”


Flash has a manual mode, too
Most new photographers learn manual modes on their way to becoming more seasoned enthusiasts. But often too many call themselves “natural light photographers,” not because of the nature of natural light, but because they don’t actually know how to use flash. Flash doesn’t always result in harsh shadows and that obvious flash look. When shooting with flash in manual mode, you can match the light in the scene to make subjects pop, and the untrained eye won’t be able to tell you even used a flash. A manually-set flash is essential for mastering tricky lighting –like sunny days and backlit subjects — and represents the next step after mastering exposure basics.
Flash doesn’t always result in harsh shadows and that obvious flash look.
Unlike learning manual exposure, there’s no meter to guide you, but with some experimentation, manual flash can be an incredible tool. Even the pop-up flash on more advanced cameras has a manual mode, which means you don’t need to invest in a hot shoe. If you happen to have a hot shoe, however, adding a flash diffuser will also help.
Vary your composition
Guatelli says that varying the composition is key, even when shooting action like sports. Using a different focal length, adding a foreground element, adjusting your position, and changing your height by kneeling or finding a higher vantage point help leads to a more interesting album — and a wider selection of single shots to choose from. “Perhaps try to change the distance to include the detail that can balance the composition,” he says. “If the field depth is shallow, try to shoot with unfocused elements that are close to the camera and not just with those that are in the background.”
Think about the entire frame
Selecting the subject is an important (and obvious) step when taking photos, but checking the rest of the frame before you shoot is just as important. By considering the entire image before you shoot, you can eliminate distractions, often just by moving your feet. At the same time, thinking about more than just your subject can also help you to fill your frame with useful information that can enhance the overall image, or provide useful details. “Don’t fix your eyes on the subject or at the center of the image. Think before shooting, move your eyes through the edges of the rectangle and move the camera,” Guatelli suggests.
Create your own moment
While genres like photojournalism and street photography require you to wait for the right moment (done right, you can capture seemingly impossible shots) sometimes, it’s also the photographer’s job to create the moment. Imagine working as a wedding photographer and the bride is a bundle of nerves — waiting isn’t going to do anything but intensify those nerves. Portrait photographers sometimes have to help create the right moments by telling a joke or a personal story to get the right reaction. This often settles the nerves that may come with being in front of the camera.
Experiment on your own
Learning from seasoned pros helps budding photographers jump start their work. Talking with a veteran sports photographer before shooting your first game, for example, often makes the difference between getting the shots and spending too much time on trial and error. However, there’s also a time for experimentation. Take the time to find your own style — and even your own tricks.


