
Adobe Lightroom may be the RAW photo editor of choice among many photographers, but working with large quantities of big files means speed is often a chief complaint. Older computers, in particular, can suffer from slower imports and delays while editing. But, tweaking some settings can help Lightroom users eke out more speed, even on an older device.
Try these seven ways to speed up Lightroom Classic, as well as a few that apply to Lightroom CC as well.
Optimize your hardware
A major part of any software’s performance is the hardware that’s running it. While updating to the latest-and-greatest computer, particularly one with four or more processing cores and a lot of RAM, will help Lightroom to run faster, you can likely squeeze a bit more performance out of your current computer by optimizing it or upgrading individual components.
First, make sure your hard drive isn’t full. Lightroom (and pretty much any other program) will run best if at least 20% of the hard drive is empty. If your hard drive is more than 80% full, move files to an external hard drive or delete unnecessary files.
Also check that your operating system is up-to-date. Updating your OS, in most cases, also updates your graphics driver and can often improve the overall performance of your machine.

You can also improve performance by upgrading your RAM, graphics card (GPU), or hard drive. Some computers, like all-in-ones or laptops, may limit which components you have access to, but even here you could add a high-speed external solid-state drive (SSD) over Thunderbolt 3 or USB-3 that can improve performance by offering faster throughput or simply more space to store more photos.
Store your catalog in the proper place
In most cases, the best place to store your Lightroom Classic catalog is on the computer’s built-in hard drive as this is typically the fastest drive. Previews are stored in the same location, so if the computer has to access a different drive, performance will slow down. However, you can store the original image files on an external drive to avoid filling up your internal hard drive. Again, a fast external SSD is recommended for speed, but traditional spinning-disk hard drives are larger and less expensive.
On Lightroom CC, working off the Creative Cloud means speed is dependent on your internet connection. In the preferences, you’ll find an option under Local Storage to “store a copy of all originals at the specified location.” Select this to keep your photos stored locally on a drive of your choosing. This will help images load faster as they don’t have to be accessed from the internet. Don’t worry, everything will still be safely backed up to the cloud, and any photos added from a different device will be automatically downloaded to the specified hard drive.
If you don’t have enough space to store all of your photos locally, you can also choose to store just the smart previews. These are compressed copies of your photos that reflect your editing decisions, but are smaller than the original files stored on the cloud. Storing smart previews locally will help speed up how quickly images are displayed, but original files will still need to be downloaded in some cases, such as when exporting.
Avoid using multiple catalogs (Lightroom Classic only)
Using multiple, smaller catalogs to speed up Lightroom performance is largely a myth. Adobe says that most users should stick with a single catalog — even users that have accumulated millions of images. The only reason to use separate catalogs is for organizing, such as professionals that have one catalog for work and one for personal photos.
You can, however, optimize the catalog. Go to File > Optimize Catalog for better performance.
Use the right preview settings (Lightroom Classic only)
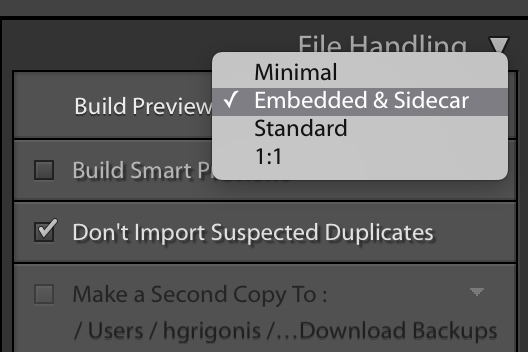
While the original files can be stored on an external drive, Lightroom previews are stored with the catalog. That means that preview settings can play a role in Lightroom performance. Adobe recommends using the embedded JPEG settings, which uses the same embedded JPEG previews that your camera generated to display on the back of the camera. This will allow you to start culling photos as the rest of the images are still importing.
When importing, on the top right, choose Embedded & Sidecar from the Build Previews drop-down menu.
Update Lightroom
Lightroom is regularly updated for performance, particularly Lightroom Classic. Check for updates regularly. Within the preferences of the Creative Cloud application, you can toggle on automatic updates to ensure you always have the latest versions of Lightroom, Photoshop, and other Adobe apps installed.
Delete unused presets
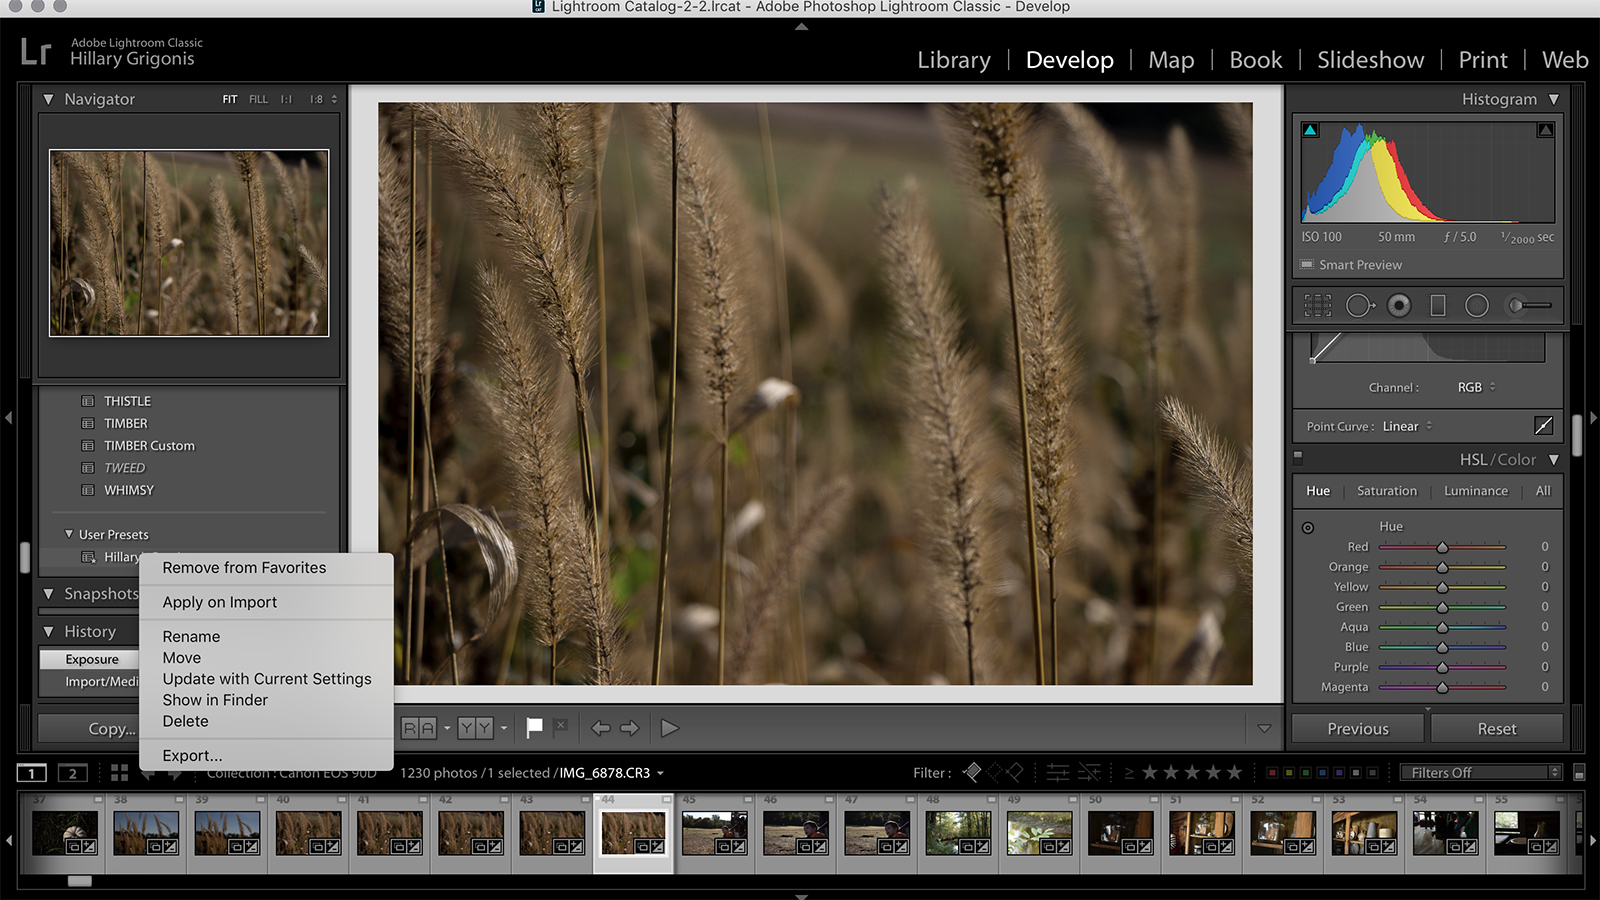
Those free presets that you downloaded could be making Lightroom slow. Take the time to go through and delete any unused presets. Right-click on the preset or preset group to see the option to delete. Besides making the ones that you actually use easier to find, this could help improve speed, particularly if you went a bit crazy and have 2,000 presets or more. Check both presets and brush presets.
Quit background processes
The more multitasking your machine does, the slower it will run. Quit any programs that you aren’t using. Older devices especially have trouble handling Lightroom with another program, so listen to Spotify on your phone as you edit on your computer, and close those web browsers.
To speed up Lightroom while you are making edits, pause any Creative Cloud syncing, as well as address look-up and face detection and resume once you’re finished. Click on the arrow next to your name on the upper left in Lightroom Classic to pause any processes.
For Lightroom CC, especially when working with photos that are not stored locally, other apps that use internet bandwidth could also affect performance. If you are syncing files to something like Dropbox or Google Drive, this could impact the load times of images in Lightroom.
Editors' Recommendations
- What Lightroom RAW photo import defaults are and how to adjust them
- How to make and install Photoshop actions to speed up your editing workflow
- Adobe Lightroom’s new Direct Import feature is for pro edits on the go
- Importing photos to Lightroom on iOS will soon be less of a pain
- Adobe Lightroom CC: All the new features announced at Max 2019


