


- 1. Before
- 2. After
With a photo and a bit of Photoshop magic, even the artistically impaired can create a cartoon. There are a few dozen different ways to create a Photoshop cartoon effect, each with its own unique look. But, many of them are intense, 25-step processes that leave you spending hours at the computer on a file with two dozen different layers. So, we set out to create a Photoshop cartoon effect that works for both the artistically impaired and the time-stretched, in ten steps or less.
Using two layers, a Photoshop filter, and some blur and color adjustments, you can create a cartoonish photograph with bright colors and dark sketch lines. This tutorial works best with a subject on a simple background — if you want to convert a photo that has a busy background, you may want to start by removing the background first. (You can follow along with the tutorial by downloading the same sample image here.)
1. Change to RGB 8 bit mode.

Some of the Photoshop tools used to create the cartoon effect only work with images that are RGB 8-bit — and when you are trying to make a photo look like a drawing, you don’t need all those extra colors anyways. Go to Image > Mode and check both RGB and 8-bit. If both are already checked, you don’t need to do anything before moving on to the next step.
2. Duplicate the background.
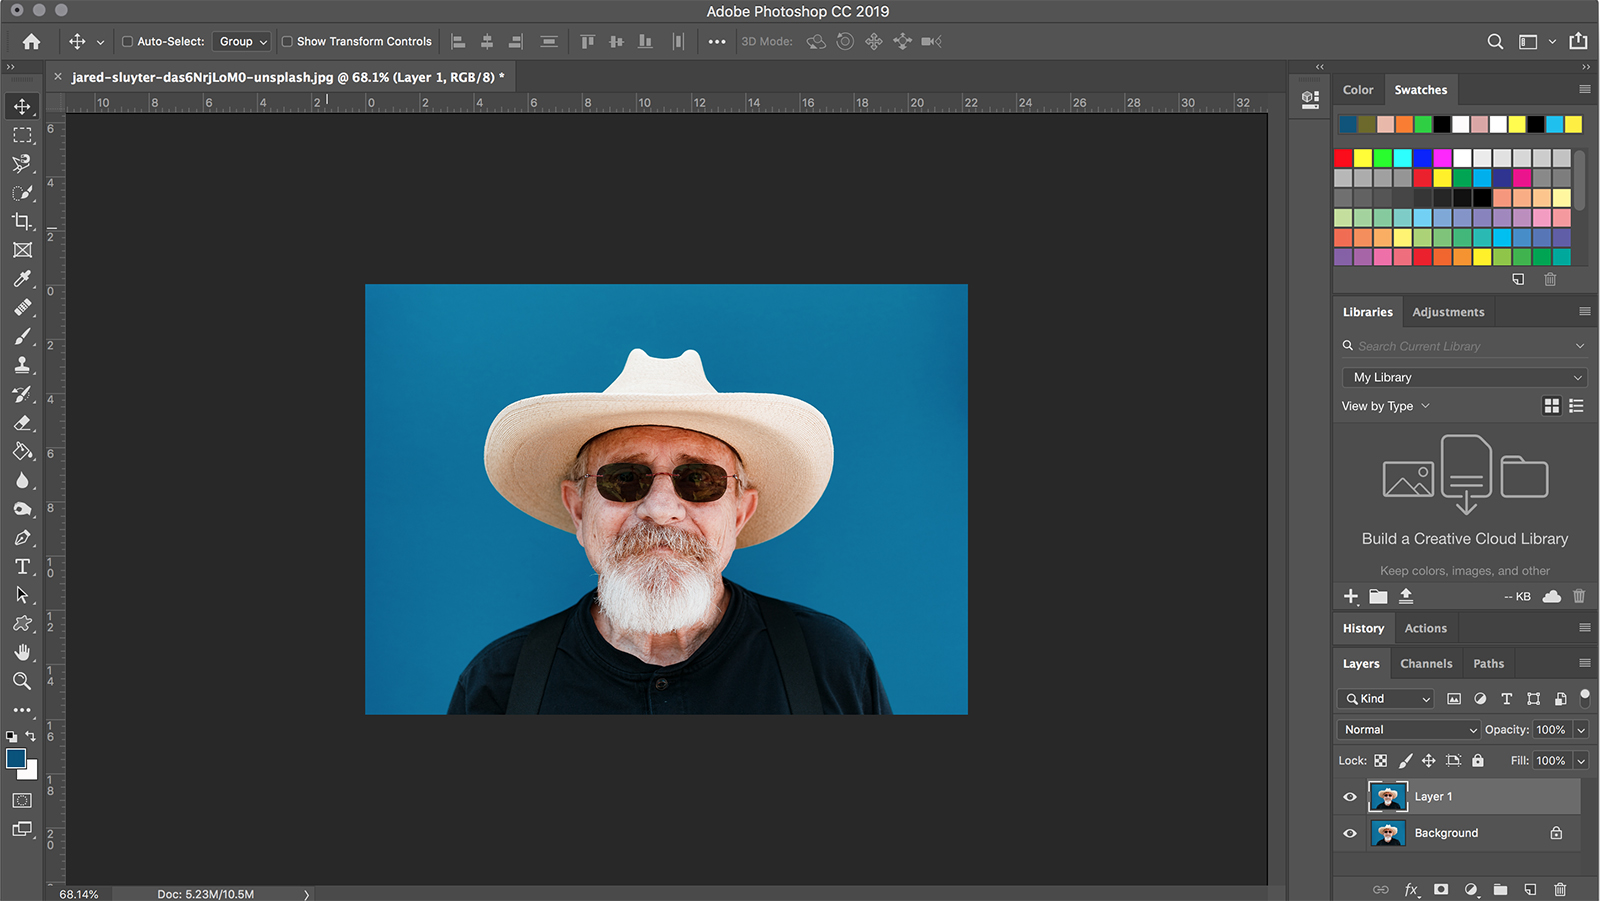
To create the effect, you need one layer for the sketch marks and one layer for the colors. With the background layer selected, press control or command-J to duplicate the background layer. You should now have two identical layers in the file. If you want, you can create a third layer in order to preserve the original image on it’s own layer, but it’s not a must — just be sure to use the save as command so that you don’t write over the original file.
3. Apply surface blur.

Select the bottom layer (or the middle layer, if you opted to leave the original image untouched on it’s own layer). This is your layer that will color the cartoon, but we don’t want all the details and skin pores because cartoons aren’t that detailed. Click the eye icon on the top layer to hide the top layer, so you can see your work on the color layer.
From the menu, select Filter > Blur > Surface Blur. Surface blur will blur everything without making the colors bleed over onto other areas of the photo. In the pop-up box, turn the radius all the way up to 100 and click ok to get a nicely blurred color layer.
4. On the top layer, apply the stamp filter.
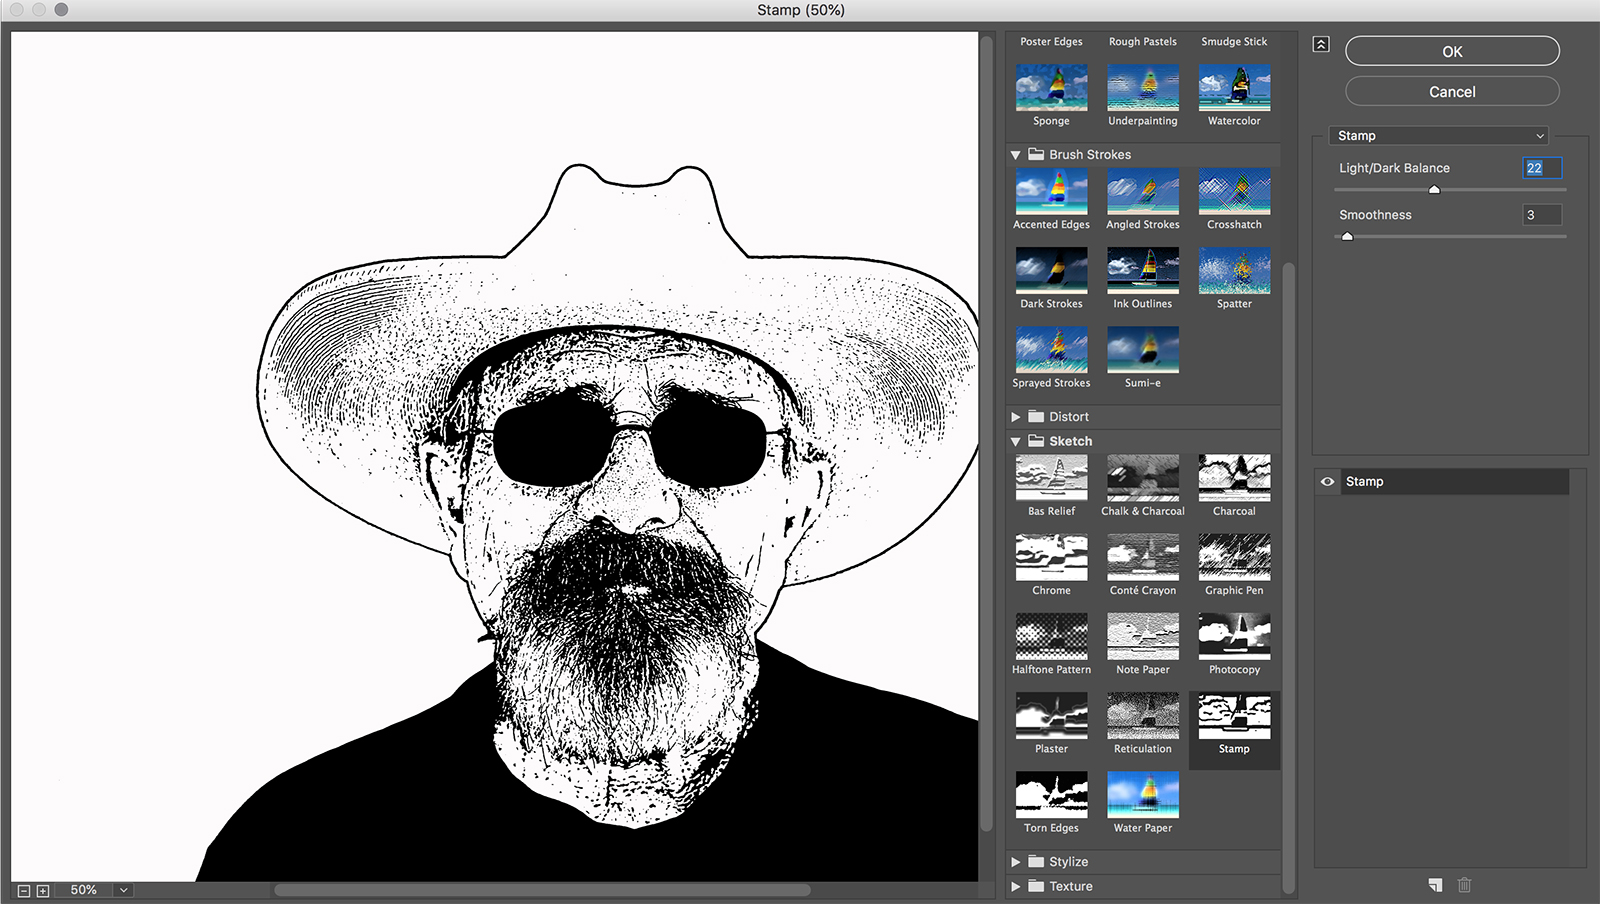
Next, we’ll add the sketch marks to the cartoon. Select the top layer and click the eye to unhide the layer. In the toolbox on the left at the bottom, choose black for the foreground (top color) and white for the background (bottom color).
Then, go to Filter > Filter Gallery (if this option is grayed out, you probably are not in 8-bit mode). Under the Sketch category, choose the Stamp effect. Adjust the Light/Dark Balance slider so that the areas of the image that should be black are black — usually a mid-point value works well for this slider. Adjust the smoothness slider so that the subject is well outlined — a low value usually works best. Click OK to apply the effect to the layer.
5. Change blend mode to multiply.
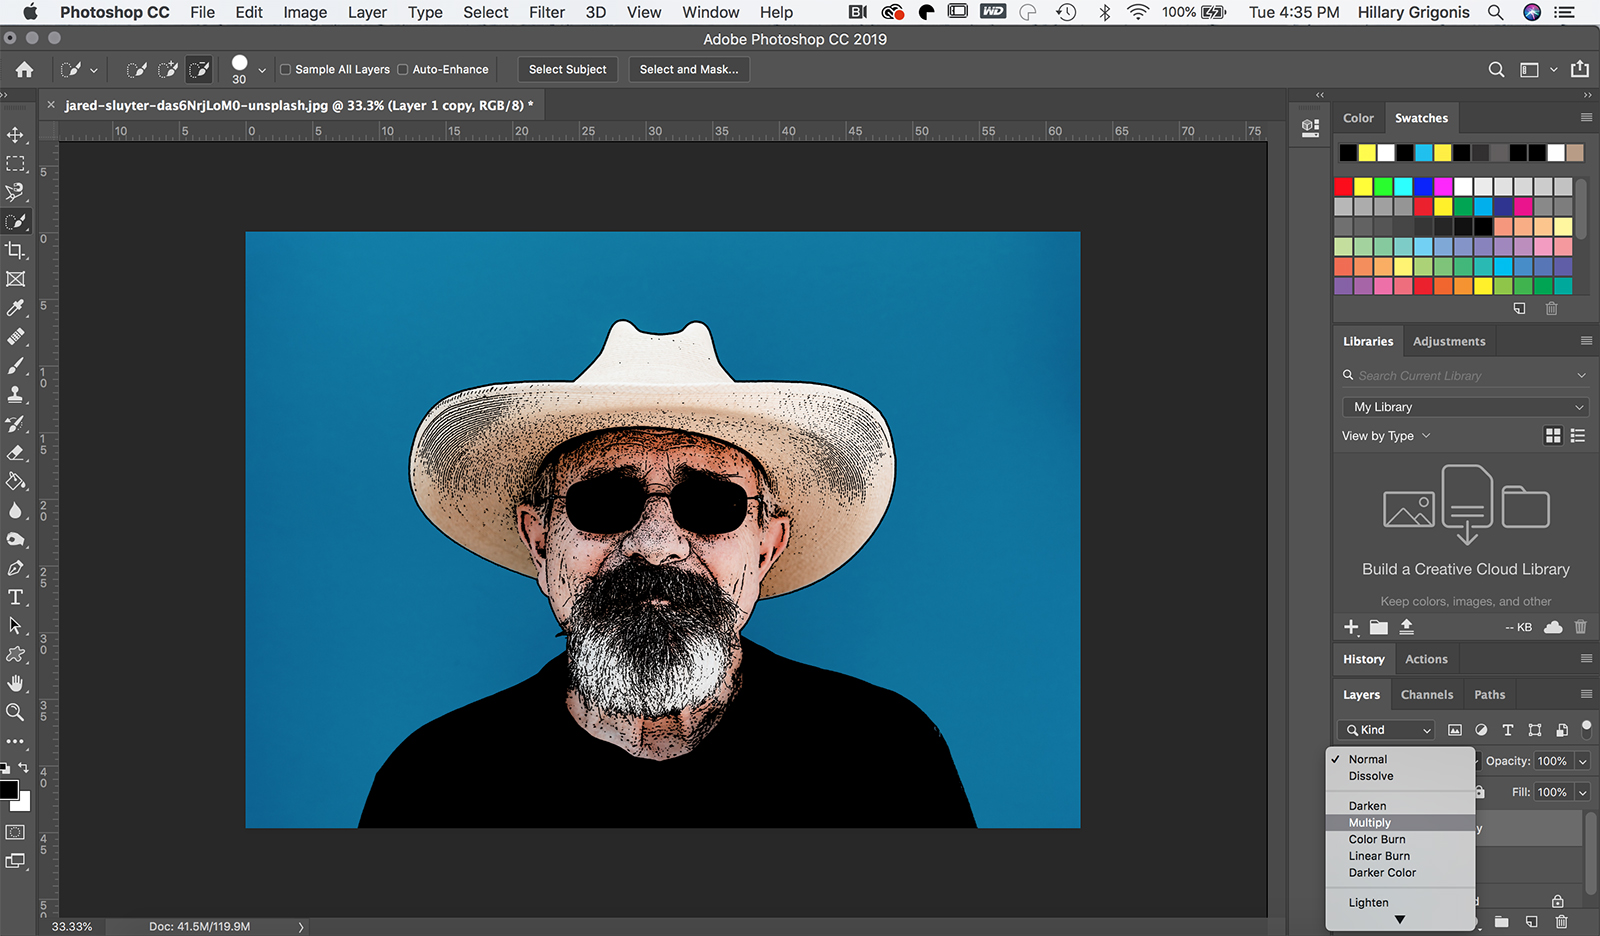
In the Layers panel, change the blend mode on the top stamp filter layer to Multiply. (By default, the blend mode is a default drop-down menu that starts with “normal.”) Your work should now be starting to look like a cartoon.
6. Clean up stamp layer with white paintbrush.

Sometimes, the stamp layer adds too many sketch marks to the cartoon. On the stamp layer, use a white paint brush to paint over any brush marks that you don’t want in the cartoon. In the sample image, I used a white brush to clean up some of the extra sketch marks on the hat and skin.
7. Play up the vibrance and saturation.
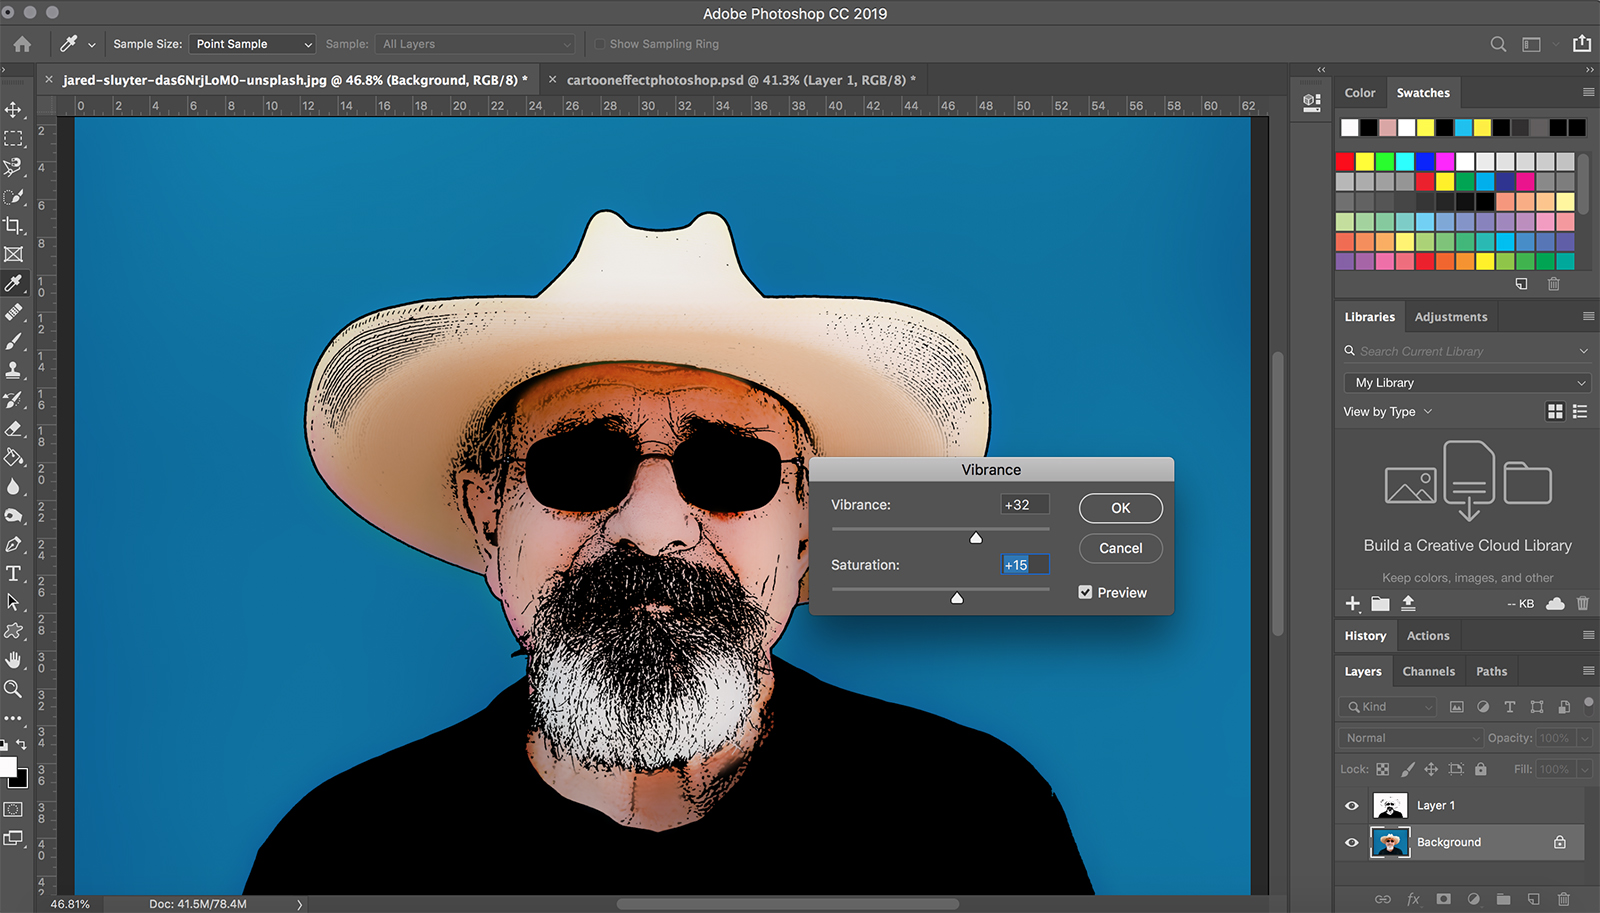
Cartoons rarely have realistic colors. Click on the color layer, then go to Adjustments > Vibrance. Move the sliders to enhance the vibrance and saturation until you’re happy with the cartoon colors.
Once you are finished with your cartoon, be sure to use the Save As option to avoid writing over the original photo. Save a PSD to hold on to all your work so you can come back and make edits later, or choose JPEG to create a compressed version to share on social media.
Editors' Recommendations
- The best Photoshop alternatives
- Photoshop will soon allow you to swap out boring skies automatically using A.I.
- Everything you can do in Photoshop for iPad, and what is still missing
- What is Photoshop Camera? How Adobe’s new A.I. app edits photos before you take them
- You can now Photoshop someone out of an image with one click


