
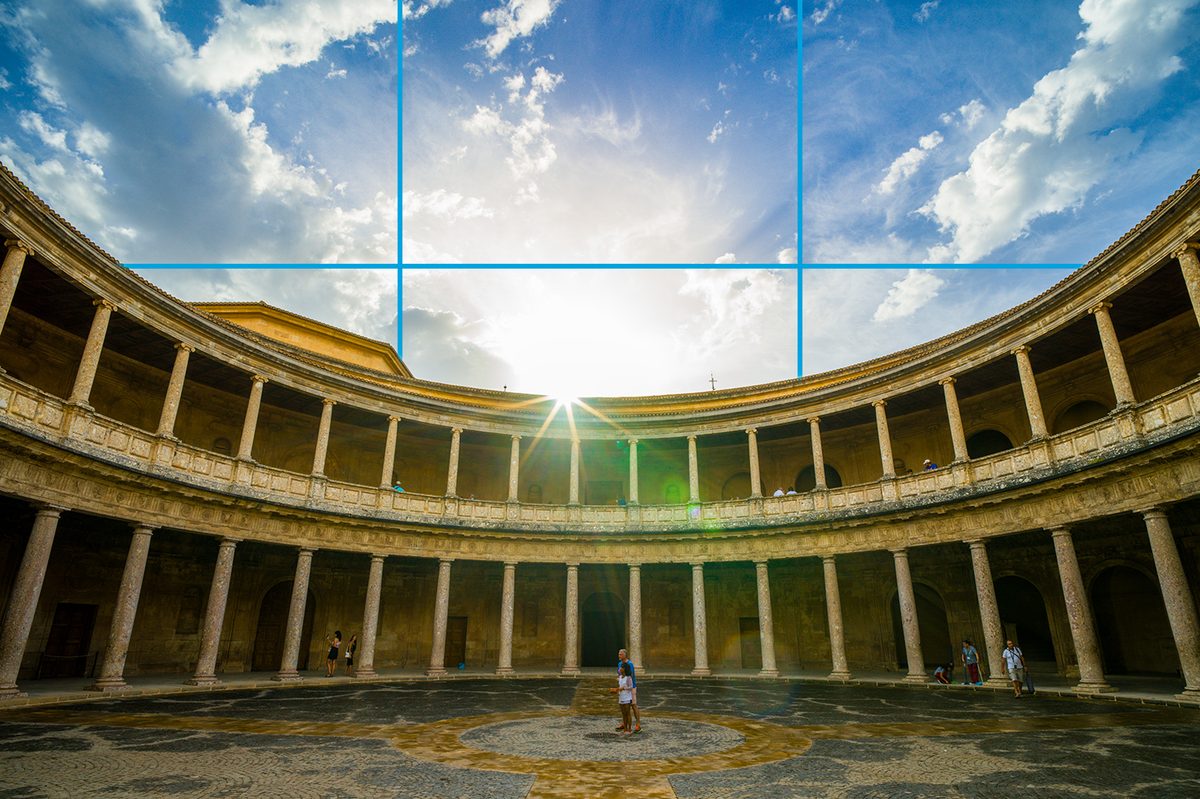
The rule of thirds is photography’s most widely known, and widely ignored, compositional “rule.” It divides the frame into thirds, both horizontally and vertically, and states that placing the subject near one of the resulting intersections is better than putting it in the middle.
More of a guideline, the rule of thirds is noteworthy because it goes against our natural inclination to make the center of our attention the center of the photograph. This is not how our eyes behave in real life; when we look at something, we look directly at it. In a conversation, we don’t stare slightly off-axis to frame the other person to the left or right of center.
But this purposeful misdirection — putting the subject elsewhere from where you expect to find it — is one reason why the rule of thirds can make a photo more interesting. It invites dynamic balance into the frame and encourages the viewer’s eye to remain mobile, rather than come to rest squarely in the middle of the image. What’s important isn’t that you follow this rule to a T, but use it to be more conscious about how you compose your photographs.
How to use the rule of thirds
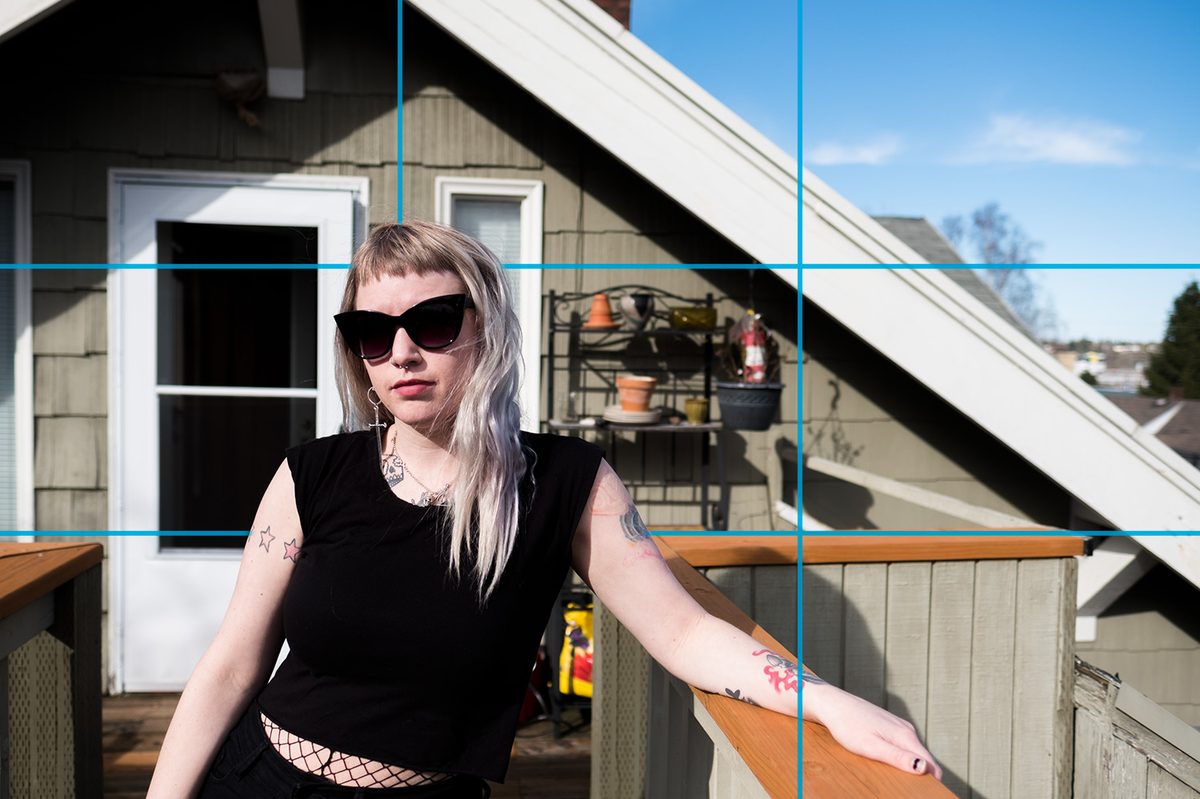
In portraiture, try to align your subject’s body along one of the vertical lines in the imaginary rule-of-thirds grid (some cameras actually have grid overlays that can be turned on to assist with this). You should aim to have their face at one of the intersection points (usually, one of the upper ones). For close-ups and headshots, the face itself may be centered, but you can still frame the eyes according the rule of thirds.
Your subject’s sight line is also important to where you place them. They should generally be looking into the frame, not off the edge. If they are looking to your left, frame them on the right. If they are looking up, frame them toward the bottom. This gives them some breathing room and allows the viewer’s eyes to follow the subject’s line of sight into the rest of the image.
You don’t always have to do this, of course. Framing your subject so that they are looking right off the edge can create tension and a feeling of being trapped. If that helps illustrate the story you’re trying to tell, then it’s the stronger composition. Most of the time, however, this is not the effect we’re going for with a portrait.
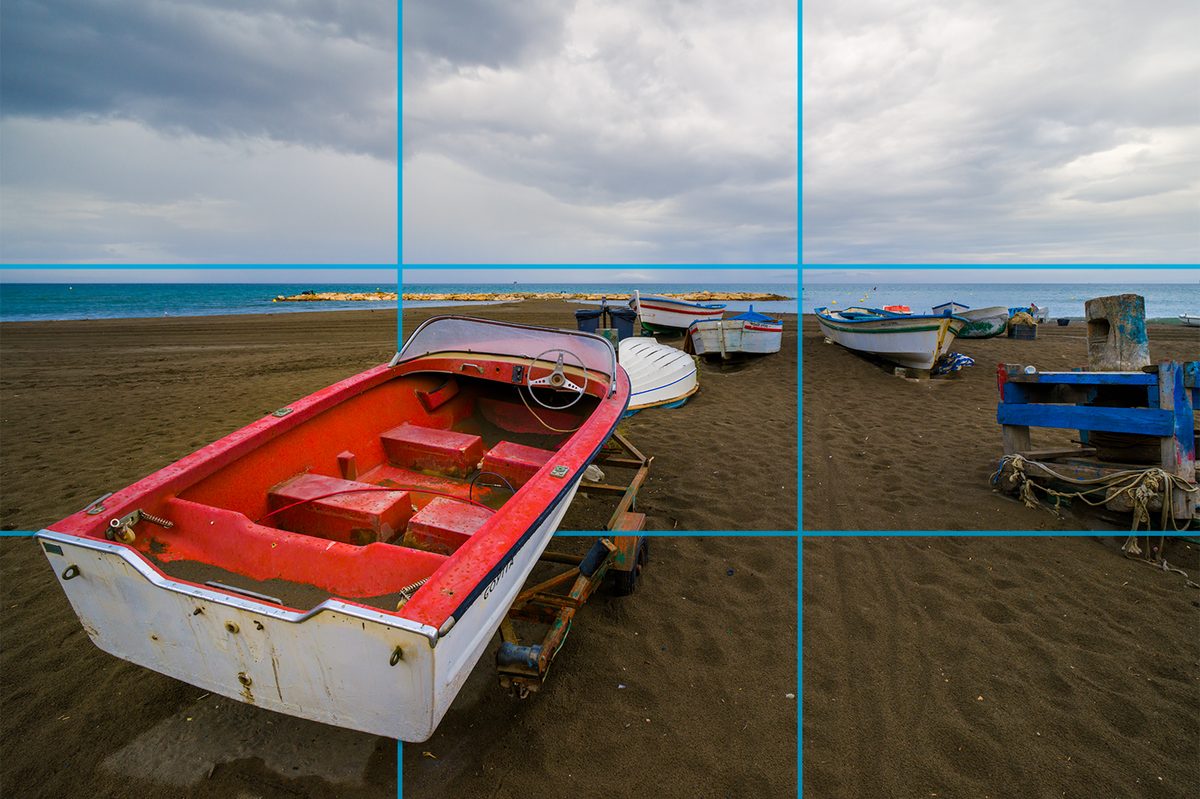
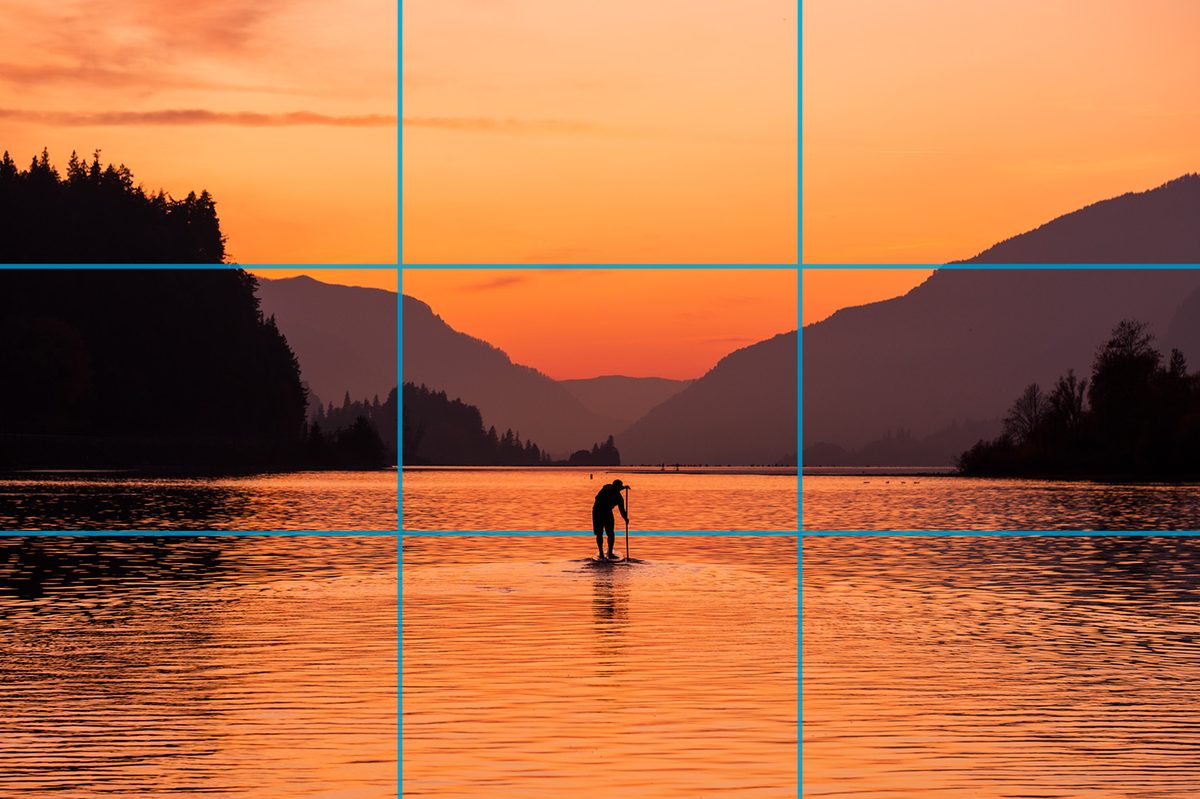
With landscapes, start by placing the horizon at either of the horizontal grid lines. Choosing the lower third will open up more of the sky — a good option when photographing a sunset with interesting colors and clouds — while aligning the horizon with the upper third will put focus on the ground. Vertical objects, like trees, buildings, or mountains, can be matched to the vertical grid lines.
Remember, the goal of the rule of thirds is to get you thinking about your composition so you can make an informed choice about subject placement. It doesn’t mean that randomly placing your subject away from the center will make a better image. Other techniques can also help point you toward the strongest composition.
Framing
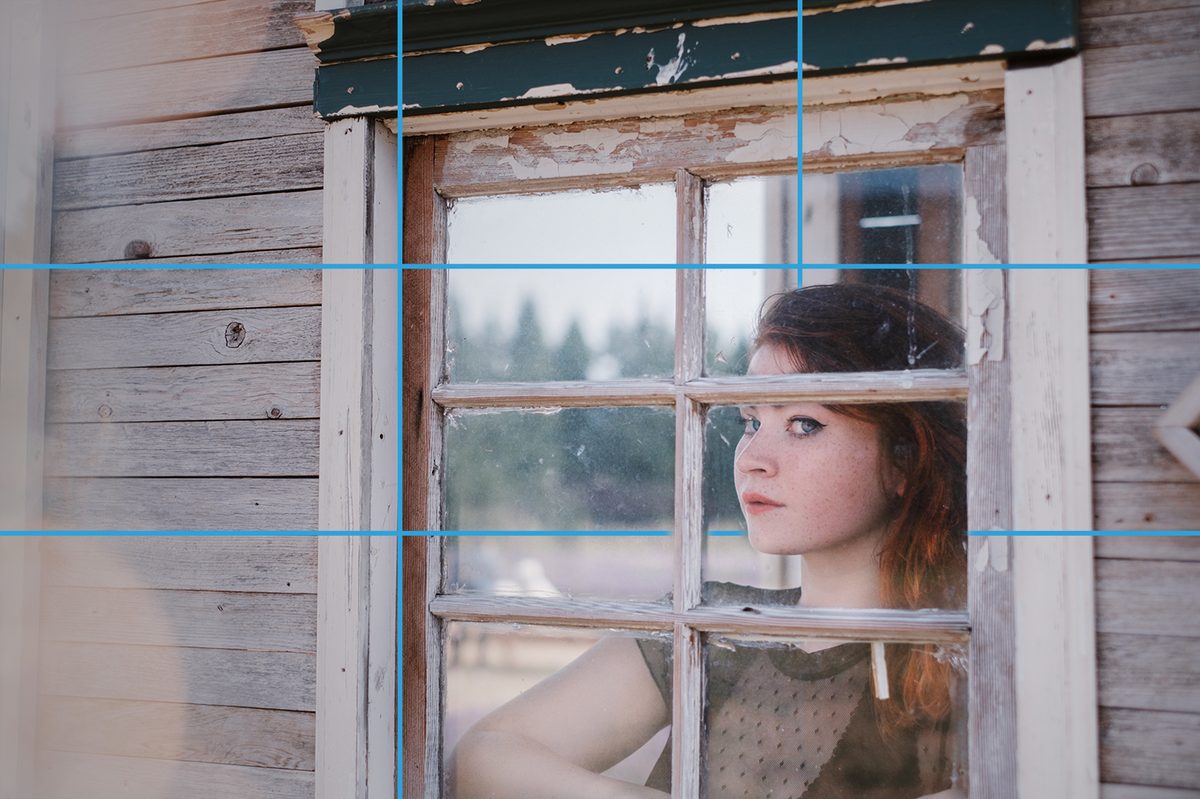
Here, we’re talking about the frame within the frame, something that helps anchor the image and provide context. A rather obvious example of this is photographing a subject through a window frame, but many objects work as photographic frames. A frame can also be made of foreground or background elements and doesn’t have to be something physically close to the subject. For example, you could compose an outdoor portrait so that your subject appears to be framed between a tree in the foreground and a mountain in the distance. It’s the abstract shape that matters.
Framing is its own compositional technique separate from the rule of thirds, but the two work hand-in-hand. Your composition will be more dynamic if your subject is not only positioned according to the rule of the thirds, but also framed by other elements within the image. Alternately, a centered subject framed equally on both sides can be used to illustrate strength and steadfastness, while avoiding all framing can lead to a sense of loneliness or emptiness. The story you want to tell will dictate how you use or avoid this rule.
Leading lines
Like framing, looking for leading lines in an image is all about abstraction. The classic example is a road that snakes off into the distance, forming an S shape. Whether straight or curved, lines are an important compositional tool that serve to guide the viewer’s eye throughout the image.
Composing your image according to the rule of thirds can lead to a lot of negative space. By incorporating leading lines into that space, the photo will be more dynamic and draw the viewer’s attention to the subject. Lines that continue off the edge of the frame will create a sense that the scene, and your story, also extend beyond the frame, opening up the viewer’s imagination. Conversely, lines that begin and terminate within the frame will make the scene feel contained, even boxed in.
When to break the rule of thirds
All of the best artistic rules are meant to be broken, and the rule of thirds is no different. First and foremost, you shouldn’t let imaginary gridlines dictate how you compose a photograph — think of them as a humble suggestion, something to keep in the background of your mind. If you spend too much time obsessing over perfect implementation of the rule, you’re going to ignore the more important aspects of the image. The rule’s critical lesson is simply that you should not default to placing the subject in the center.
Beyond that, there are also some situations where you should purposefully go against the rule of thirds.
Storytelling
Telling a story with your photos involves variety, control, and attention to detail. It also requires a fair amount of emotion, which isn’t always possible to convey while adhering to the rule of thirds. In other words, your photo’s story includes far more than technical aspects, and its composition transcends technical limitations. The lovely 2015 video above from Canon Australia, beautifully illustrates what we mean. In this video, six photographers tell six different stories about the same portrait subject. The majority of the portraits still adhere to the rule of thirds in some way, shape, or form, but each photographer does so in brilliantly unique ways.
Symmetry
Symmetry draws our gaze, so it’s only natural to highlight it when we see it around us. Symmetry is especially pronounced in photographs that feature reflections. For example, imagine a picture of a mountain reflecting in a lake where the water’s far edge perfectly bisects the frame. The two peaks — one physical, one reflected — extend equidistant from the center. You can use the same idea to illustrate vertical symmetry, in which case you’d frame the subject vertically according to the rule of thirds – or intentionally go against them to create an asymmetrical effect.
Technical/scientific photos
It’s easy to get caught up in artistry and unique photography approaches, but “good” photographs don’t always need exciting angles or other gimmicks. For example, technical or scientific photos aim to be as clear and concise as possible rather than making an artistic statement. Taking pictures of products for catalogs and marketing images is another instance where you don’t have to worry about being artistic and taking inventive photos; you need to spotlight the product. However, this doesn’t mean that you can’t get a little creative with technical images, especially if it means you deliver a more appealing shot. For example, MIT science photographer Felice Frankel doesn’t consider herself an artist. Still, she makes excellent use of color and composition to help scientists better communicate their ideas, proving that there’s always room for artistic flair.


