No one likes paying for things, but at least it’s a process that can be made easier. And Google Pay makes paying for items as easy as reaching into your pocket and unlocking your phone.
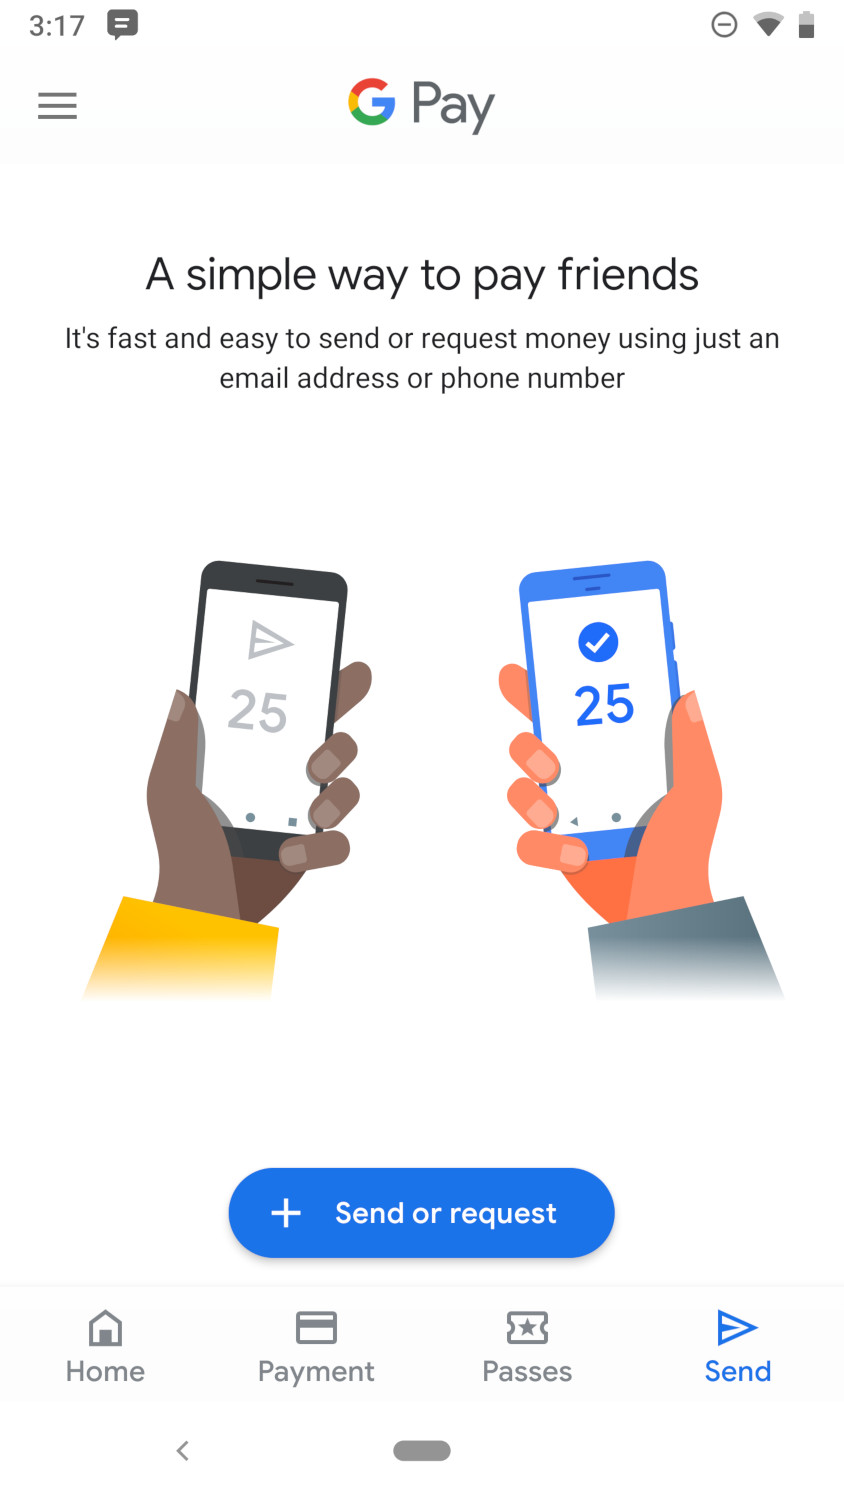
But it’s not just your groceries that Google’s made it easier to pay for. Do you owe a friend for your half of the lunch you split? Or perhaps for some evening drinks? Settling up with a chum shouldn’t be difficult either, and that’s where Google Pay Send comes in, making it loads easier to quickly and easily balance the books. If you’re the one that’s owed, you can put in a payment request.
Getting this sort of stuff right can be tricky, and we all know it’s especially worrisome whenever finances are involved. But don’t worry, we’re here to make it easier. We’ve put together a quick guide to getting your Google Pay and Google Pay Send accounts set up in no time.
Google Pay


The app formerly known as Android Pay has had a branding change and a bit of a polish, but it’s still the same app below the new face. If you have an existing Android Pay account, there’s no need to worry — all of your saved cards will transfer over to your new Google Pay account, and you won’t need to do anything to get it set up.
But what if you’re new to Google Pay and need to set up your account for the first time? We’ve got you covered there, too. Getting a Google Pay account set up is quick and easy, and once you’re done, you can get right down to what really matters: Retail therapy.
How to set up Google Pay
Google Pay will greet you and ask which of your connected Google accounts you want to use on your Google Pay account. It will then take you through the stages of getting a credit card signed onto your account. Hit the Add a card button, and Google will alert you if you already have a card assigned to your account and offer the option to Add a new card. If you don’t have any existing cards attached to your account (from the Google Play Store, for example), or you want to add a new card, then you’ll be taken straight to the card-adding options.
From here, you can choose how you want to add your card. Google Pay offers you the chance to simply have the app look at your card through the camera and automatically add the details. Otherwise, you can add the card yourself by entering the card number, expiration date, and CVC (card verification code). Either way, you’ll be then asked to accept the terms of service before verifying your details either by calling your bank, or by text message. Enter the verification code (or let Google autofill that for you), and you’re ready to go.
How to use Google Pay
Using Google Pay on your smartphone
Using Google Pay is as easy — if not easier — than getting your account set up. As long as your phone has NFC (near field communications), you’ll be able to use your phone like a contactless card at many pay points — just keep an eye out for the Android Pay or Google Pay symbol.

When you’re ready to pay, wake your phone’s screen and hover it near the pay terminal. Your phone will make a noise and vibrate to confirm the payment, and your screen will show a visual confirmation of payment.
You can also use your Google Pay account to pay on selected apps like Airbnb, Kayak, and DoorDash, and it’s just as easy. Just select the Google Pay option at checkout, and Google Pay will ask you to confirm payment.
Using Google Pay on the web
Google Pay is no longer restricted to just being used on your smartphone. Google is rolling out the payment system on the wider internet, and you’ll soon be seeing “Buy with Google Pay” buttons cropping up on Chrome, Safari, and Firefox — no matter which device you use them on.

In order to use your Google Pay account to pay for purchases on your desktop PC, or any other device, simply hit the “Buy with Google Pay” button, and confirm your card options and delivery address, just as you would with any other payment option. As long as you’re signed into the correct Google Account, your card details will be saved across devices.
Google Pay Send


Google Pay Send allows you to send and receive money from friends and loved ones. It’s similar to Venmo and other peer-to-peer payment services. The way you’ll use Google Pay Send varies largely on your location — in some places, including the U.S., Google Pay Send has been rolled into the Google Pay app. Elsewhere, Google Pay Send is still its own standalone app — though we expect it to be rolled into the Google Pay app everywhere eventually.
To check if you need to use the standalone app, open the Google Pay app and see if there’s a “Send” button on the bottom right-hand corner. If so, you can just use the Google Pay app, which means you can skip a few sections below and head straight to “How to use Google Pay Send in the Google Pay app.” If not, you’ll need to go through the steps on setting up the app outlined below.
How to set up the Google Pay Send app
Setting up Google Pay Send is simple; in fact, if you’ve already set up Google Pay the work is done. To set up Google Pay Send, you’ll need to install the app from the Google Play Store. If you want to add additional cards or your bank account, however, the process is simple.
The first time you open the app, you’ll need to skip through a few tutorial screens. When you see the screen with the $0, tap the hamburger icon on the left side and go to Payment methods. From here, you’ll be able to see the card on file and add additional payment methods by tapping the Add Payment Method bar at the bottom of the screen. Depending on your card or account, you may have to call your bank to verify.
If multiple people use your phone, or you just want an added layer of security, you can set up a PIN for the app. To configure your PIN, just tap the hamburger icon followed by Settings > Security and toggle on Require PIN.
How to use the Google Pay Send app


Using Google Pay Send is incredibly simple. Just tap the $0 on the main screen and enter the dollar amount and select Send or Request. You’ll be presented with a screen asking you to allow the app to access your contacts; just tap Allow.
From here, you’ll be prompted to select the appropriate person. Once you’ve selected the intended contact, you can enter an optional message and tap Send or Request. The first time you initiate a payment, you’ll need to tap Allow on a message that asks you to allow the app to access your location. You may also need to enter personal details like your name, Social Security number, and date of birth the first time you use the app.
Once you’ve completed the process, you’ll see a confirmation screen showing that the payment has been sent.
How to use Google Pay Send in the Google Pay app

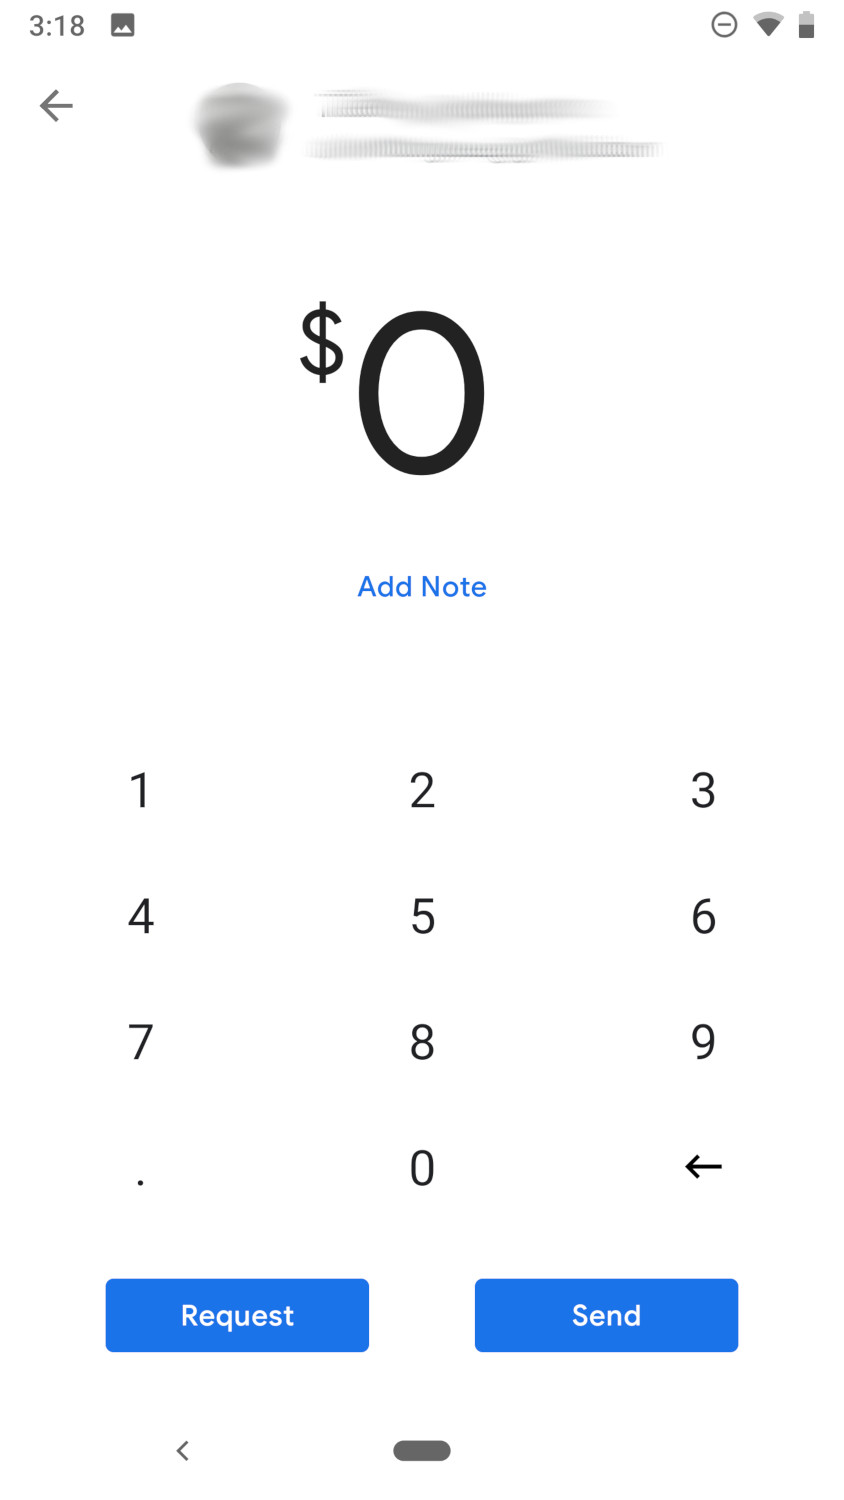
If you are in an area where Google Pay Send has been rolled into Google Pay, the steps are slightly different — but still super easy. To use Google Pay Send, simply tap on the Send tab on the task bar on the bottom right of the Google Pay app, then hit the Send or request button.
From there, all you have to do is select the friend you want to send money to or request from, then type in the amount, and either press the Send or Request button, depending on what you want to do.
Once you complete these steps, you’ll get a confirmation screen showing that you’ve sent the payment.
Editors' Recommendations
- The best Android tablets in 2024: the 11 best ones you can buy
- A new Google Pixel Tablet is coming, but it’s not what you think
- Best Google Pixel deals: Save on Pixel 8, Pixel Buds, and Pixel Watch
- What is NFC? How it works and what you can do with it
- Best iPhone 15 deals: How to get Apple’s latest iPhone for free