Since Wi-Fi is a vital part of today’s MacBook experience, connection problems are serious business. We know you want to get back online right away, whether it’s to turn in an important report or catch up on the latest streaming episode.
Here’s a guide on what to do to get your MacBook back on the network quickly and fix what went wrong. Take a look and find the solutions that fit your problem.
Run Wireless Diagnostics
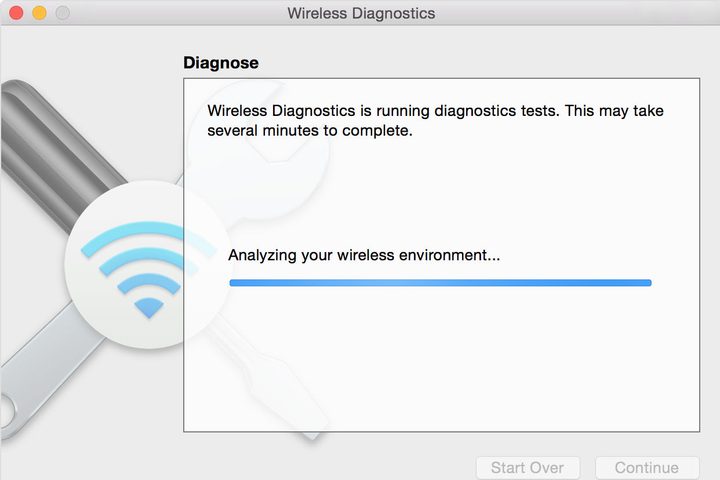
Modern versions of MacOS (since around Mountain Lion times) have a diagnostic tool built in to check the wireless network. Start by running this tool: Hold down the Option key (Alt on some Mac keyboards) and select the Wi-Fi icon in the upper-right corner of your screen. Then, select the Open Wireless Diagnostics option that has appeared there. Click Continue, enter your login password if necessary, and wait for the diagnostics to complete.
When given a choice, head to the summary of the diagnostics. Select the blue “i” button next to each summary note to learn more, and see if any of the notes include an important error or failure that you can note when pursuing solutions. If the diagnostics tool finds a major problem, it may stop diagnostics entirely and give you a pop-up window instead with a valuable description of what’s going wrong.
Check your Wi-Fi connection and restart your router
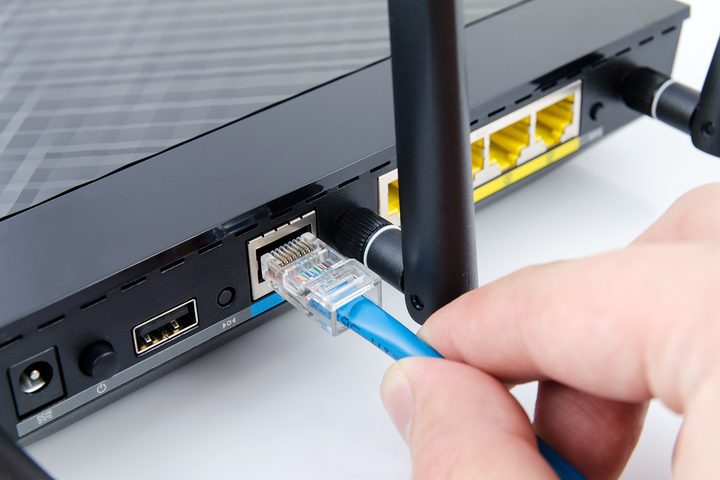
Is the Wi-Fi acting poorly for other devices, too? That’s a good sign that the network itself is at fault. It’s a good idea to start with a router inspection to see if anything is wrong. Do a physical inspection of the cables to make sure connections are secure, and make any changes if necessary.
Then you can reset your router to see if this helps fix your problem. Resetting a router can fix all sorts of issues, including problems with router updates, dropped connections, and lost connections with hard-line internet. Remember to unplug your router from the modem before you begin, and wait for a little while before turning your router back on to make sure the reset is a success.
Update MacOS and other software

Have you recently updated MacOS? Sometimes, new updates can cause connection problems. In this case, you can roll back the update and wait — Wi-Fi problems in updates are, for obvious reasons, quickly patched. It should be no more than a day or so before you can update safely.
However, an update can frequently fix any problems you may be having with Wi-Fi problems, particularly if it’s been a while since you have updated your computer. So, check MacOS for any updates that haven’t yet been implemented, and see if your Mac recommends updating any router devices.
Change preferred order of services
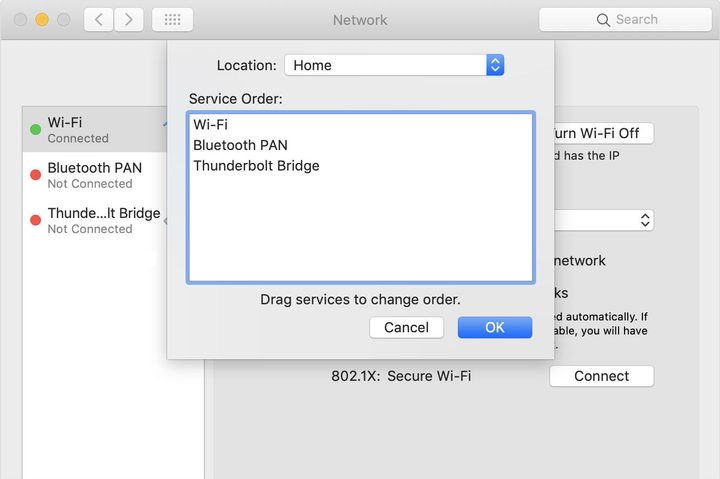
Head over to System Preferences in your Dock and select Network. This gives you a closer look at your Wi-Fi settings and the network that you are trying to connect to. This screen can help you if you want to create a new Wi-Fi network or turn your Wi-Fi detection off and on again, but there’s something else you should try here as well.
Select the gear-shaped Settings icon in the bottom-left corner, then choose Set Service Order. Here, simply make sure that “Wi-Fi” is on top. If other entries are before it, then your Mac may not be giving that router enough attention.
Check your TCP/IP settings
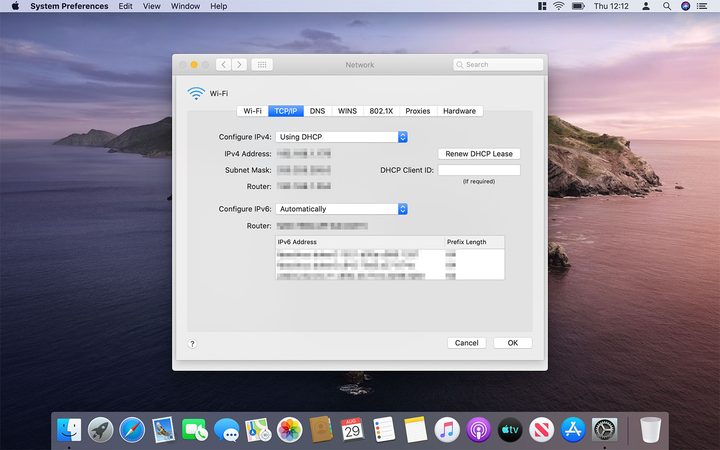
The Network section of System Preferences can also help you resolve TCP/IP problems. Open it up as in the previous step, then click Advanced and click the TCP/IP tab. If you don’t see your IPv4 address here, or something else seems unusual, select Renew DHCP Lease, which offers a basic reset of your network connections.
There’s rarely ever an issue with modern network systems but, if resetting your network doesn’t fix the problem, reach out to your network administrator. Or, check with your local internet service provider to sort through the settings in your TCP/IP and DNS tabs. Once you’ve set an appointment and communicated with your provider, you can follow their instructions for changing your network information. With this method, you may have to check that your internet settings are accurate manually.
Remove all your accessories

While this advice may seem unusual, it happens frequently. The accessories and devices in your home could be interrupting your Wi-Fi connection. This problem has popped up quite a bit with the newer Macs with USB-C ports because they can produce an opposing signal to the network. To check if your device is disrupting the network, unplug every accessory and reboot your Wi-Fi. At that point, check to see if your computer can connect to the system. If it does, then plug each device back in one-by-one until you can pinpoint which accessory is causing the problem.
It’s definitely not ideal, but your best bet is to avoid using the disruptive device. Try running it only when you don’t need an internet connection or try to return it for a refund if possible.