
The motherboard might not be the most exciting part of your system, but it’s arguably the most important. It’s also the biggest, which can make it a bit awkward to install, but as long as you’re careful it’s not difficult. Whether you have a mammoth eATX board, a more typical ATX, or one of the smaller mATX or ITX options, here’s how to install a motherboard in a few quick steps.
If you’re still on the fence about what motherboard to buy, here are some great options for gamers.
Step 1: Prepare your tools
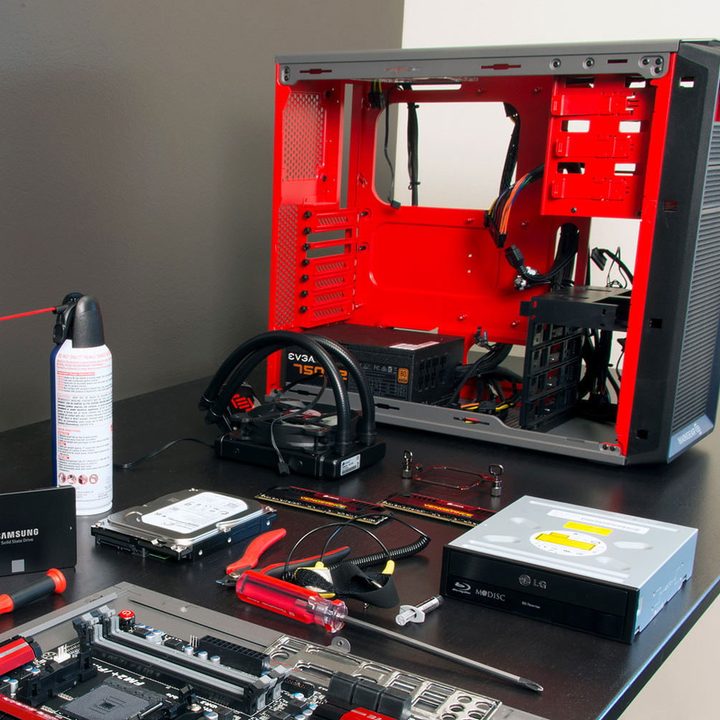
Before you install any PC component, it’s important to get all the tools you’ll need and adequately protect yourself and your hardware. That means wearing an anti-static wristband and performing the installation on a non-conductive surface — definitely don’t do it on a carpeted floor.
In the case of a motherboard, you’ll want a long, Phillips head screwdriver, preferably one with a lightly magnetized tip to hold the screws to it. A pair of needle-nose pliers is a good idea too, should you need to fish out any screws that are dropped within the bowels of your PC case.
We’d also recommend good lighting so that you can see what you’re doing and make sure to have your motherboard manual handy if you have any questions that are specific about your board.
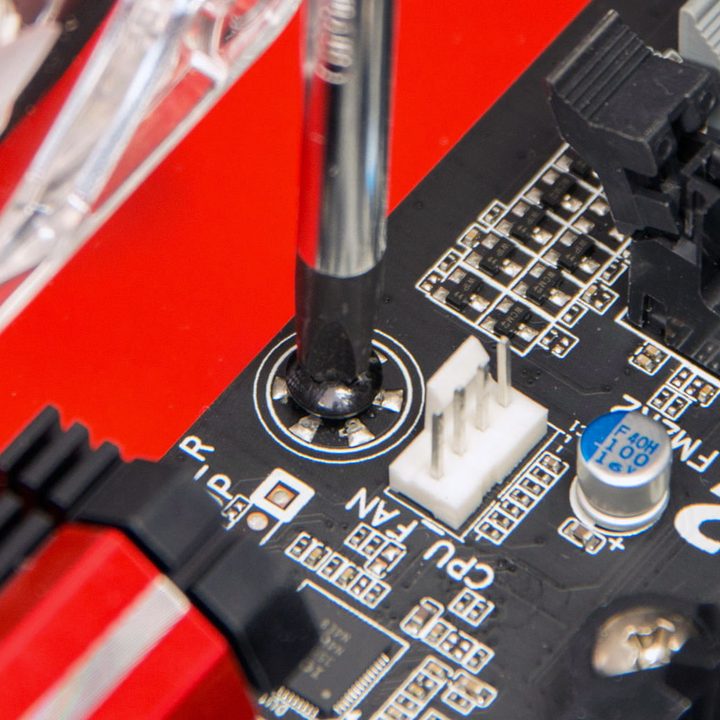
Step 2: Screw in the standoffs
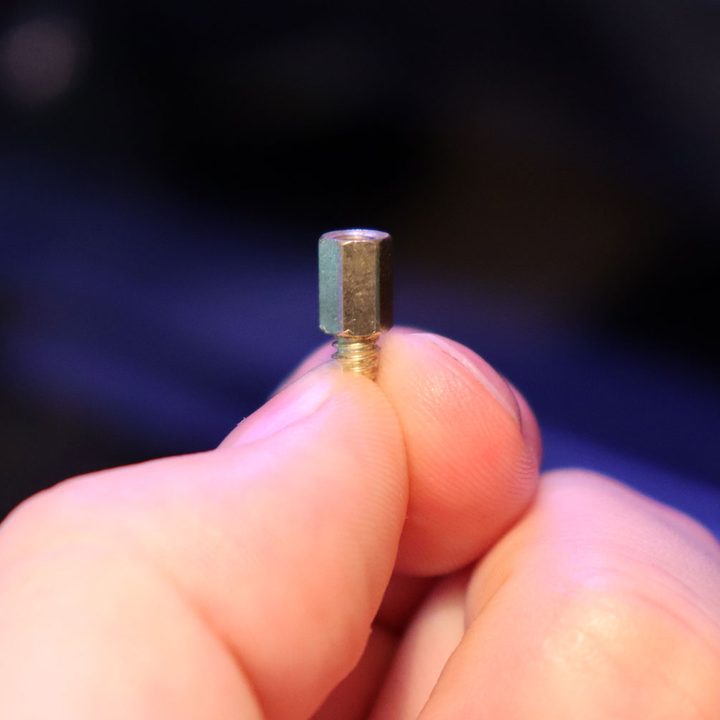
A motherboard is a sensitive piece of electronic equipment, so we don’t want it to come into contact with the conductive chassis of your case. That’s why, before installing the motherboard itself, we need to install the standoffs. They are male screws with a female head, letting you screw the motherboard into them directly. They are often brass, but are sometimes painted black. You should have received a number of them in a small bag with your motherboard, or alternatively, with your case.
Many cases come with these pre-fitted, but not always for the specific form or size of motherboard you’re using.
Refer to your motherboard and case manual (or look for eATX, ATX, mATX, or ITX notes on the motherboard tray) to find out which ones you need to screw in and where. When you’ve found the correct locations, screw them in by hand. It can be a little fiddly, but you shouldn’t need to use any kind of tools to get them in. If you feel the need to, it’s usually because the standoff alignment isn’t right. Readjust and try again.
Step 3: Install the I/O shield
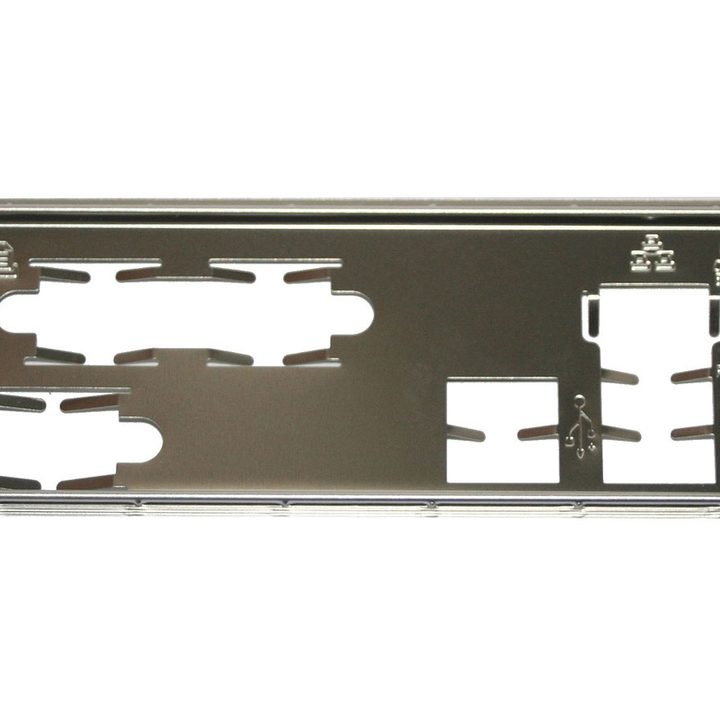
The final step before the motherboard itself, is installing the I/O shield. It’s the silver or black panel that will protect the rear ports of your motherboard and will have come with the motherboard in its box.
Find it and press it into the rear gap in your case. It should be obvious where it goes, but make sure to double check the orientation before pressing it in.
Step 4: Install the motherboard
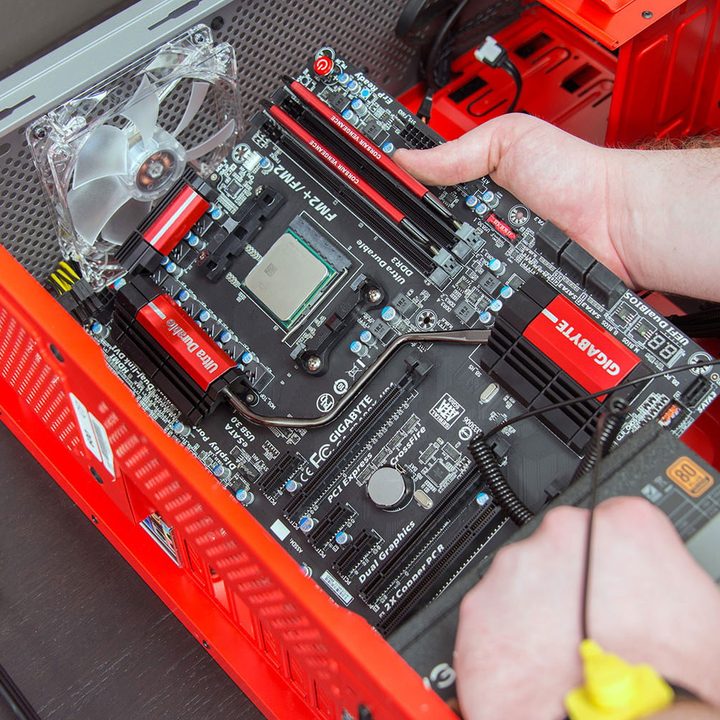
At this point you might want to install the CPU first, but it’s not a must. For more information on that, here’s how to install CPU, whether it’s AMD or Intel. To install the motherboard, you’ll want to carefully lower it into the case — coming in at an angle slanted upwards towards the front of the case can help, depending on the chassis.
You want to line up the screw holes on the board with the spacers you’ve put in place. Make sure it also fits neatly into the rear I/O shield too, and that no pieces of metal cover up any of the ports.
Use the screws included with your motherboard. You may need to hold the motherboard gently in place while you put the first screw or two in, but once those are there, you should have no trouble screwing the rest in. As with the standoffs, if you feel like you’re forcing it, unscrew and start again.
It’s also a good idea to only screw in the screws a little to get them placed, before going around and tightening them all, one by one.
Step 5: The power cables
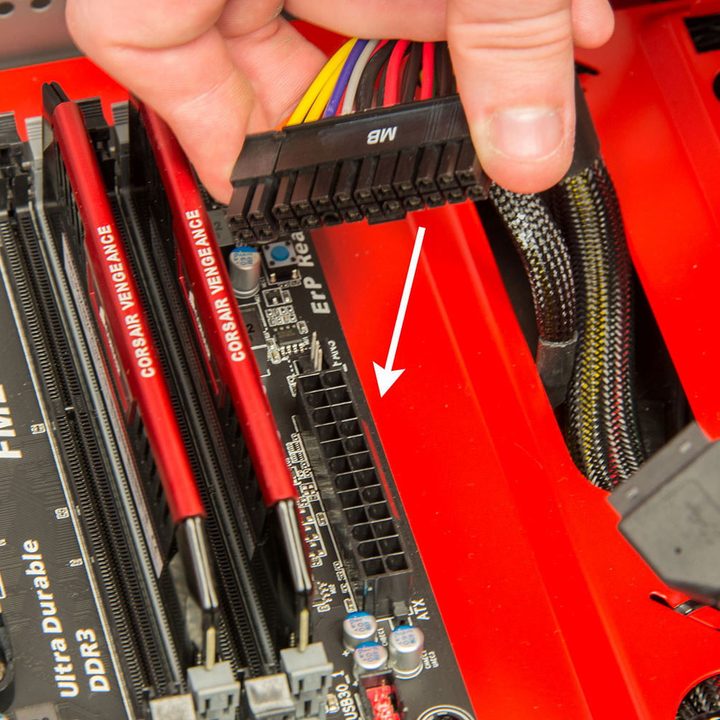
To give power to your motherboard, you’ll need to plug in its power cables too. For most boards this will mean the 24-pin long connector, and a smaller, four or eight pin connector. The former is usually located on the right side of the motherboard after installing it, while the latter is typically found near the top. Placement can vary, however, so refer to your motherboard manual to be sure.
Route the cables to these locations however you like, then gently push them into the respective slot, making sure they are orientated correctly. If you’re not sure, check the shape of the power sockets as they are rounded and squared deliberately to make incorrect inputs impossible.
With that done, it’s on to the other components in your build. Refer to our guide on how to build a PC for more information on them.


