By overclocking your CPU, you can squeeze extra performance out of your PC without spending any extra money on the best processors on the market. Most processors have a little extra headroom, and if you know how to overclock your CPU, you can get extra performance for effectively nothing, helping to make your games and apps run faster. Combined with a GPU overclock, your PC could punch well above its weight.
You'll want to make sure you have a good cooler to keep noise levels and temperatures down, but if you're willing to take the time to learn, an overclock can be a great way to extend the life of your PC's processor. Here's how to do it.

A word of caution
When you overclock a processor, a couple of things happen. First, the chip runs hotter and uses more power, often to the point where the efficiency is significantly worse. This is particularly problematic if you're using a stock cooler, which typically has poor cooling capability. That doesn't necessarily mean you can't overclock, but your potential overclocking headroom is much lower than when using a more advanced air or liquid cooling system in your PC. Using one of the best CPU coolers will help.
Second, you're operating outside of the limits of your CPU when overclocking, which could reduce its life span due to higher temperatures and voltage. But most moderate and even significant overclocks usually won't impact your CPU in any meaningful way.
You'll also have to consider the quality of your motherboard, too. Since overclocking raises power consumption, you'll want to make sure your motherboard has enough voltage regulator modules (or VRMs) to handle it. A motherboard with poor VRMs or an insufficient amount of them will see the VRMs hit dangerous temperatures. When you're stress-testing your PC, we recommend getting an application like HWMONITOR that can report how hot your motherboard is getting. Any component hitting 100 degrees Celsius or more can be dangerous for your PC's health.
If you want to overclock a laptop CPU, you're probably out of luck. Few allow it, and fewer still possess the thermal headroom to make it viable. But even if you can, we caution against it for your first overclocking venture since you might need to resort to more exotic methods, such as applying liquid metal to the CPU cooler and relying on third-party software.
Finally, overclocking your CPU can void its warranty. AMD and Intel typically don't cover overclocking, though they would be hard-pressed to prove overclocking killed your CPU — unless you pushed way too much voltage through the chip. Similarly, motherboard manufacturers may or may not cover overclocking. If you're concerned, check the warranty before trying.
Before you do any of that, have a good think about whether you should overclock your PC's processor, and do as much reading about it as possible to fully inform yourself. Mistakes can prove expensive.
Identify your CPU
Before you start overclocking the CPU, you'll need to determine two things. First, whether or not your CPU can even be overclocked. This info is usually available on the manufacturer's website (that would be AMD or Intel), but the rule of thumb is that virtually all AMD CPUs are overclockable, while only Intel CPUs ending in K or X are overclockable.
It's pretty easy to find out which CPU your computer has.
Next, you'll need a motherboard that supports overclocking, and it's the chipset that matters here. AMD motherboards with the B or X prefix officially support overclocking since 2017; Intel motherboards with the Z prefix are the sole motherboards with official overclocking support. It's not strictly impossible to overclock (or raise clock speeds) with a motherboard that doesn't officially support it, but your options are far more limited (more on that later).
You may be wondering what kind of frequencies your CPU might be capable of hitting. Although there have been some processors that historically could overclock by up to 50%, that is an impossibility with modern designs. They're all so well-tuned that you are unlikely to find more than a few hundred extra megahertz on even the best overclocking chips with standard cooling solutions. That doesn't mean it isn't worth doing, but it's worth keeping your expectations in check. You can often achieve similar performance gains by overclocking your memory.
Know what's safe and what's not
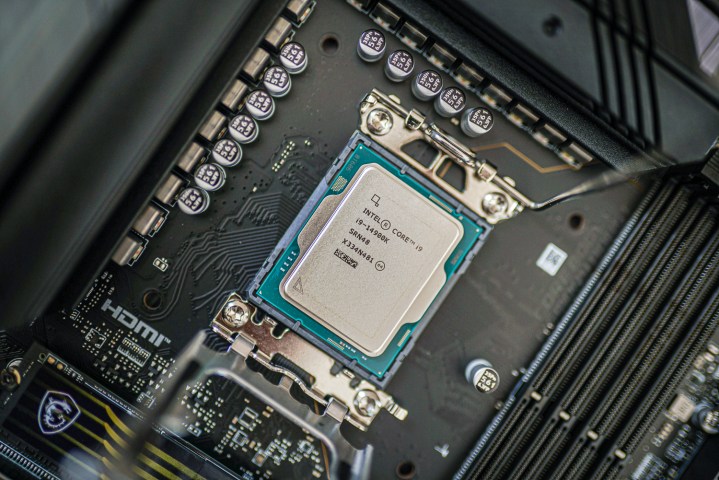
What's safe for your CPU depends on what model it is and how much you're willing to risk. For a long time, 80 to 85 degrees C was considered the hottest a CPU should get, but nowadays, CPUs like the Core i9-14900K and the Ryzen 9 7950X hit 95 degrees C right out of the box. For modern CPUs, 95 degrees C is the new limit. Of course, it's uncertain if 95 degrees C is also safe for older CPUs that run closer to 85 degrees C at stock. For this guide, we recommend keeping temperatures at least under 95 degrees C, though less than 85 degrees C is ideal.
Make sure you're familiar with how to check your CPU's temperature.
In order to give your PC the best possible thermal performance, we recommend taking a can of compressed air and a cloth to clean all the dust out of your PC while wearing an antistatic bracelet. Don't use a vacuum, it can create dangerous static electricity, in addition to not being very good at cleaning out dust from filters, fans, and coolers. You may also decide to give your CPU fresh thermal paste or even get a brand-new cooler.
Voltage depends on two factors of your CPU: its model and its quality. The vast majority of CPUs from a specific generation will have a similarly safe limit for voltage, regardless of chip quality. In the table above, we have provided estimates for what kind of voltage you need to achieve an overclock within the corresponding frequency range, but you shouldn't assume your CPU is safe just because it's at or under that amount of voltage. We stress that it's hard to foresee the long-term consequences of raising the voltage on any CPU.
Furthermore, some CPUs have a higher quality than others and can reach higher clock speeds at lower voltages, which is why there's a range of frequencies rather than a single number. Higher voltage will almost always increase a processor's ability to hit higher frequencies, but since you can't increase the voltage indefinitely without damaging or killing your CPU, having a higher-quality CPU will make a big difference.
You might wonder why temperatures rise so much after overclocking. Well, voltage directly impacts power consumption in the same way that increasing the voltage increases power consumption. Power consumption is what makes a processor hot, which is why higher-end CPUs with more power draw need bigger coolers. Increasing the clock speed will also increase power, and since you'll be increasing both the voltage and clock speed to overclock, you will likely see a dramatic rise in power.
Intel CPU: Extreme Tuning Utility
Since this is a beginner's guide to overclocking, we're going to start off with Intel's Windows-based Extreme Tuning Utility (XTU). It’s a free software suite explicitly designed to overclock your Intel CPU. The main advantages of XTU are that it's official, has tons of settings to tweak, and gives useful statistical information. Even if you're not overclocking, it's a great little utility providing loads of information about your system.
XTU isn't a perfect program, but it is a good gateway into overclocking, even though it can look intimidating at first with its many options. However, you really only need to worry about a few things and most of these options can be safely ignored.
Step 1: The first time you start XTU, take a few baseline readings to make sure your CPU is ready to overclock. Start by running Stress Test located on the left-hand menu. Run this test for at least an hour.
You can sit and watch the test or do something else. If you leave, return toward the end of the hour and look at the system information in the window's base. Take note of the Package Temperature. If your CPU is hotter than 85 degrees C, you don't have much, if any, thermal headroom to overclock. We recommend improving your cooling before continuing any further.
If your temperature is below that — preferably well below — you have some thermal wiggle room to push your chip at a higher frequency (with relative safety).
Step 2: Although you can overclock your CPU using the Basic tab, learning about the different components of an overclock will help you better understand what's happening with the chip. It also makes it easier to achieve a stable overclock. Select the Advanced Tuning tab from the left-hand menu and then look at the section called Multipliers.
Multipliers (or CPU ratios) correspond to the speed you're getting out of the CPU. It's a multiplication of the BCLK frequency, or base clock, which by default is 100MHz. A x32 multiplier would typically mean a turbo frequency of 3.2GHz. Raise your multiplier by one number (x33 in our example) across all cores. Although you can adjust frequencies individually on different cores, we'll push for an all-core overclock to keep things simple.

Step 3: Now, test the overclock's stability. Select Stress Test from the left-hand menu and rerun the test. In this case, you only need to run the test for 10 minutes. If it completes without a problem, increase the multiplier by another step. Rinse and repeat. Eventually, the test will report a fail result, or it will cause your computer to crash. When that happens, step back to the previous multiplier setting.
Step 4: If you're happy with the final overclock, run more extended stress tests and play a few games for several hours to ensure the overclock remains stable. If not, reduce the multiplier another step and begin the stress-testing process again. When you reach a point where you can happily use your PC as usual at a higher frequency, pat yourself on the back for a successful overclock.
Step 5: A way to improve your overclock even further is to try raising the voltage. Many voltage parameters can affect a CPU's operation, but arguably the most important and impactful is core voltage (VCore). You can adjust the voltage using Intel's XTU, similar to how you changed the multipliers. This process can differentiate between unstable and stable overclocks or even the difference between modest and much higher overclocks.
XTU has multiple ways to change the voltage of your CPU. We recommend using the Core Voltage slider to set a specific value. However, you can also use the Core Voltage Offset, which is a value that is added to the Core Voltage. The nice part about using the offset slider is that you can allow the CPU to manage the core voltage automatically, allowing it to fall when the CPU is idle, which means better power efficiency and temperatures but also a lower overclock. However, if you use the offset slider, you need to monitor the voltage at which your CPU is running.
Be warned: You need to take more care when adjusting the CPU voltage than you do with multipliers. If you push the CPU to run at a ridiculously high multiplier, it will just crash and restart your system. If you try to force too much voltage through your CPU, it can kill it, so proceed with caution. For most Intel CPUs that came out within the last five years, you'll want to stay at or below 1.3 volts if you want to be relatively safe, while 1.4 can be acceptable for older CPUs (6th Gen and older especially), but 1.5 volts is almost always dangerous for modern CPUs.
When ready, select the Advanced Tuning tab in the left-hand menu of the XTU and increase your core voltage by about .025. For example, If you're starting at 1.250, move to 1.275. Select Apply. If the system doesn't crash, you can rerun the stress test to see if you're still within a safe temperature range.
Step 6: At this point, you have all the tools for finding your CPU's stable overclock. Take it steady and only increase the multiplier by one each time, and only increase the voltage by .025 volts (or 25 millivolts) with each attempt at achieving stability. You'll also want to keep an eye on the temperature, which shouldn't be higher than 95 degrees C, the thermal throttling threshold for most CPUs. Lower temperatures are better, but you may decide running the CPU at a hot temperature is worth the reward.
If your system crashes or restarts, that's a telltale sign you've pushed the frequency too far. Go back and make some adjustments. The most important outcome is that you find a safe and stable frequency for your CPU. It's fun to push it to run at a much higher frequency, but if it's not steady enough to run applications or play games without crashing, it's not much use outside of bragging rights.
Once you've hit the thermal or voltage limit, you should stop and try running the stress test for an hour. If it passes, then you have finally achieved what is probably the best overclock your CPU is capable of. If your PC crashes, then dial the frequency back a bit and try again. Once you've finished locking in your clock speed and voltage, you should save a profile in XTU so you can reapply it later in the event that it wasn't actually stable or if you want to try overclocking again.
Overclocking a locked CPU
If you have a locked Intel CPU, this section is for you. So, you can't do any of the fancy stuff we discussed in steps 1 through 4, but there are options in XTU that can increase the frequency of your processor: raising the power limit and increasing boost times. Tweaking these settings may allow your CPU to boost higher and for longer periods of time, but your mileage may vary.
Under the Core section of XTU, where voltage and multiplier controls are found, you should see two sliders labeled Turbo Boost Power Max and Turbo Boost Short Power Max. Go ahead and crank these up to Unlimited. Don't worry; this isn't like raising the voltage on your CPU -- it's just raising the maximum power consumption possible. You'll also find a slider labeled Turbo Boost Power Time Window. Set that as high as you can. With these changes made, your CPU should try to hit a higher frequency when boosting and for longer.
This is not a comprehensive look at locked CPUs and how they function in XTU, so you might have less or even more options than we've described, such as additional boost and power limit options we're not aware of. You may also be able to raise the core multiplier on individual cores so that the core frequency is higher than it would normally be, but that depends on what hardware you have.
PCs using locked CPUs, particularly laptops, will likely run into hardware limitations; your CPU might overheat or be incapable of consuming more power. It's possible to remedy thermal constraints by using a better cooler, fancier thermal paste, or some kind of cooling pad, but if you see a Yes under Power Limit Throttling and Current Limit Throttling, then the only thing you can do is lower the voltage, which will make the CPU more efficient and allow it to hit higher clock speeds. However, the voltage can only be reduced so much until the system is no longer stable.
In fact, for thermally limited systems (primarily laptops), simply lowering the voltage might be enough to achieve a higher clock speed, assuming your CPU has somewhat modern boosting technology. Obviously, this isn't overclocking at all, but if you're just looking for extra performance, undervolting might be the solution.

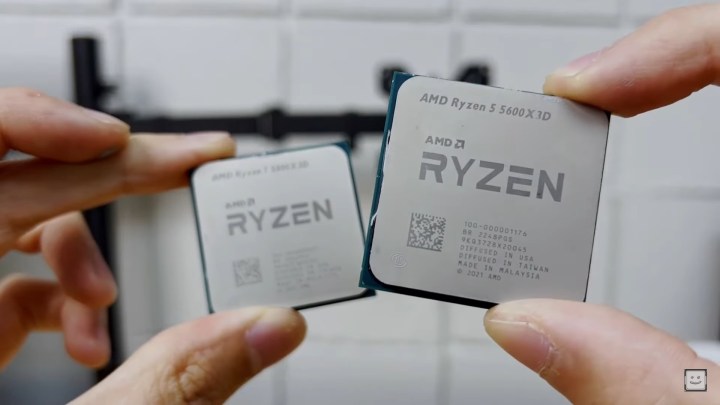
AMD CPU: Ryzen Master
AMD Ryzen desktop CPUs have their own version of XTU, called Ryzen Master. It's very similar to XTU, but arguably more modern and with more useful features for people who just want a quick and easy overclock. Unfortunately, you can only use Ryzen Master on desktop chips; all mobile CPUs are locked out.
Older AMD processors from the FX and A series use AMD Overdrive instead. Overdrive is pretty similar to Ryzen Master, but not quite the same, so double-check what you're doing every step of the way.
Step 1: Before you begin overclocking the CPU, make sure that it won't exceed safe temperatures. Although Ryzen Master has its built-in stress test, it doesn't last very long, which means it's not a very good stress test. Thankfully, there are plenty of third-party applications that can stress test your PC, such as AIDA64, Prime95, and Cinebench.
In this guide, we recommend using AIDA64 as it has hardware monitoring built into it, just like XTU and Ryzen Master. Open AIDA64 and select Tools from the top menu, followed by Stability Test. Press Start when ready and leave your PC for around an hour. Make sure that at no point during testing do the temperatures exceed 80 degrees C. If they do, improve your CPU cooling before trying to overclock.
Step 2: The latest Ryzen Master software is packed with options, the majority of which you don't need for a basic overclock. To keep things simple, make sure you're in the Basic View. If your software matches the screenshot above, you're all set. If not, select Basic View from the bottom-left corner of the expanded interface.
For the quickest and easiest overclock, select Auto OC to have the software do it for you. If you want to overclock manually though, follow these steps:
First, switch the Control Mode from Default to Manual. This will allow you to manually adjust clock speed and voltages, which you'll need for the overclock. This will unlock the CPU Clock Speed and CPU Voltage sliders. This time, you'll be increasing the total clock speed rather than a multiplier.
Boost the CPU Clock Speed by 50MHz, then select Apply & Test. Ryzen Master will boost your processor's frequency and test it, but we recommend you run a stress test in AIDA64 as well.
Continue this process until you've reached the speed you want or you experience a crash. After that point, dial it back to the last stable setting and use your computer for several hours (or maybe even a day or two). If it crashes again, step it back again and test again. When it's able to run all day while stressed, this is your base overclock, which you may be able to fine-tune for a little extra speed using voltage control.
Step 3: Increasing the CPU's voltage can improve the stability of an overclock and also allows you to overclock even further. The drawback is that it can dramatically increase temperatures due to increased power draw. Pushing the voltage too high can damage your processor as well, so proceed with caution. Only make small adjustments at a time.
Ryzen 1000 and 2000 CPUs are mostly safe at voltages at or below 1.4 volts, but if you have a Ryzen 3000 or newer CPU, you'll want to stay at 1.3 volts or less. If you're willing to take the risk, use the CPU Voltage section to push up your voltage by a .025 volt increment. After that, hit Apply & Test to make sure the system is stable, then go back and repeat the process.
Just as with Intel CPUs, we recommend you read reviews and posts made by users on forums such as r/overclocking to get an idea of how far you can go. But as far as we can tell, most Ryzen CPUs (particularly higher-end chips) overclock pretty poorly as they're already clocked very high out of the box. To make matters worse, manually overclocking disables many of Ryzen's boost technologies, which means applying an all-core overclock will almost certainly reduce single-threaded performance, especially on models rated for higher frequencies.
Step 4: Continue to increase frequency until your system crashes and then increase voltage so that you can achieve stability and increase the frequency more. Eventually, you'll run into one or more problems that prevent you from going further: Hitting the maximum safe voltage for your CPU, hitting 95 degrees C or more in the stress test, or using up your power budget. Run one more stress test, this time for an hour, and if it's stable, you've achieved the highest overclock you probably can. If your PC crashed during the stress test, however, you'll need to lower the clock speed a little.
When Ryzen Master loads with Windows, it may prompt you to provide your admin approval to apply the overclock. You can start the app and manually apply the overclock if it doesn’t ask for your permission.
How to overclock your CPU with the BIOS
Before XTU and Ryzen Master existed, people overclocked by going into the PC's BIOS. The experience, while less convenient and often more time-consuming, is very similar to what you see in XTU and Ryzen Master, but with the potential for more customizability and thus higher clock speeds.
Step 1: These days, it is crucial to get familiar with your board, specifically its BIOS. There are a couple of different ways to get into the BIOS. The typical way is to press a specific key before your PC boots into Windows; this key is usually Delete, F11, or F12. Just keep pressing the key until you get into the BIOS.
However, it's possible that with Fast Boot enabled, or if you have a particularly quick SSD, you'll miss the window for pressing the key. To get around this (on Windows, that is), you can search for Advanced startup in the Windows search, find the Restart now button in the Advanced startup option, and when your PC reboots, you'll see the Windows recovery screen. Select Troubleshoot, then Advanced options, and finally UEFI Firmware Settings.
Next, you'll want to find the section with all the overclocking stuff. Usually, it's pretty simple to navigate to this part of the BIOS, but if you're having trouble, we'd recommend consulting your motherboard's manual or trying to find a guide for your specific board. Also, many newer motherboards are coming with simpler UIs enabled by default, and to get to the overclocking section, you'll have to press the key that shows you the full UI. If you're looking at the BIOS and there's almost nothing in there, it's probably in some simple UI mode.
Once you find the overclocking section, you'll want to familiarize yourself with all the options and what you can tweak. Like with XTU and Ryzen Master, we're focused mainly on the CPU's frequency and voltage, but depending on your motherboard, things will look slightly different. On Intel motherboards and sometimes AMD motherboards, raising the clock speed will be done by increasing the CPU multiplier or CPU ratio, which is multiplied against the base clock (or BCLK), which by default is 100MHz. A multiplier of 30 means 3000MHz, or 3GHz. On most AMD motherboards, you instead input the frequency into a field labeled something like CPU frequency.
If you don't see any way to adjust the frequency or core voltage, you'll need to find an option that enables manual tweaking. Again, this varies depending on your motherboard, but usually, you'll see something like Automatic, which you can change to Manual. After you do this, you should see and be able to change these figures.
Step 2: Before you start tweaking settings, you'll want to stress-test your PC. There are many applications you can use to stress-test an overclock, but we recommend AIDA64, Prime95, or Cinebench R23. AIDA64 and Prime95 can quickly reveal stability and thermal issues thanks to their extreme intensity; however, they are somewhat unrealistic as you'll probably never run into a real-world workload that will force your CPU to consume so much power. Cinebench R23, on the other hand, is a little lighter, more realistic, and provides a score to see how much more performance you're getting from your overclock.
If your PC can run any of these benchmarks for over an hour without hitting 80 degrees C, then you're ready to start overclocking. If you do see temperatures above 80 degrees C, we recommend improving your cooling solution, as you won't have enough thermal headroom to achieve anything but a minor overclock.
Step 3: From here on out, the process is similar to what you see in XTU and Ryzen Master: gradually increasing the frequency and then testing your PC's stability. For Intel CPUs and pre-Ryzen AMD CPUs, you'll only be able to raise the frequency in increments of 100 MHz via the CPU ratio. Ryzen CPUs can handle smaller increments, but we recommend going in steps of 50MHz or 100MHz.
Once you've changed the CPU ratio or frequency, save changes and exit the BIOS. Then, run the stress test of your choice for at least 10 minutes; you don't need to do another full hour yet. Keep repeating this process until your PC crashes or if you see the CPU's temperature hit 95 degrees C. At this point, you can't increase the frequency any more.
Step 4: In order to increase frequency, you now need to increase the voltage. You'll need to find the field that says something like CPU core voltage or CPU voltage. You may have the option to either input a single value or an offset. We recommend a single value due to its simplicity and greater overclocking potential, but it's possible to achieve better temperatures and higher efficiency in general with an offset, though your overclocking potential could be limited. Furthermore, if you use an offset, you need to carefully monitor your CPU's voltage during the stress test to make sure it's safe.
There's another option you might want to check out: load-line calibration (LLC). Higher levels of LLC will mitigate voltage droop and hit its intended voltage quicker. What this means for overclocking is more stability and potentially more overclocking headroom, but there can be consequences for increasing LLC. In a worst-case scenario with high LLC, your CPU might overshoot its intended voltage and hit dangerous levels, potentially causing CPU death. We recommend keeping LLC at the medium level, which is usually called LLC 3.
We recommend starting at the default voltage and adding voltage in .025 increments. So, if your voltage started at 1.2 volts, you'll add .025 to come up with 1.225 volts. Once you've done this, save and exit, and start the stress test again. If your PC is now stable, then you can go back into the BIOS and start increasing the clock speed again.
Step 5: Now, it's a process of increasing the frequency until your PC crashes and then raising the voltage, and starting the process all over again. You should stop once you've approached the limit of what voltage you're comfortable with or a temperature of 95 degrees C. You might also run into power limitation issues, but that will depend on your motherboard and your CPU's power consumption.
Once you've come to this point, save a profile of your settings in the BIOS, reboot, and run an hourlong stress test. If your PC passes, then you're done, but if it crashes, you'll need to lower the clock speed until your system is stable.
Step 6: If you have a locked CPU, that means you can't change the multiplier, but that's technically not the only way to increase the frequency. By raising the BCLK, you can increase the frequency without even touching the clock multiplier. There are a few reasons why you shouldn't (or can't) do this.
Firstly, BCLK overclocking makes everything on the motherboard operate at a higher clock speed. That might sound like a good thing, and it is until your motherboard stops working properly. It's unlikely you'd do permanent damage to your board, but you'll definitely make it way less stable if you increase the clock speed too much.
Secondly, stable BCLK overclocks usually aren't very high due to that stability issue. Even 10% might be a long shot, and you could end up getting something as measly as 3%, which isn't exactly amazing.
Finally, it's usually impossible to alter BCLK on motherboards with locked chipsets. It's extremely unlikely you'll be pairing a Z690 board with a Pentium G7400, for example, which makes BCLK overclocking unrealistic from a financial perspective, too. If you have a locked CPU, you're better off looking into settings like Multi-Core Enhancement and anything else that's related to raising power limits and increasing boost times (which you can do with XTU and Ryzen Master anyway).