  1. Home
  2. Computing
  3. Apple
  4. Evergreens

MacOS Monterey just launched. Here’s how to upgrade your Mac

Add as a preferred source on Google

MacOS Monterey is here. Apple’s latest Mac operating system has finally been released with a bunch of great new features for your computer. Want to install it on your Mac? You’re in the right place, as we’ll take you through the necessary steps to get MacOS Monterey onto your Apple computer.

Just follow the steps below and you’ll be good to go.

Recommended Videos

Step 1: Check compatibility and back up

The Time Machine back up option in the MacOS menu bar.
Digital Trends

Not every Mac will be able to install MacOS Monterey. Check your Mac against the following list of devices that Apple says can run MacOS Monterey:

  • MacBook Air (early 2015 or later)
  • MacBook Pro (early 2015 or later)
  • 12-inch MacBook (early 2016 or later)
  • iMac (late 2015 or later)
  • iMac Pro (2017 or later)
  • Mac mini (late 2014 or later)
  • Mac Pro (late 2013 or later)

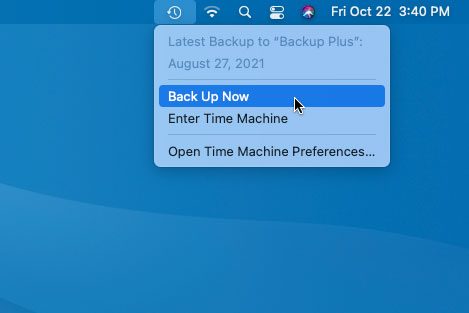
Once you know your Mac qualifies, you should back up your Mac to ensure you can recover your computer if something goes wrong. The best way is to connect an external drive and use Time Machine, which comes installed on your Mac. Simply connect the drive, open System Preferences and click Time Machine, then tick the checkbox marked Show Time Machine in menu bar. Click the Time Machine icon in your menu bar, then click Back Up Now.

Back in System Preferences, make sure the Back Up Automatically checkbox is also ticked so your Mac will handle backups for you in the future.

When the backup has finished, continue to step 2.

Step 2: Open About This Mac or System Preferences

The About This Mac screen in MacOS Big Sur.
Image used with permission by copyright holder

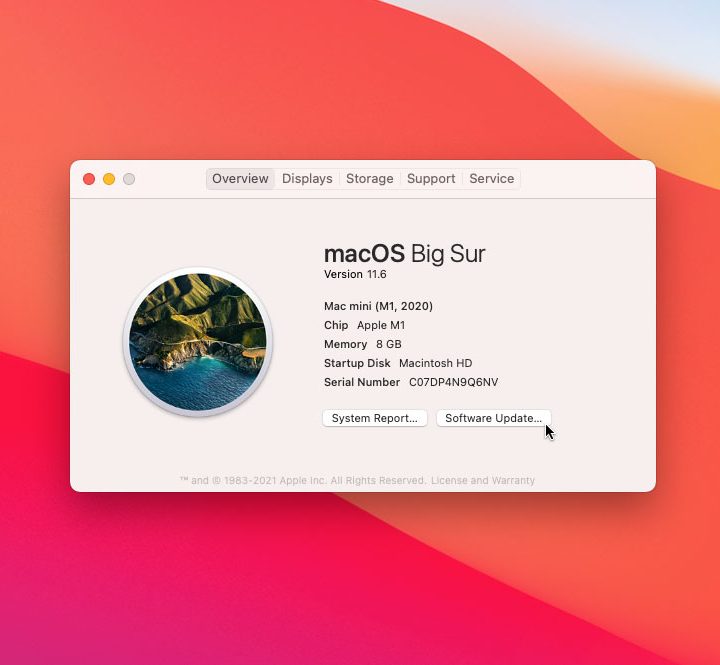
There are two ways to find the MacOS Monterey update on your Mac. The first method is to click the Apple icon in the top-left corner of your Mac’s screen, then click About This Mac. From there, make sure you are on the Overview tab, then click Software Update.

Alternatively, open System Preferences and click Software Update.

Step 3: Download and install the update

The Software Update screen in MacOS Big Sur.
Image used with permission by copyright holder

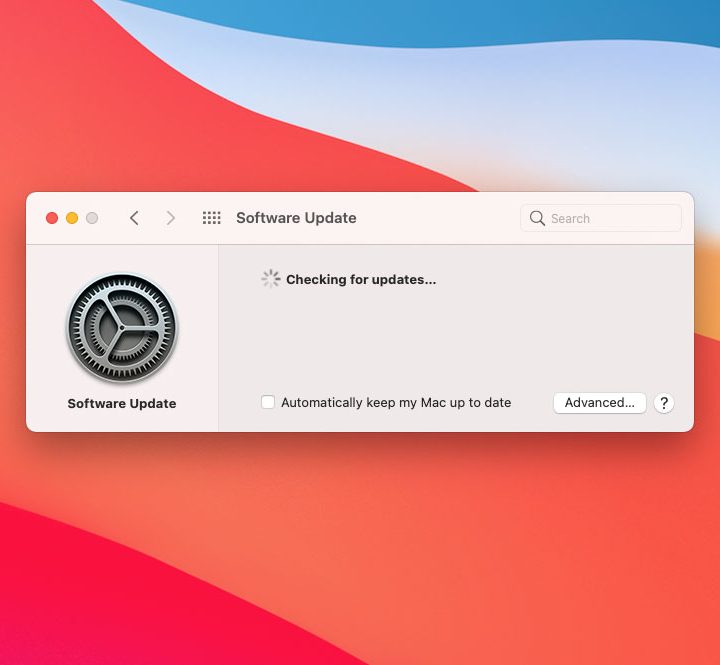
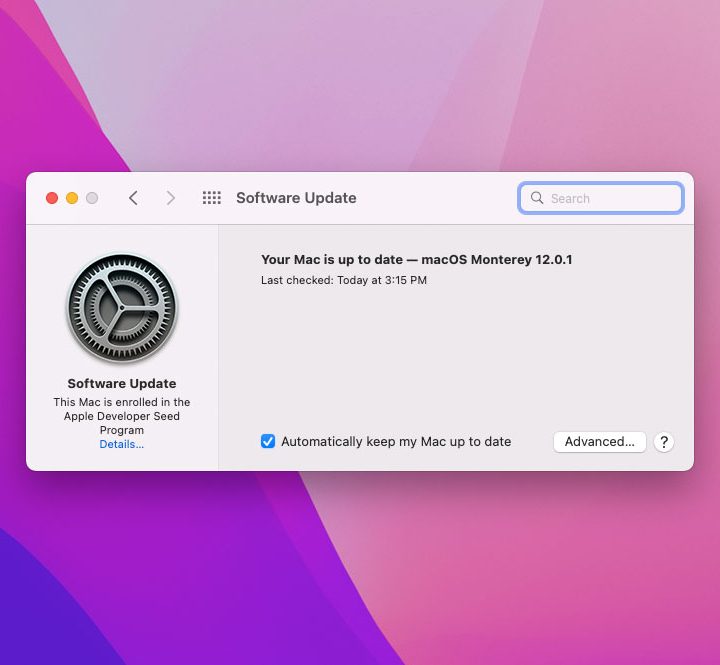
Your Mac will now check to see if it has the latest updates. If you are not already on MacOS Monterey, an update will appear giving you the opportunity to update. When you are ready, click Upgrade Now.

Your Mac will begin downloading the update. When it is finished, you will be prompted to restart your Mac so that the update can install. Click Restart Now.

Your Mac will restart and begin installing MacOS Monterey. This can take a little while, and your Mac might restart a couple times during the process.

Step 4: Successful installation

The Software Update screen in MacOS Monterey.
Image used with permission by copyright holder

When the installation process has finished, your Mac will load into your login screen. MacOS Monterey has now been installed!

Alex Blake
Alex Blake has been working with Digital Trends since 2019, where he spends most of his time writing about Mac computers…
The refurbished MacBook Neo may be your best way around Apple’s price hike
MacBook Neo has hit Apple’s refurbished store after its price increase
Student using MacBook Neo in classroom.

The MacBook Neo launched in March as Apple’s most affordable notebook, but it has already been caught in the company’s recent price hike. The base model with 8GB of RAM and 256GB of storage now costs $699, while the 512GB version with Touch ID is priced at $799.

Just days later, Apple has already listed refurbished MacBook Neo models on its online store, giving buyers a cheaper official option, though the savings are not as generous as you might expect.

Read more
This cross-device clipboard app solves the copy-paste problem I keep running into on my Mac
ClipboardAI keeps a searchable history of everything you copy
Text, Electronics, Mobile Phone

I have lost count of how many times I have copied something important, copied another thing before pasting it, and then realized the first item was gone. It is a small frustration, but it happens often enough to become annoying. I recently came across ClipboardAI, which caught my attention because it goes beyond Apple’s built-in clipboard by saving copied items into a searchable history.

Instead of replacing the last thing you copied every time, ClipboardAI keeps a searchable record of copied text, links, codes, email addresses, phone numbers, addresses, and images across iPhone, iPad, and Mac. That means an older clip does not disappear just because you copied something new.

Read more
If you miss the feel of paper in the digital age, this app gives your Mac’s screen a textured look
A paper-like screen overlay could make long work sessions feel less harsh.
Advertisement, Poster, Electronics

Most screen-comfort tools work by changing color temperature. Apple’s Night Shift makes the screen warmer, often giving everything an orange tint. Paperman is an interesting alternative because it adds a subtle paper-like texture over the display instead.

The app is available for Mac and Windows, and it is designed to make a screen look closer to paper, matte glass, or an e-ink display. It softens the harsh contrast and reduces the glossy look of modern screens during long reading or writing sessions.

Read more