Spotlight, OS X’s desktop search utility, has existed for years. However, in OS X Yosemite, it gets a much needed update. The new version has added a wealth of features that make it one of the best desktop search options around. Here’s what you need to know.
Starting with Spotlight
At its original Yosemite presentation, Apple indicated that Spotlight would start to work as soon the user started typing on a blank desktop. This feature is either not active yet, or has been cut, but it’s still easy to activate the tool through shortcuts.
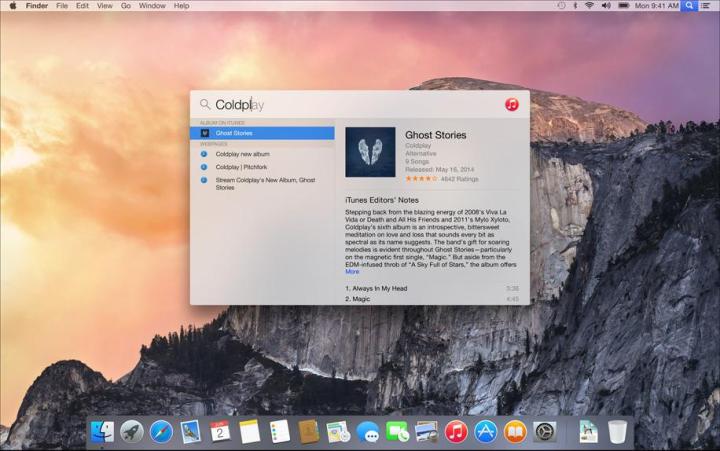
By default, there are two shortcuts you can use with Spotlight. The first is Command + Spacebar, which brings up the standard search menu. The new incarnation of Spotlight revolves around a window that appears in the middle of the display. It brings in results not only from your local computer, but also iCloud, and the Internet as well.
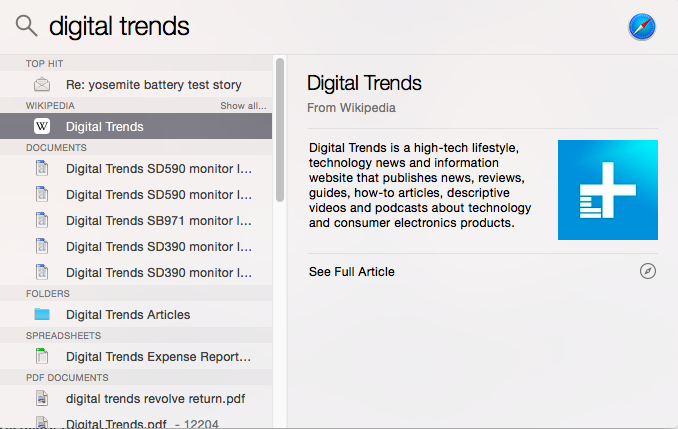
Let’s say, for example, that you search for “Yosemite.” Doing so will provide you with a map of Yosemite National Park, a Wikipedia article on the same place, and a dictionary entry for the term. You’ll also, of course, see any files or emails on your computer which have “Yosemite” in their file name or text.
Alternatively, you can hit Option + Command + Space to open a Spotlight search window in Finder. This is handy if you’re only interested in finding files. While the new Spotlight window is useful, it prioritizes Web results over files; the former appears above the latter. Opening Finder to search will let you hone in exclusively on locally stored content.
Both of these shortcuts can be rebound by going to Spotlight’s preferences, which are found in the System Preferences menu. However, you can only rebind each to one of the F1 through F12 keys.
Fine-tuning search
Spotlight’s preferences also let you fine tune search results by excluding certain categories of items. By default, everything is turned on, but you can change this by de-selecting what you don’t want. If you find the dictionary results to be unnecessary, for example, you can remove them, and the same goes for Web search (which is enabled via Bing, by the way).
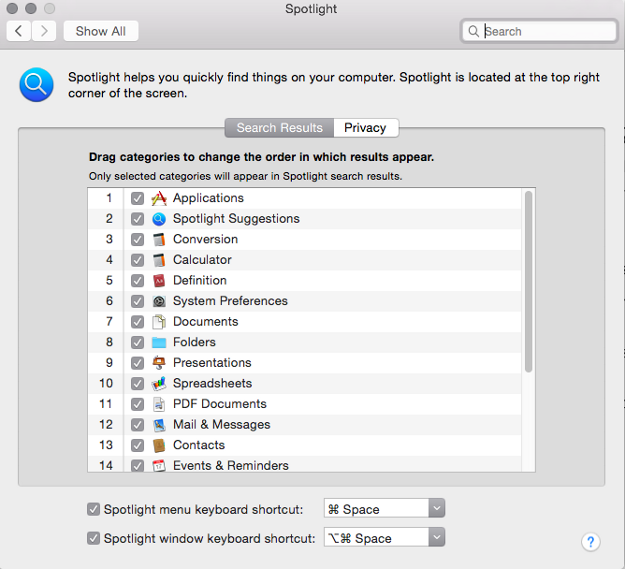
You’ll also find a privacy tab in Spotlight’s preferences. This is not populated by default, but you can add any folder that you like. Adding a folder to the privacy tab ensures that it will never show up in Spotlight.
There are no parental controls for Spotlight, but only because they’re enabled by default. We tried searching for a number of terms that might be offensive, including sexual slang, and none of them pulled results from the Web. Results will appear if these words are included in your emails, documents or file names, however.
Advanced Spotlight search tips in Yosemite
Spotlight still includes all the search features that worked in previous versions. Here are some shortcuts that will help you fine-tune your results.
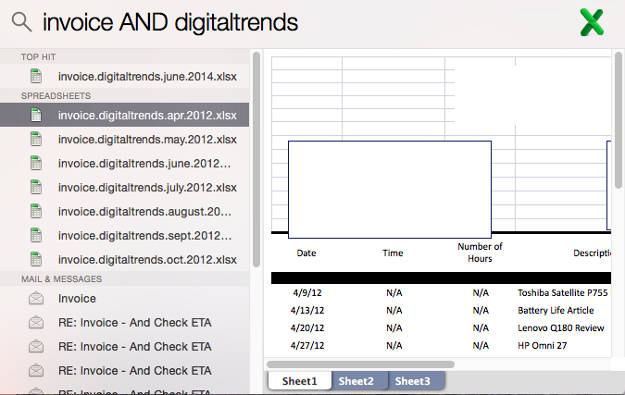
AND, OR and NOT – These terms, which must be entered in all-caps, will let you refine your results by combing or excluding terms. Entering “yosemite AND mac,” would help you filter out documents that are about Yosemite (the national park) rather than Yosemite (the OS X operating system). Note, however, that these operators seem to automatically exclude Web results from Spotlight’s search.
Kind – This term, which does not have to be typed in all caps, will limit your search to a specific file type. After typing in “kind,” you need to enter a file extension. For example, “spreadsheet kind .xlsx” will limit a search to Excel spreadsheets.
Modified and created – These terms, which do not have to be typed in caps, let you limit a search based on created or modified date. For example, the search “spreadsheet created: 7/4/2014” will limit your search to the fourth of July. You can also enter a range, such as “7/4/2014-7/30/2014” or a date keyword used by OS X, such as “yesterday” or “today.”
You can combine these operators in a variety of ways. For example, using kind and modified will restrict a search to only specific kinds of files modified in a specific date range. Familiarizing yourself with the operators will help you create extremely specific searches to find files you thought were gone for good.
Conclusion
The new version of Spotlight works extremely well, even in the beta version of Yosemite. Files are indexed extremely quickly, results appear within seconds, and a wide variety of data is available regardless of what you type in. Plus, Spotlight only takes up a small portion of your desktop. There’s no need to keep looking for the best desktop search tool – this is it!
If you want to read up on Yosemite’s other new features, feel free to check out these guides on how to send calls and texts in OS X, how to use the new notification center, and how to make the most of Mail Markup.
Editors' Recommendations
- How to add and use desktop widgets in macOS Sonoma
- How to download MacOS Big Sur
- The best new MacOS Monterey features Apple just announced
- Mac OS X is 20 years old today. Here’s why it was so revolutionary
- Apple could end antitrust woes by making the iOS App Store more like the Mac’s