I’ve built hundreds of PCs. I’m not confident enough to say thousands yet, but I’m sure I’ll hit that mark before too long. Every time I go to review a new graphics card or processor, I go through the process of tearing down and rebuilding PCs half a dozen times or more. And I’ve gained a lot of insight into the process during that time.
I don’t sell the PCs I build — I simply use them for evaluation — but it’s a process I engage in so often that it feels second nature. Here are five tips for building a PC that you won’t find in a guide on how to build a PC.
Screws come with your case

This is a more common issue than you might think. Nearly all of the screws you need to build your PC will come with your case. Most brands, especially if you’re buying one of the best PC cases, include a small accessory box. In it, you’ll find your motherboard, hard drive, and power supply screws. No, these screws don’t come with your motherboard, hard drive, or power supply. They all come with your case.
That may seem obvious if you’ve built a PC with brand-new parts; not something you need to worry about. There are plenty of cases where you won’t be building with brand-new parts, though. Maybe you’re repurposing a case from a pre-built PC, or maybe you picked up a case secondhand. In either situation, you may not have all the screws you need to complete the build.
This happened to me recently. A friend of mine upgraded his PC, and he was giving some old components to another friend. They brought everything over and we chipped away at the early stages of the build before realizing that we didn’t have enough motherboard screws. Thankfully, my friend kept his accessory box, so we were able to get everything squared away.
The lesson here is to keep your accessories when building a PC. Extra screws and cable ties may not seem like a big deal, but you never know what you’ll do with your hardware once you decide to upgrade. Thankfully, you can buy extra screws separately. Most motherboards use #6-32 x 3/16″ or M3 screws, and you can pick up a kit of miscellaneous PC screws on Amazon for about $10.
Phantom storage

Without fail, I’ll get a call from a friend who’s built a PC for the first time with the same alarm: “My hard drive isn’t showing up in Windows.” If you built your PC with two (or more) hard drives, you’ll reach your operating system and find that only one shows up: the one you installed Windows on. Don’t worry, your hard drive isn’t broken and you don’t need to send it back. You just need to tell Windows about your new component.
In the Windows search box, search for “Create and format hard disk partitions.” This will bring you to the Disk Management screen, where you can see all of your hard drives and their various partitions laid out. Check the list, and you should see a drive with a black bar that says “Unallocated.” Right-click the virtual mass and select New simple volume.
This will take you to the volume creation wizard, where you can assign your new hard drive a letter, give it a name, and format it to work with Windows. You should only do this if you’re using a new drive, though. This process will erase all of the data in the partition.
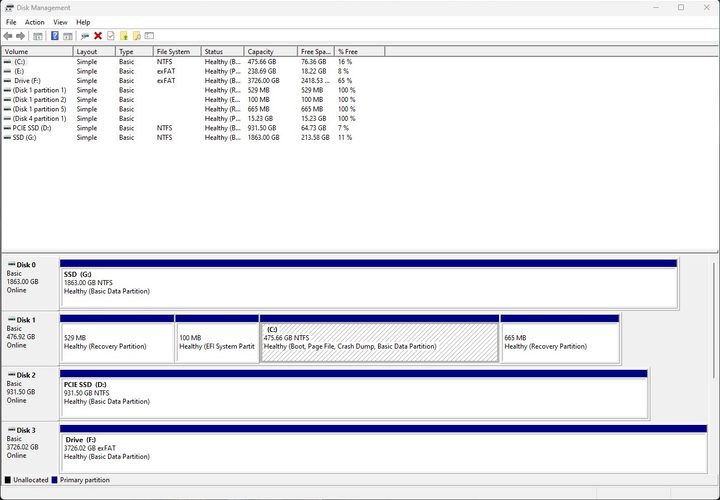
Although I’m highlighting Disk Management here for formatting a new hard drive, there are some other things you can do with this window. For instance, you can take one hard drive and split it into multiple partitions. If you have a massive 8TB disk, you can split it into two 4TB partitions, or four 2TB ones. These partitions will show up separately in Windows, making it easier to organize your files.
I had to resort to Disk Management for a USB drive recently, even. After reinstalling SteamOS on my Steam Deck, a 16GB USB drive was formatted for the Linux file system. Because of that, it only showed up in Windows as having 128MB of storage — the leftover space that SteamOS didn’t gobble up in Linux partitions. I hopped into Disk Management, removed the SteamOS partitions, and reclaimed all of the space on the drive.
More fans isn’t always better

If you frequent the drool-worthy Instagram feeds of PC builders and modders, you’re probably under the impression that more fans are better. That’s not always the case, and with how expensive the best PC fans are, you can spend a lot of aesthetics for very little practical benefit.
Around a decade ago, there was much more conversation around the balance of fans in your PC case, nearly all of which has dissolved. It’s still an important topic for new PC builders, though. When selecting the number and placement of PC fans in your case, it’s important to think about the flow of air throughout your case.
PC fans break down into two groups. Either they’re drawing cool air into the case (intake fans) or they’re exhausting hot air out (exhaust fans). You’ll know if the fan is intake or exhaust by looking at the orientation. If the front of the fan is facing out of the case, it’s an intake fan. If the front of the fan is facing toward the case, it’s exhausting air.
The most important thing when building a PC is to have your intake and exhaust fans reasonably balanced. It doesn’t need to be one-to-one, and the traditional wisdom is that you actually want one more intake fan than an exhaust fan — I’ll get to why in a moment — but you want to make sure that you don’t skew too heavily in one direction or the other. If you have twice as many exhaust fans as intake fans, or vice versa, you’ll have a PC that runs loud and is prone to accumulate dust.
This all comes down to airflow throughout your case and the air pressure it creates inside your case. Too much positive air pressure (too many intake fans), and you’ll be drawing dust in. Too much negative air pressure (too many exhaust fans), and you’ll be forcing air to come through your case by any means and build up dust. Balance is key to keep your system running efficiently and to avoid dust.

I usually stick with one more intake fan than exhaust fan, creating slight positive air pressure. That’s because most modern PC cases include dust filters, helping keep dust out of your case with an extra intake fan.
In a situation where your intake and exhaust fans aren’t balanced, you’ll not only accumulate more dust, but your PC will run louder. If you have several exhaust fans without enough intakes to balance them, or vice versa, they will be working against each other. That means they’ll continue to spin and create noise, even if they aren’t providing any benefit. For instance, if you have three intake fans and three exhaust and you add another three exhaust fans, you’ll see essentially no impact on temperatures in your PC, all while gathering more dust and generating more noise.
Keep in mind this idea with your all-in-one liquid cooler, as well. If you’re using an AIO, its fans definitely count toward the number of intake and exhaust fans in your PC. A 240mm AIO exhausting air with three 120mm drawing air in would be an ideal scenario with this type of setup.
Hardware is only half the battle
If you’re building a PC for the first time, you’ll spend so much time on the hardware that it’s easy to forget everything you need to do once all the parts are pieced together. There are some configuration steps you should take after building a PC to ensure it’s running in its best possible form.
For starters, grab any Windows updates available and check your motherboard vendor’s website for additional drivers. Your PC will still boot, and you’ll still be able to use it, but Windows will rely on basic, built-in drivers to ensure your PC even functions. Additional chipset and networking drivers are good to pick up to make sure everything is up to snuff with your networking and to avoid any stability issues.
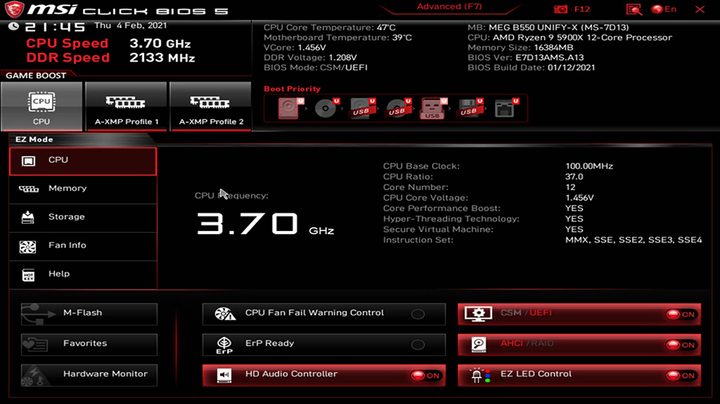
The real configuration you need to do happens in the BIOS, though. Shut down your PC and spam the Delete key while booting it. You’ll enter the BIOS. Every motherboard’s BIOS is a little different, so make sure to look up your specific model to find out where everything is. Here are a few things you’ll want to turn on:
- Intel XMP or AMD EXPO — These are overclocking profiles for your RAM, and you’ll need to turn one off for your memory to run at its rated speed.
- Resizeable Bar — This is essential for your GPU to run at its full potential. Nvidia calls it ReBAR and AMD calls it Smart Access Memory, but regardless, you’ll need Resizeable Bar enabled in your BIOS.
- Above 4G Decoding — Required for Resizeable Bar. You may not see Resizeable Bar in your BIOS until you enable this setting.
- PBO or Precision Boost Overdrive (AMD only) — If you have an AMD CPU, it supports PBO. This is an algorithm that allows your processor to boost to higher speeds when needed. Set it to “Auto” in your BIOS.
Your motherboard and case matter
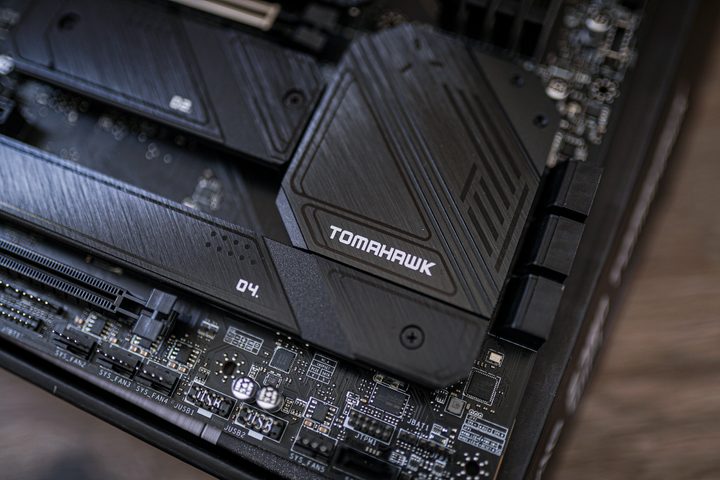
When selecting your parts, there are several compatibility steps to keep in mind. Tools like PC Part Picker can help determine if your motherboard will fit in the case you selected, as well as if your CPU is supported by the motherboard you buy. Something that isn’t mentioned is if the motherboard supports all of the features of your case.
I’ve done probably a dozen builds for friends and relatives where they show up with a new, cutting-edge case like the Hyte Y40 and a budget-oriented motherboard, and I have to break the news that only some of the ports on the front will work. It’s a common mistake that’s very easy to make.
When selecting a motherboard, make sure it has all of the headers you need for your PC case. In most cases, you’re looking for a USB-C header and USB 3.0 header. Other ports, like USB 2.0 and HD audio, are available on all motherboards you can buy now. If for some reason they aren’t, you’ll probably want to reevaluate what PC you’re building.
This can work in the opposite direction, too. If you’re building a modern platform but using an older PC case, you may not have enough headers to squeeze everything in. Many components, such as AIO coolers, tap spare USB 2.0 headers for data transfer, as more cases have moved onto USB 3.0. An older case with a modern platform may mean you run out of USB 2.0 headers and aren’t able to use the ports on the front of your case.
When selecting your components, make sure to go through a checklist of everything your PC should be capable of doing and make sure your parts support it. Everything will need to be plugged into your motherboard, which is one of the reasons we recommend spending more on a motherboard.
Bonus: check your PSU fan
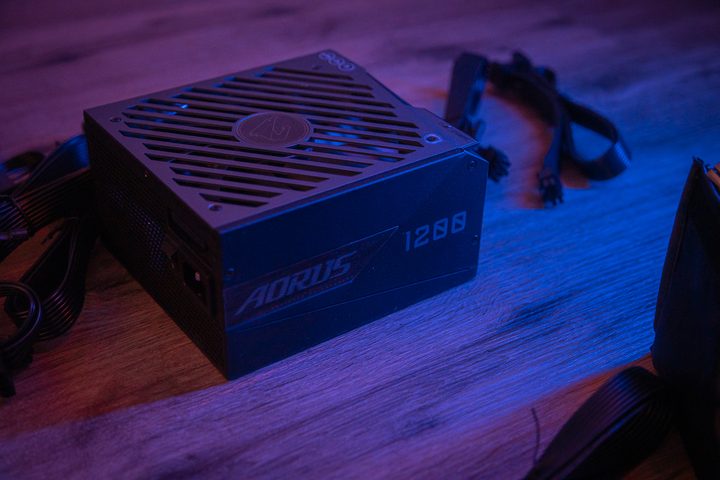
This is a bonus tip because it’s easy for beginners to gloss over. Make sure your PSU fan is facing toward the outside of your case. Every case is a bit different, so you’ll want to check your specific case for placement. In any case, though, you never want your PSU fan going up against a solid piece of metal. It needs some airflow, too.
Dozens of other tips
There are dozens of additional tips for building a PC, and they can be hard to manage. You’ll want to make sure your RAM is installed in the right slots — usually printed on the motherboard — and that all of the plastic film is removed from components before they’re installed. You’ll need to manage how much thermal paste to apply to a CPU cooler, as well as determine how the front panel connectors all hook up to the motherboard. And that’s all before we talk about building a balanced PC that has the right mixture of hardware for the performance you’re after.
That complexity shouldn’t turn you away, though. The most important tip for building a new PC is to take your time. Follow a guide thoroughly, and if anything seems off, pause and look for help. It can definitely help to get a friend who’s built a PC to stand around and double-check your work, too. The complexity is what makes PC building so rewarding, so take your time, and you’ll be a pro before you know it.