Steel plumbing pipe might be one of the most versatile building materials on the planet. Along with the wide variety of wrought iron connector joints available, you can use this tubular material to create just about anything you dream up — and with little or no tools, to boot! In this project, all you have to do is screw the pieces together and do some very basic cutting and screwing.
The best part is that the mixture of steel pipe and old wood gives this clothing stand a timeless industrial aesthetic that fits nicely into a wide variety of different settings. Whether you’re looking for a clothing storage solution for your studio apartment, or you’re a retailer looking for a cool way to display your wares, this rack will not only do the trick — it’ll add a dash of charm to your space in the process. It’s also ridiculously durable and super simple to break down for transport, making it ideal for people who move around a lot. Here’s a quick breakdown of how to build it!
Tools & Materials
Everything you need
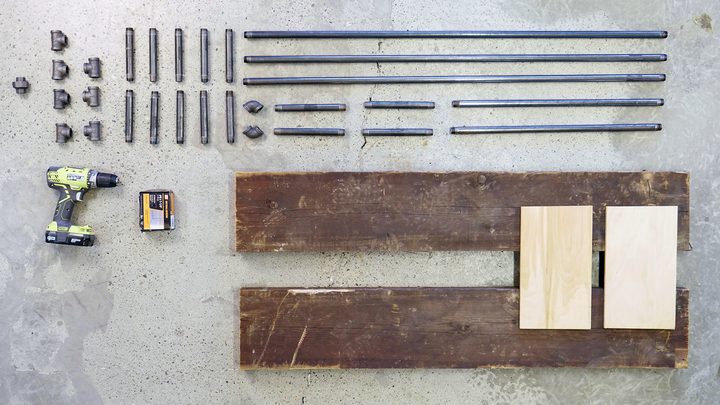
- (3x) ½ inch steel pipe, 48 inches
- (2x) ½ inch steel pipe, 24 inches
- (8x) ½ inch steel pipe, 4 inches
- (4x) ½ inch steel pipe, 6 inches
- (8x) ½ inch cast iron pipe fitting, T-shape
- (2x) ½ inch cast iron pipe fitting, L-shape (elbow)
- (1x) ½ inch cast iron pipe fitting, coupling
- (2x) 2×8 inch board, at least 52 inches long
- (2x) plywood pieces, ¼ inch thick
- Wood screws
- Drill/driver
- Saw
Building process
Step 1: Acquire and cut the wood
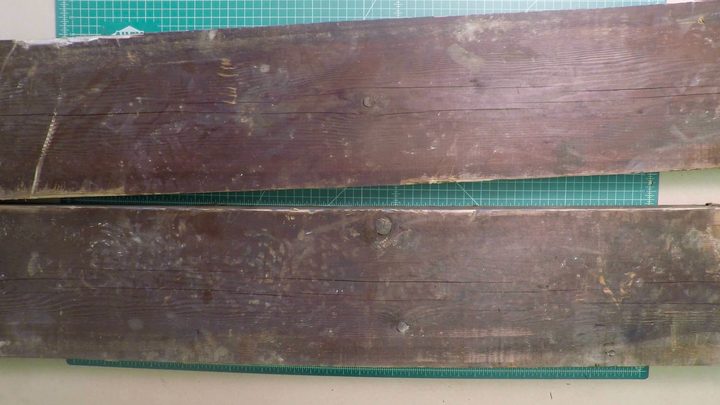
This is probably the hardest part of the entire build — especially if you want to use a cool-looking piece of reclaimed hardwood like we did. Any old 2×8 board will do, but getting your hands on good reclaimed wood can sometimes be a pain. If you don’t have a good hookup for lumber, hop on Google and look for Habitat For Humanity ReStore locations in your area, as well as architectural/industrial salvage stores. Craigslist is also a good place to hunt. Once you’ve got ’em, use whatever saw you’ve got to chop ’em down to about 52 inches long. You don’t have to be exact, but you’ll want to make it a minimum of 52.
The next step is finding a piece of 1/4 inch-thick sheet wood. This can be practically anything — plywood, MDF, or even hardwood. As long as it’s between 1/4 and 1/2 inch thick, you’re all good. You don’t even need to measure it, really. This wood is used to join the two main boards together from the underside. You won’t see them, so don’t worry if they’re not aesthetically pleasing. Cut both pieces to whatever dimensions you want — just make sure they’re not longer or wider than your base platform. Ours were roughly 11 inches square.
Step 2: Assemble the pipes
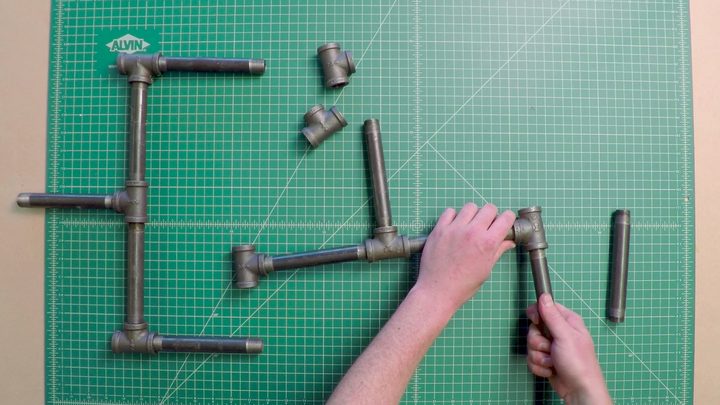
This is the easy part. Start with the legs. Grab six T joints and all eight 4-inch lengths of steel pipe. Assemble them as shown in the video above. Here’s a really crappy drawing to help you out.
When you’re finished assembling the legs, place them aside and switch your focus to the main rack body. Grab all of the long pipe pieces (three 48-inch pipes and two 24-inch pipes), two elbow joints, and the coupling piece. Assemble them in a big ol’ square, with the elbow pieces at the top, and the 24-inch pipes at the bottom, joined with the coupling in the middle.
Step 3: Attach the legs to the main body
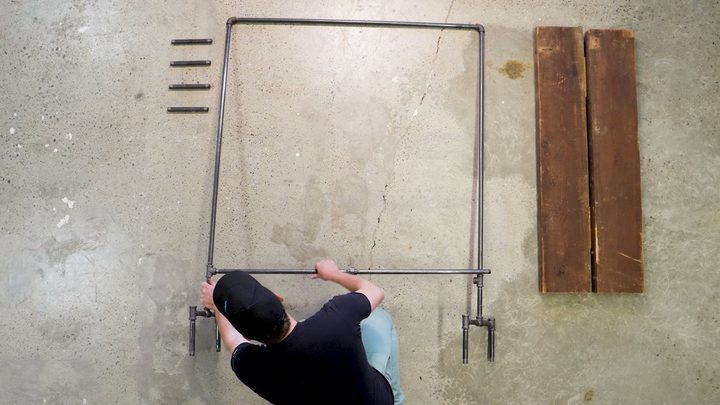
This part is pretty simple, since you’re basically just screwing the leg assembly into the bottom of the main rack body — but there’s a bit more to it than just screwing around. At this point, after you’ve attached the legs, you’ll want to take a minute or two to tighten everything up. This often isn’t as simple as it seems, since twisting the pipes past a certain point requires a lot of torque, but don’t worry. If you reach a point where you can’t twist any further with just your hands, you can always screw in one of the remaining 6-inch pipe lengths to use for leverage.
Step 4: Assemble the wooden base
You’ll probably need a saw for this step, and any kind will do. Start by measuring the distance between the right and left legs on your rack base, then marking out that length on your 2″ by 8″ board(s). Generally speaking, that distance will be around 52 inches, but yours might vary slightly, so it’s best to measure first.
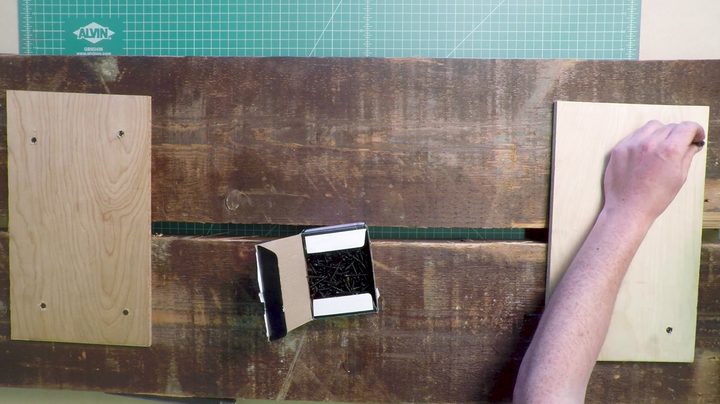
Next, grab your scrap wood, screws, and drill. Place your 2-inch by 8-inch boards upside down, and about 5/8 of an inch apart, so they form something that looks like a giant Kit Kat bar. Next, screw your scrap wood onto these boards to join them together. Place the scrap squares roughly 1 foot from the ends of the big boards, and drive in as many screws as you please. We used eight.
Step 5: Put it all together
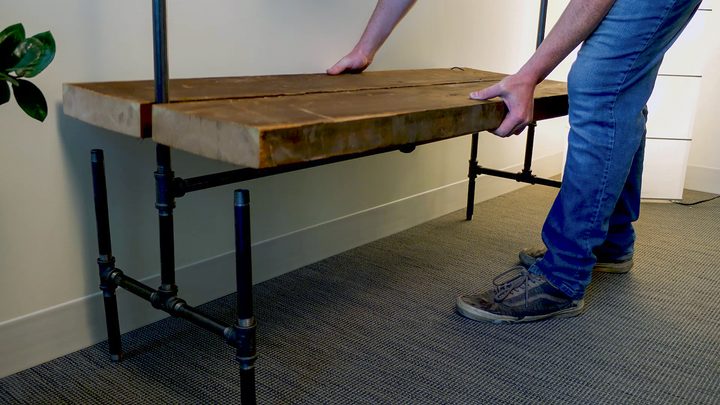
At this point, you’re practically done. If you’ve followed the steps on this page, you’ll have four 6-inch lengths of pipe left. Screw them into the T-joint holes facing upward on the rack’s legs. Then, place your wooden platform on top. Boom. you’re done.
Step 6: Use it

Now all that’s left is to hang your clothes on it.