If you’re playing Kingdom Hearts 3, chances are this isn’t your first adventure with Sora, Donald, and Goofy. The excellent PS4 and Xbox One action RPG is a faithful sequel to the PS2 classics in terms of the gameplay loop and even when it comes to the basic mechanics. Still, it’s been more than 13 years since the release of Kingdom Hearts 2. Even the most dedicated of fans may need a refresher, even if you’re just returning for the Re:mind DLC, as well as a primer on some of the new systems introduced here.
Further reading
Kingdom Hearts 3 tips and tricks
Our beginner’s guide will help you hit the ground running, and point out aspects of the experience you should watch out for as you make your way through the lovingly re-created Disney worlds as a Keyblade master.
1. Choose your Desire and Power

Right from the jump, you have to make a pair of fairly important choices: Choosing your Desire and Power. The problem is that besides vague descriptions, it’s unclear how these decisions affect Sora. While there is no wrong choice, you may want to know what each does. For Desire, the trait you pick first, you get to choose between Balance, Wisdom, and Vitality. Your starting HP and MP correlate with your decision.
- Balance: 105 HP/110 MP
- Wisdom: 90 HP/120 MP
- Vitality: 120 HP/100 MP
If you lean on magic attacks, choose Wisdom. If you want to fight up close a lot, choose Vitality. And if you want a balanced set of both HP and MP, pick Balance (we chose Balance for our first run).
Your Power relates to Ability learning, specifically the rate at which you learn different classes of abilities.
- Warrior: Melee abilities
- Mystic: Magic abilities
- Guardian: Defensive abilities
Regardless of which you pick, Sora’s full range of basic moves will be available to you. And it’s not like you won’t learn magic moves if you pick Warrior and vice versa. We chose Warrior and still learned some high powered magic abilities as we reached high levels.
2. Set up command shortcuts
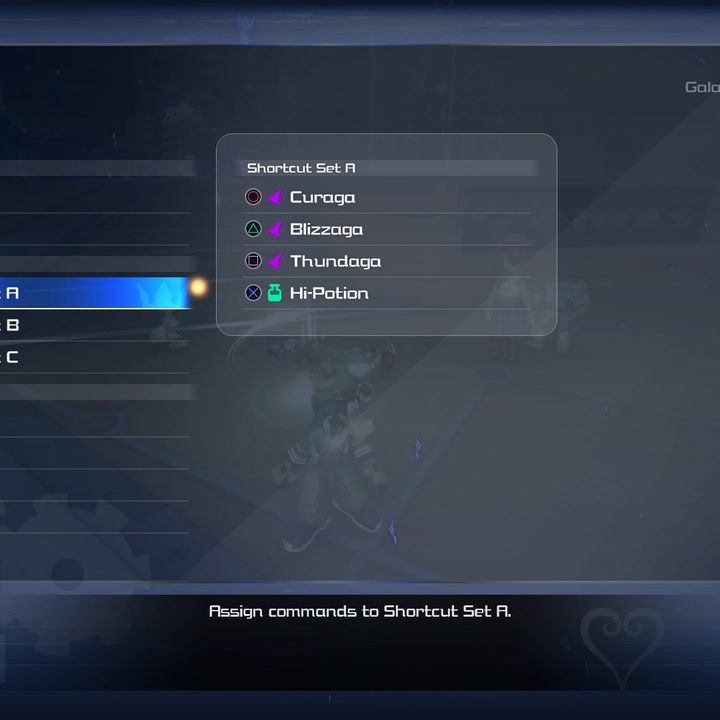
One of the first things you’ll want to do is set up command shortcuts for magic/items. Using the D-pad to scroll through the command menu (twice) for what you’re looking for is cumbersome and frankly completely inefficient. Go into the pause menu and click on Customize. There you can create three shortcut menus to assign magic/items and more to the four face buttons. When in combat, simply hold L1/LB to open the shortcut menu. We recommend assigning at least one restorative ability (cure/potion) to a slot. Other than that, add whichever moves you tend to use the most.
3. Upgrade Keyblades and synthesize gear/items
Throughout each world, you’ll come across Moogle Shops near various save points. Moogle sells you wares such as potions and new gear, but the little guy also has a handy workshop that may go unnoticed at first. All those items you get from killing enemies, opening chests, and breaking stuff? You can use those to increase the strength/magic of your Keyblades, as well as craft new items and gear. As you get further into the game, you’ll have more than a handful of Keyblades to level up. As some of the leveling materials are quite rare, make sure to throw the materials at the Keyblade(s) you use most.
Beyond leveling Keyblades, you can combine items and gear to make better equipment. It’s usually better to spend materials creating gear rather than items (gear lasts forever, after all), but we crafted the occasional Mega Potion to have on hand for boss fights.
4. Use Attraction Flow and summons to your advantage
Kingdom Hearts 3‘s new summon system, Attraction Flow, is both visually enticing and effective for taking out large groups of Heartless quickly. The more attacks you land, the more summons will appear above the command menu. Sometimes, you’ll have multiple summons available at once. To cycle through them and choose, you have to press L2/LT.
While you have to make sure you use them before they expire, you have more than 30 seconds to trigger each one. When in boss battles, feel free to unload them as soon as they pop up. However, when squaring off against groups of Heartless, consider your timing. It’s not beneficial to trigger Blaster Blaze, the cart-shooting mini-game, when there are only a few Heartless around. Instead, wait until the next group spawns, which often happens after taking out the first wave.
5. Balance your Keyblades
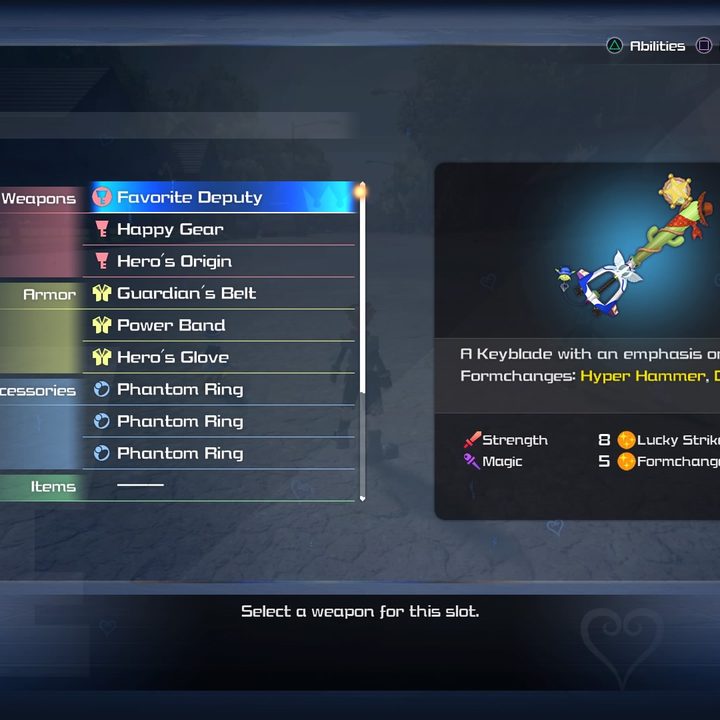
At first, this won’t matter, but each world you complete rewards Sora with a new themed Keyblade. Once you have more than three, you have some decisions to make. Sora can equip up to three Keyblades at once. Switching between them in combat is as simple as pressing right on the D-pad. As each Keyblade has at least one form change and different strength/magic properties, it’s smart to equip Keyblades that complement each other.
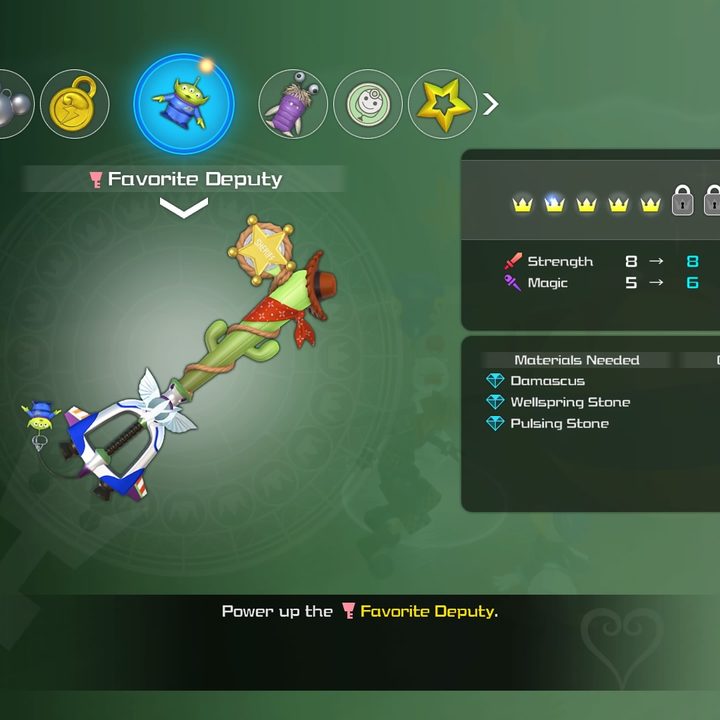
For instance, Shooting Star, which you get in Twilight Town, transforms into dual arrow guns, allowing Sora to take out enemies from afar. It’s also magic-oriented, so it’s better by default for ranged magic attacks. Favorite Deputy from the Toy Story world, meanwhile, is strength-oriented, and its form changes are designed to bring you close to the Heartless to wallop them into dust. These blades work well together because of their different strengths.
6. Check gear slots and upgrade often
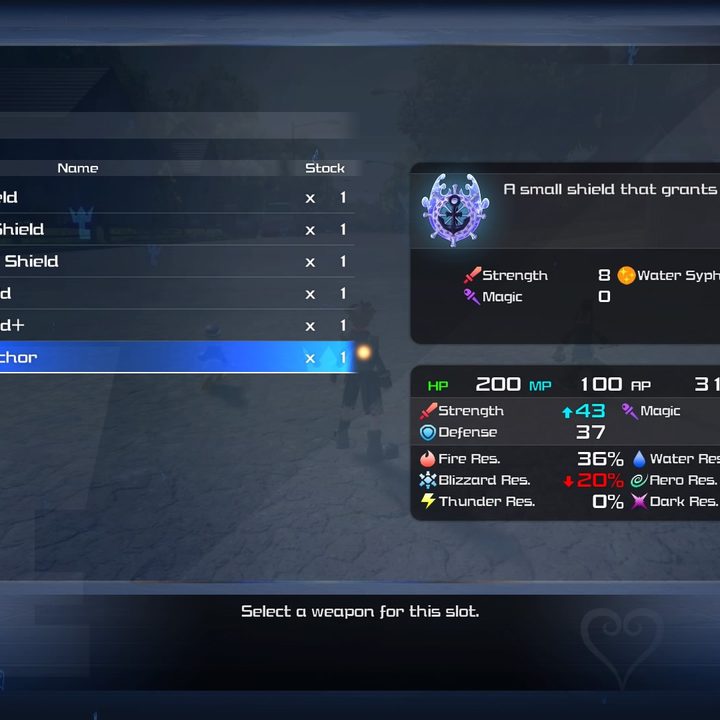
Sora, Donald, and Goofy earn experience points for each enemy they slay, which eventually translates into leveling up. While your stats go up automatically when you level, you’ll want to check your gear/magic slots regularly. At the start, each character’s slots are limited, but as you level up, more armor/ring slots will open up. Leaving them empty doesn’t help anyone. The same goes for magic, as you’ll steadily unlock more powerful versions of each spell (Fire turns to Fira which then turns to Firaga). New spells must be equipped manually (go back and modify your shortcuts, too).
Always compare the gear in your inventory to what each character has equipped, and make sure to check the Moogle Shop for better gear, not just for Sora but for his friends, too.
7. Don’t forget about new abilities
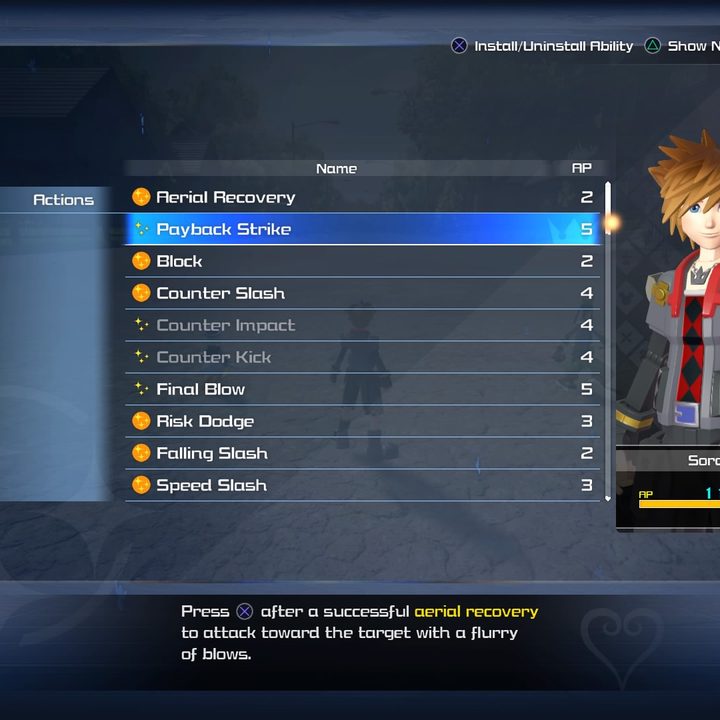
Leveling up also adds AP (ability points) to your characters, which can be used to activate new abilities. Most abilities aren’t equipped automatically, so you have to go into the Abilities menu to spend your points. It’s easy to forget to do this. At one point, our Sora had about 40 unused points and a bunch of cool abilities just sitting there unactivated. Take the time to read each ability description to see if it’s one you’ll actually use first, but you can equip most of what you have available at all times in our experience.
8. Worry not about the Gummi ship
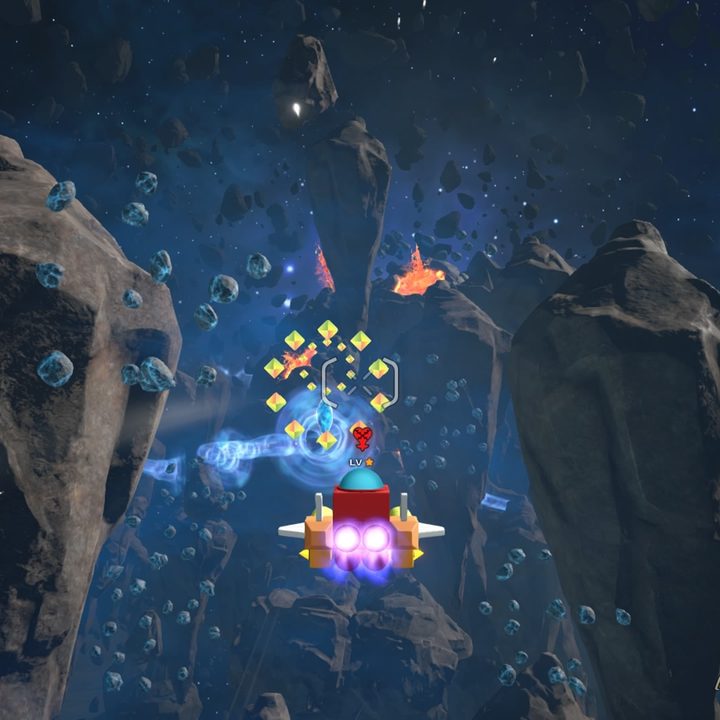
Traveling from world to world on the Gummi ship can be a drag. This is the one area of Kingdom Hearts that hasn’t really improved in the long gap between Kingdom Hearts 2 and Kingdom Hearts 3. Just know that you really don’t have to worry about your Gummi ship level. Besides a few mandatory ship battles, you can avoid combat altogether. Your Gummi ship levels up too, but it’s really not that important. We never had an issue completing the mandatory tasks despite not taking the time to engage in optional battles during our voyages.
9. Always have a Kupo Coin on hand
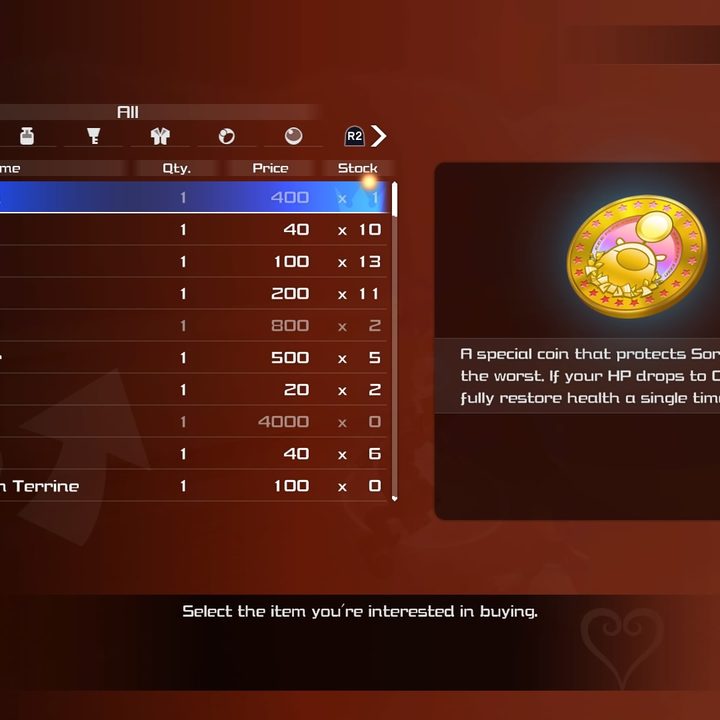
With Sora’s magic, Donald’s magic, and potions, it’s not too hard to avoid death in Kingdom Hearts 3. That said, sometimes you get a little overzealous in a boss battle. That’s why you should always have a Kupo Coin on hand. Retailing for 400 Munny, the Kupo Coin is at the top of the list in every Moogle Shop. With a Kupo Coin in your possession, you have the capacity for a new life after a sudden death as the result of the Kupo Coin’s restorative powers to reset Sora’s health It only works once, and you can only hold one Kupo Coin at a time, so make sure you re-buy it after each use.
10. Cooking can be helpful
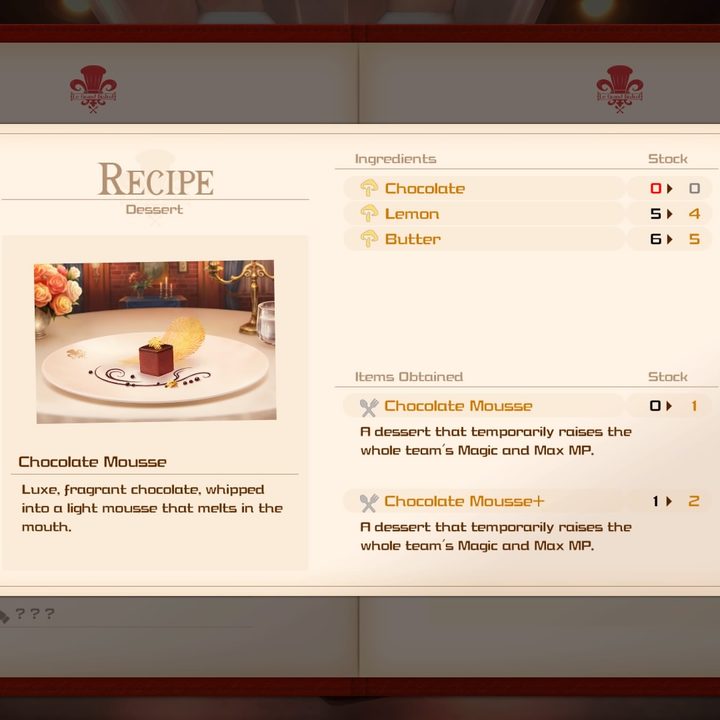
Slight spoilers here. Once you reach Twilight Town early in the game, you’ll meet Remy from Ratatouille. After completing a short ingredient-fetching mission, you can start cooking in his kitchen. Each recipe requires you to complete a brief (and easy) mini-game. Eating meals gives your team temporary stat boosts, some of which can be quite huge. Consequently, if you’ve depleted your stats in an earlier struggle, cooking a meal in Twilight Town with Remy is a surefire way to easily make up for past losses.
“Cooking can be helpful” basically translates to “cooking isn’t necessary if you’re doing well in this part of the game,” in which case you can skip the cooking altogether. We cooked a couple of meals during our first visit to Twilight Town, but that was it. If you do wind up cooking, you can visit the Bistro straight from the save menu.