The Amazon Fire TV Stick is a tremendous streaming device that keeps you connected to all your favorite entertainment services, including popular streaming platforms like Amazon Prime Video, Netflix, and Disney+. But like any other web-connected gadget though, your Fire Stick may run into hiccups and glitches. Not to worry, for it is just a machine; and for now, us humans can still troubleshoot and fix machines (until they start taking over).
- Can’t connect to your Wi-Fi network
- The remote won’t function properly
- Fire TV remote app won’t connect
- Unable to share your screen to your Fire TV
- Fire TV logo is stuck on the screen
- Television shows a blank screen
- Fire TV Stick won’t turn on
- Apps crash or refuse to load
- Your Fire TV won't stop reading the screen
- Your Fire TV Stick won't update
- There's no sound
- 4K Ultra HD isn’t working on your Fire TV device
- Headphones won’t connect to Fire TV Stick
- Factory reset your Fire TV Stick
Fortunately, most Fire TV Stick issues have been experienced by more than one user. Whether you’re having issues connecting your Stick to the internet, or your audio sounds super choppy, we’ve put together this list of the most common Amazon Fire TV Stick issues, and what you can do to get your streaming device back in working order.
Can’t connect to your Wi-Fi network
You’ll need to get online if you want to enjoy Netflix, Hulu, Amazon Prime Video, or any other streaming service.
Step 1: If your Wi-Fi doesn’t seem to be working, first make sure you are connected by heading to the Fire TV Home screen, then selecting Settings, and then Network. If your network won’t connect, ensure that you are entering the correct password.
Step 2: If your Wi-Fi network doesn’t appear at all, make sure that your Fire TV Stick is in range and that other devices aren’t having the same issue.
Step 3: Attempt to reboot your modem or router to solve your internet connection problem.
The remote won’t function properly
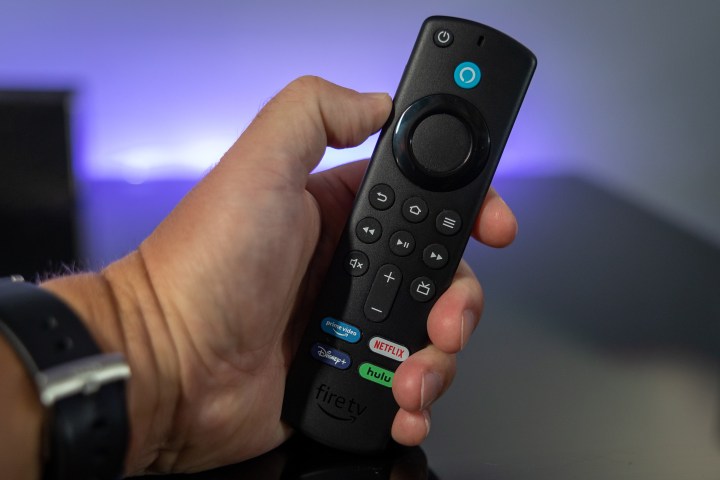
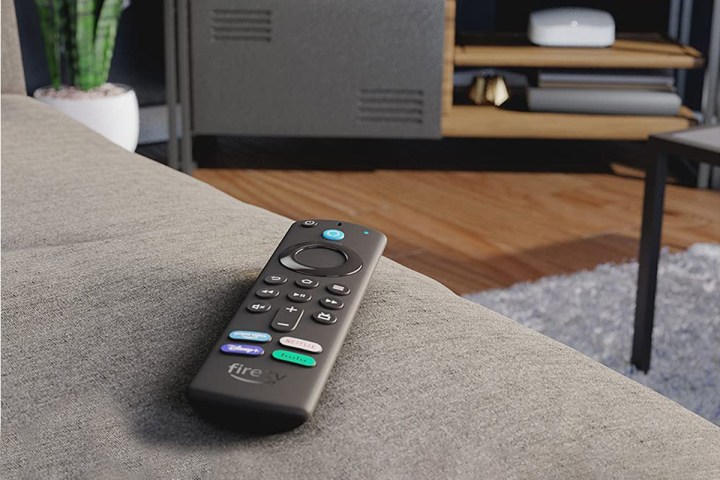
The primary way you’ll want to interact with your Fire TV Stick is with the included Amazon remote. If it ceases to function, start by replacing the batteries, as this may solve the issue. You must also be within 10 feet (3 meters) of your Fire TV device to use the remote.
If you've replaced the batteries, make sure you're within range, and if the remote still does not work, you may need to restart the Fire TV Stick with the following steps.
Step 1: Press and hold the Left + Menu + Back buttons for 10 seconds.
Note: On older first-generation Fire TV Stick remotes, omit holding the Back button. Additionally, allow a total of 15 seconds for the operation.
Step 2: Release the buttons and wait 60 seconds before continuing.
Step 3: Remove the batteries from the remote.
Step 4: Unplug your Fire TV Stick from its power source and wait 60 seconds before continuing.
Step 5: Plug in your Fire TV Stick’s power source and wait for the home screen to appear.
Step 6: Reinsert your remote’s batteries.
Step 7: Hold the Home button on your remote for 40 seconds, then release.
Step 8: Within 60 seconds, the remote should reconnect with your Fire TV Stick.
Fire TV remote app won’t connect
If you don’t want to use the physical Fire TV remote to control your setup, you can also use the Fire TV app.
If you have issues using the Fire TV app, begin by ensuring that you are connected to the same Wi-Fi network as your Fire TV Stick. You may need to re-pair your app remote with your Fire TV Stick if it is not responding. If so, follow these steps:
Step 1: Download the Fire TV app for Apple or Android.
Step 2: Ensure you are connected to the same Wi-Fi network as your Fire TV Stick.
Step 3: Open the Fire TV app and select an available device.
Step 4: Follow the on-screen prompts to complete the process.
Unable to share your screen to your Fire TV
If you want to share the content on your smartphone or tablet’s screen with your Fire TV Stick, you can do so with only a few clicks.
Step 1: There are a few devices that do not support screen mirroring with Fire TV. Make sure you are not trying to use any of the following:
- iOS and macOS devices
- Android devices that are older than Android OS 4.2 (Jelly Bean)
- Windows devices that do not support Wireless Display (WiDi)
- Android devices that do not support Miracast
Step 2: If your Fire TV Stick supports the screen-share function, when you hold down the Home button, a mirroring icon should appear if your device is compatible.
Step 3: If your smartphone or tablet cannot find the Fire TV Stick, ensure that they are both on the same network and within 30 feet (10 meters).
Fire TV logo is stuck on the screen
You purchased a Fire TV Stick to watch your favorite content, not the logo! If the logo is displayed on your television screen, your device is likely stuck.
You can fix it with the following steps:
Step 1: Unplug the Fire TV Stick from the television and its power source, reconnect it, and try again.
Step 2: If the issue continues, be sure the power source you are using is strong enough to power the Fire TV, and give the device 25 minutes to get itself unstuck from the logo screen.
Step 3: Lastly, try a different HDMI port on your television, as the selected port may be causing the issue.
Television shows a blank screen
Worse than being stuck with a boot logo is being stuck with nothing.
Step 1: If your television doesn’t show anything other than a blank screen, begin by unplugging your Fire TV Stick, then plugging it back in.
Step 2: Double-check that your television is set to the correct HDMI input for your Fire TV Stick.
Step 3: If you are using an HDMI cable or extender, try connecting the Fire TV Stick directly to the TV to see if it may be causing the issue.
Step 4: The same idea goes if you are using an AV receiver — make sure you are on the correct input, or try plugging the Fire TV Stick directly into the television to see if the receiver might be causing the problem.
Fire TV Stick won’t turn on
Step 1: If your Fire TV Stick doesn’t turn on, make sure that the remote has fresh batteries and that it isn’t the issue.
Step 2: Unplug the Fire TV Stick and plug it back in to force a reboot of the device.
Step 3: Check to make sure that the Fire TV Stick’s power source is plugged in properly.
Step 4: If you believe that your Fire TV Stick is turning on but isn’t showing an image, refer to the section above (Television shows a blank screen).
Apps crash or refuse to load
A working Fire TV Stick is great, but it’s useless without your favorite media streaming apps. If your app crashes continually or refuses to load, begin by clearing the app cache using the following instructions:
Step 1: Go to the Fire TV Home screen.
Step 2: Open the Settings app.
Step 3: Select Applications.
Step 4: Choose Manage installed applications.
Step 5: Select the app you are having an issue using.
Step 6: Choose Clear cache and Clear data.
Step 7: If clearing the app cache and data does not solve your issue, attempt to reinstall the app.
Uninstall the application by following the steps above, but select the Uninstall option for step 6. After, navigate to the App & games section to install your application again.
Your Fire TV won't stop reading the screen
There's a feature on Amazon Fire TV products called VoiceView that's actually quite the godsend for visually impaired users. When activated, it will read whatever available text is displayed onscreen. Sometimes though, the feature can get toggled on by accident. After you've finished hyperventilating (because you thought your Fire TV was possessed), follow these quick few steps to disable the screen-reading function.
Step 1: Select Settings.
Step 2: From the Settings menu, select Accessibility, then choose VoiceView. Then all you have to do is confirm that you actually want to turn the feature off.
And if you'd rather not deal with software, you can also turn off VoiceView by simply pressing and holding the Back and Menu buttons on your Fire TV remote.
Your Fire TV Stick won't update
When it comes to anything tech, software updates are the key to a balanced breakfast, and this is no exception for Amazon's Fire TV Stick devices. While the Fire TV Stick should perform automatic updates to ensure you're getting the best user experience, there are times when updates may start failing. Here's how to troubleshoot and fix this issue.
Step 1: It may sound silly, but there's a chance your Fire TV Stick isn't actually connected to the internet. In order to check, you'll need to head into your Settings menu, then tap Network. From here, you can use the play/pause button on the remote to test your connection (you should also see an onscreen breakdown of your Wi-Fi network info).
Step 2: If your Fire Stick isn't online, you can attempt to reconnect from the Network screen. If you're still having trouble after this, you may want to unplug your Fire TV and give it several seconds to reboot, then reconnect to your TV. You can also try resetting your modem or router.
Step 3: Another common reason your Fire TV Stick may not be updating is because you have too many apps and games on the device. Generally speaking, a Fire TV Stick needs around 500MB of free space for new updates to download and install successfully.
Step 4: If you want to check how much space is available, head into Settings, then choose My Fire TV.
Step 5: Select About, then choose Storage.
You'll be able to see how many bytes your Fire TV Stick is currently consuming on this screen. If it's more than 500MB, it might be a good idea to delete a few apps that you're not using anymore. This will free up some space for those much-needed software updates.
There's no sound
You're watching your favorite episode of Alf, and then it happens: the sound drops out. Before you start panicking, do realize that audio issues can happen with any streaming device. Now let's start troubleshooting.
Step 1: First thing's first: Make sure your Fire TV Stick didn't accidentally get muted. To do this, just press the Mute button on the remote. If the Stick was muted, it should be muted no more.
Step 2: A loss of sound can also be attributed to bugginess with whatever streaming app you're using or the Fire TV Stick itself. Try exiting your stream, then go back into the movie or episode and restart. If you still don't have sound, try closing the app altogether. If you still don't have sound when you relaunch, you may want to physically reset the Fire TV Stick.
Step 3: While the Fire TV Stick should be smart enough to know which audio codecs to use, you may sometimes have to manually disable Dolby Digital Plus to get your audio back on track. To do so, head into Settings, then choose Display and Sounds.
Step 4: Select Dolby Digital Output, then choose Dolby Digital Plus off. Now head back into your stream to see if you have sound.
Step 5: If your Fire TV Stick is connected to an AV receiver or soundbar with HDMI switching, you'll also want to confirm that the switching device is set to the correct input and audio passthrough settings.
4K Ultra HD isn’t working on your Fire TV device
You’ll be able to stream 4K content using the Amazon Fire TV Stick 4K, Fire TV Stick
You’ll also want to make sure the TV your Fire TV device is connected to is a 4K TV. Even if you’re using a 4K-ready Fire TV device, if your TV tops out at 1080p (or lower), that

Headphones won’t connect to Fire TV Stick
It was one of our favorite Roku features, and now it’s available for Amazon’s Fire TV devices: the ability to pair a set of Bluetooth headphones or earbuds to your Fire TV Stick, Fire TV Cube, and smart TVs running Fire TV OS. Sometimes this useful feature doesn’t work correctly though. Here’s a few things you can try:
Step 1: Bluetooth performs its best when you’re hanging out in the same room as the host device, and usually no more than 35 feet away. This isn’t to say you can’t head into another room, or enter a different floor of your home when you’re using Bluetooth headphones with your Fire TV device.
But do keep in mind that walls, floors, and frequency-emitting devices (like other consumer tech gadgets, and appliances like microwaves) can cause interference between your headphones and Fire TV.
Step 2: If you can’t get your Bluetooth headphones to play Fire TV audio, your
Step 3: Now put your Bluetooth headphones into pairing mode. Once they show up on your Fire TV’s device screen, select them to pair both devices.
Factory reset your Fire TV Stick
If any of the instructions given above fail to solve your issue and you have already rebooted your Fire TV Stick by unplugging it and plugging it back in, you can choose to reset your device completely.
It's important to note that resetting your device will clear out all settings and personalization, returning it to the way it was when it first came out of the box. To factory reset your Fire TV Stick, follow the instructions below:
Step 1: Go to the Fire TV Home screen.
Step 2: Select the Settings app.
Step 3: Choose the System option.
Step 4: Pick Reset to factory defaults.
Step 5: If prompted, enter your PIN, then select Reset.
When your Fire TV Stick restarts, you’ll need to set it up again. If you need assistance, please feel free to follow our guide on setting up an Amazon Fire TV Stick for the first time.
Step 6: You can also restart your Fire Stick with the device's remote. With controller in hand, all you have to do is press and hold the back button and the right side of the navigation circle for around 10 seconds.
Step 7: You should then see a prompt on your TV screen that asks whether or not you'd like to move forward with the reset. If you don't do anything, your Fire TV Stick will automatically reset after a short period of time.
If you are still unable to fix your device or need a bit of help, we recommend that you reach out to the folks at Amazon for additional support. If your device hardware is flawed, they may replace it for you if you are still under the original warranty.
Editors' Recommendations
- All of Amazon’s Fire TV streaming devices are heavily discounted today
- How to reset an Amazon Fire TV Stick
- Best streaming devices for 2024: Apple TV, Roku, Fire TV, and more
- How to connect headphones to an Amazon Fire TV device
- How to add new a profile to Amazon Fire TV


