
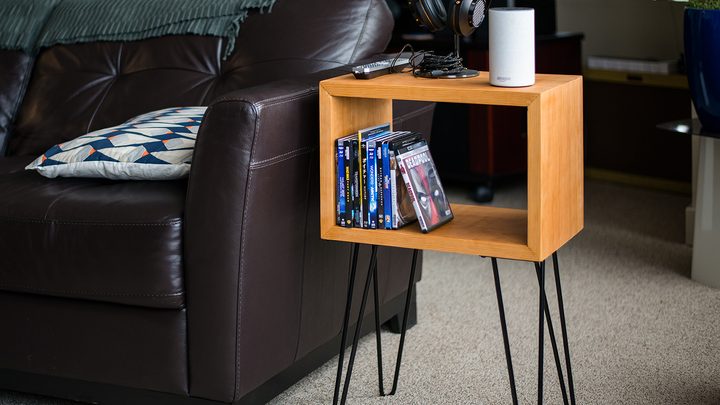
The stylish Mid-Century modern side table in the video above has a wonderfully minimal design that looks sweet in any setting. Better yet, it’s surprisingly easy to make, with a super-fast technique for assembling the box, and hairpin legs that simply screw on.
You can make the box in all sorts of dimensions: Square and sculptural, long and narrow with taller legs from that turn it into a hall or sofa table, or even wide and shallow as a desktop.
To bring the table to life, you can use one of the coolest woodworking tricks in the game — wrapping up a mitered box with packing tape. If you get all the angles right, you’ll get a gorgeous result with the wood grain wrapping seamlessly around the corners. Here’s what you’ll need to get started:
Tools and Materials
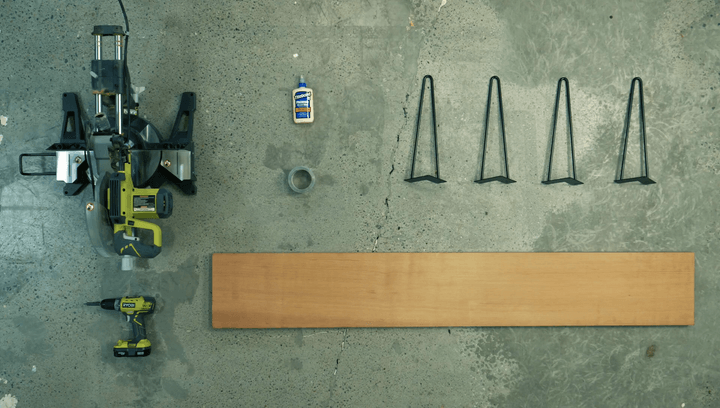
- Wood slab (dimensions are up to you, but we used an 8″ by 6′ pine board, 1 inch thick)
- Hairpin legs (mounting screws included)
- Wood glue
- Packing tape
- Finish
- Miter saw
- Drill/driver
Miter magic
To grasp the genius of the tape trick, you first need to understand that “miter” is an old-timey carpenter’s word for a 45-degree joint. Cut a 45-degree angle at the end of each piece, put them together, and you magically get a right angle.
Next, you need to understand how tricky it can be to clamp miters together. Gluey miters are slippery creatures. Carpenters typically just shoot a nail into the side of mitered trim to make sure it stay put, but nails don’t look that nice in furniture. That’s where this tape trick comes in.
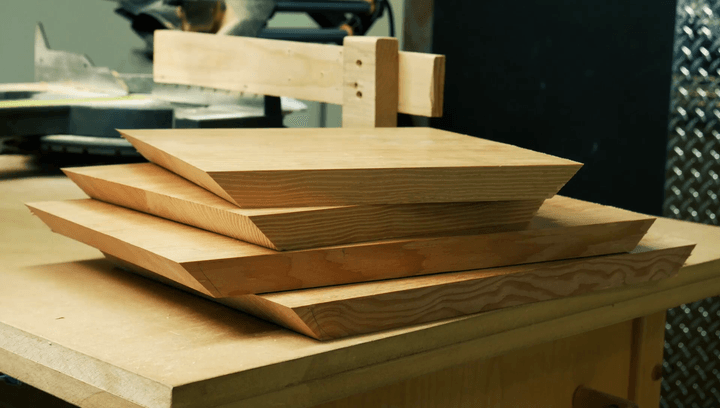
After you cut 45-degree bevels on the end of the box parts, using a tablesaw or miter saw, you put all the pieces in a row, with the bevels facing down. Then you connect them all with packing tape, making sure they are lined up straight, and pulling the sharp tips of each miter close together as you go. Packing tape is perfect because it’s strong, it lets you look through it to see what’s going on, and it peels off afterward without leaving gunk on the wood. Press and rub the tape to get a good bond.
Next, you flip over the whole row so the bevels are facing up and the tape is on the bottom. It can be hard to flip all the pieces without the tape coming loose, but it helps a lot to pull them off the front edge of a table a little bit and hold a long stick against the top and bottom to keep the pieces aligned while you flip them.
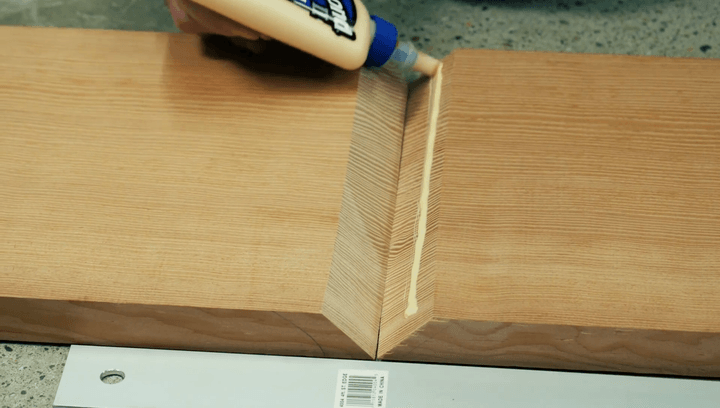
Now brush some wood glue onto all the miters. These bevels are end grain, which tends to drink up a lot of glue, so put a little extra on if the joints look dry. Here comes the magic.
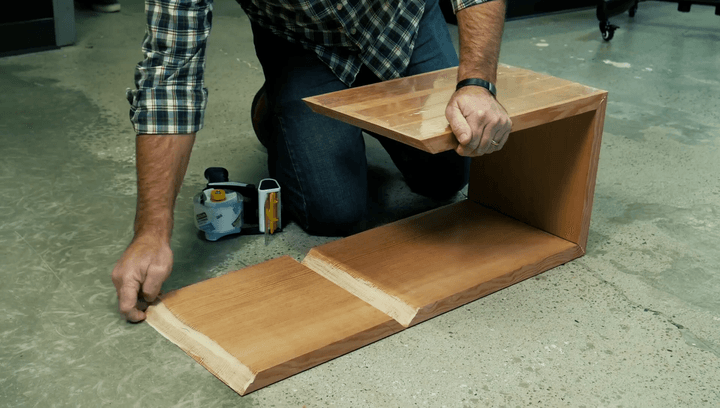
With the tape firmly in place, you can simply fold up the pieces to form the box, watching the tape pull all the corners tight. That just leaves one last corner to pull together, which you should do firmly, stretching more tape over it to lock that last joint.
Now leave the box for a few hours (or preferably an entire day) to let the glue dry. Then, peel away the tape and do your sanding and finishing before attaching the legs.
Keys to success
To get good results with the tape trick, you need to get a fews things really right about your box parts. First, the board you use needs to be perfectly straight, with square, parallel edges and uniform thickness. In other words, it needs to be milled and tablesawn by someone who knows what they’re doing. That might well be you, but it could also be the friendly folks at your local lumberyard. Better yet, find a hardwood dealer. They’ll have better boards and be more willing to mill and size them as needed.
Second, if you cut the miters with a sliding miter saw like we did, the board can only be as wide as your saw will cut, so check that first.
Once you’ve got a beautiful board that’s milled straight and true, the next big step is to get the cuts right. To get tight, strong joints, you’ll need opposite workpieces (top and bottom, left and right) to be exactly the same length, and the 45-degree angles to be dead-on. Get any of that wrong, and you’ll get gaps in your box.
Start with the miter saw. Before you start the project, give it a quick test by tipping it over to the 45-degree setting and making a couple cuts in a flat piece of scrap board — or better yet, a piece of plywood or MDF. After that, put the two the two mitered edges together and check the resulting corner with a square. If it’s not right, you’ll need to adjust your saw.
Additionally, you’ll need to get the parts cut to the right lengths. For a square box, that means all four sides should be perfectly equal. For a rectangle (like ours), all the opposing sides will need to match up (ours is one foot tall on the sides, and 1.5 feet long on the top and bottom). To make that happen, you’ll need to set up a stop on your miter saw or tablesaw.
Start by mitering one end of each workpiece. To make a stop for your miter saw, screw a long stick to the fence, and then screw a block somewhere along it to catch the mitered end you just cut. That will ensure that every workpiece you bump up against that stop comes out the same length.
To check your work, stand all the parts on edge and see if all of the joints come together okay. If they don’t, make some adjustments and recut the edges. If they do, enjoy that tape trick!
If everything goes wrong and the tape just isn’t applying enough pressure to pull the joints together, there’s a solution — but you’ll have to surrender and buy some clamps. Start by pulling the box apart and recutting the miters, then use band clamps like these from Rockler. Three should do the trick, putting tremendous pressure on the middle and near the edges.


