
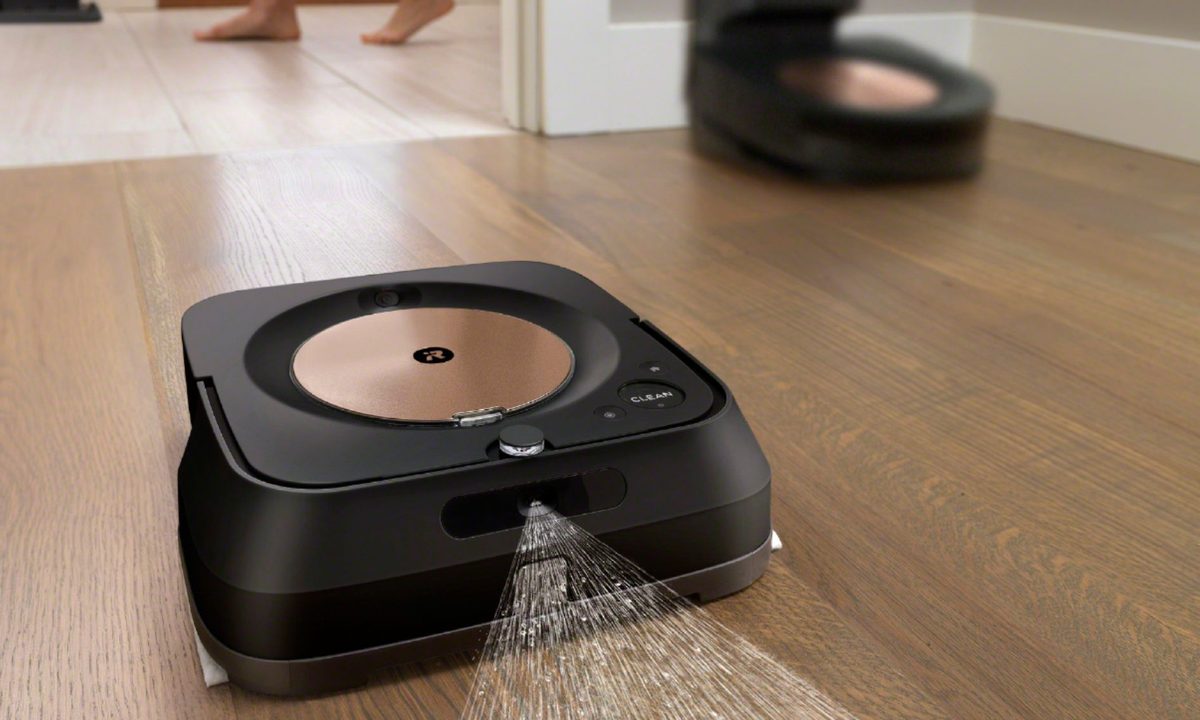
Robot mops for 2021 and mop-vacuum hybrids add a new feature to smart floor cleaning: they use a spray of water or cleaner, plus pads and other traditional mop features to clean up messes. That’s a big advantage for hard flooring since it can remove dust more thoroughly and clean up light stains that might otherwise go unnoticed.
These general instructions will work for many robot mops — whether you have one that cleans big areas or robot mops better suited for small spaces. But adding water to a smart robot vacuum also includes some extra maintenance steps to keep it clean and working well. If you’ve never cleaned a robot mop before, here’s what you should know.

How to clean your robot mop
Obviously, every robot mop is a bit different. Braava models from iRobot, for example, typically use wiping pads, as do many other models. Mops from Roborock use a more unique sonic mopping technique. That means not all cleaning options will apply to your model, but you should still manage to pick up a few useful tips. When in doubt, consult your manual for more information.
Step 1: Fill your robot vacuum with water or cleaning fluid as recommended. Never use any type of cleaner other than what the manual or manufacturer states. Don’t mix water with detergent, vinegar, or anything else. Adding extra cleaners like this can damage the robot mop and prevent it from working properly in the future.

Step 2: At the end of the cycle, empty out the tank entirely. Don’t let water stay in it, if possible – that can lead to contamination, mildew, and other problems.
Step 3: Some robot mops have cleaning cycles that they can perform on themselves. It’s a good idea to run that self-cleaning cycle every several cleaning sessions. Look for an option in the app or a Clean button on the robot mop itself. If your mop does not have a self-clean option, you can use a damp towel to clean out its tank and make sure it’s not getting slimy or dirty.
If you have a lift-out tank, like some models offer, then you can pull the tank out, fill it with warm water, and shake it vigorously to help clean it. Again, stay away from any soaps or other cleaners.

Step 4: Robot mops have charging stations, and many of those stations add a drip tray so that the mops don’t drip water on the floor or near any sensitive electronics. If your model uses a drip tray, then every several cycles, take the tray off and clean it in the sink. Let it dry completely before you put it back on the charging station.

Step 5: Many robot mops use pads for cleaning. There are many different kinds of pads, so you’ll need to follow your individual instructions for cleaning them. Some pads are disposable, so you’ll want to remove them after a cleaning cycle or two and replace them with a new version. Some are washable, so you’ll need to set up regular washing cycles to launder them.

Step 6: Robot mops also use sensors to navigate floors and avoid obstacles. Every several cycles, take a soft, clean cloth and wipe down those sensor areas on the robot. This step helps remove dust that builds up over time that can block sensors and lead to mistakes.
Step 7: If you have a hybrid mop model, like the Roborock S7 or other similar bots, it also has brushes on the bottom and sides that it uses to clean. Every several cycles, detach these brushes and clean them – if they are especially dirty, run them through water and let them thoroughly dry to remove any gunk.
Likewise, hybrid models may have filters that need to be cleaned or replaced, too.
Step 8: Remember, there are some stains and dirt that a robot mop won’t be able to tackle properly. To minimize wear and tear on your robot mop, occasionally do a full cleaning session yourself with a mop. Your robot mop can then work to keep your floor sparkling at other times without having to tackle jobs that are a bit too big for it.


