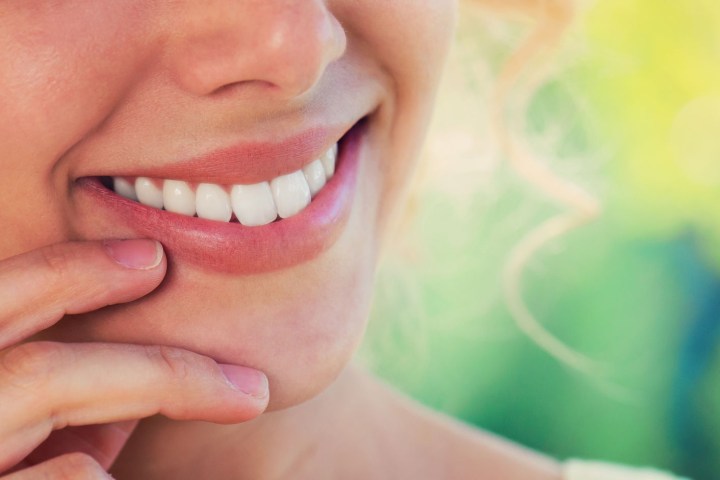
Adobe Photoshop is traditionally the go-to software for corrections like teeth whitening, but the program’s younger sibling, Lightroom, actually has a pretty good built-in fix that’s even faster to use — and with the Creative Cloud, if you have Photoshop you also have Lightroom. We’ll go over how to whiten teeth in Photoshop with a method that can fix any set of teeth, then we’ll jump into the faster Lightroom fix that works on most smiles, so you can choose which method works best for the shot or your photo-editing workflow.
How to Whiten Teeth in Photoshop
Step 1: Create a Layer Group, then select the teeth
With your image open in Photoshop, start by creating a layer group that includes just the teeth. Click the folder icon in the Layers panel to create a new group.
Then, go ahead and select all the visible teeth with one of the selection tools. We used Photoshop’s Select and Mask tool — added in a recent update — by going into Select > Select and Mask. Using the tools on the left and the brush size options on the top, select the teeth. Then, refine the selection using the “-“ tool at the top, and for a more natural looking selection, drag the feather option to the right a bit in the righthand toolbar. Click Okay and the mask will appear in the layers panel — if it doesn’t show up in the group you created, simply drag and drop it to that group folder.
Now, you’ve created a mask that includes just the teeth. Everything white in the mask will be included in whatever effects you apply to the layer mask, while anything black will be left out — so with the teeth white inside the layer mask, you can apply effects to only the teeth while leaving the rest of the image untouched.
If your teeth selection wasn’t quite perfect, you can refine by painting inside the masks with black and white paintbrushes — just make sure the mask is selected inside the layers panel by clicking the black and white box next to that group folder. For example, we selected a bit too much of the photo at first, applying some of the effects to the edge of the lip. To remove that area from my selection, we just painted over it with a black paintbrush inside the mask. You can always go back and refine the mask later — it’s often easier to see your selection errors once you’ve started applying the whitening affects.
Step 2: Create and adjust a Hue and Saturation Layer
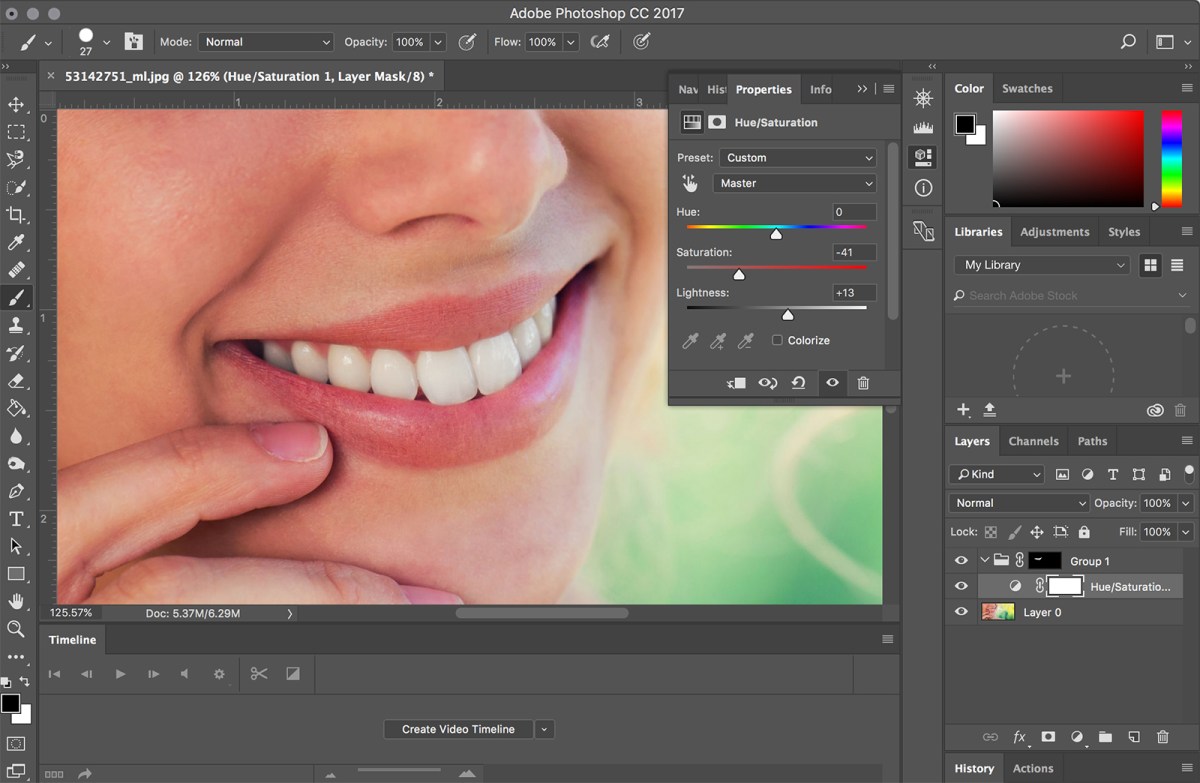
With the teeth selected, it’s easy to make adjustments and remove the yellow hue without affecting the colors in the rest of the photograph by using adjustment layers. Start by creating a hue and saturation adjustment layer by heading up into Layer > New Adjustment Layer > Hue/Saturation.

Inside the properties panel for that new Hue/Saturation adjustment layer, take and drag the saturation slider to the left. The key here is to stop before you see gray. If the teeth look gray, drag the slider back to the right a bit. To lighten up the teeth, drag the lightness slider to the right a bit as well.
Step 3: Refine with Levels
If your subject has teeth that are uniformly yellow, you can probably stop after step two and still get good results. The problem is that most teeth aren’t the same exact shade. Some spots may be yellower than others, or the teeth in the front might be whiter than the side teeth. So after step two, you’re left with mostly white teeth but a few spots that appear to be more gray than white. This next step fixes those issues and creates a more natural result.
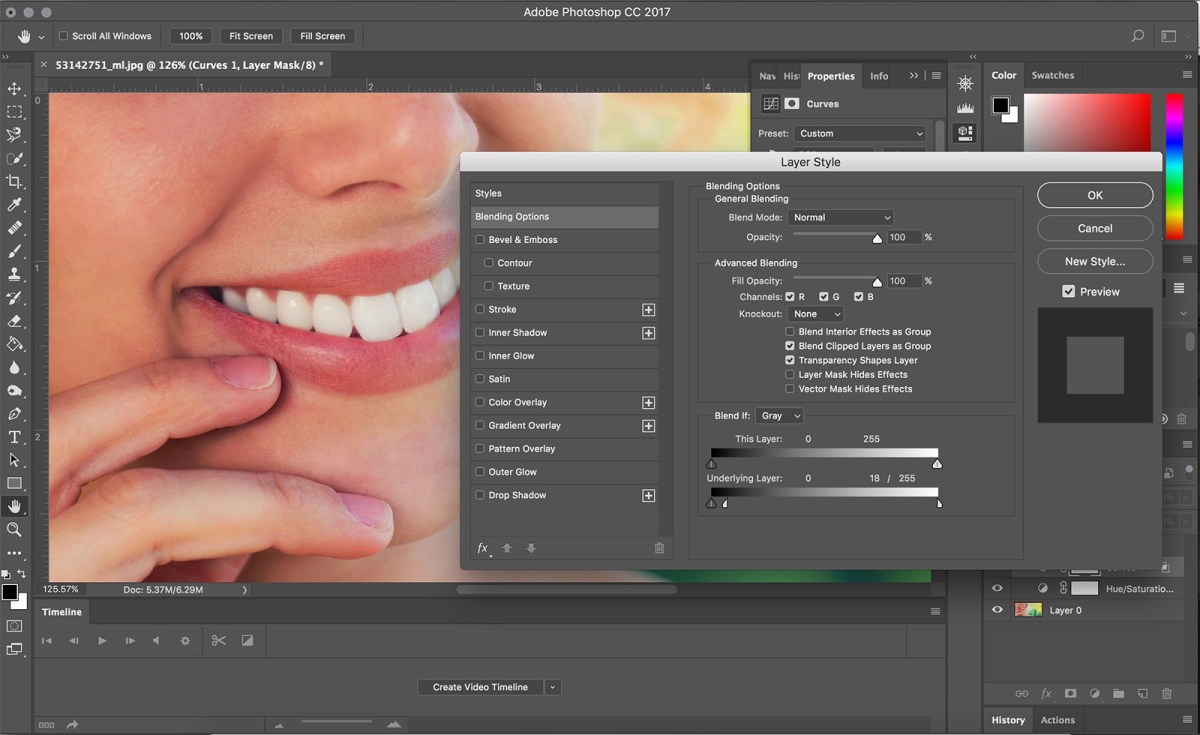
Go to Layers > New Adjustment Layer > Curves. Since you created a group when you added the mask, the same mask will already be applied to that levels layer and you don’t have to re-select the teeth.
Inside the properties panel of the Curves layer, drag the mid-tones up about one graph point — this will look unnaturally white, but don’t worry, you will fix that shortly.
Now, click on the FX icon in the layers panel and select Blending Options. At the bottom of the pop-up window, you’ll see “Select if Gray.” On the slider labeled Underlying Layer, hold alt/option and click on the right arrow on the white side of that slider, then drag to the left until you get a more natural result — on our image, we had to drag pretty far over to the left to get the most natural look. This step only applies the lightening affect to the gray spots on the teeth, making the teeth more uniformly white.

That’s it! Before you call it good though, zoom in on the teeth at least to 100 percent. You may need to go pack and refine your mask a bit more. You can also go back into the adjustment layers and lessen or increase the effect if the look isn’t quite natural enough or isn’t quite white enough. That’s one of Photoshop layer mask’s strong suits — you can always go back and correct adjustment levels later if you don’t get it right the first time.
Confused? Aaron Nace of Phlearn has a video tutorial using a similar whitening technique.
How to Whiten Teeth in Lightroom
Photoshop gives you the most control over the teeth whitening process, but Lightroom has a control that still produces fairly good results, and is a bit faster — we prefer the Lightroom tool, but we will use Photoshop when Lightroom results aren’t quite there.
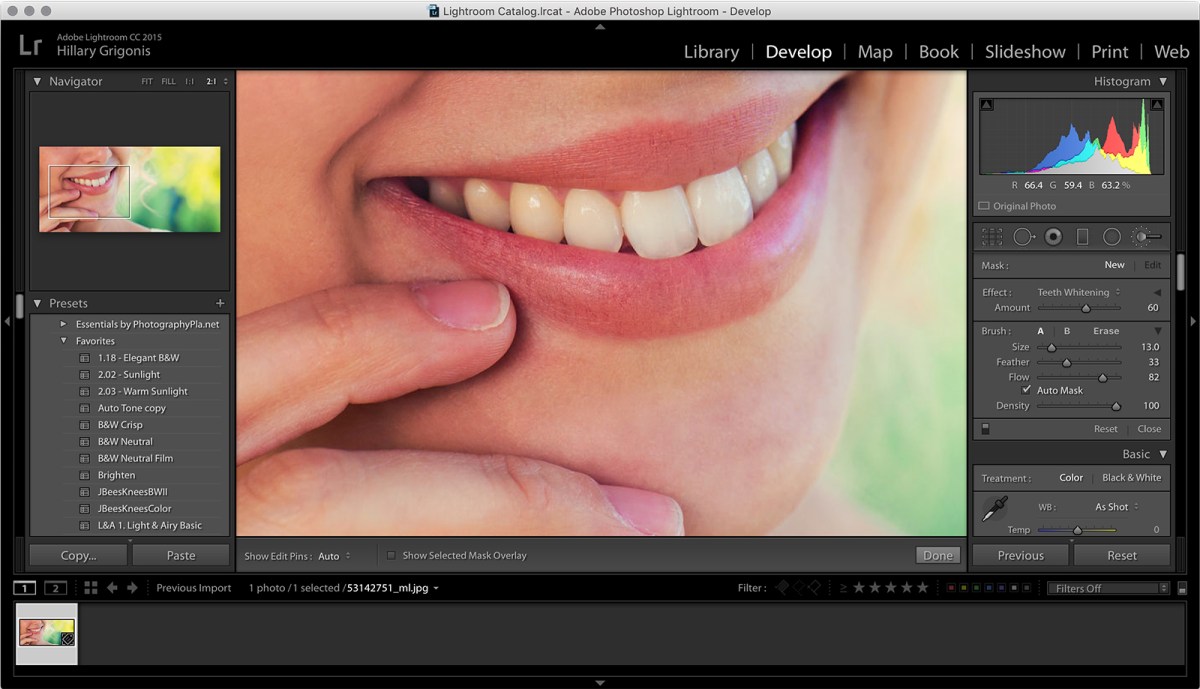
Inside the Develop module of Lightroom, click on the brush tool. Under Effect at the very top of the brush options, select Teeth Whitening from the drop down menu. Below that, you can select the appropriate brush size — we always check automask so the program will detect the edges automatically, although if the teeth are very uneven you may need to uncheck the automask and paint carefully. Now, just paint over the teeth with the brush.

If the teeth appear too white, you can drag the amount slider down to reduce the intensity of the effect. You can also customize the brush by tapping the arrow that appears right next to the effect drop-down menu and adjust the exposure and saturation levels.
Lightroom makes quick work of whitening teeth, while Photoshop offers a bit more finesse. There’s no wrong answer, but we’ve largely left the task up to Lightroom after discovering how easy it is to whiten teeth using the built-in tool.
With any beauty edits, always be cautious about over-doing it. Whiten teeth too much, and they’ll look fake. When in doubt, get a third opinion from a friend, especially before potentially offending whoever is in your photograph.
Using layer masks makes it easy to learn how to whiten teeth in Photoshop while being able to go back and fine-tune the effect. Lightroom’s built-in teeth-whitening brush, on the other hand, is a faster for quick fixes. Now, go edit a photo that would make any dentist proud — or learn how to edit hair, eyes or even oily skin.
Editors' Recommendations
- The best Photoshop alternatives
- Photoshop will soon allow you to swap out boring skies automatically using A.I.
- What Lightroom RAW photo import defaults are and how to adjust them
- Photoshop for iPad finally has Edge Detection — here’s how to use it
- What is Photoshop Camera? How Adobe’s new A.I. app edits photos before you take them


