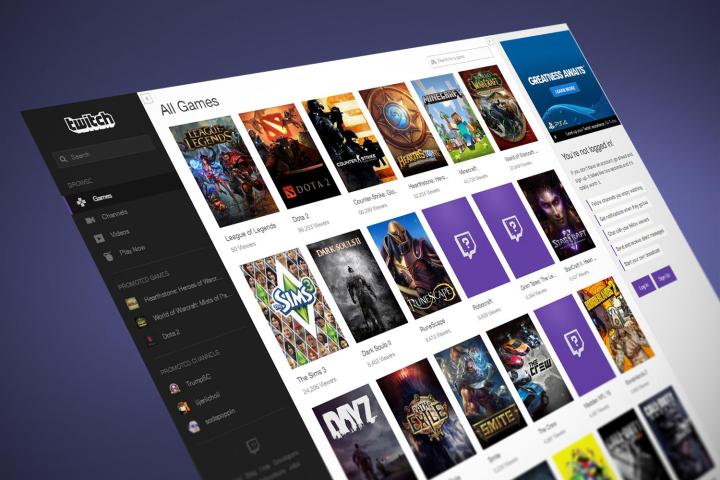
Saving with VOD on Twitch
VOD is an option Twitch offers streamers so they can keep parts of their stream in storage for later access and easy viewing for their fans. If you haven’t tried this part of Twitch yet, it’s the easiest way to turn streams into long-term videos. Here’s how to enable it.

Step 1: Log on and visit the Creator Dashboard. Once here, select the three-lined Hamburger icon at the top-left of the window to open settings.
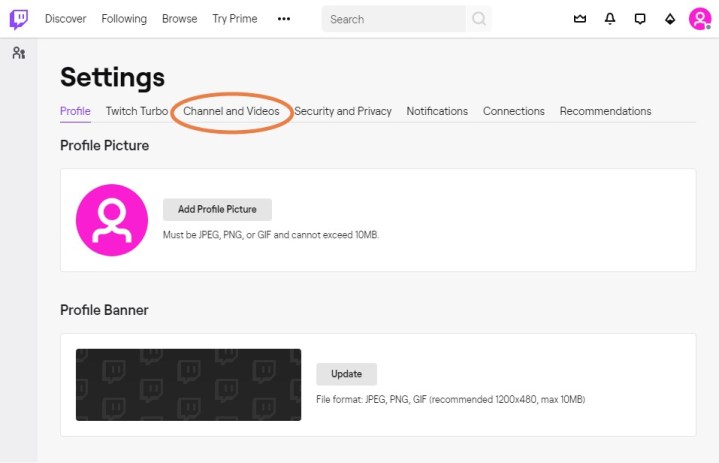
Step 2: In the menu, choose Preferences, then select Channel. This will shoot you over to the Channel Settings page. Once there, select your Profile Icon in the top-right corner to open another menu. Here, choose Settings, then choose Channel and Videos.

Step 3: In the Channel and Videos section, look for the heading that says Stream Key and Preferences or similar wording (the format sometimes changes with Twitch updates). Here, you will see an option to Store Past Broadcasts. Make sure the slider here is turned on to enable storage. This will automatically save your broadcasts.
Storage will last a certain amount of time based on the streamer type. Twitch Partners, Prime users, and Twitch Turbo users will be able to keep videos for 60 days. Others will keep videos for 14 days before removal. However, you can also highlight certain clips as particularly important videos, and these will stay permanently. Otherwise, you should transfer videos to YouTube or a similar platform if you really want to keep them or show them for years to come.
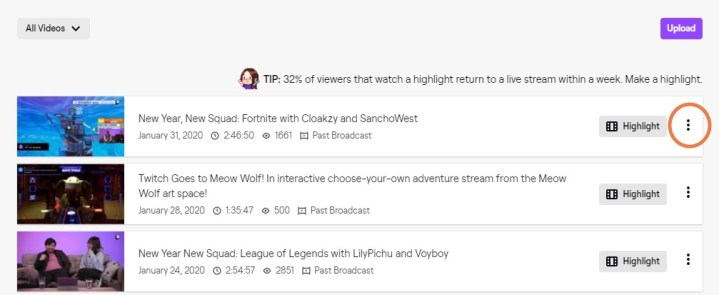
Step 4: If you ever want to share a video, upload separate videos, or make a video a Highlight, visit your stored videos by going to the Hamburger menu icon again and selecting Content, then Video Producer. This will show all your stored videos.
This section has several useful categories, including showing all your current Highlights, as well the videos that are about to expire. However, the most useful function is the Three-Dot Lines at the right of each video. Select these for a drop-down menu that gives you all the options for managing videos, including editing them down to a certain clip, downloading them to local storage, turning them into a Highlight, or deleting them entirely. If you use YouTube, you can also use the Export function for fast uploading to that platform.
Final Note: If you are a fan who’s subscribed to a Twitch channel and wants to view past footage of streams, you can go to the streamer’s archive and see the video Highlights and other uploaded videos that the streamer is allowing fans to watch. That’s the best way to watch past videos if you aren’t sure where to begin!
Saving streams at a higher video quality
Twitch VOD is the answer to many recording issues, but in some cases, a streamer may want to record a video with higher resolution or other extra features, something VOD doesn’t allow. VOD also doesn’t allow for especially long streams, which is problematic for many streamers. Fortunately, Twitch does allow local recording of your stream using third-party tools. Twitch specifically recommends using the free, open-source Open Broadcaster Software (OBS) for this, and since this is a solid, compatible app, we recommend it, too.
Step 1: If you haven’t already done so, visit the OBS Project and download their software, then spend some time getting acquainted with the tools. You will need to use OBS to stream to Twitch with this approach, so it’s a good idea to try a couple of streams in OBS just to get used to the process.
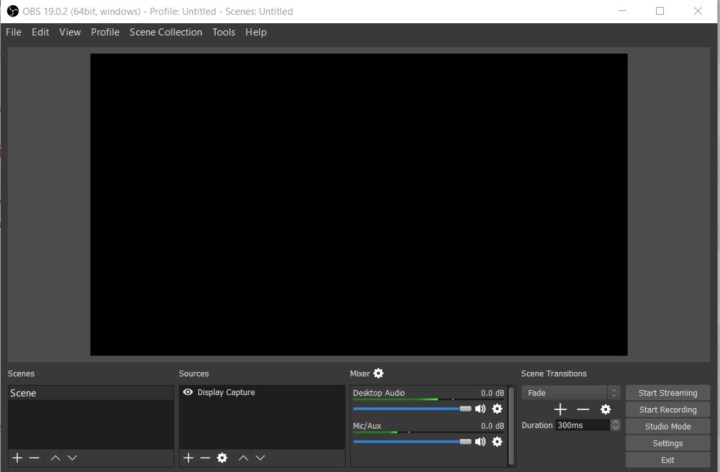
Step 2: When ready, open OBS and select the Settings menu at the top, and select Settings.
Step 3: In the Settings side menu, select Broadcast Settings. Here, look for the section that says Save to File. Select it so that it is enabled.
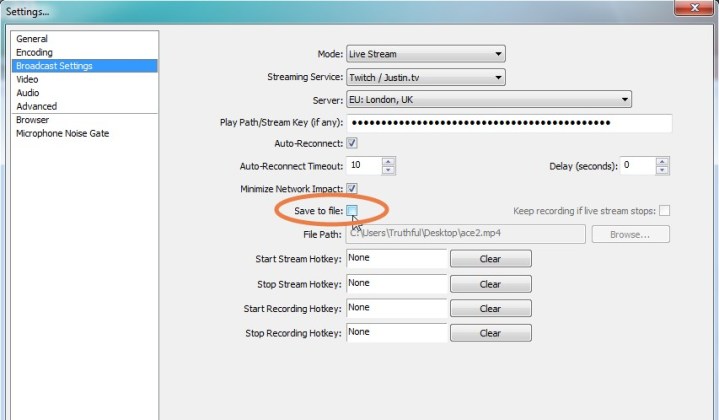
Step 4: Below Save to File, you will see a section called File Path. Type or paste a file path for the folder you want all these videos saved to. File names will, by default, be the date and time of the recording, although you can change that. Select Apply when you’re finished.
Step 5: Now, the stream will automatically save to local storage when you are finished, allowing you to edit or store it from there.
Recording someone else’s Twitch stream
In general, we don’t recommend recording a Twitch stream that you are watching. Twitch streamers frequently produce this content as part of their job. With their ownership, the responsibility of saving and sharing it — or choosing not to — is theirs. It’s also legally dicey.
On the other hand, if you obtain authorization from a streamer to film their work while you’re watching their stream, there are plenty of invaluable gadgets that can assist you. Many capture applications will permit you to film a portion of your screen with tailor-made tools. One of the apps that do this extraordinarily well is the free application we previously discussed earlier in this article, OBS!
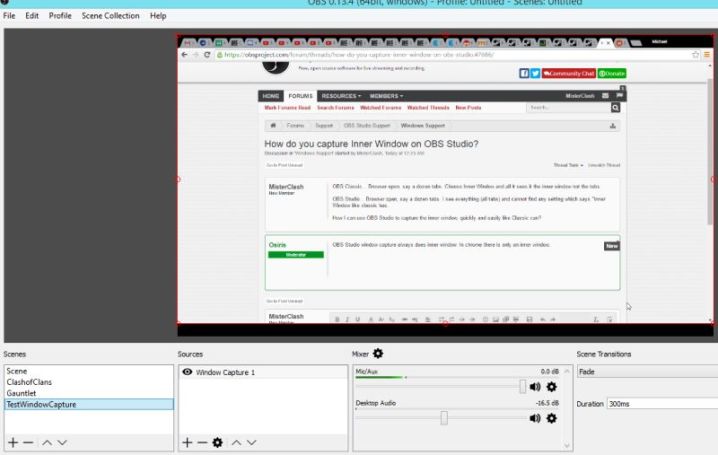
If you have OBS Studio downloaded, this method is relatively easy from start to finish. You can begin capturing video when you switch to Window Capture mode. While you’re looking at the capture zone, press and hold the Alt key and pull your cursor to one side to adjust the size of the capture area. Once you do this, you can change its size according to your Twitch video window and record what occurs there. Keep in mind that your video’s quality may be restricted a bit when using this technique.
If you’re not thrilled about using OBS, you can opt for other useful video capture tools that may work better for you. If you view Twitch with VLC, for instance, you can typically use the VLC recorder to record certain bits and pieces of the stream.
Editors' Recommendations
- How much RAM do you need for a laptop, gaming PC, or tablet?
- The best webcams for Teams, Zoom, streaming, low light and more
- The best 4K video editing PC build for under $1,000
- How to record a Skype call
- How to upload a video to YouTube