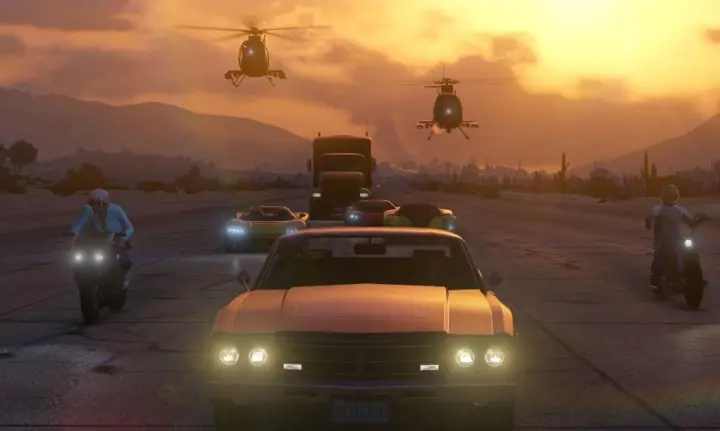
It’s been cool to see GTA Online grow from the rough-edged gem that it started out as into the polished anarchy that characterizes its present-day state. We’ve seen an assortment of add-ons and new features introduced since it launched in October 2013, including creation tools that empower players to deliver content of their own design.
The latest of these is Capture Creator, which allows for the building of match maps in one of the game’s four Capture the Flag-inspired competitive modes, which all fall under the Capture umbrella. Read on for a look at how each of these modes works and some tips for using the new Capture Creator effectively.
You’ll need to bring some creative spark on your own to actually make anything, but this guide is meant to help you overcome the technical hurdles of turning that spark into a grand conflagration.
Capture basics

Before we can explore the particulars of Capture Creator, it’s important to understand how the four basic Capture modes work.
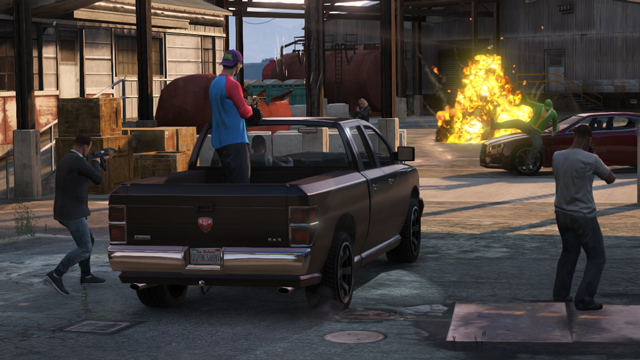
- Contend: In Contend, teams fight to get their hands on one or more target packages – it could be a bag of money, a duffle bag, or a secure briefcase – that must then be ferried to a home base. Do it successfully and you’ll score points for your team. A package disappears and respawns once it’s been returned to a base. The process of fighting over these targets and ferrying them back continues until one team hits a designated point total or time runs out.
- GTA: Much like Contend, GTA is all about ferrying target objects back to your base. The difference in this mode is that you’re gunning for vehicles. Where Contend matches tend to fit best in relatively small spaces, GTA matches often require using much more of the map. Teams compete for control of vehicles, working against a clock to nab the highest score for bringing designated rides back to base.
- Hold: In Hold, teams fight bring captured packages back to base, but the packages remain there and can be stolen by other teams. You’ve actually got to worry about defending your base in this mode, meaning some players will stick around to fend off invaders while others sweep across the map to capture packages, either in neutral territory or from enemy bases.
- Raid: Similar to Hold, Raid places equal emphasis on offense and defense. At the beginning of a match, all team bases spawn with some number of capture packages already inside them. The goal is to assault enemy bases and bring those packages back to your home base, while preventing opposing players from doing the same.
This ought to go without saying, but it’s best to spend some time actually playing these modes using pre-existing maps before you try diving in with the Capture Creator. It’s certainly possible to come up with something without ever having played a Capture match, but getting some firsthand experience in “official” maps should provide a better sense of what works and what doesn’t work with regards to balance.
Pay attention to base placement, to vehicle and weapon/item placement. Where do you spawn? Where do you respawn, and in what type of vehicle (if any)? Are all of the base locations balanced with regards to how defensible they are? These are all key elements you should be paying attention to.
Creator basics

Now that you understand how Capture works, let’s take a look at the Creator half of this equation. GTA Online‘s Creator spreads across Deathmatch, Race, and now Capture options, but there are some common elements that link all three.
The first is your perspective on the world, which is viewed either from a top-down perspective or from a ground-eye view, with you in control of the campaign’s Michael (just because, really). You start out with the bird’s-eye view, but can easily switch over to Michael by pressing the Back button (Xbox 360 controller). You can then switch back to the other camera by pressing down on the D-pad to bring up the Creator controls menu and then pressing the Back button. Helpfully, these options and the related buttons are all noted right in your HUD.
Note that switching between the two cameras isn’t just an aesthetic choice. The top-down view can zoom right down to the pavement, but it’s not able to interact with any of GTA Online‘s interior spaces. For that, you’ll need to switch to Michael. You’ve still got all of the same tools that you would in the top-down view via the Creator controls menu, you’re just restricted to a character’s-eye perspective.
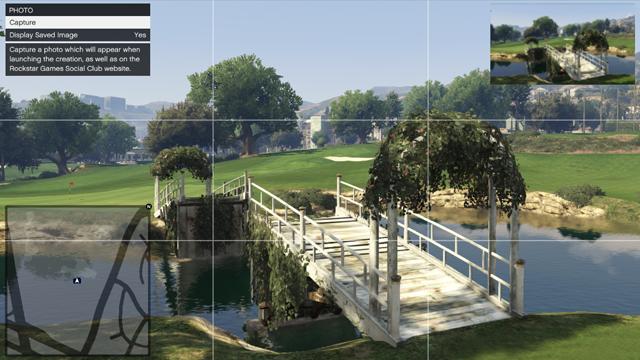
All Creator maps must also have some descriptive data to make them findable by other players. You’ll need to come up with a title, a brief description, and some search tags (a handful of words and phrases that characterize your creation). It’s very helpful to have an external keyboard or second screen device (a la Xbox Smartglass), since typing lots of text with a controller can be a slow and arduous process. You’ll also need to snap a photo to serve as your creation’s profile image.
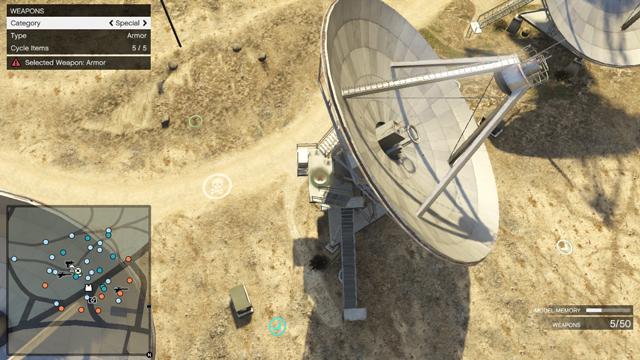
Capture creating – first steps

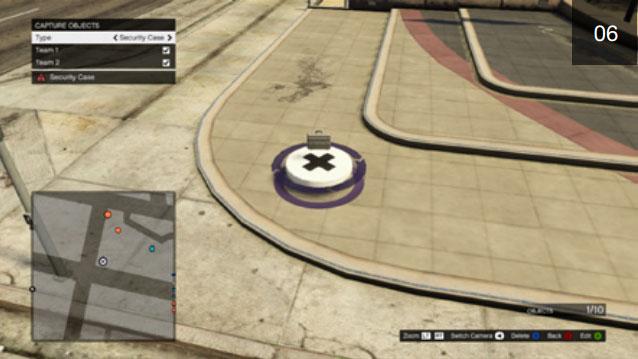
Now that you understand how the Creator camera works and what information you’ll need to punch in regardless of the mode you’re working with, we can move on to the Capture Creator itself. The first thing you’ll need to do is decide which of the four Capture modes you want to build an arena for. The basic controls remain the same regardless of what you choose, but the particulars of elements like Capture Objects (each team’s target packages) and base setups vary from mode to mode.
These differences mostly come down to common sense knowhow, but it’s something to keep in mind. If you’re making a GTA Capture match and you’ve designated large vehicles as the targets, for example, you’ll want to make sure that the return zone at each base is large enough to accommodate them all. If you’re making a Raid Capture match, you’ll want to think very carefully about base placement and size, since all of the Capture Object spawns must be placed inside those designated areas.
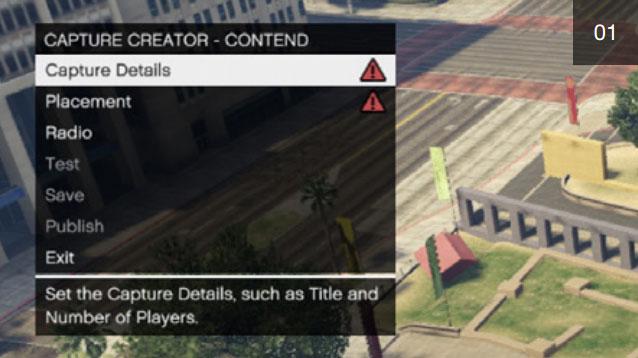 Before doing anything else, head to the Capture Details menu (where you set title, description, and so forth) to establish the top-level attributes for your creation. You’ve got to decide how many teams there will be and how big those teams are, what the overall lobby limit is (up to 16), and any time limits or score targets.
There’s an assortment of other settings as well: team vehicle sets the ride that players respawn in (if any), player carry limit dictates how many Capture Objects an individual can hold at once, and the Ambient Settings sub-menu allows you to set the time of day, weather, vehicle and pedestrian density, and lobby radio/game music, as well flip an on/off switch on things like AI-controlled gang members and emergency services.
You can come back and change any of these elements later, but it’s important to set them up first thing – especially the number of teams and their overall size – since that heavily informs how you design the rest of your creation.
Capture creating – the nitty-gritty
Once you’ve got your top-level elements in the Capture Details menu set, it’s time to head over to the Placement menu. Your first act here is to set up the both the Trigger location and the Lobby Camera. Your Trigger location sets the literal map marker where your Capture creation can be found. Similarly, the Lobby Camera – which must be in close proximity to the Trigger – dictates what players in the lobby are looking at while they wait. This isn’t optional; you won’t be able to interact with anything else in the Placement menu until you set the Trigger.
Next you’ll want to figure out where each team’s base will be. You’re not restricted to just two teams in Capture, but however many there are, you’ll want to think carefully about the locations you choose. This gets back to the earlier point about spending some time playing before you try your hand at creating. Try to think about how much distance there is between each base, how defensible the designated locations are in relation to one another.
 You’ll also need to place team start points – one for each member of each team – though it’s worth noting that these are not the same as respawn locations. Neither team restart points nor respawn locations, which is a separate Placement menu option, necessarily need to be located at or near a base. You might prefer to have all teams spawn right next to one another when the match starts. Or to have respawn zones in a more central location. You can even skip respawn areas entirely, in which case downed players reappear close to where they died. It’s entirely up to you; just remember to aim for a balanced setup.
You’ll go on like this from here, setting down Capture Objects/Vehicles, weapons, support items, and the like. Always pay attention to the item “budget” in the bottom right corner of the screen. There are limitations on how many of certain objects can be placed. As with everything else, think carefully about individual placements and how they could impact the flow of a match. Will you put down health/armor pickups? Near bases? In central locations? Will you dot a GTA Capture map with explosives for taking out target vehicles? Where can you place these items so that they’re most effective? Where are they least effective?
Capture creating – advanced tips
Team numbers, base locations, spawn locations, Capture Objects… that stuff is all necessary for building out a map in Capture Creator. It doesn’t have to be where your creativity ends, however. There’s a variety of other elements you can adorn your creation with to further personalize it. We’ll take a broad look at those now.
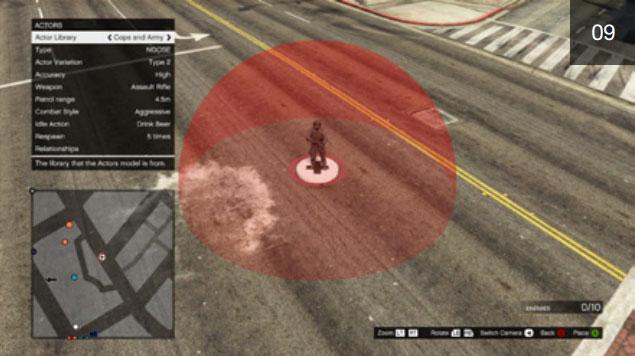
The Actors option allows you to fill out your created space with an assortment of NPCs. This process gets fairly involved, as you’re able to not only choose the type of actor (Gang Members, Cops and Army, etc.) and specific character model used, but also set a wide range of AI parameters and spawn conditions. You can set it so that an Actor is carrying a Capture Object (only one per Actor though) or driving a vehicle. Or both together. An Actor can be hostile/friendly to everyone, or be assigned to fight for/against certain teams. Attributes like combat style, weapon choice, accuracy, and movement are all in your control.
 The Props option gives you the ability to insert an assortment of objects into the world; dumpsters, gas tanks, barriers, ramps… there’s a wide and varied assortment, broken into a range of categories. There are both movable Dynamic (up to 10 can be placed) and unmoving Static (up to 50 can be placed) props. Whichever type you’re placing, you can rotate it around to tweak it’s positioning, but that’s about the extent of it. There’s no way to alter the size or physical makeup of a Prop, though certain items – such as ramps – come in multiple sizes and shapes.
The last thing we’ll touch on here are Zones. Say there’s a part of the world that you want to clear of ambient pedestrians and/or vehicles, which is to say the people/vehicles that spawn naturally as part of GTA Online‘s open world. To create a Zone, you’ve got to first choose what you want to clear out – peds, vehicles, or both – and then choose the corner points for the box that the zone represents. You move your cursor to wherever you want one corner of the Zone to be and press A (Xbox 360 controller), then move it to where you want the opposite corner to be and press A again. Very simple.
Testing out your creation
The final step before publishing your map is a required test run. Before you choose the Test option, look at the Capture Creation and Placement menus. Do you see any menu items marked with a triangular red icon? That means you’re missing something. Go back into that menu option and figure it out. Shouldn’t be too difficult.
Testing is a simple process. For each team, you’ve got to obtain a Capture Object/Vehicle and score 1 point by delivering it to your base. This can also be a great way to get a real feel for your creation, since you’re deposited on the map with full access to weapons, vehicles, and the like. You can always run around as Michael in the creator, but your access to much of GTA Online‘s gameplay is restricted. Note, however, that if you edit anything after you’ve completed your test, you’ll need to test the whole thing again.
Note as well that there’s a difference between saving a creation and publishing it. Saved Jobs – this isn’t just restricted to Captures – can be played with friends, regardless of whether or not they’ve been tested. The testing is only required if you want to publish your job to Rockstar Games Social Club for everyone to use.
Publish checklist
Once you’ve built everything and tested it, you’re ready to publish. Here’s a final checklist of what you’ll need to have set up before that can happen. Note that if any of these elements aren’t set, the Publish option will be greyed out. Good luck, and have fun!
- Title
- Description
- Photo
- Target score
- Trigger
- Lobby Camera
- Team Start Points (all must be placed)
- Team Capture Points (one for each team)
- Capture Objects/Vehicles (there must be at least one for each team)
- Completed Test
Editors' Recommendations
- GTA 5 cheats: codes and phone numbers PS4, PS5, Xbox, and PC
- How to sell cars in GTA 5
- The biggest gaming news of 2023: Insomniac leak, GTA 6 reveal, and more
- The hacker who leaked Grand Theft Auto VI has been sentenced
- Grand Theft Auto VI didn’t need The Game Awards