What you will need
While some light tents require hard-to-find materials like Tyvek, everything for this quick DIY can be picked up at a grocery store, and chances are pretty good you may already have some of it lying around.
For this project, you will need:
- Tin foil
- Foam board or a large piece of cardboard
- Tape
- White poster board
- Window
- Table
- Camera (yes, your smartphone counts)
- Tripod (optional)
How to make a quick DIY light tent
Light tents are usually accompanied by a pair of lights, which is one of the reasons why they are so pricey. A quick way to lower the cost is to use a light source everyone has access to: a window. Technically, this doesn’t create a real light tent, but mimics the effect in much less time than other, more complex DIY light tents.
Most light tents, however, use two lights, one on each side. With a window on one side, a quick DIY reflector fills in the shadows on the opposite side. Take a piece of foam board or a large, sturdy piece of cardboard and wrap it in tin foil. You can wrap it completely, or just cover one entire side. Use some scotch tape as needed to keep your DIY reflector from falling apart.
Next, choose your window wisely. Avoid any windows that create a square of light on the carpet – you want soft, even lighting to avoid weird shadows. A north or south facing window will work for this any time of the day, but if you’re limited to east-west options, simply shoot when the sun is on the opposite side of the building.
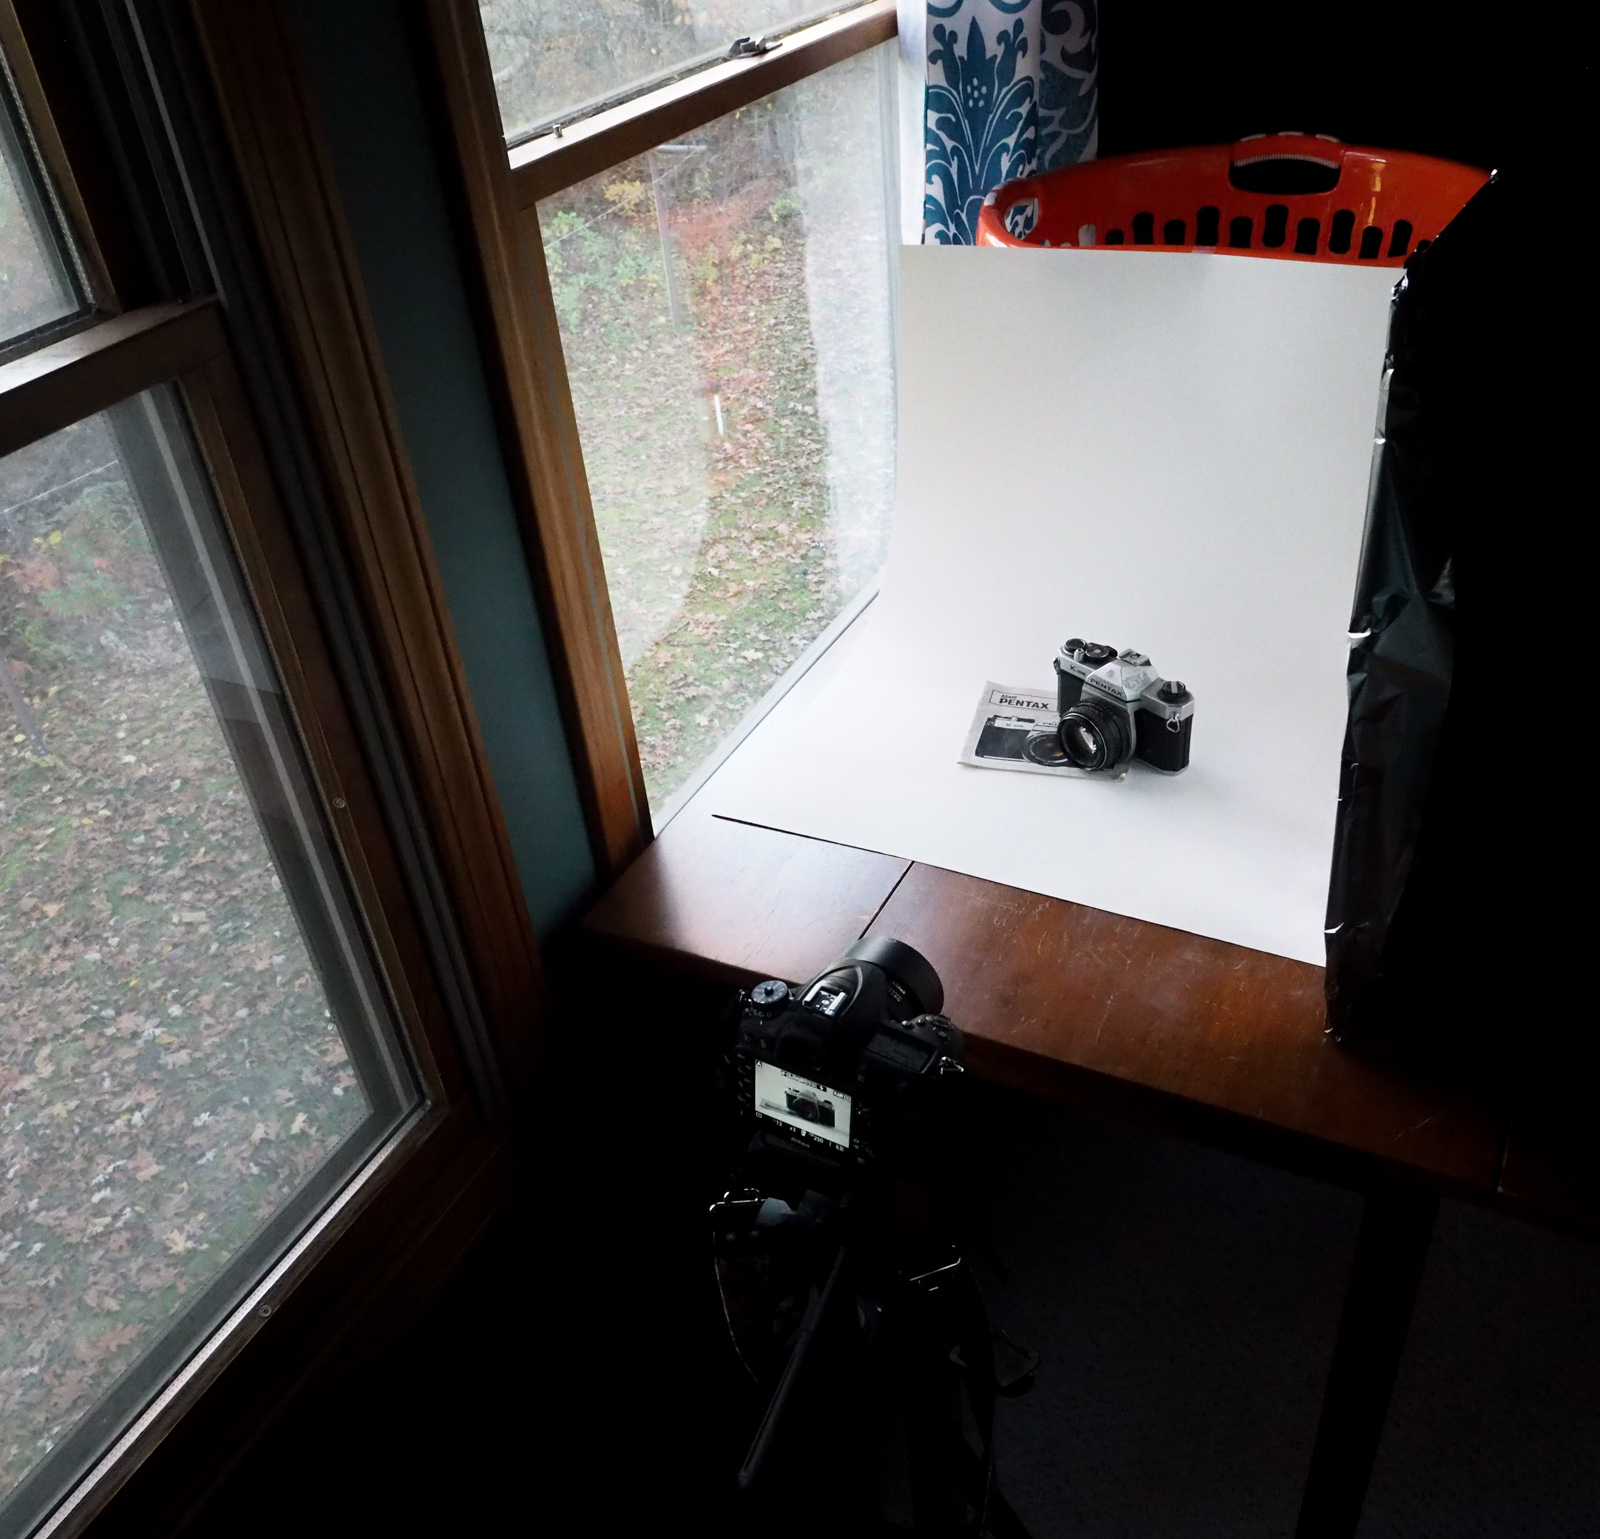
Bring a table over to that window so that you can place the product you want to shoot directly next to the window. For the seamless white backdrop, tape up a piece of poster board so that the paper is covering some of the table and also fills in some of the background, with the window to one side. You can use whatever random household items you have on hand – I used a laundry basket.
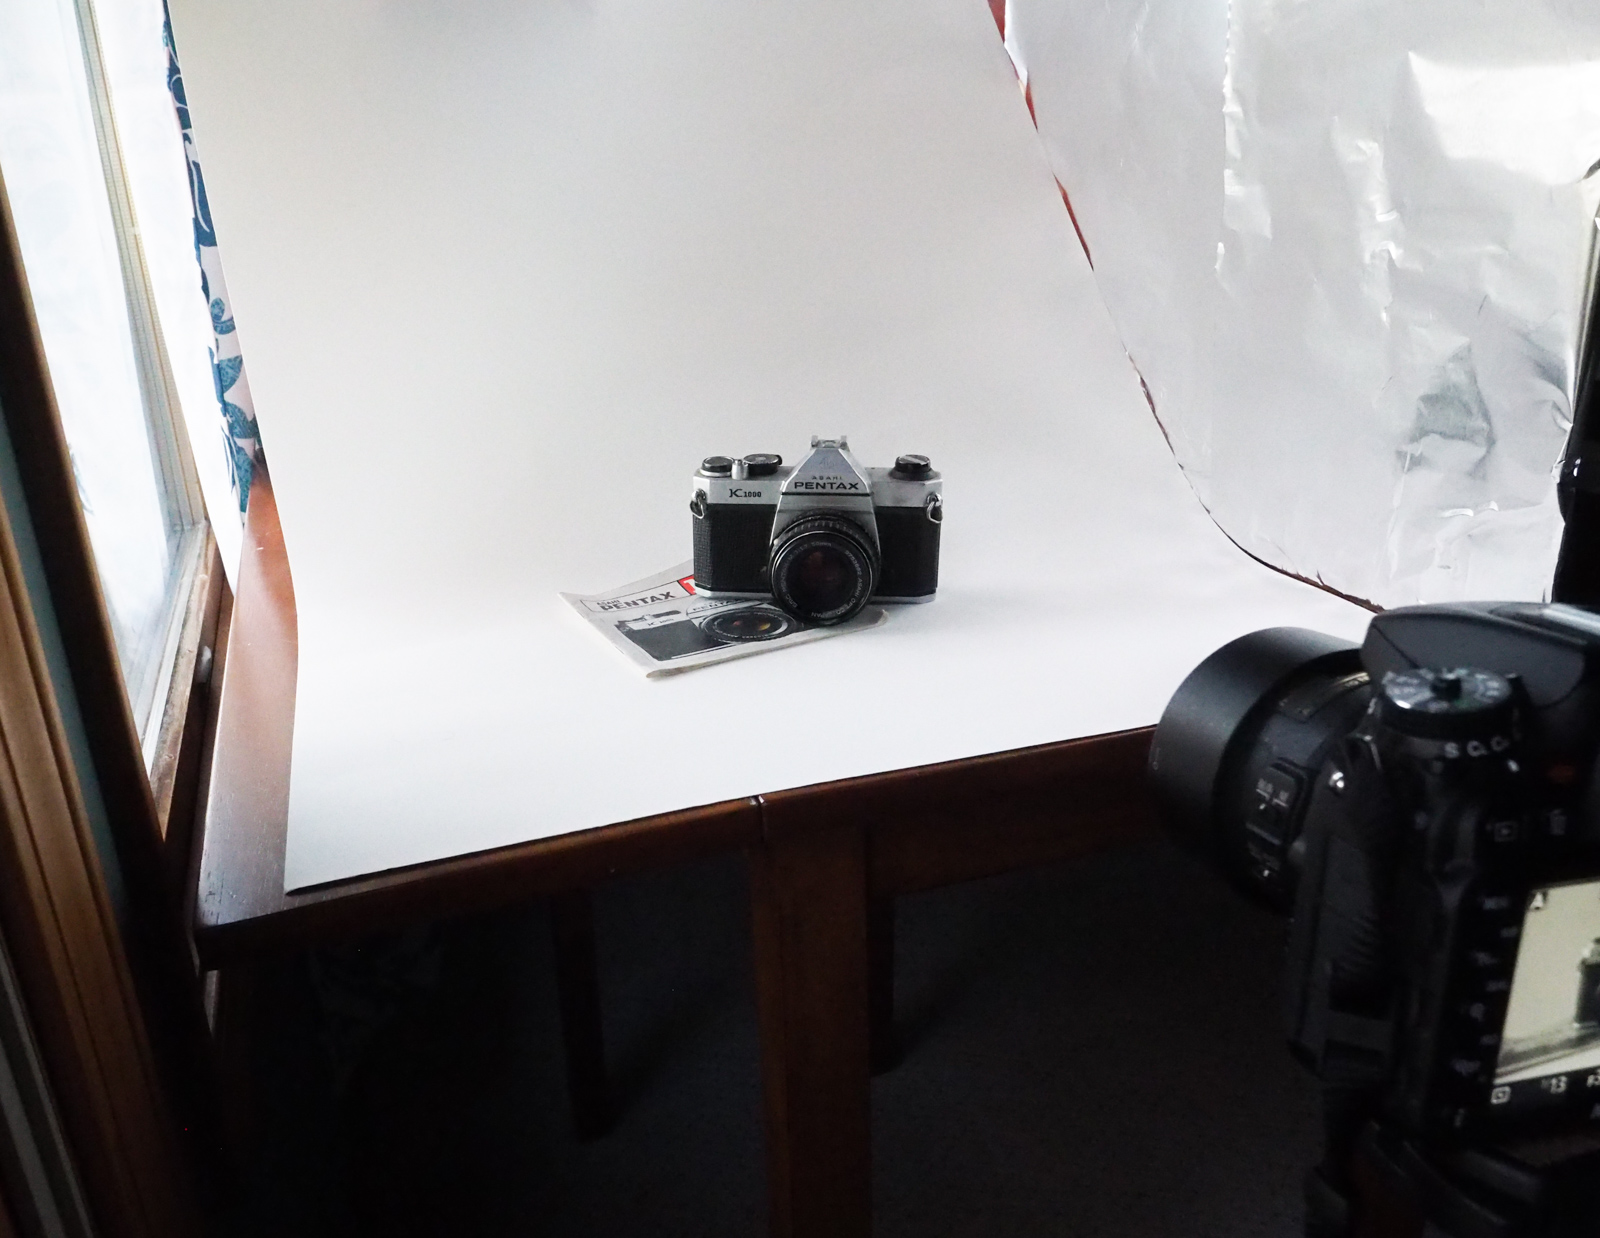
If the object you are photographing is large, poster board won’t be enough to cover the entire image. White sheets or a few yards of white fabric from a craft store will also do the trick for bigger objects.
On the opposite side of the white poster board, place your tinfoil-covered contraption so that it is parallel with the window, tinfoil side facing the window. The reflective quality of the tinfoil will bounce some of that window light back, making it look like you used a two light set-up.
Place the product between the window and that DIY reflector on the white poster board – and now you’re ready for the photos.
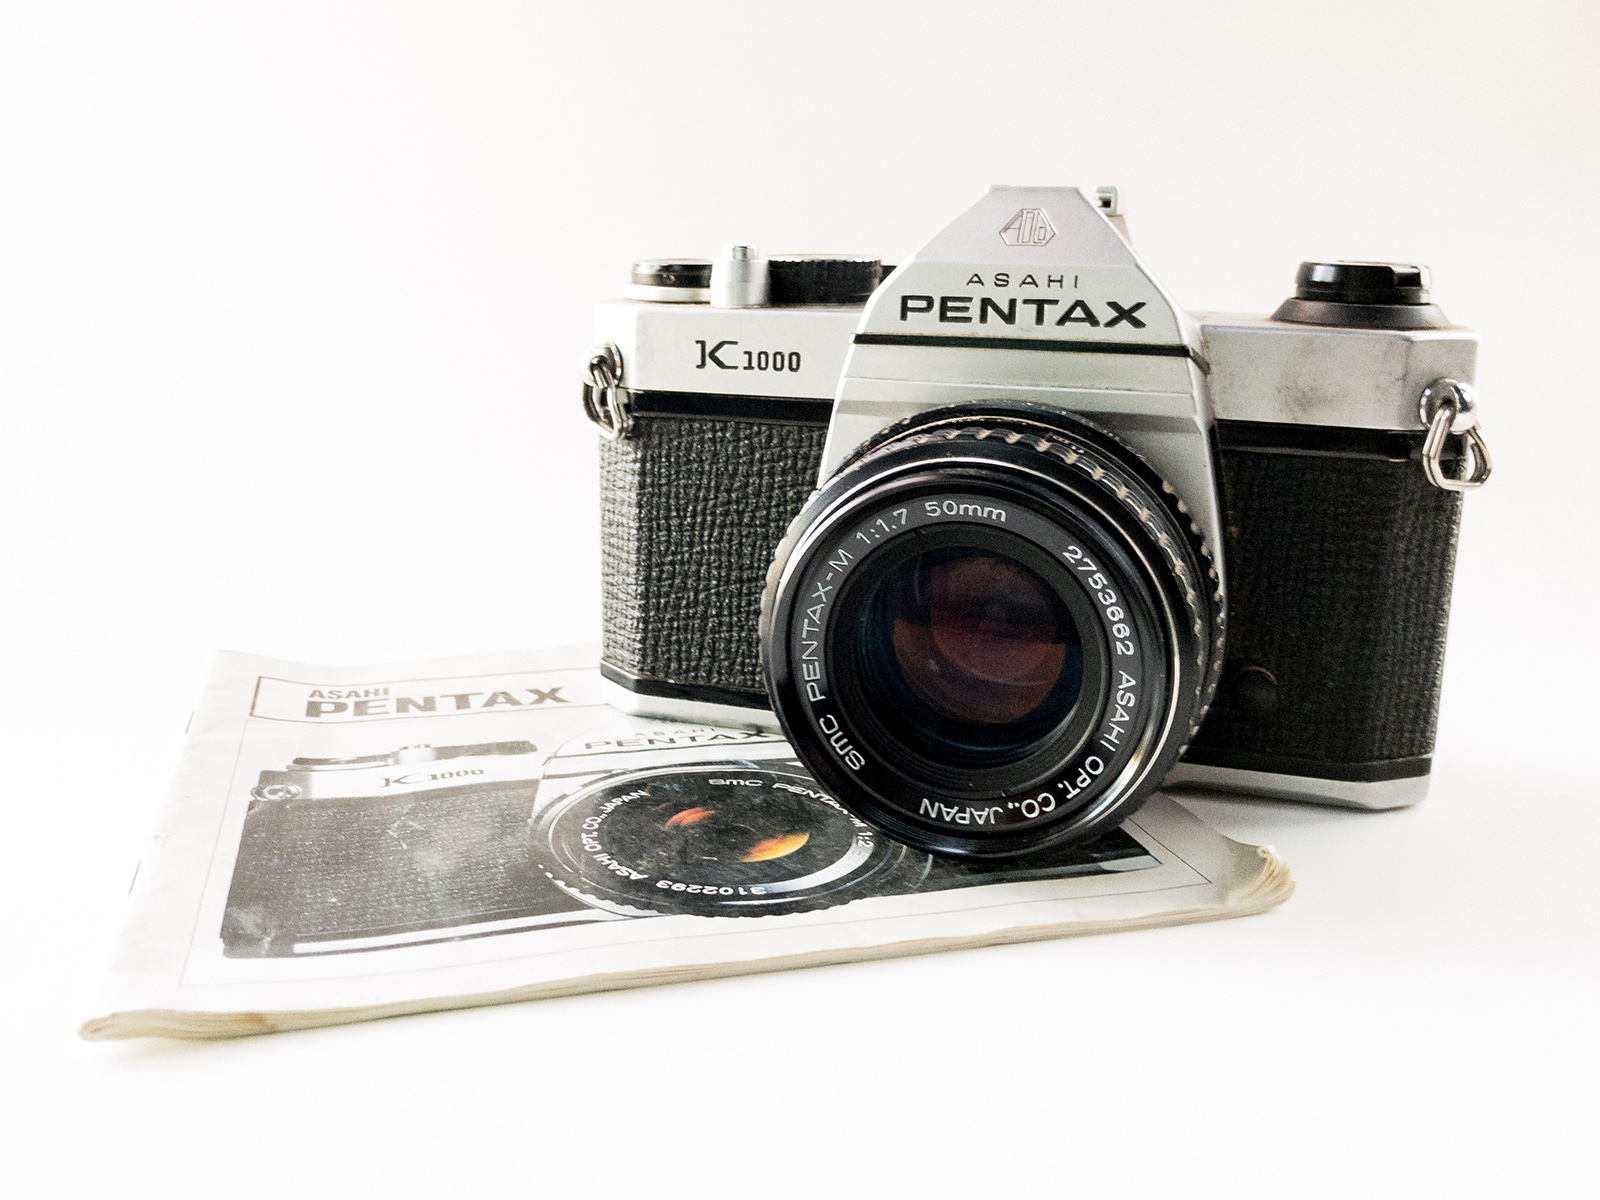
If you have a tripod, set that up to help prevent any camera shake when shooting. With the tripod, I was able to shoot with a low ISO and still get shake-free images, but if you don’t have a tripod, simply turn the ISO up and if you can, prop your elbows up on the table to steady your hands. I used aperture priority mode on my DSLR set to f/3 with an ISO of 250 to get the following shots:

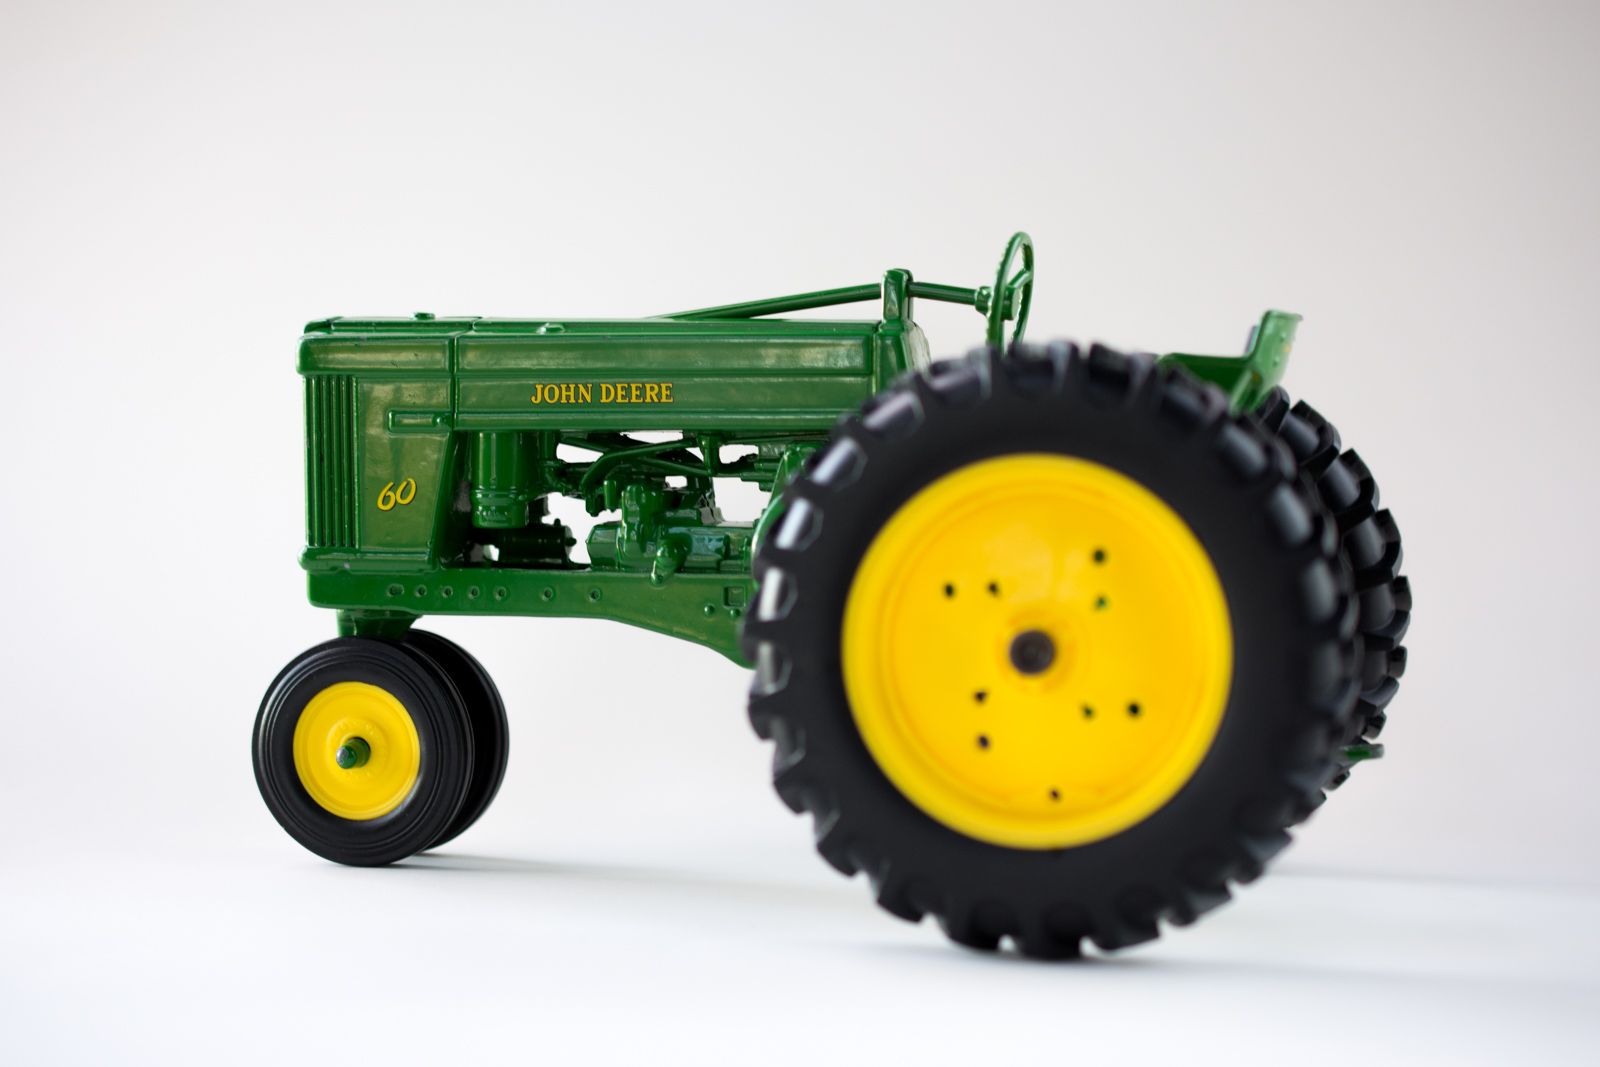

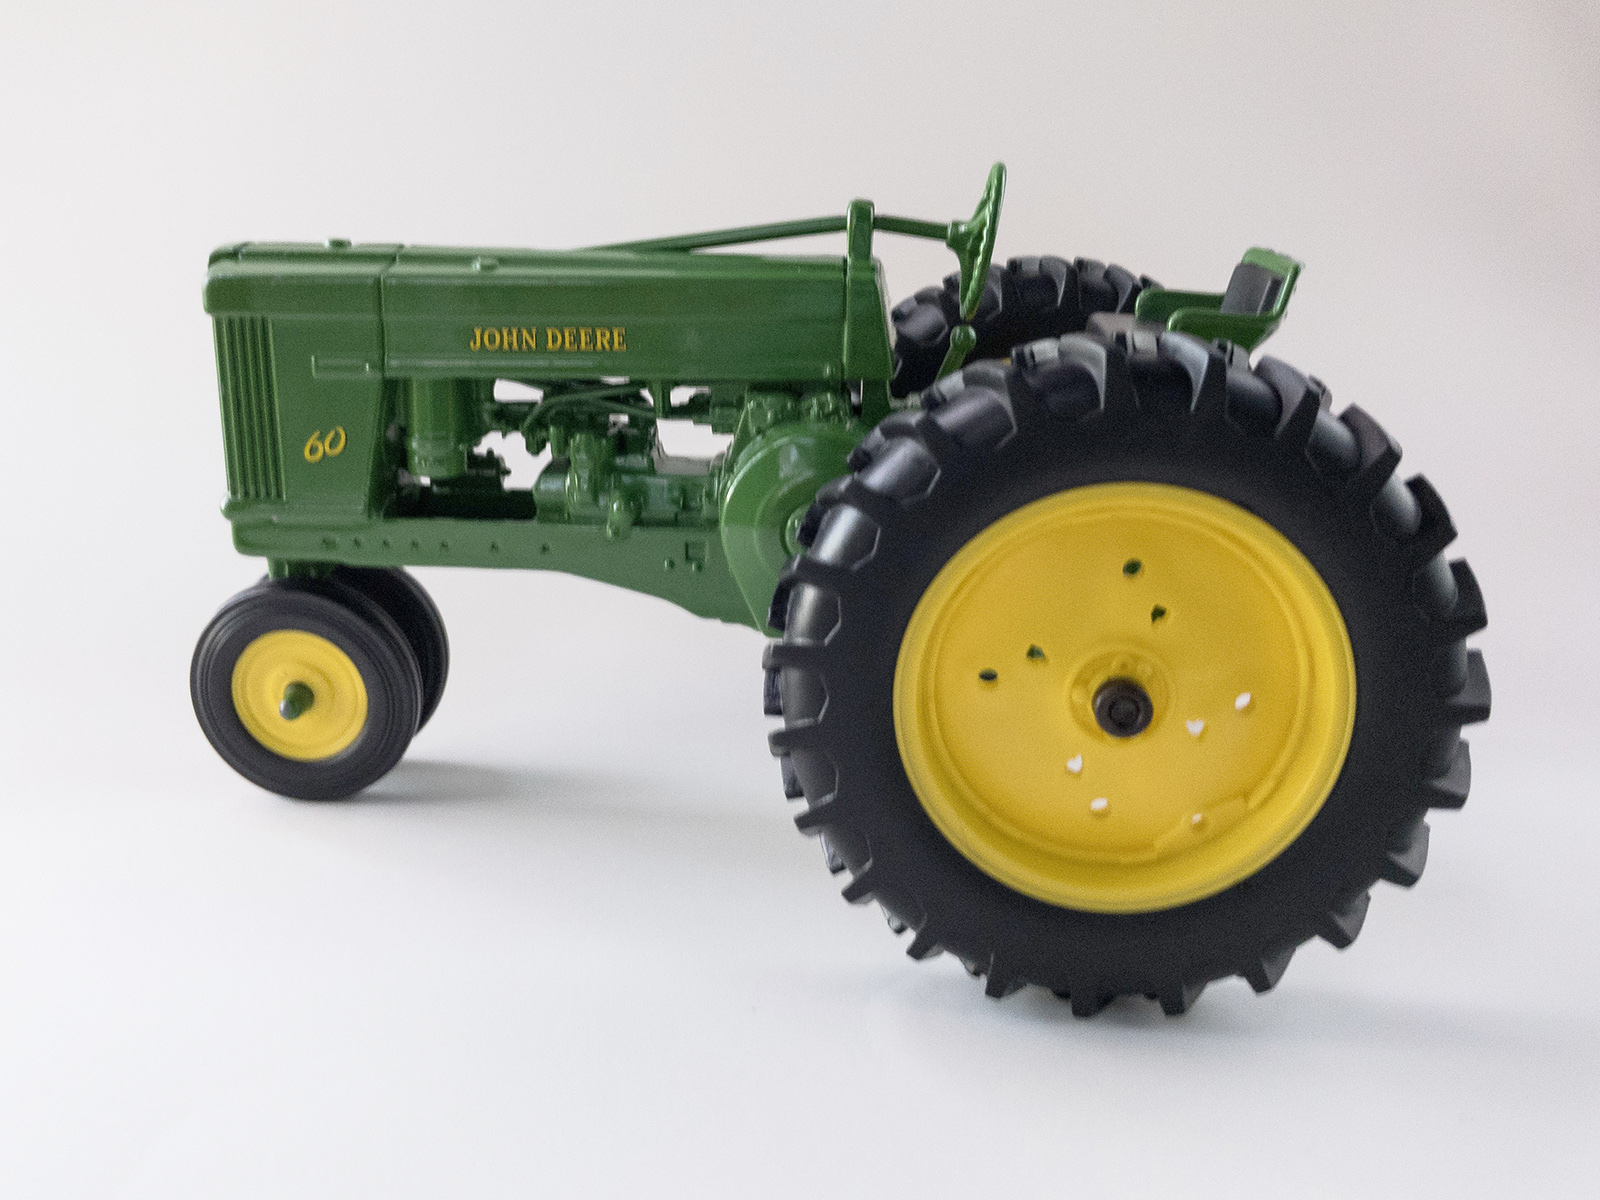
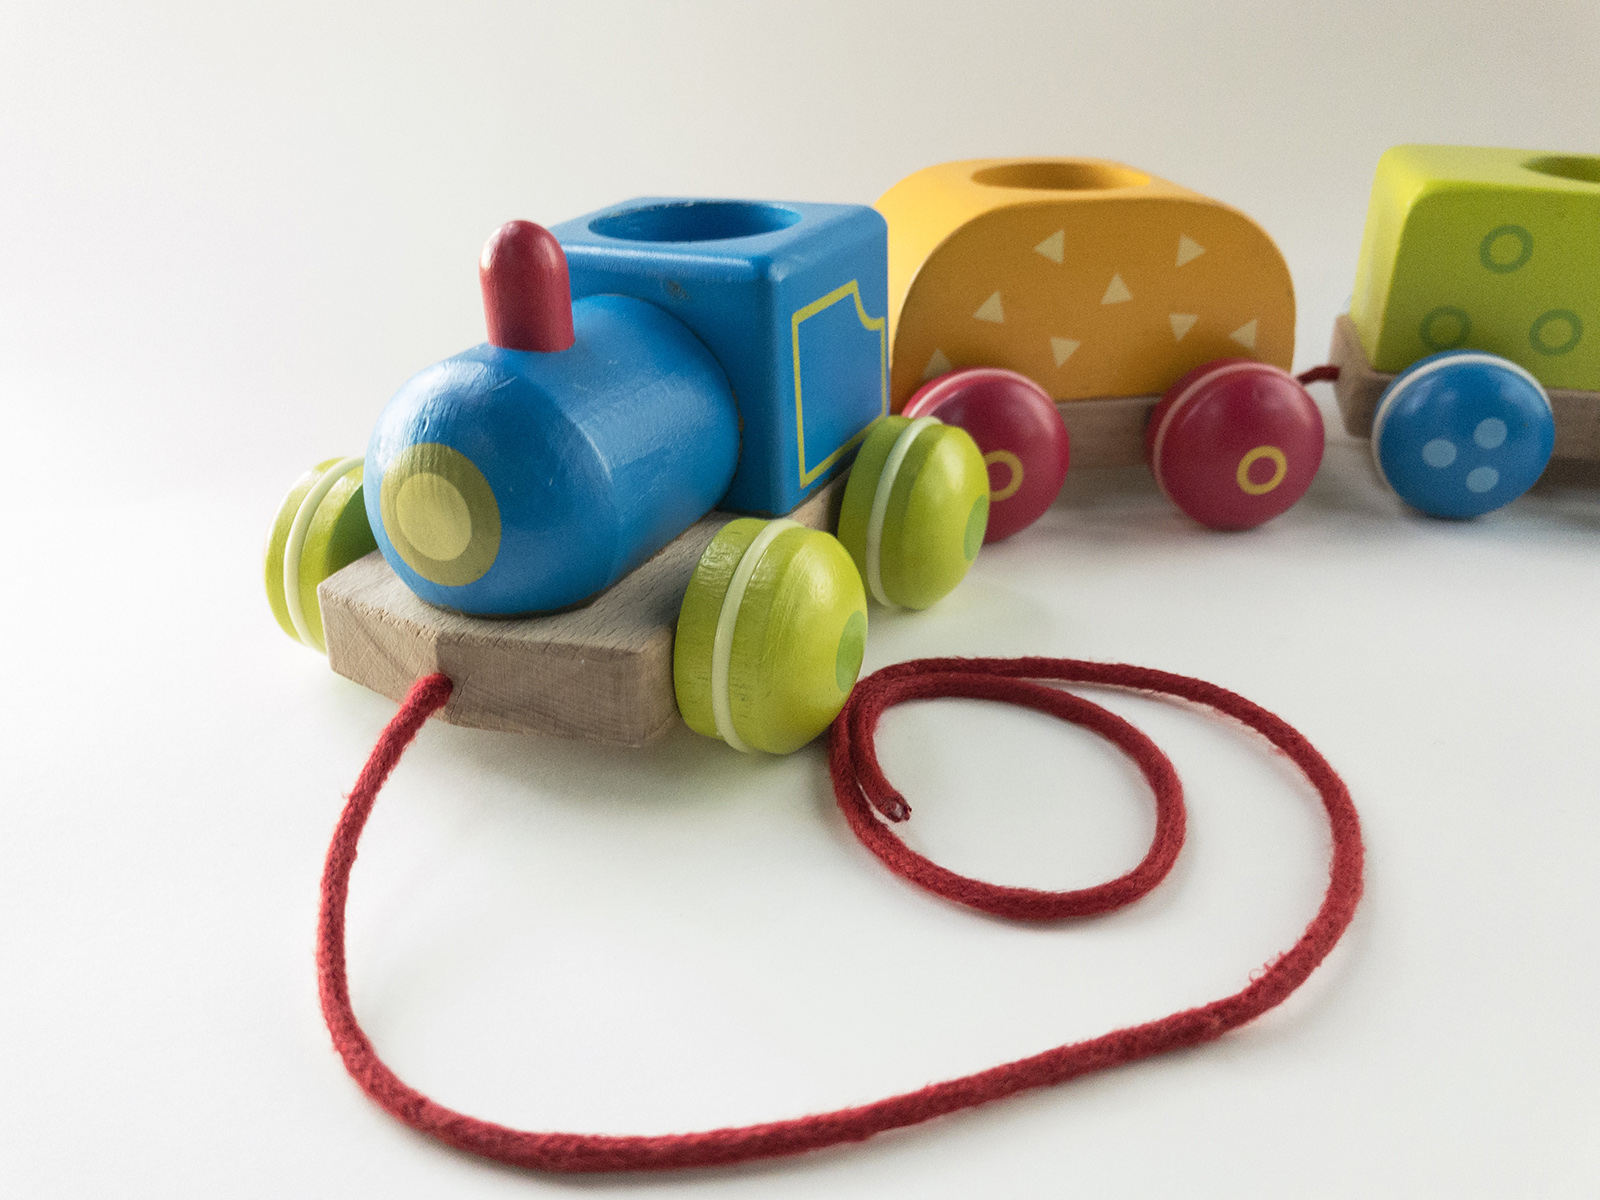
Of course, buying a DSLR would well-exceed that $5 project estimate. While it would be a good idea for those with an Etsy or eBay business to invest in a good camera, there’s nothing wrong with using your smartphone to shoot a few photos to clean out your garage with a few eBay listings. I took these photos using an iPhone 7, using the Lightroom app in order to shoot a DNG file:
After the shoot, a quick edit will help polish the look – use whatever image editing program you have – even most free options will do the trick. I used Lightroom on my desktop with a Creative Cloud subscription, but the smartphone version is free to use. Since I didn’t use an actual white backdrop, I tweaked the white balance and bumped up the exposure a bit so the background became a pure white.
Overall, this DIY setup took about ten minutes to prepare (excluding actually shooting and editing the images), and I spent around $2 on poster board and dug out a roll of tinfoil I already had in the kitchen.
A light tent helps soften the shadows to create flattering light for detailed product photos. While this DIY solution won’t allow you to shoot at 1 a.m. in your basement and isn’t as portable, using window light is an inexpensive way to get professional-looking results without investing in professional-looking equipment. Tinfoil and laundry baskets may not look that classy, but in photography, what’s behind-the-scenes stays behind-the-scenes, right?