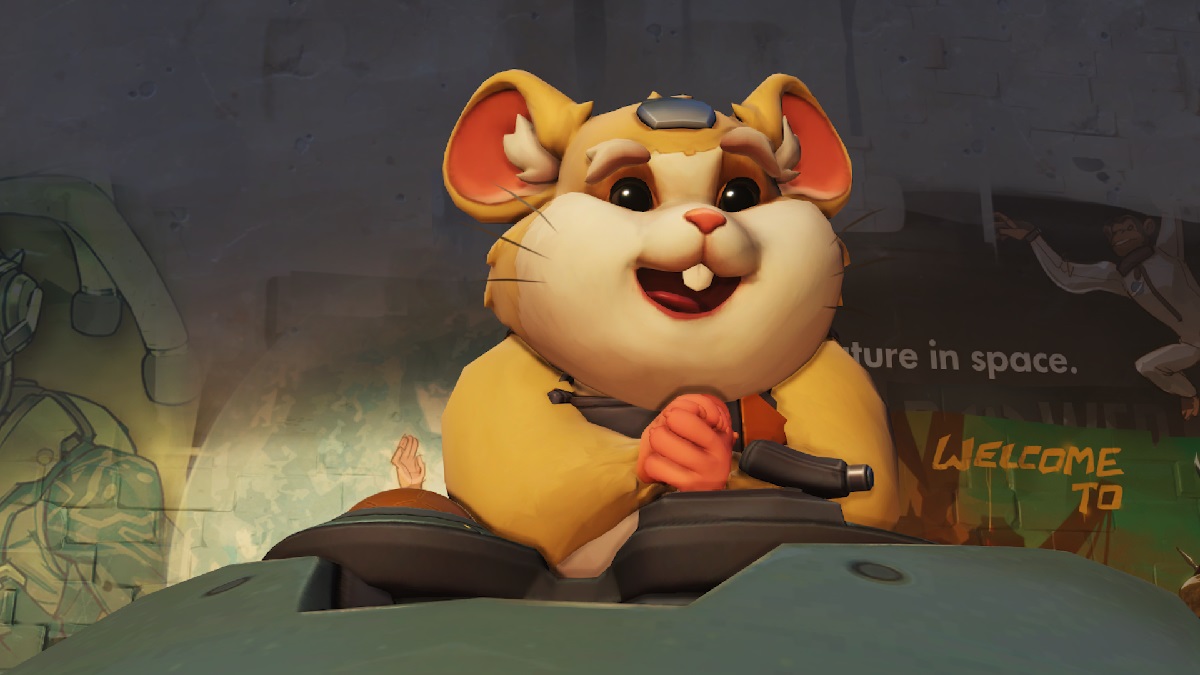

Overwatch’s 28th hero has finally made the leap from the Public Test Realm (PTR) into the proper game. His name is Wrecking Ball, and he’s the cutest little hamster you ever did see. He also goes by the name of Hammond, and he can be found in an oversized mech kitted out with miniguns. Looks kind of like a hamster ball, right?
Wrecking Ball may look like an unassuming, roly-poly little guy, but don’t sleep on this diminutive dynamo, because he can do exactly what his name implies if played correctly: wreck things. Now that he’s available for everyone on all platforms, we’ve put together a guide to help you get acclimated to his various moves and abilities. Here’s everything you need to know.
Who is Wrecking Ball?

Hammond the hamster is a 14-year-old rodent previously held in captivity at the Horizon Lunar Colony in the Overwatch universe. Animals were held in this facility and administered various types of genetic therapy while scientists studied how they adapted to staying on the moon for long periods of time. The colony housed mainly gorillas, monkeys, and primates, but was also home to smaller creatures like Hammond.
Hammond grew smarter with each passing day, and while in captivity would often escape his habitat to explore the moon base and pick up skills as a mechanic, oddly enough. Of course, after the gorilla uprising that took out the colony’s team of scientists, Overwatch mainstay Winston hatched a plan to escape to Earth, and Hammond wanted in.
Using his extensive mechanical knowledge picked up during his nightly forays into the inky black around the moon base, he created his own small capsule and attached it to Winston’s escape pod. Plummeting to Earth, Hammond found himself in Australia, controlled by the Junkers.
The determined hamster modified his inimitable escape pod into a fighting mech, and hit up the Scrapyard’s battle arena while in Australia. Using the winnings he amassed while rising up the ranks under the name Wrecking Ball, he upgraded his makeshift mech until it reached the form we know now. The rest is history, and he’s now joined the Overwatch team as hero 28.
What kind of hero is Wrecking Ball?

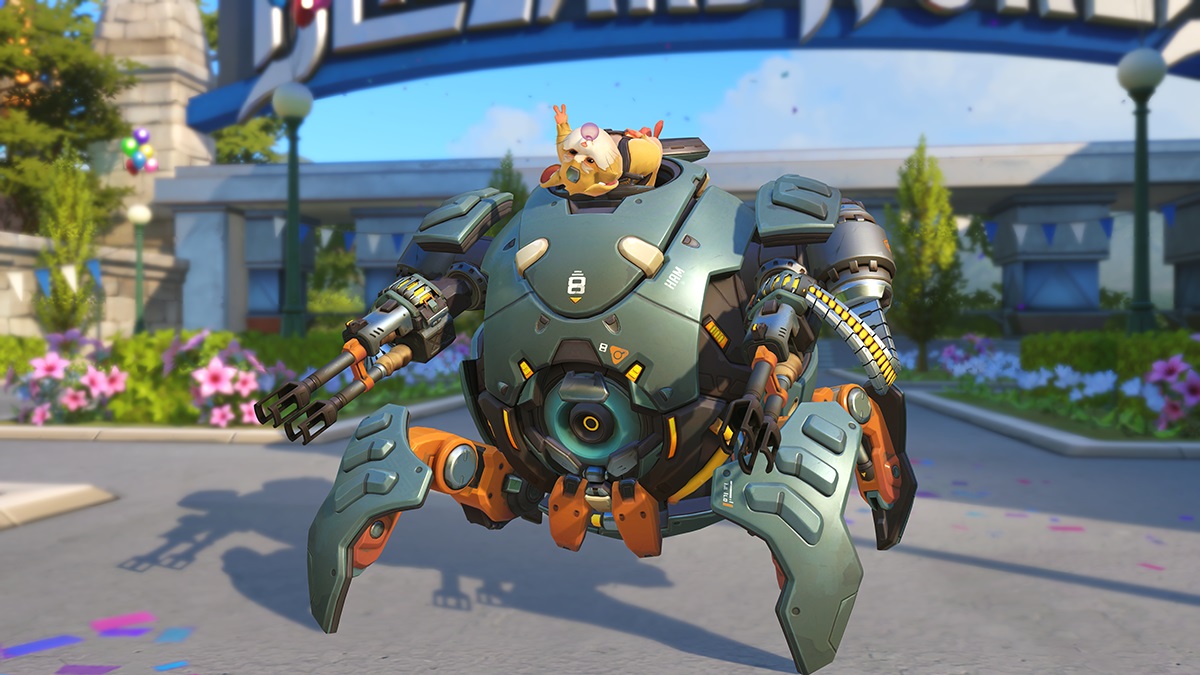
Wrecking Ball is a tank hero with some intriguing play mechanics.
Much like the popular mech user D.Va, he’s dependent on his outer shell, because Hammond obviously can’t jump out and take on enemies like the pro gamer beast and MEKA fanatic. Wrecking Ball’s mech shell makes him difficult to kill, and a powerful disruptor, but he’s also entirely dependent on waiting for cool downs to expire. That means he’s perfect for rolling up on entire squads of enemies and pulverizing them, but can struggle against flanker heroes that use speed to their advantage.
His Ultimate ability is sluggish to charge, and it can take forever to charge through primary fire alone. You’ll need to actively charge his Ultimate while saving heftier abilities for souped-up heroes and tanks that seek to counter Wrecking Ball.
Consider him a distraction and bullet sponge for multiple heroes at a time until you can charge up that Ultimate and lay waste to the team before you.
What abilities does Wrecking Ball have?

Wrecking Ball features a wealth of tank-centric abilities meant to deal out a healthy amount of damage and soak it up just the same. Here’s what the rambunctious little rodent has to offer.
Quad Cannons
These assault weapons act as Wrecking Ball’s primary firing mode. He has a decent number of bullets to pepper enemies with, just like with D.Va’s mech. Because of that, you’ll want to train your sights on those who dare cross you and just unload.
Do this as often as you can, and see that you charge your Ultimate up, despite the fact that it can take a somewhat frustrating length of time to do so with your Quad Cannons. You can even get away with whittling away enemy tanks’ health bars with this ability, as long as you stubbornly keep at it.
Grappling Claw
Wrecking Ball’s secondary fire ability lets Hammond grapple onto objects and walls in maps, and once one side is attached to its desired target, Wrecking Ball can swing into battle. Yes, just like the Miley Cyrus song.
The Grappling Claw does damage by busting through enemy crowds at high speeds, even providing knock-back if going at maximum speed. When at full speed (white hot), it’s good for at least 50 points of damage to any unfortunate enemy caught in its wake. Otherwise, you can use it to swing across the map and get to where you’re going much quicker. It’s also appropriate for pairing with Piledriver (see below), so you can simply drop from your Grappling Claw into the attack and really screw up your enemies’ days.
Adaptive Shield
The Adaptive Shield is Wrecking Ball’s lifeline, and is an integral part of keeping you in the game. When deployed while near the enemy team, it becomes even stronger. It can only be used outside of Hammond’s Roll form, so it’s perfect for cruising up on a few unsuspecting enemies and unleashing with your Quad Cannons for a bit before making a clean getaway.
It’s also perfect for popping after unleashing Wrecking Ball’s Ultimate, or the damaging Piledriver attack. Both those attacks can put you in a vulnerable position. Adaptive Shield gives you a chance to make a tactical withdrawal if needed.
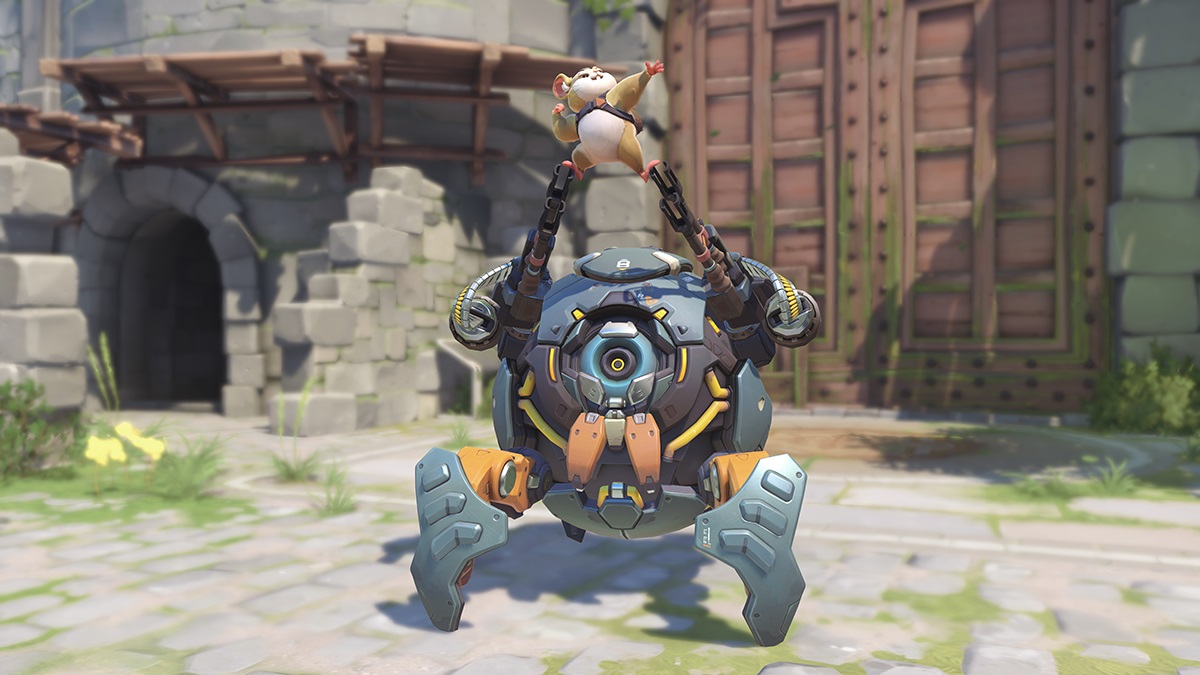
Piledriver
This ability does exactly what it says on the tin. Wrecking Ball slams into the ground to deal an impressive amount of damage, while launching enemies into the air. It’s perfect for use when rolling up on a group of DPS or healer heroes to, well, wreck ’em.
This attack has about a second of wind-up time, so enemies can dodge if they see it coming. If you can land it, though, the other team is in for a world of hurt. Make sure you use Adaptive Shield right after engaging Piledriver, as well, so you aren’t killed after executing your attack.
Roll
As one of the abilities that acts as a hilarious nod to Hammond being a super-intelligent hamster, Roll is also an extremely useful ability for making a quick getaway. You can speed through each map and out of danger, but Wrecking Ball is vulnerable while doing so. He can also be immobilized by Junkrat’s traps, so be ultra careful when steering yourself out of harm’s way.
While Roll is an excellent way to mobilize, it’s also useful when combined with abilities like the Grappling Claw and Piledriver. You can use Roll to ramp into the air, utilize the Grappling Claw to sail towards an enemy squad, then bring the hammer down with the explosive Piledriver.
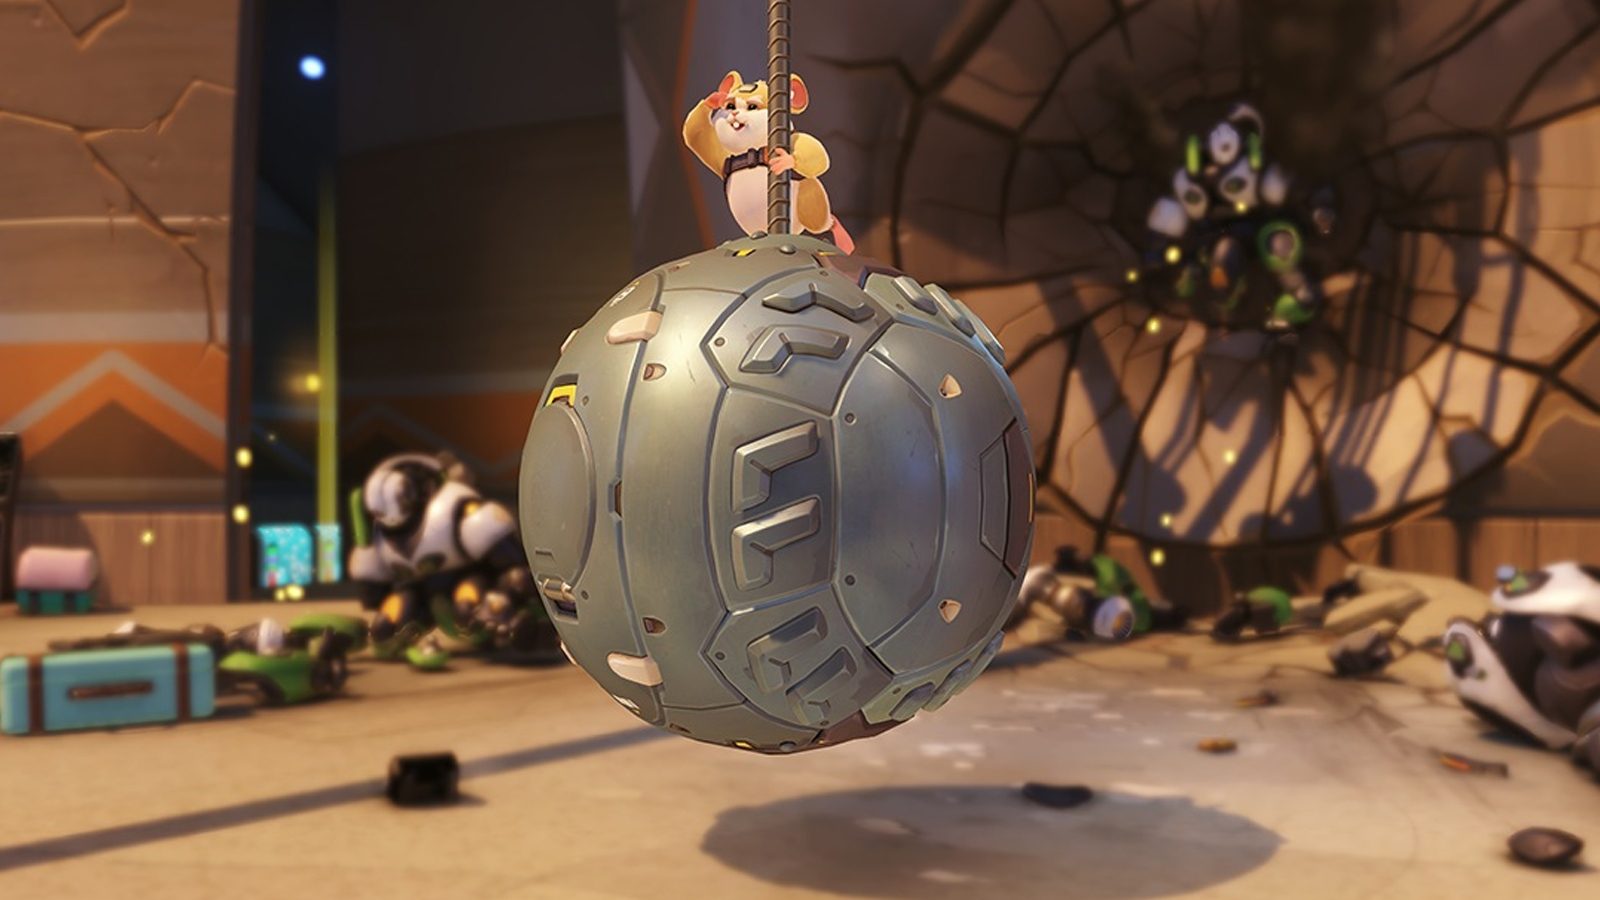
Minefield
Wrecking Ball’s Ultimate is a doozy. When launched, it drops 15 proximity mines, as the name implies, around his current position. Each mine can serve up 130 damage apiece, so you only need a couple to wipe out an entire team if you position the mines just right.
The mines need a moment to become armed, and each has around 50 health, so enemies can react and destroy your mines if you’re off the mark.
Use this devastating Ultimate to defend objectives, wipe out enemies squatting on the payload, or capture points to turn the tides of battle back into your favor.
General Wrecking Ball tips and tricks

While Wrecking Ball can dole out some serious damage, he is a tank, so his main purpose is to distract enemies and keep fire off the rest of his squad. However, unlike other tanks, Hammond’s protection doesn’t come from one or more abilities. Instead it comes from his in-your-face playstyle. He forces enemies to deal with him and ignore his allies.
That means you’ll need an aggressive, risk-friendly playstyle. Much of what Wrecking Ball can accomplish begins with gaining air time. This requires you use his Grappling Hook ability. You’ll need to get used to soaring through the air, damaging enemies while swinging, and tying it all together with the Piledriver, released after reaching the highest point in your swing. After slamming into the ground, activate your shield to master Hammond’s most devastating combo in the game.
With that said, don’t get cocky with Wrecking Ball’s formidable mech shell and powerful, damaging abilities. You’re still susceptible to enemy tanks if you don’t utilize his Adaptive Shield properly (or at all). You must distract opponents, but you can’t distract them forever without dying. Work on waiting for teammates so you don’t find yourself isolated. Hammond is extremely vulnerable when caught off-guard, and after completing a high-flying combo attack.
Coordinate with your team, execute combos, and beat a hasty retreat when you’re out of position. Keep these basics in mind and you’ll be well on your way to becoming a ferocious Hammond main.
Editors' Recommendations
- Stardew Valley gift guide: the best gifts for every villager
- Overwatch 2’s story-driven PvE missions are being abandoned by Blizzard
- Like a Dragon: Infinite Wealth gift guide: best gifts for every character
- Modern Warfare 3 Zombies: Mercenary Convoy guide
- All Gold Ball locations in Like a Dragon Gaiden: The Man Who Erased His Name


