Capcom’s Resident Evil 2 remake might look similar to its action-focused Resident Evil 4 or Resident Evil 5 at first glance, but the game is still very much rooted in survival-horror. For newcomers to the genre, it can be difficult to survive Raccoon City’s many zombies and monsters, not to mention the puzzles found around nearly every corner.
Tips and tricks to surviving in Resident Evil 2
Staying alive during the zombie apocalypse in Resident Evil 2 isn’t easy. Zombies are harder to take down, resources are scarce, and you’ll be doing a lot of moving around through areas where your safety will be compromised. However, with a few tips to get yourself started, you’ll be ready to conquer both Leon and Claire’s stories and strike a blow to the heart of Umbrella Corporation.
1. A down zombie isn’t a dead zombie
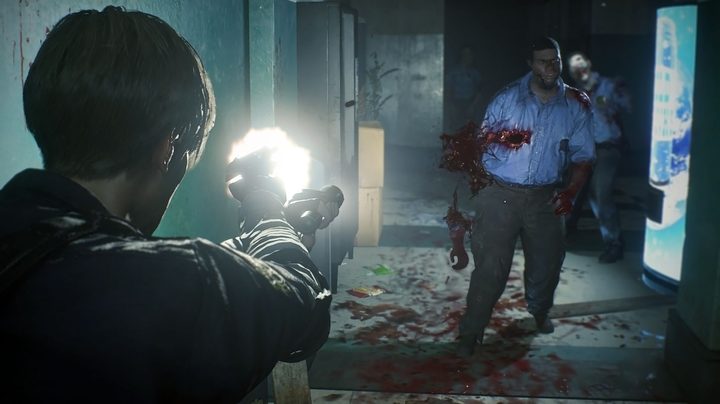
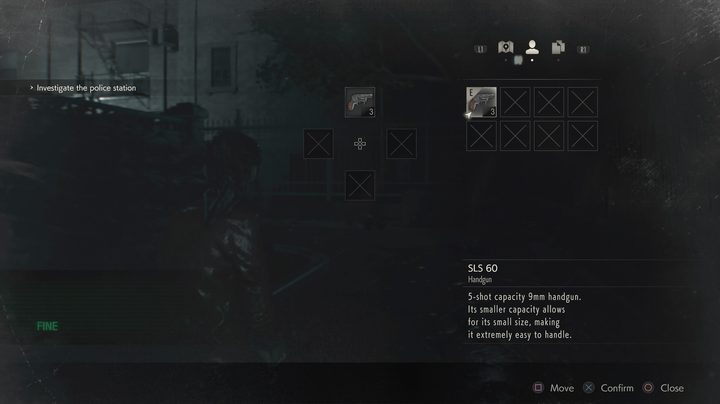
Many other zombie series live and die by the “headshot to kill” strategy, with a bullet to the dome capable of taking down any undead coming your way. In Resident Evil 2, it will take about three bullets from your default 9mm pistol to knock a zombie down, and only if they’re all headshots. If the zombie’s head explodes with one of these shots, it’s dead, and you won’t have to worry about it anymore.
More often than not, however, a zombie will get back up moments later and resume its attack. You can expedite its final death by continuing to fire into its head as it goes down, but it can take nine or more shots for this to happen.
There are some very tight areas where it will be necessary to completely kill enemies in order to keep them from attacking you, but more often than not, you can simply shoot them in their legs to limit their mobility. A crawling zombie can still grab you, but it will take a lot longer to do so.
2. Run to save ammo
This isn’t Resident Evil 5, and you are going to run out of ammunition in the middle of some tough encounters. In these situations, your best option is often just to run until you can escape the threat and pick up some more resources.
There is an art to running away in Resident Evil 2, however. Enemies will lunge at you from a few feet away in order to grab and take a bite out of your neck, which can do serious damage. To avoid this try to draw the zombies you face over to one side of a room or hallway, and then quickly dash to the other side. In all but the smallest areas, this can be the difference between life and death.
3. Stock up on knives and grenades
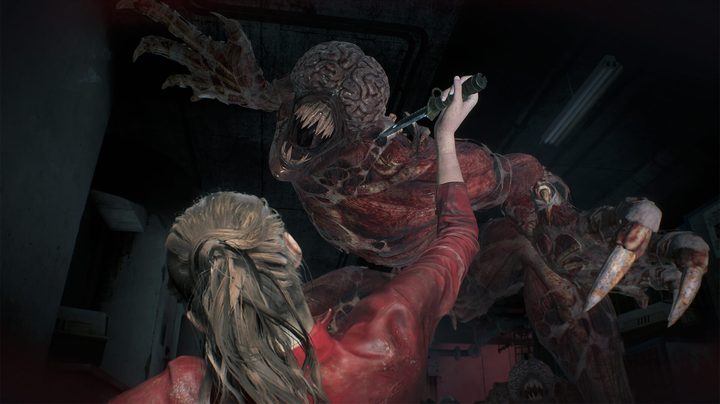
If you do happen to get grabbed, you don’t automatically have to take extra damage. Whenever most enemies grab you, you’ll see an L1/LB button prompt quickly appear on screen. Pressing this before you’re bitten will cause you to stick a knife in their head or a grenade in their mouth, either of which will force them off of you long enough to get away. If it’s a knife, you can also grab it out of their corpse once they’re dead.
With the game’s limited carrying space, keeping a supply of both knives and grenades can seem tedious, but it will come in handy during difficult moments. Just ensure that your knives aren’t about to break, as their durability goes down with each use.
4. Always check your map
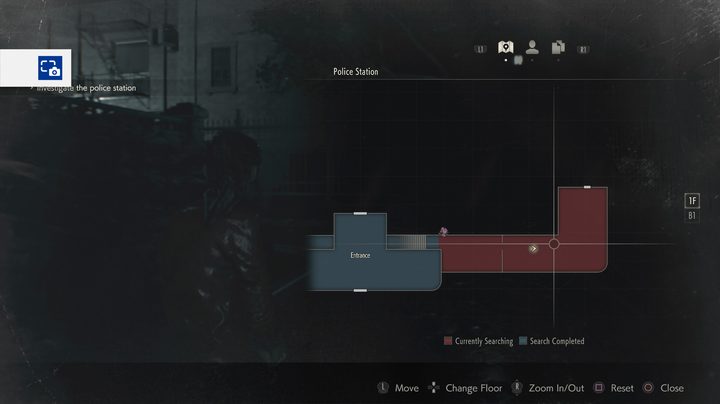
With the many twists and turns in Resident Evil 2’s environments, it’s nearly impossible to stay properly oriented without looking at your map on a regular basis. Luckily, it’s incredibly useful for not only figuring out where to go next, but also locating resources you’ll need to survive.
Once you’ve opened up the map, you’ll see three different colors for rooms. Black rooms are ones you have not visited yet, while red rooms are those you have visited but have not completed an objective or located all items. Blue rooms have been completed or all items have been picked up.
Once you’ve walked near an item, it will pop up on your map, as well. If you’re confused about where to find more ammunition or green herbs, this is a great first option. When you’re struggling against enemies in a confusing space, you can also use the map to locate the nearest exit without having to waste precious in-game time. Against late-game bosses, this is a necessity.
5. Examine every item
Walking in circles and not sure how you’re supposed to open a door or figure out the solution to a puzzle? The answer might be in your pocket. Go to your inventory and look for items labeled “key items,” and choose the option to examine them. This lets you rotate the items around in any direction you want, allowing you to find secrets codes or buttons.
Sometimes, doing this will reveal another item inside, like when opening a small toolbox. Other times, however, you’ll find something written on the underside of an object which can come in handy with nearby puzzles. If you feel like you’ve already checked everywhere else, there’s a pretty good chance that this is the solution to your problem.
6. Expand your inventory
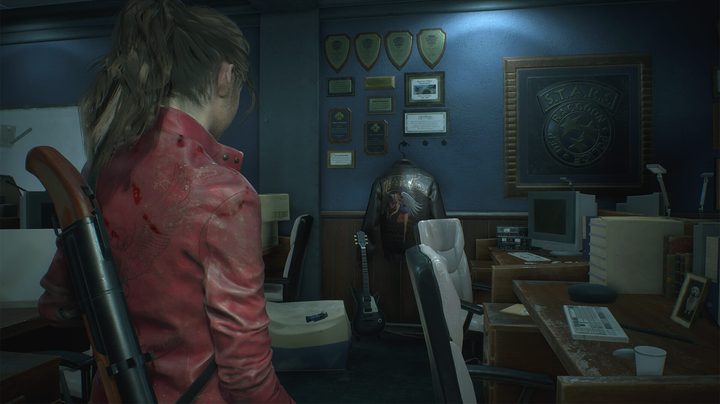
We can’t count how many times we ran out of space in our inventory while picking up ammunition, key items, and new weapons in Resident Evil 2, but some of those headaches can be avoided by expanding your inventory through hip pouches. These items can be found throughout almost all of the game’s environments, with a few available in the starting police station. Make sure you get at least one before you’ve left this area, and the second one located in the storage locker area can be yours if you locate two missing keys for its control console.
The storage you have available at the start of the game will seem like plenty, but then you’ll get a second, third, fourth, or even fifth weapon, along with extra ammunition. You’ll soon be unable to pick up a healing item or a key item without discarding something, which is an unnecessary waste that could come back to literally bite you later.
7. Never delete healing items
Early on in the Resident Evil 2, you’ll find yourself with an abundance of red and green herbs, which serve as your primary healing items. It can be tempting to discard them in order to pick up a new weapon or key item at this point, but do yourself a favor and head back to your nearest storage container and drop it off there. There will come a point when you’ll need those healing items and then some in order to survive, and you can always go get them out of storage later.
The blue herbs you’ll sometimes find are used for curing toxicity, and these will seem like throwaway items, as well. However, you need them for surviving in the sewer area later in the game. It’s nearly impossible to complete that section without at least a few of these, though you can start deleting them after that point if you really want to.
8. Save frequently
Resident Evil 2 features the typewriter saving system from the 1998 game, but you don’t have to find ribbons in order to use it. This means you can essentially save as often as you like, and there are multiple slots in case you want to keep a backup, should you be nearly dead or out of ammunition in your current state.
Find an item? Save. Defeat a group of enemies? Save. You have nothing to lose from doing this, and you cannot rely on the game’s auto-save system, instead. At one point, we found it had been well over an hour since the game had auto-saved, and one wrong move would have resulted in us losing a huge amount of progress.