When you get rid of an item on your Mac like a file, image, or application, it goes into the Trash folder. Trash on Mac is similar to Recycle Bin on Windows. Your items remain there until you empty it
Because the Trash folder can become full of items that count toward your Mac’s storage space, it’s a good idea to empty it every so often. You can do this manually or set the Trash to automatically empty every 30 days.
Keep in mind that when you empty the Trash, its contents are permanently deleted from your Mac.
View the size of the Trash folder
If you’re curious about the size of the Trash folder, you can view the total amount of the contents in just a few steps.
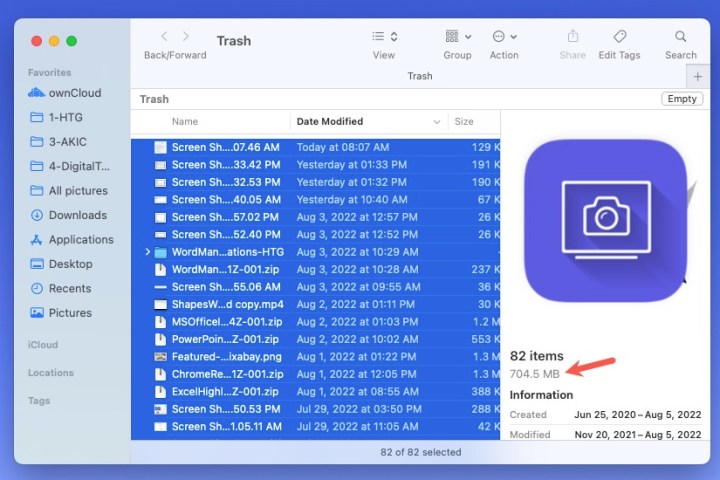
Step 1: Open the Trash icon in your Dock.
Step 2: Select all of the items in the folder by pressing Command + A or using Edit > Select all from the menu bar.
Step 3: In the preview on the right side of the folder, you’ll see the number of items and their total size.
If you don’t see the preview, select View > Show preview in the menu bar.
Manually empty the Trash on Mac
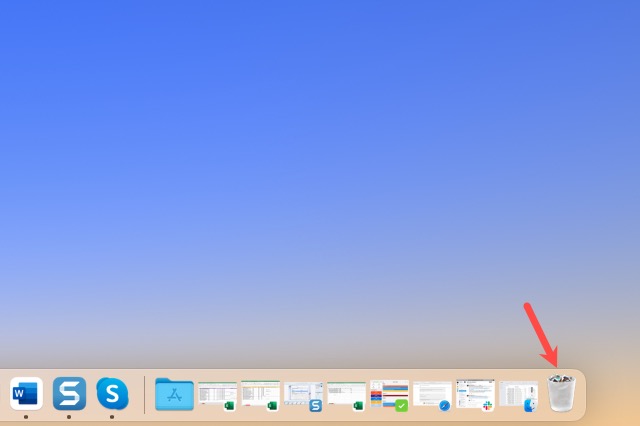
When the Trash folder contains items, the icon displays as a trash can that's full of stuff on the right side of your Dock.
Step 1: To empty the items in the folder, select the Trash icon.
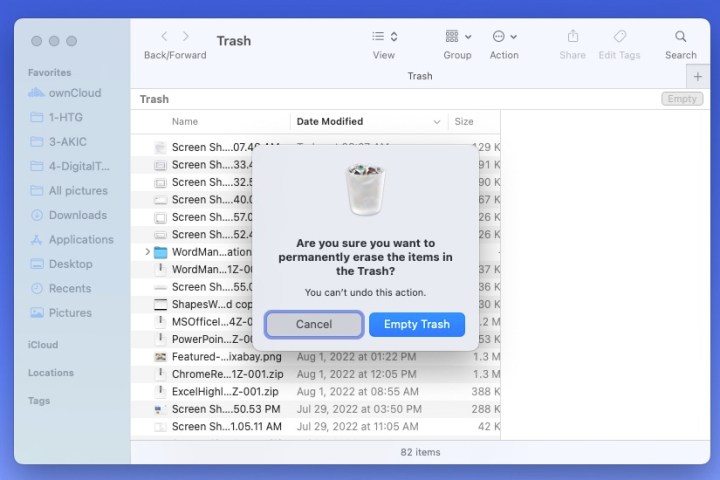
Step 2: On the top-right of the folder, choose Empty.

Step 3: When the confirmation message displays, pick Empty Trash to continue and delete the items.
Step 4: Alternatively, you can right-click an item in the folder and pick Empty Trash. You can also select Finder in the menu bar and choose Empty Trash.
If you want to empty the Trash without the confirmation message, use the keyboard shortcut Option + Shift + Command + Delete.
Automatically empty the Trash
Remembering to empty the Trash might be a task in itself, so MacOS gives you the option to automatically empty it after 30 days.
Step 1: With Finder active on your Mac, select Finder > Preferences in the menu bar.
Step 2: Go to the Advanced tab.
Step 3: Check the box for Remove items from the Trash after 30 days.
Notice that directly above this setting, you have the option to enable or disable the warning before emptying the Trash.

Remove a certain item from the Trash folder
Maybe you don’t want to empty the entire Trash folder because you might need to recover an item at some point. You can delete specific items in the Trash instead.
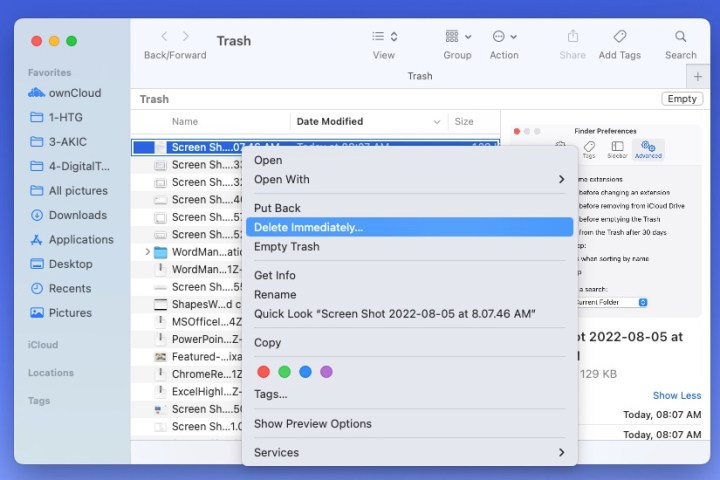
Step 1: Select the Trash icon in your Dock.
Step 2: Right-click the item you want to remove and choose Delete immediately.
Step 3: Confirm this action in the pop-up box by picking Delete.
That item is then permanently removed from your Mac, just as if you emptied the entire Trash folder.

Recover an item from the Trash folder
As mentioned, you can recover items from the Trash if you decide you still need them. If you set the Trash to automatically empty after 30 days, be sure to follow these steps to recover the item before it’s permanently deleted.
Step 1: Select the Trash icon in your Dock.
Step 2: Right-click the item you want to recover and choose Put back. Alternatively, you can select the item and choose File > Put back from the menu bar.
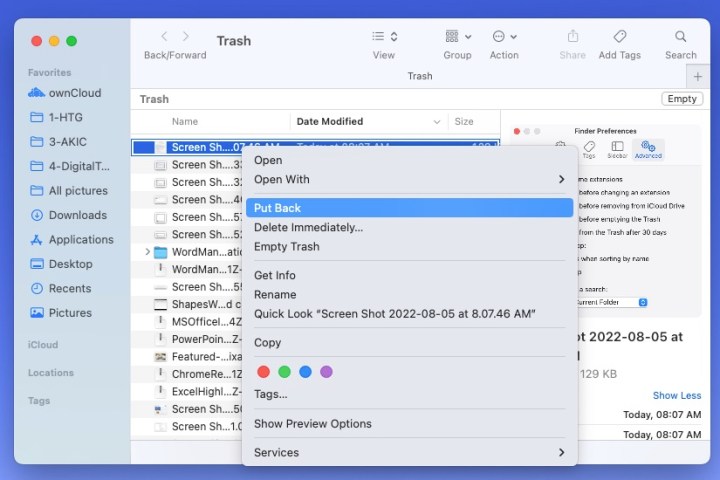
Step 3: The item is then returned to its original location, like its original folder or your desktop. Head to the spot from where you sent the item to the Trash to view it.
Keep an eye on your Trash so that you can empty it when it’s full and free up space on your Mac if you need it.
Editors' Recommendations
- The 6 key things Apple must fix in the next version of macOS
- How to change the login picture on a Mac
- How to change your MAC address on Windows and Mac
- How to create a Memoji on a Mac
- How to delete messages on your Mac