When you log into your Mac every day, one of the first things you see is a circular login picture above your username. On its own, this UI element is how you and other household members will know what user profile belongs to whom. Fortunately, Apple also gives you the ability to customize this image. You’ll be able to choose from your own personal photos, emojis, as well as Memojis.
If you’d like to personalize this part of your Mac login, we’ve put together this guide to teach you how to add a login image to your macOS profile.
Change the login picture on a Mac
Changing your login picture is a fun way to personalize your lock screen. It’s also a great way for other users of your Mac to see their own favorite image when it’s their turn to sign in.
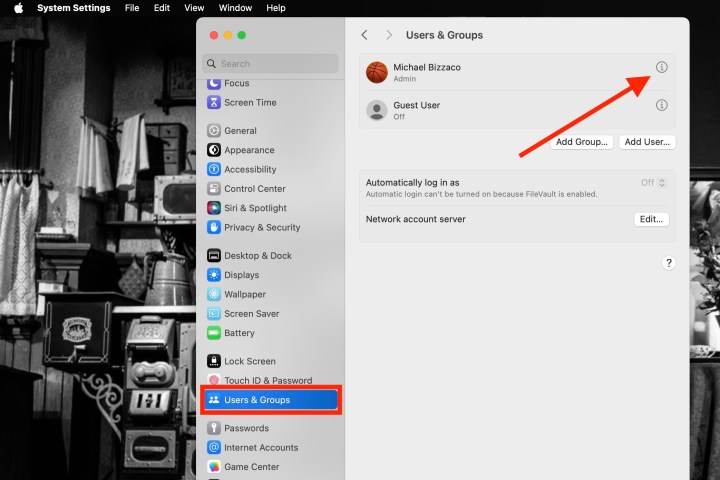
Step 1: Open System Settings by using the icon in your Dock or the Apple icon in the Menu bar.
Step 2: Select Users & Groups.

Step 3: Choose the user from the list of options.
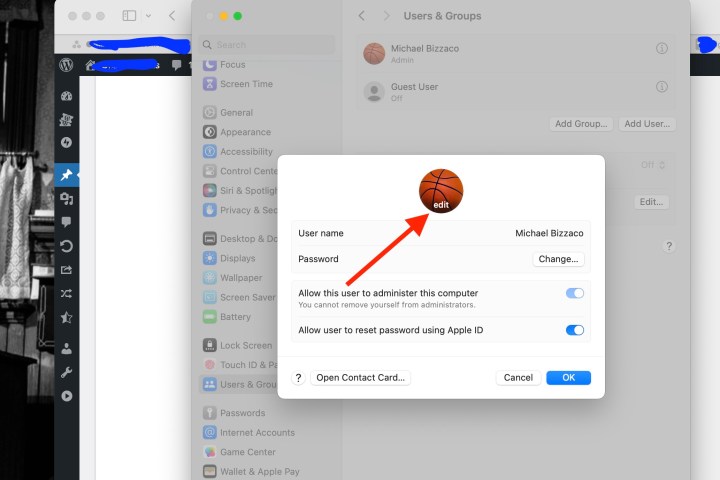
Step 4: Pick the current picture. You’ll see “Edit” when you hover your cursor over it.

Step 5: You’ll then see a window pop open with all of the picture options. You can use a current Memoji or create a new one, choose an emoji, use your monogram, or look at the suggestions. You can also use your Mac’s camera to snap a photo or select a picture from the Photos app.
Memoji: Pick a current Memoji or use the Plus sign to create a new one. Then, use the Pose tab to choose the facial expression and the Style tab to pick a background color.
Emoji: Select one of the popular emoji options or use the Plus sign to view the full selection. Then, go to the Style tab to pick a background color.
Monogram: Choose a monogram color from the collection.
Camera: To snap a picture on the spot, select Camera. Place your face within the circular frame and select the Capture button. To use the image, pick Save. Otherwise, pick Cancel.
Photos: Expand the Photos section to pick your Favorites or a particular album. Then, select the photo you want to use.
Suggestions: If you’re not sure which picture you want to use, you can look through the Suggestions. You’ll also see many default pictures like flowers, sports, animals, and symbols.

Step 6: After you select the picture you want to use, you’ll see its preview in the bottom-left corner. Drag the slider to zoom in or out of the image for just the right look.
Step 7: When you finish, select Save. You can then close the System Settings using the X on the top left.
How to change the login screen background
Not only can you change your login image in macOS, but you’ll also be able to customize the look of the entire login screen. To do so, start by heading into System Settings. Click Wallpaper from the lefthand column of options.
Now all you have to do is select one of the images built into macOS, or use your own by clicking the Add Photo button.
How to change your login password
Changing your login password in macOS isn’t very difficult, and we have an entire guide dedicated to the subject. That being said, we’d like to tell you where to locate the password-changing settings in macOS.
All you have to do is click System Settings * > *Users and Groups. Click the Info button next to a username, then just click Change to begin changing your own login password. You can also click Reset to change another user’s login credentials.
Now when you see your Mac’s login screen, ready for your password, you’ll have a picture that suits you.


