We all forget a password once in a while. It’s really just a fact of life at this point, but things are a little different when you forget crucial login info for your go-to computer. And if you’ve ever forgotten your MacOS password, you’ll know just how frustrating it is to be locked out of your do-everything PC. But even if one of your Mac or MacBook’s system-stored hints isn’t enough to jog your memory, there’s a couple of ways you’ll be able to reset your MacOS password.
We cover each method in this guide, so without further ado, let’s find out how to log back into our MacOS machines!
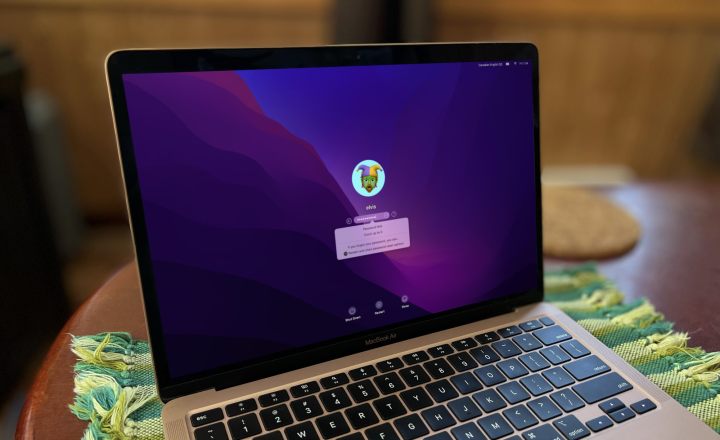
How to reset your Mac password with your Apple ID
If you've forgotten your Mac password, your Apple ID can usually provide a quick solution, letting you reset the login password. The user name and password for the Apple ID are the same as the one you used for your iCloud or Apple One account. If you can sign into Apple Music, Fitness+, or any of Apple's other services, you can reset your Mac password if it uses the same Apple ID.
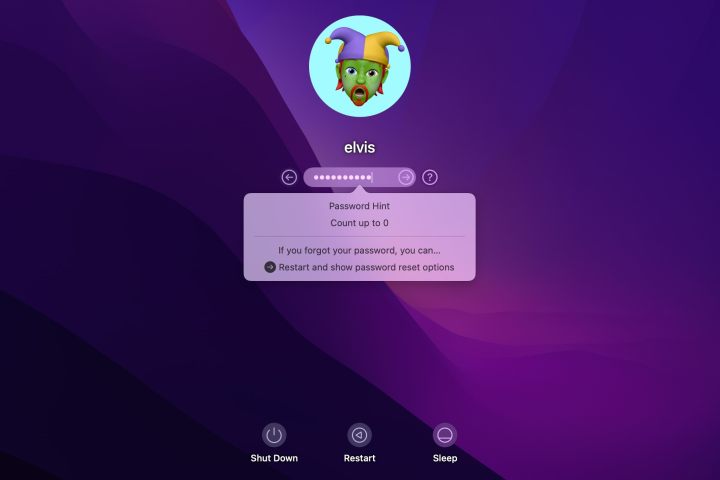
Step 1: After several wrong attempts at signing in, your Mac might offer the option to reset the password with your Apple ID. If not, it will allow you to restart the Mac and show options for resetting the login password. If Apple ID is an option, choose it now and skip to step 3.
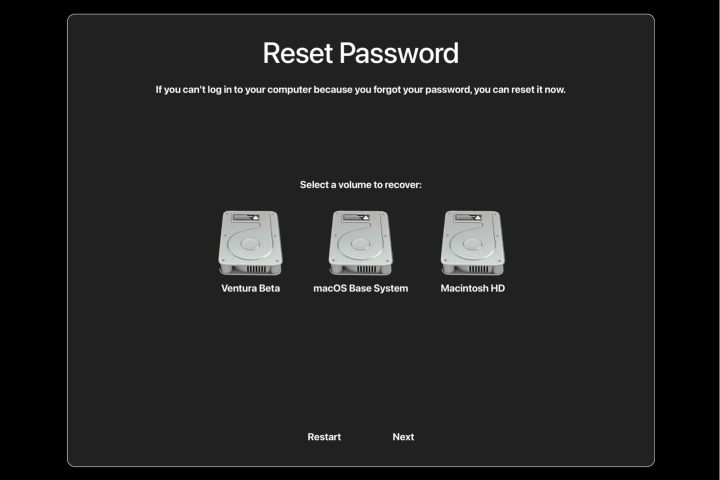
Step 2: After restarting, your Mac will show one or more disk volumes to use. In most cases, you should choose Macintosh HD, the default name for your Mac's startup drive. If a volume called macOS Base System appears, disregard it since it's a small volume used internally by the operating system and doesn't contain any user data. If you've renamed your startup drive, select that volume.
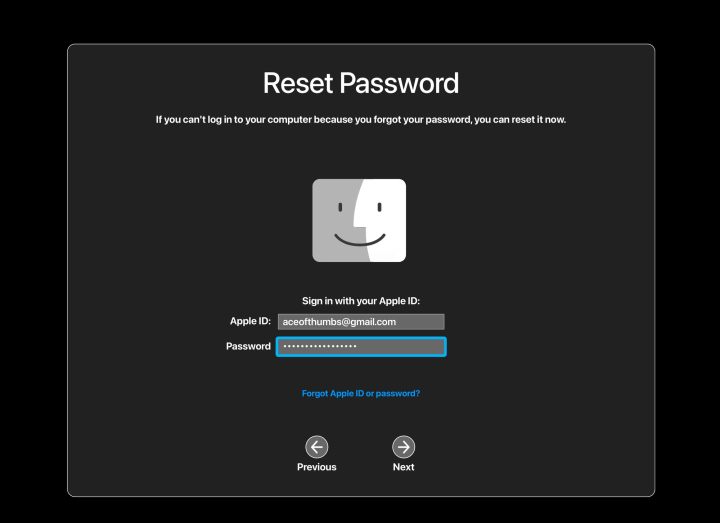
Step 3: Enter your Apple ID and password and choose Next.
Step 4: If you have two-factor authentication on your Apple account, you'll need to enter a verification code, then select Verify.
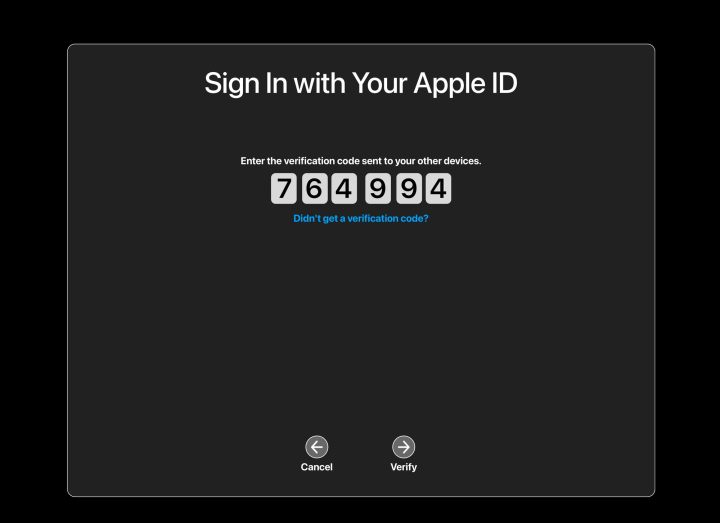
Step 5: One or more Mac user accounts will appear and you should pick the one that needs the password reset, then choose Next.

Step 6: The next step is to enter a new password, type it again to verify, and ideally provide a password hint that will help if you forget it again.
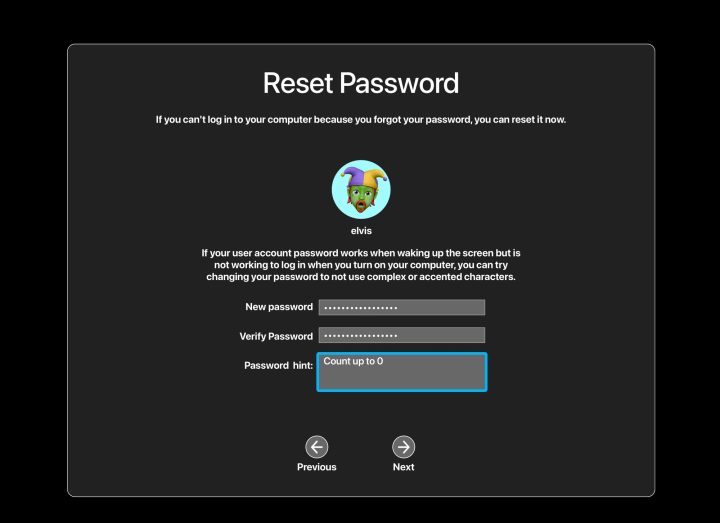
Step 7: At this point, your Mac password has been changed and your Mac will ask you to Restart so you can log in and use your Mac again.

How to change your Mac password with a FileVault recovery key
When you can't remember or even guess your Mac's login password, you can reset it if you have your FileVault recovery key written down somewhere. The default setting for a Mac is to use your iCloud account to encrypt your drive. However, there is an option to use a recovery key, which is a 24-character code that should be physically written down and kept safe. You use this code to reset your Mac's password.
Step 1: After a few tries, your Mac will recognize that you don't know your password and suggest restarting and resetting the login password. Find your FileVault recovery key and then choose that option to get started.

Step 2: Select Macintosh HD or whatever you've named your startup drive, then choose Next.

Step 3: The Mac will ask for your recovery key, which is the FileVault encryption key that you wrote down. Type in that 24-character code, then select Next to proceed.
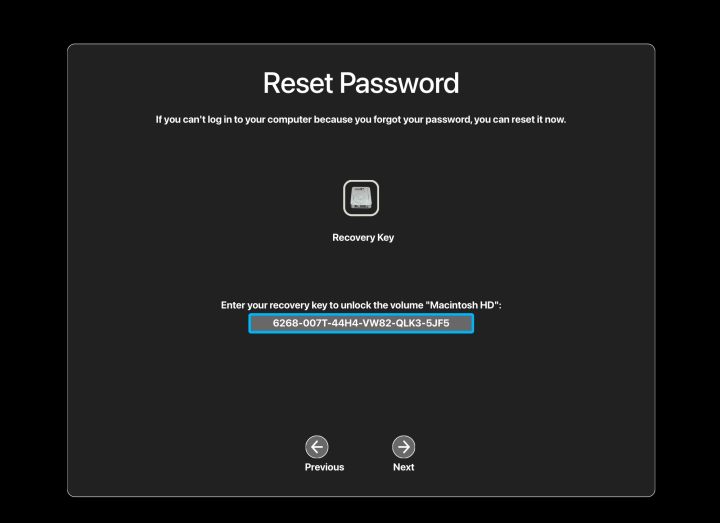
Step 4: Select the user that forgot their login password if there is more than one user for this Mac.

Step 5: Now you can type in a new password, enter it again to verify on the line below, then fill in a hint that will remind you of the password and choose Next.

Step 6: Select Restart to sign in with your new Mac password.

When does a Mac require a password?
Your Mac admin password is often required when waking the computer up from sleep and almost always needed when restarting or powering up a Mac or MacBook even when Touch ID is available. You might need both your administrator name and password to log into your Mac if that option is selected in System Settings, but the default is to require only the password.
Can a Mac be set up so a password isn't needed?
While it is possible to disable the password and set a user account to automatic login, doing so requires FileVault to be off, which is a privacy risk. The password is still needed to make significant changes to your Mac. You should probably only disable the login password in a very secure environment.
How to disable or delay your Mac's automatic logout
While completely disabling your Mac's login password isn't a good idea, it might be okay to disable or delay the automatic logout that happens when your Mac goes to sleep. Here's how to make that adjustment in both the latest versions of MacOS, and legacy versions.
If automatic logout is disabled, you'll need to manually log out, restart, or turn off your Mac to protect it from unauthorized access, so be careful if you decide to make this change.
Step 1: Open System Settings and select the Lock Screen option in the left-hand column.
Step 2: You should see an option that says Require password after screen saver begins or when display is turned off. Click the dropdown and select Never.
Next, we'll cover how to disable automatic logout in older versions of MacOS.
Step 3: Open System Preferences and select the Security & Privacy pane.
Step 4: Choose the lock in the bottom-left to allow changes. You'll have to authenticate with Touch ID or your Mac password.
Step 5: To delay the time before logout, choose the menu to the right of Require password and pick the time that you'd like. You can even make automatic logout happen the moment your Mac goes to sleep by selecting immediately.
Step 6: If you want to completely disable the automatic logout, uncheck the box to the left of Require password. A warning will appear and you must choose Turn Off Screen Lock to confirm it.
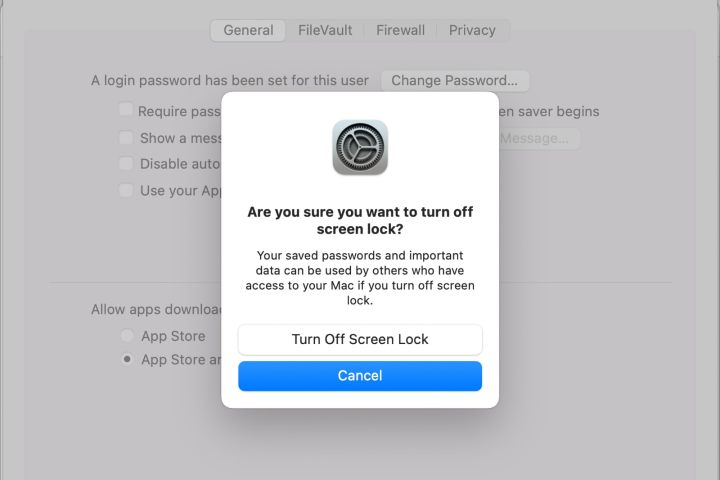
Step 7: If iCloud Keychain is being used to store your passwords, another warning will appear letting you choose between switching off Keychain for this Mac or leaving it on despite the additional security risk.
Can you reset your Mac's login password with another user account?
While it is possible to change your Mac's password if your computer has more than one admin account, that only works when running MacOS 11.0 (Big Sur) or earlier. Big Sur was released in 2020, and the current version of MacOS is Sonoma.
We do have a guide that describes how to use an administrator account to reset your Mac's login password when using an older version of MacOS though.
MacOS is an operating system that's been around long enough to offer solutions for almost every sticky situation that might arise, including forgetting your login password. With a few tips and a few minutes of work, you can usually reset the password and sign in as if nothing ever happened.


