Click a page to jump to it:
- Fingerprint sensor, Google Pay, Camera app, quick camera, and fast charging
- Google Fit, notification light, charge devices, quick settings, and battery percentage
Get the most out of the fingerprint sensor
The Nexus 6P and Nexus 5X are the first Nexus phones to feature fingerprint sensors, or as Google calls it … Nexus Imprint. The first thing to do is make sure that you are using it, since it’s the best way to secure your phone. If you aren’t, head into Settings and select Nexus Imprint.
We recommend that you set up both your index fingers, since the sensor is on the back of the device. The setup process for each finger prompts you to tap it on the sensor multiple times, so make sure to tap it at different angles because you’re not always going to tap the sensor at the same exact angle each time you unlock your phone.
Since you can save up to five fingers, you can set one finger for a significant other if they access your phone often.
Another tip is to actually record the same finger multiple times. For example, if you think you will use your right index finger most of the time, you might record it three different times as three different fingers, even though they aren’t. This will make Nexus Imprint even more accurate.
Use the fingerprint sensor to authenticate Google Play purchases
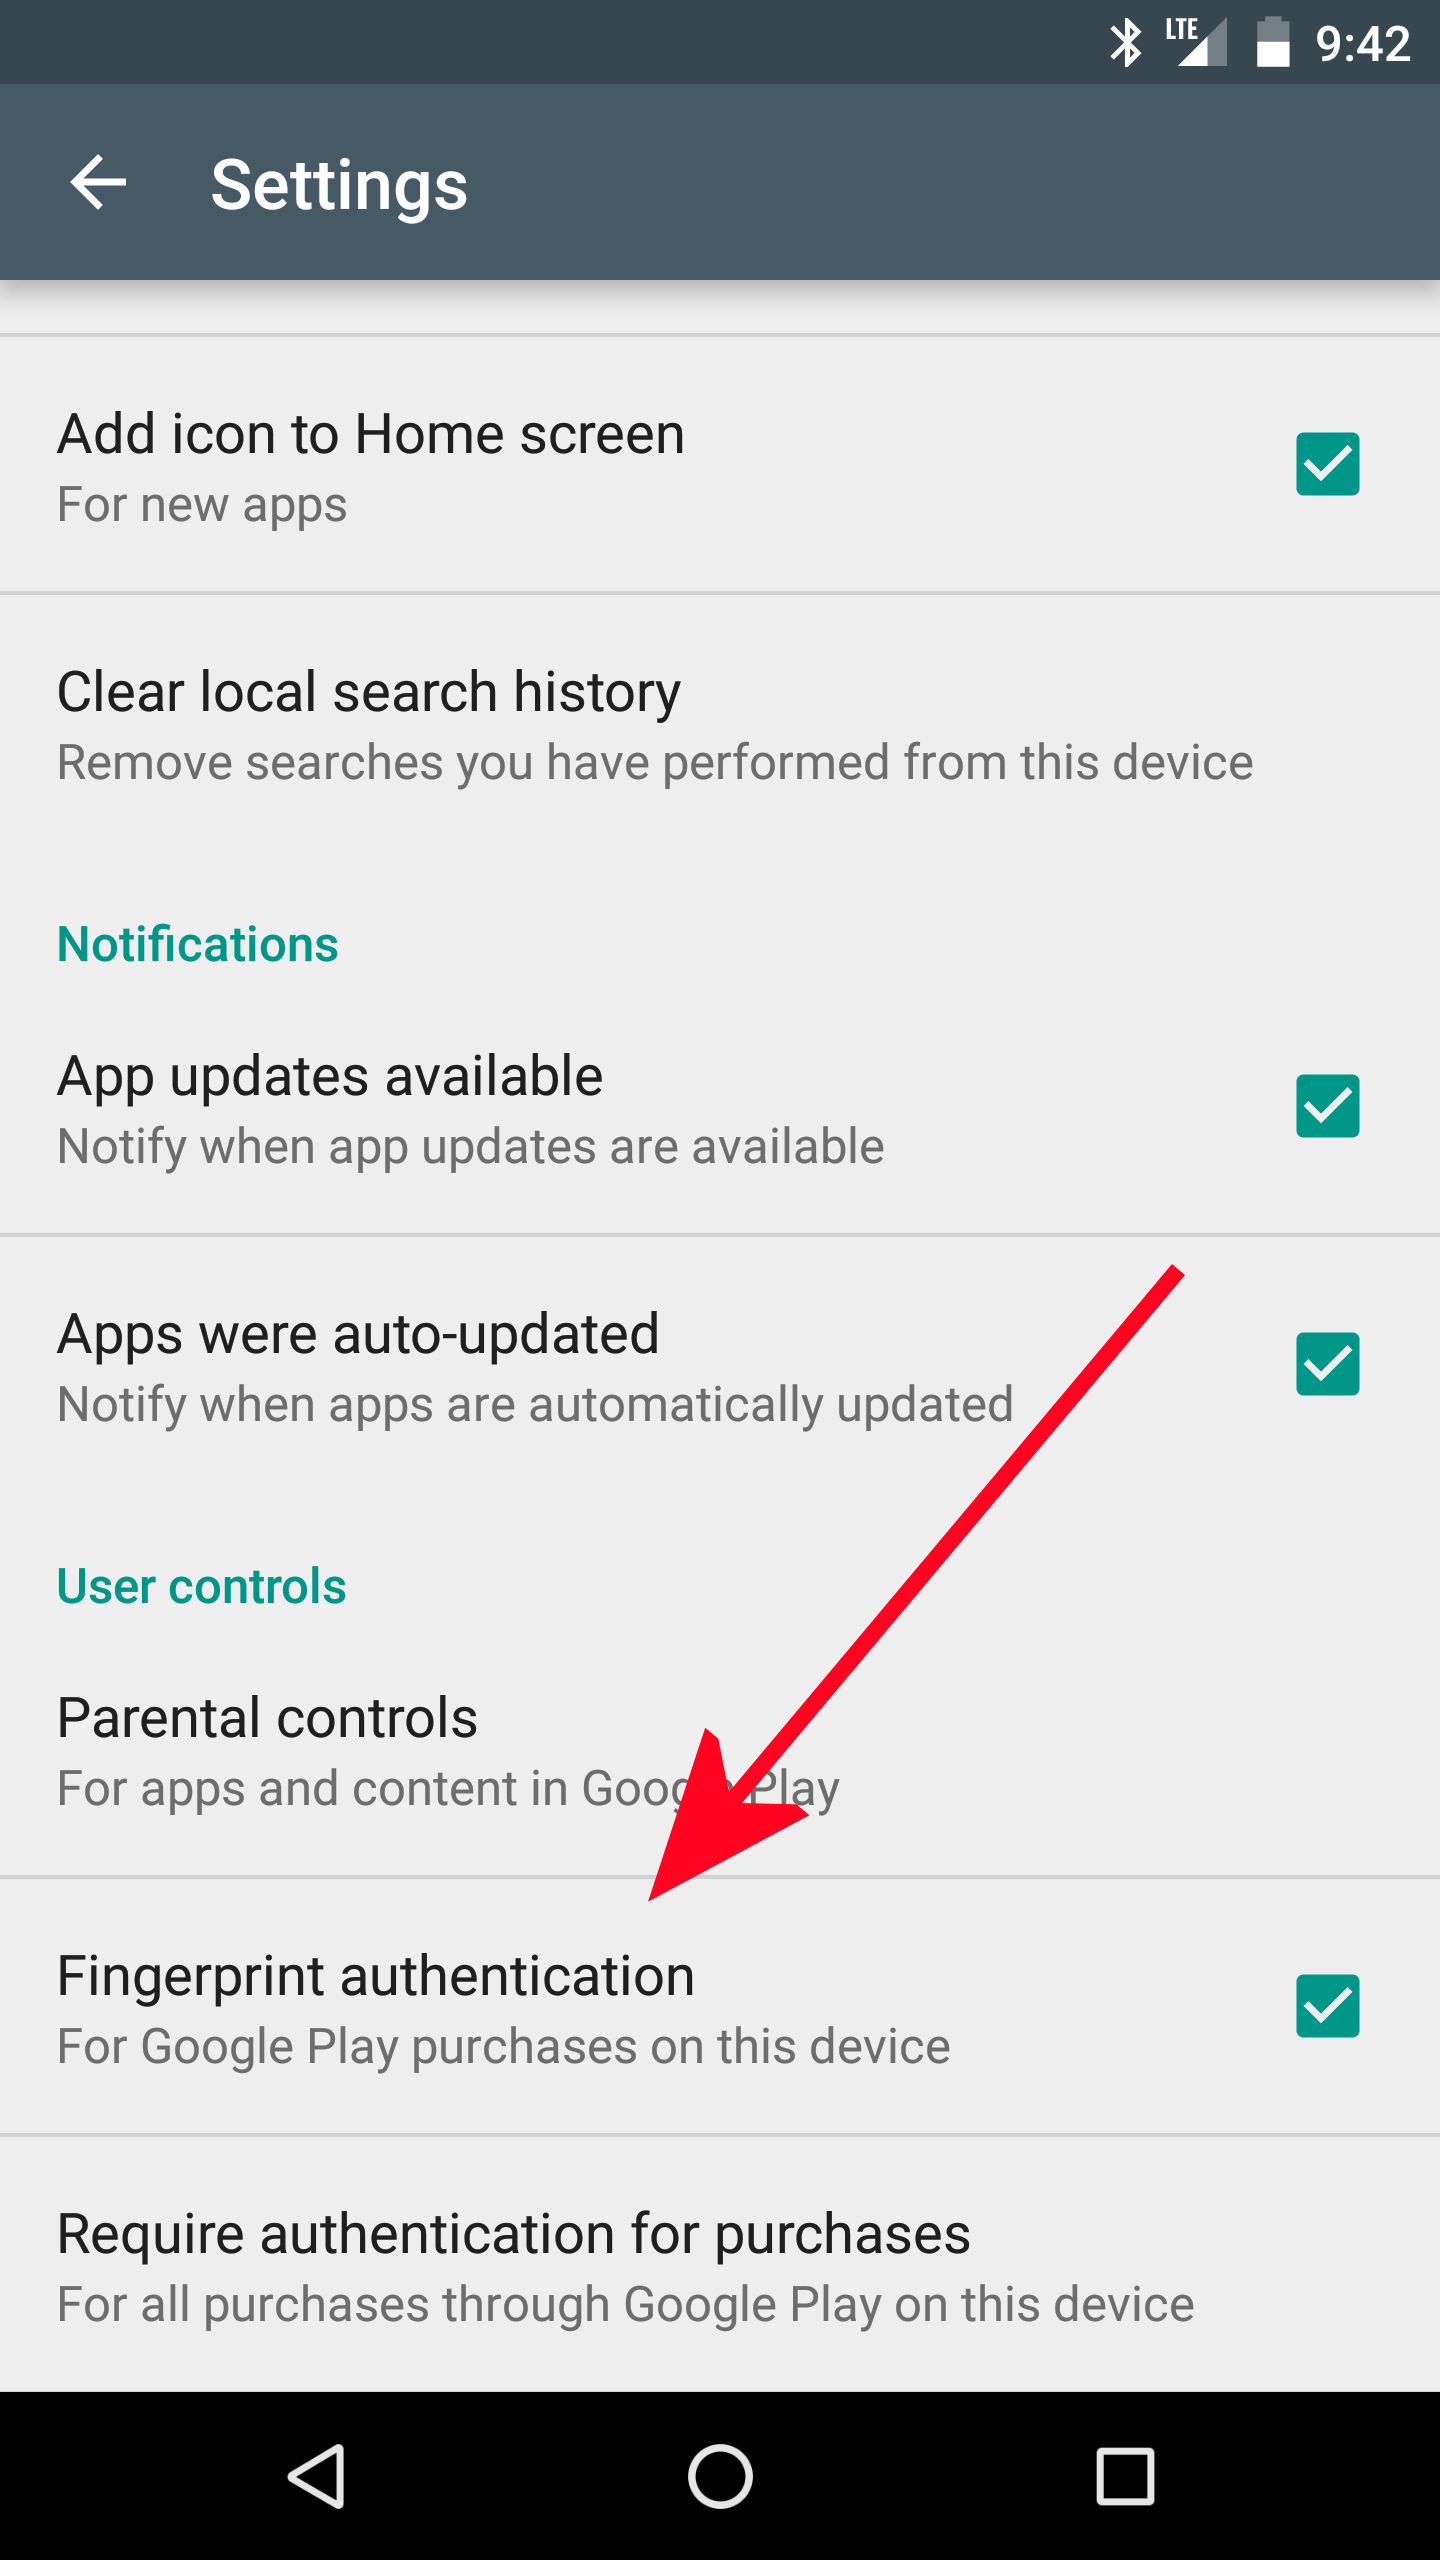
You already know that you can use the fingerprint sensor to unlock your phone, but did you know that you can also use it to authenticate Google Play purchases? Turn this feature on, and you will no longer have to type in your Gmail password when paying for stuff on Google Play. This not only makes buying things faster, but it’s also great if you have kids that might already know your password. Here’s how to turn this feature on:
- Open the Play Store app.
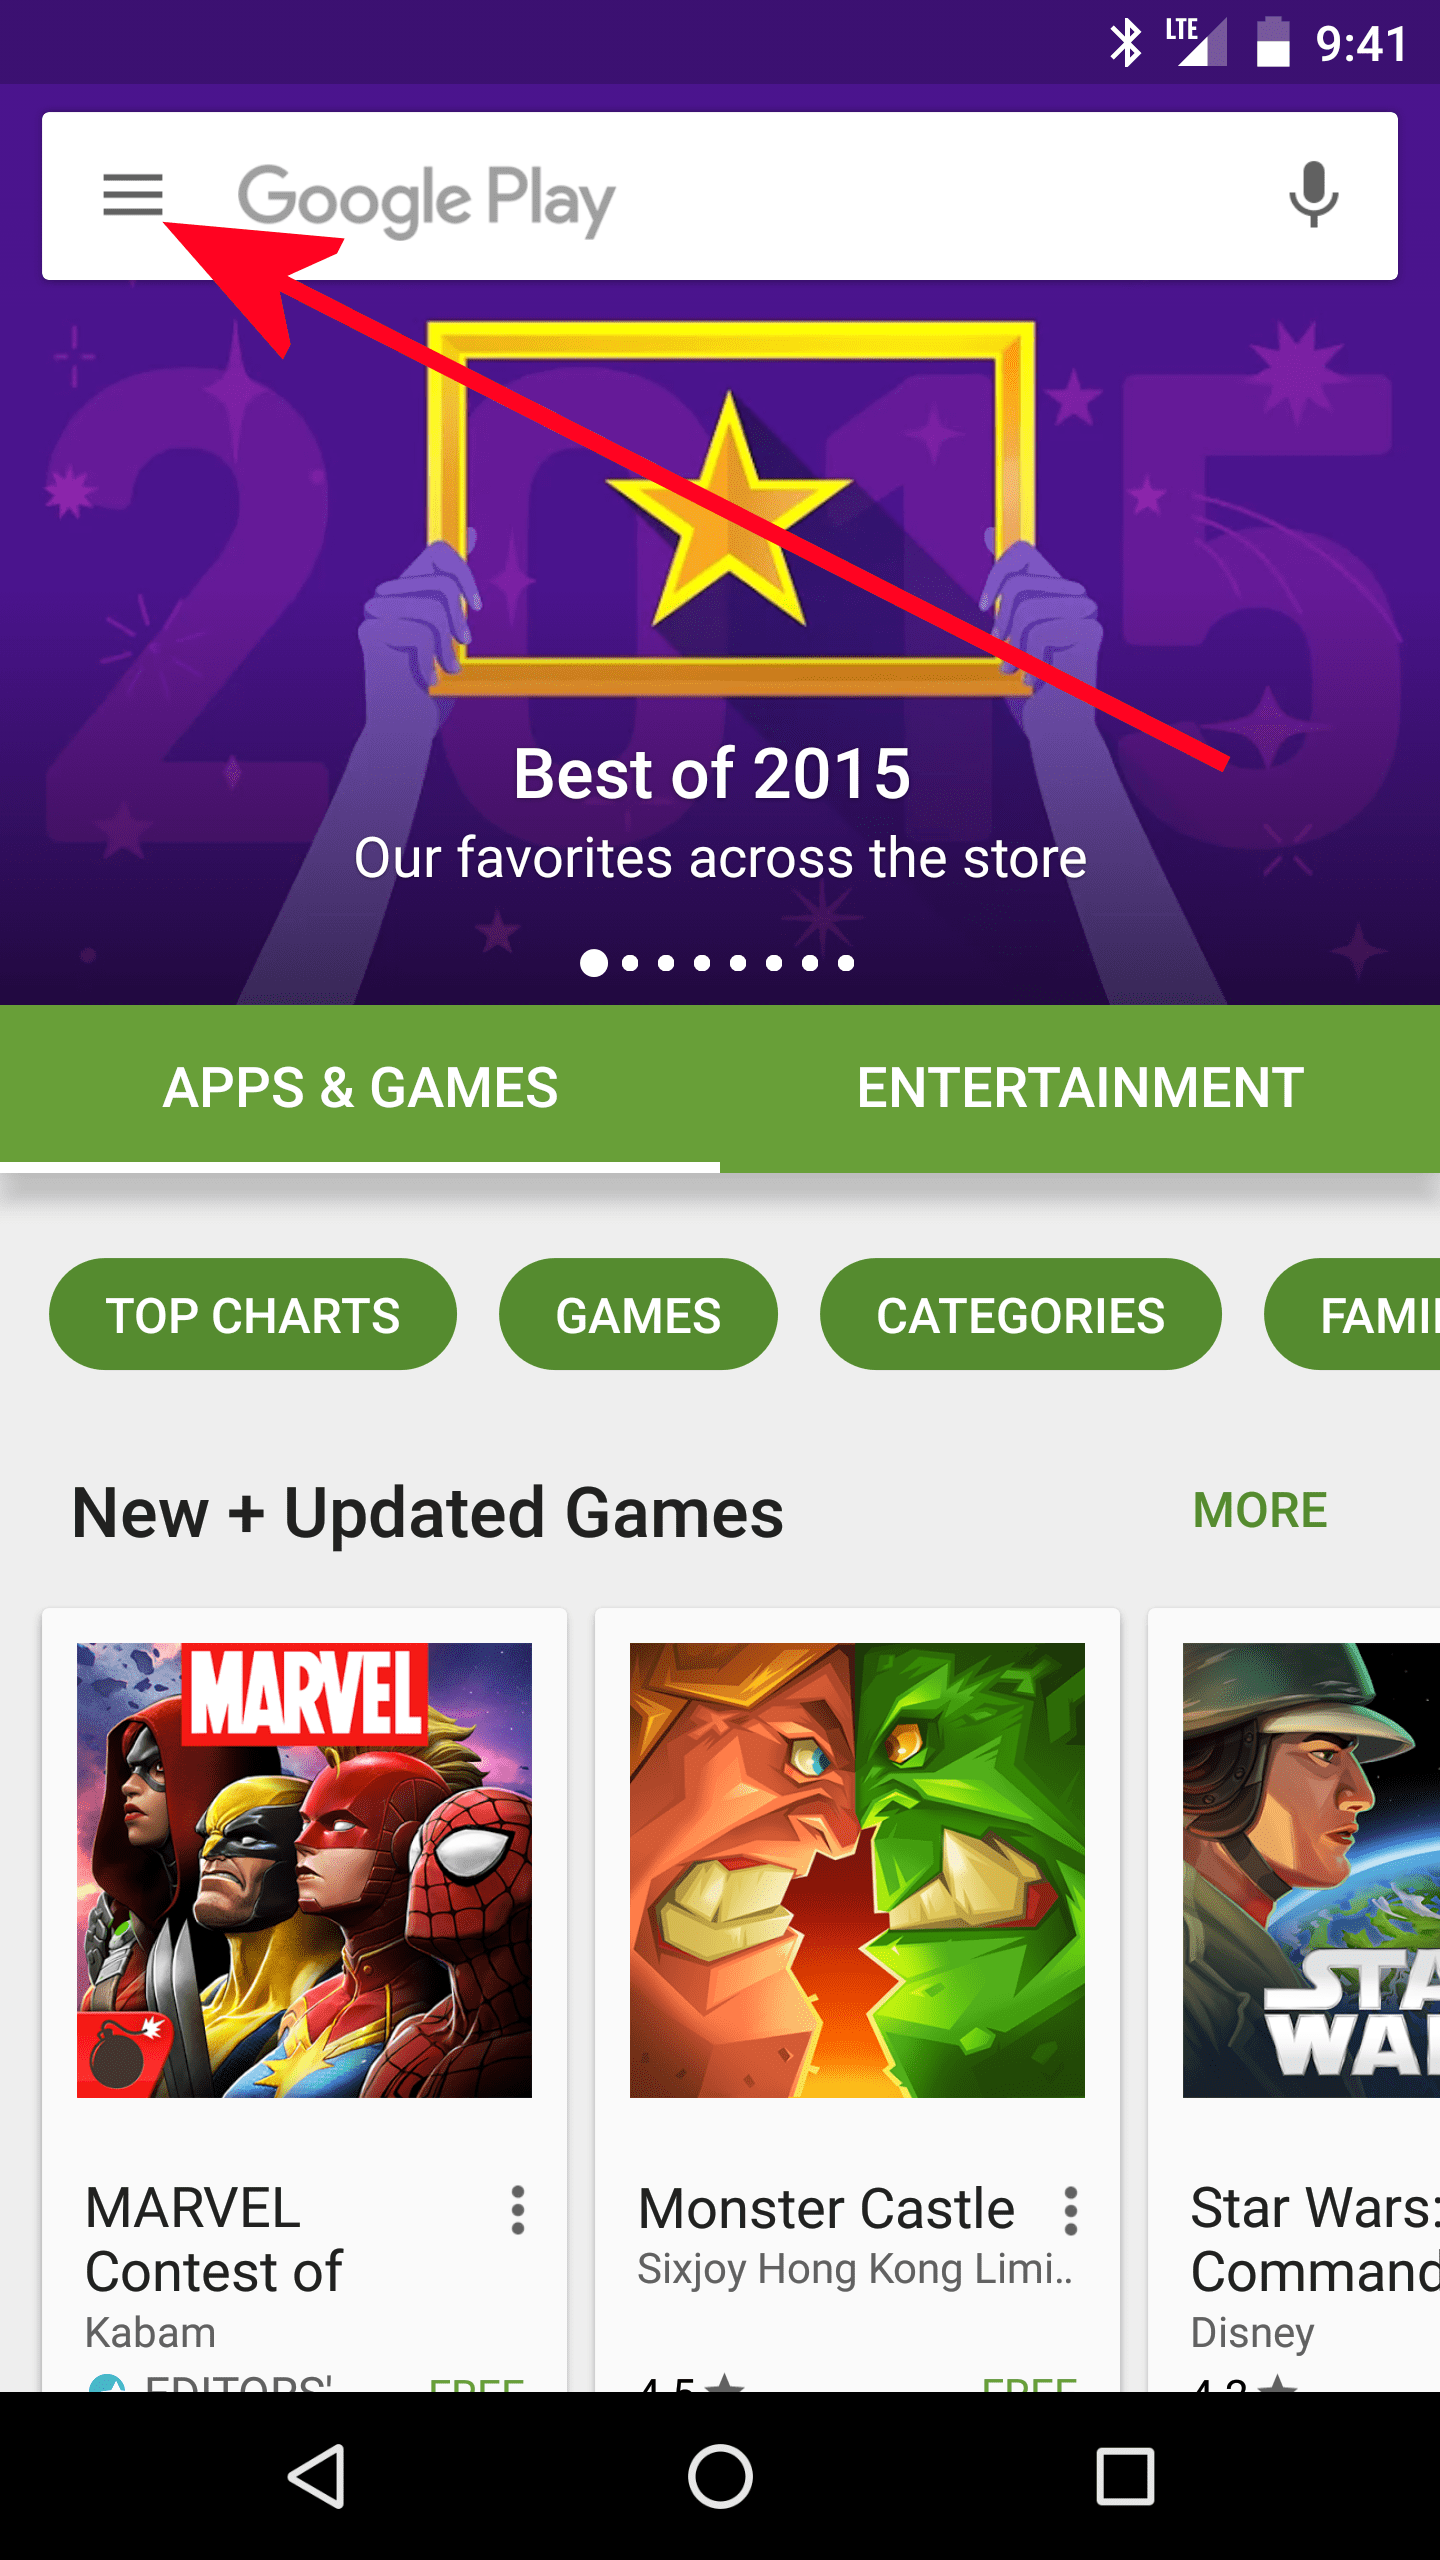
- Tap on the hamburger icon (three horizontal lines) at the top left.
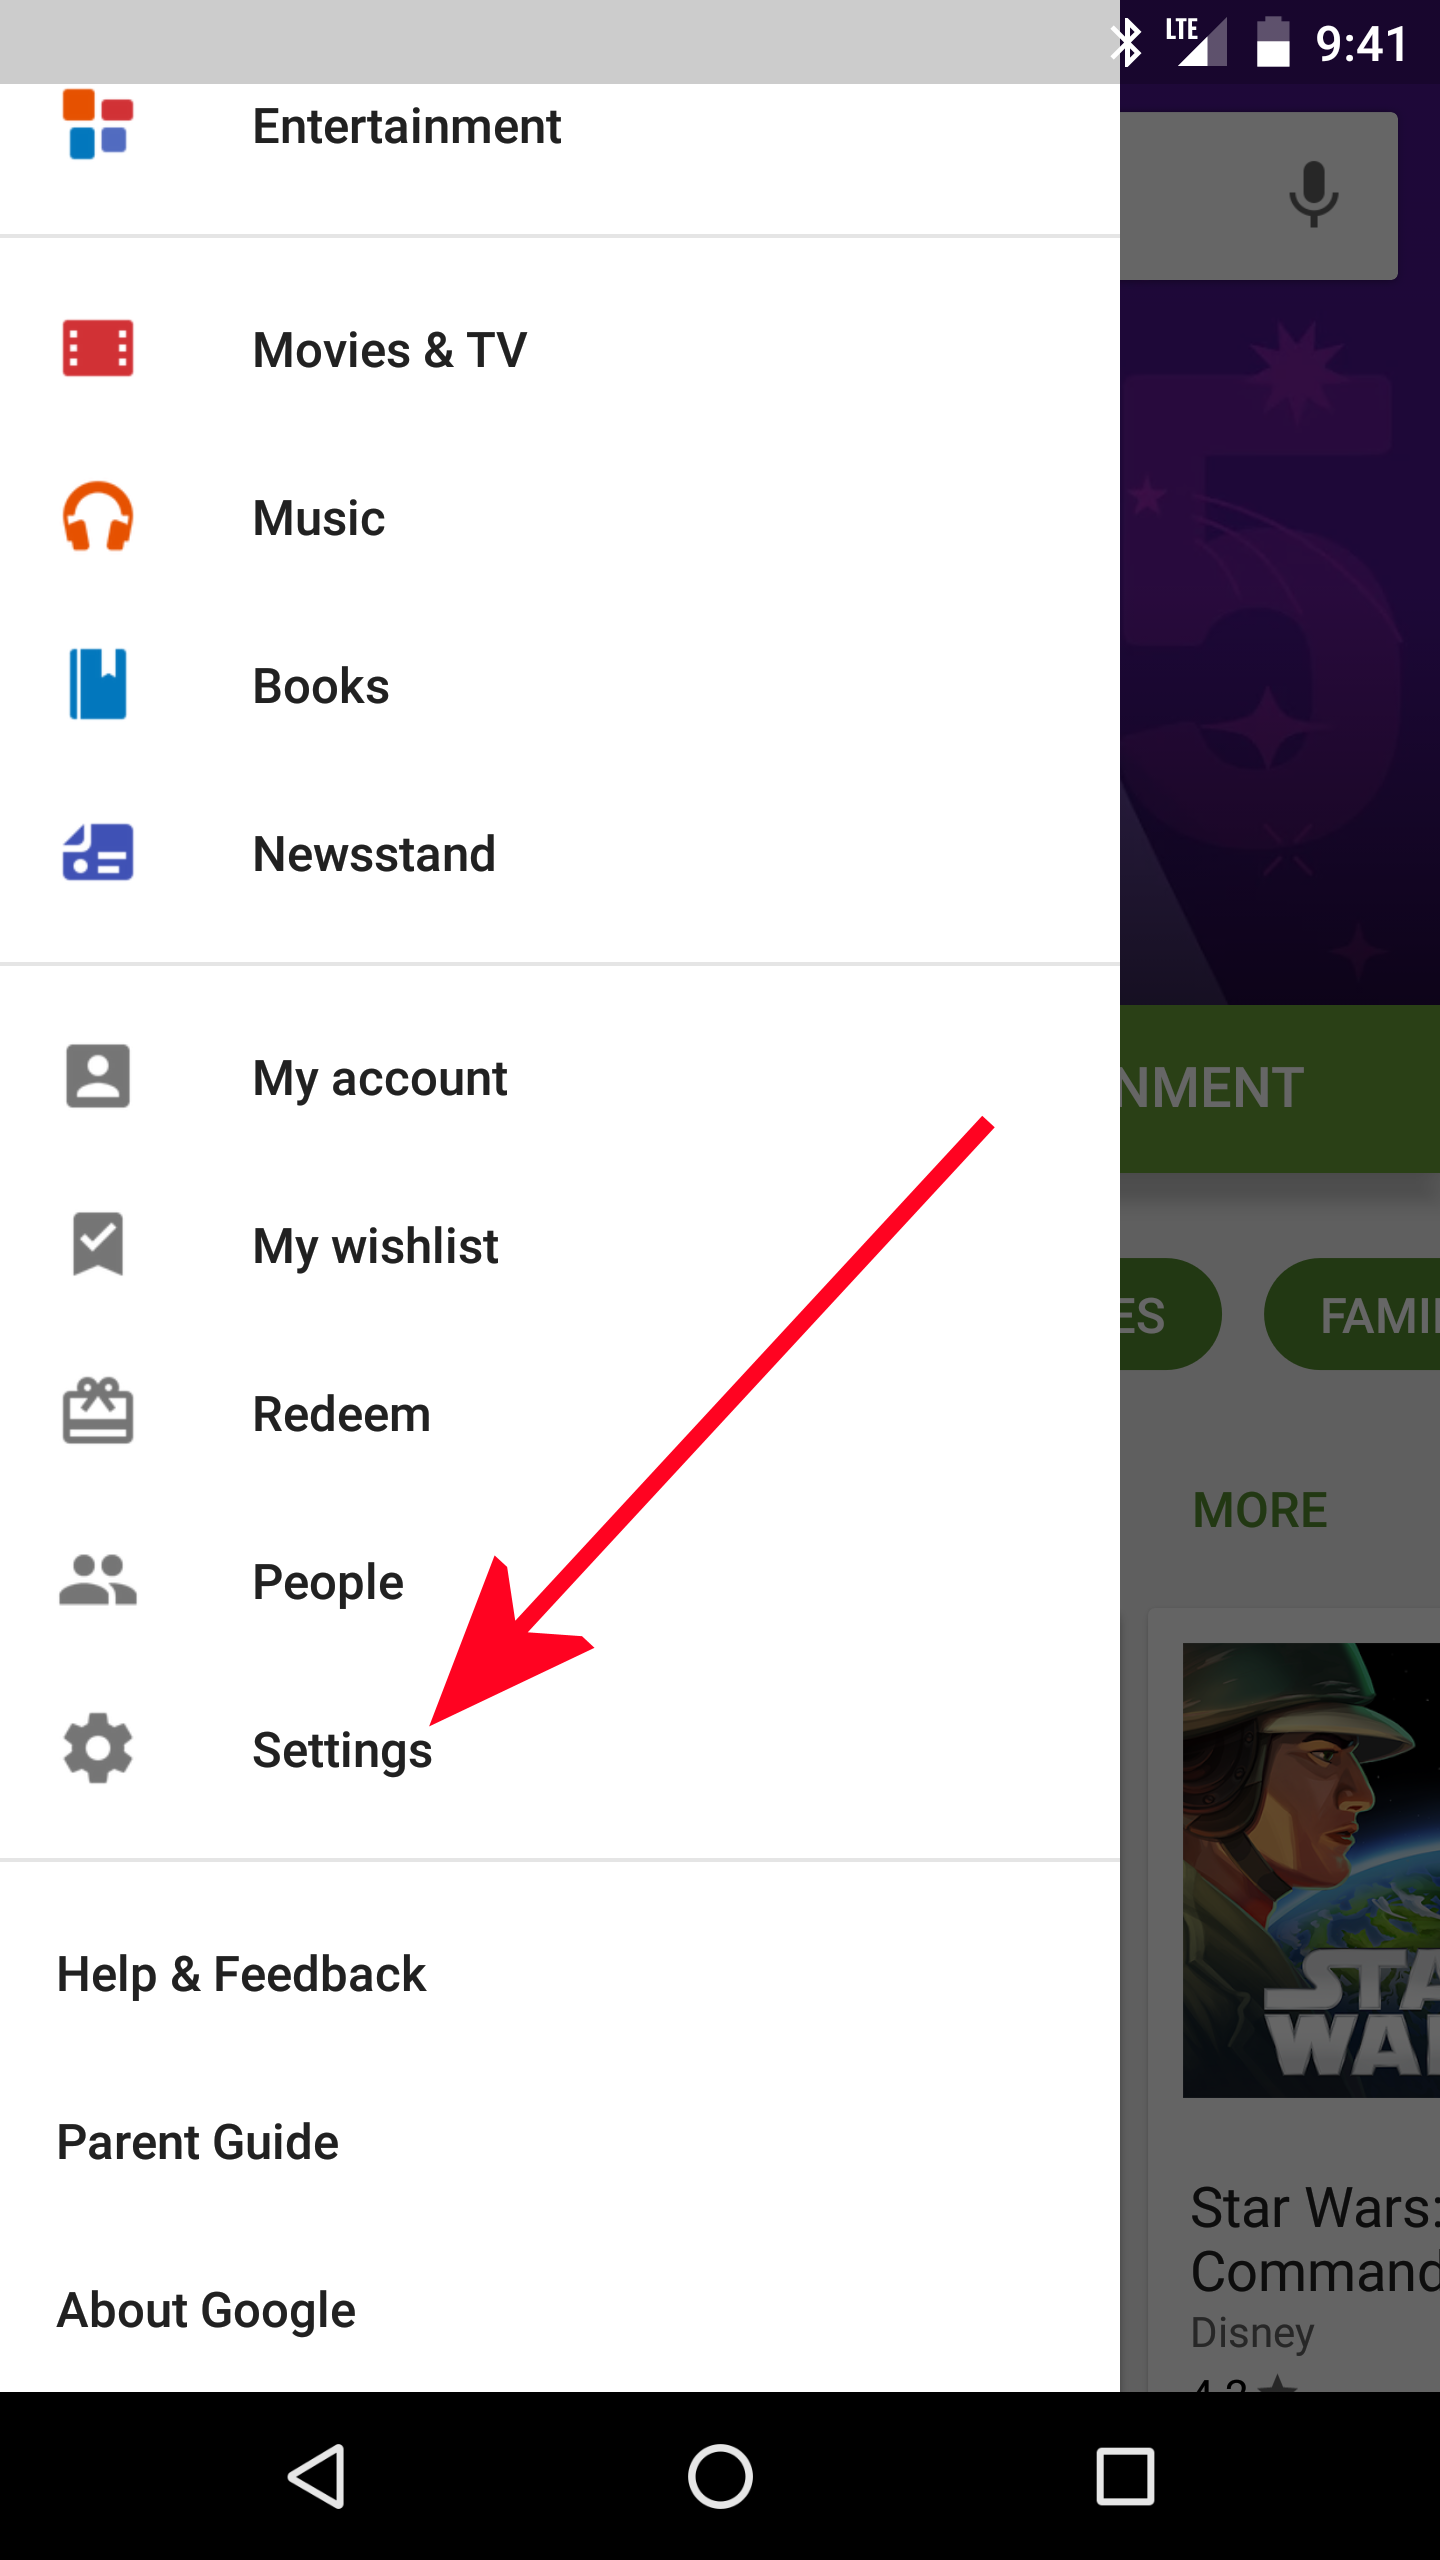
- Tap on Settings.
- Scroll down to Fingerprint Authentication and check it. You will need to enter your Google password one more time, for the last time.
Use a different Camera app
The Nexus 6P has an amazing camera with fantastic low light performance. However, the Google stock camera app leaves a lot to be desired, especially for those who like to adjust a lot of settings.
There are several camera replacement apps in the Play Store that will give you a lot more control for capturing even cooler photos. You will be able to set ISO levels, exposure times, and so much more. You can also use these apps to save RAW images as well.
Our favorite camera apps include Camera FV-5 ($3.95), Manual Camera ($2.99), and ProShot ($2.99).
Choose a different Camera app for the quick camera launch gesture
In case you didn’t know it, you can quickly open the camera app by tapping the power button twice. This works even when the phone is locked. It’s great for when you want to capture a picture quickly, but you might prefer a different camera app (like the ones from the above tip) to open instead of the stock Google camera app. There’s an easy way to fix that.
- Make sure the camera app that you want to use is already installed on your device.
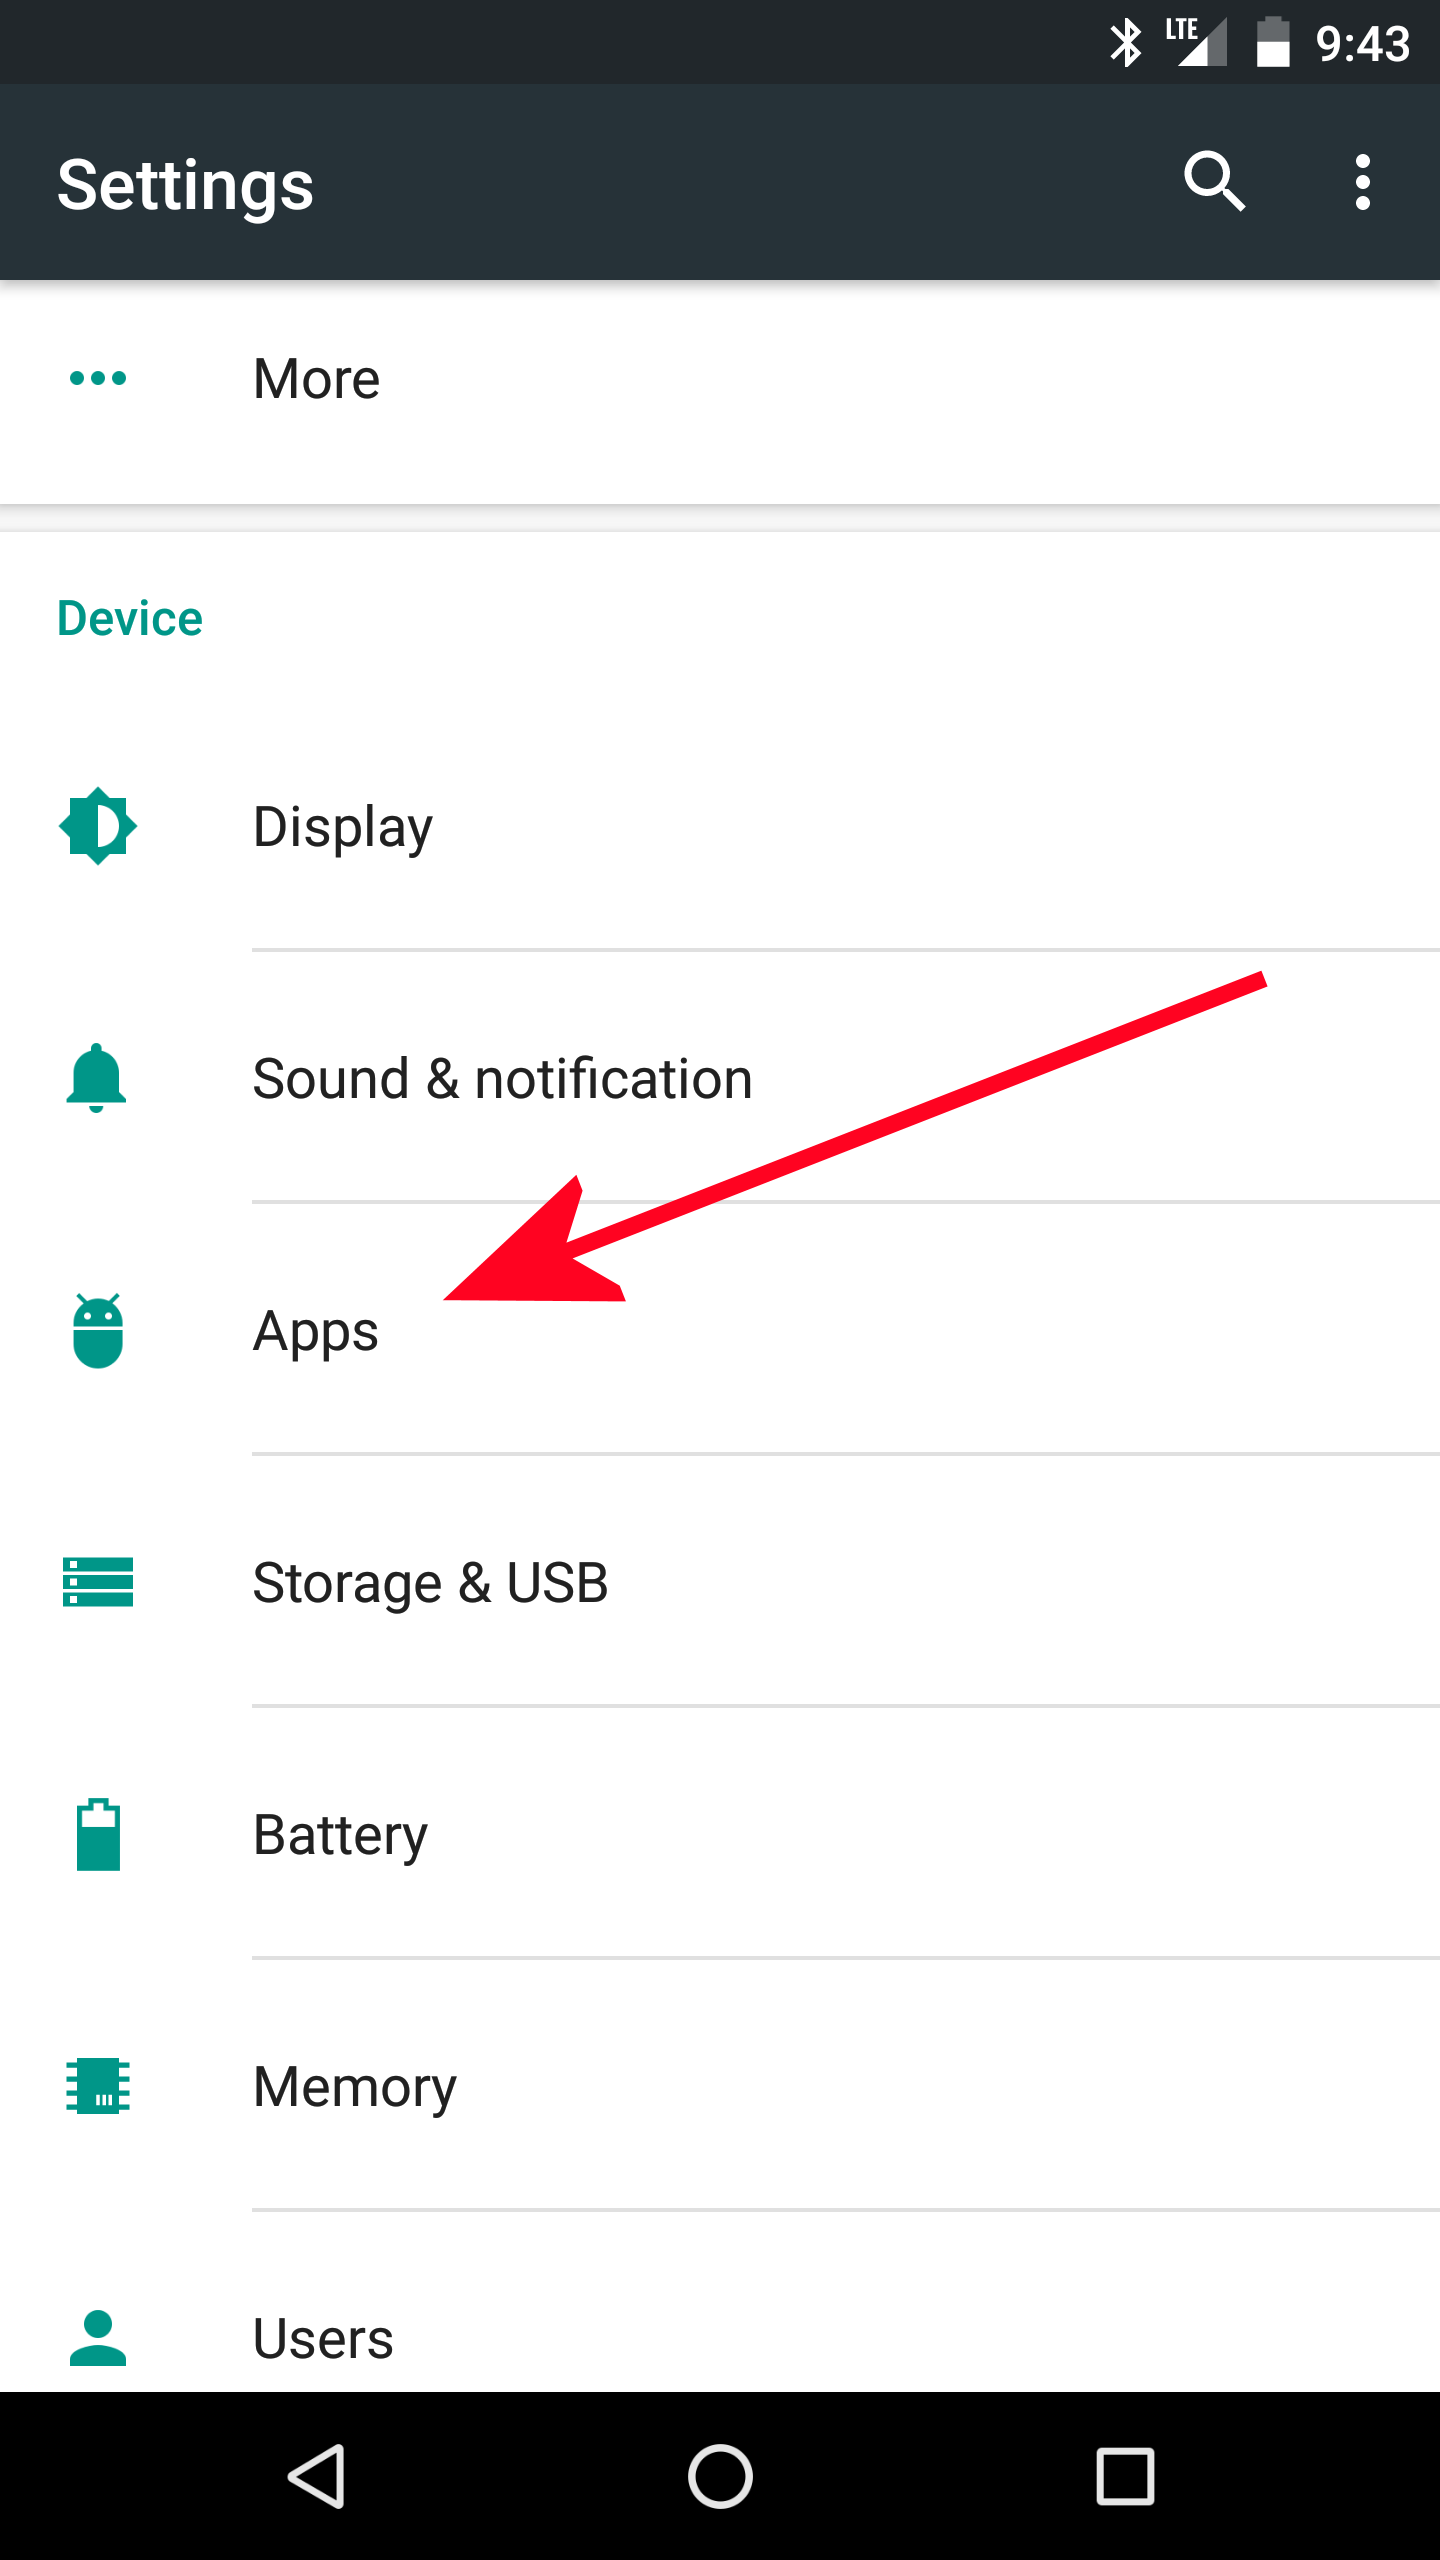
- Open Settings, and choose Apps.
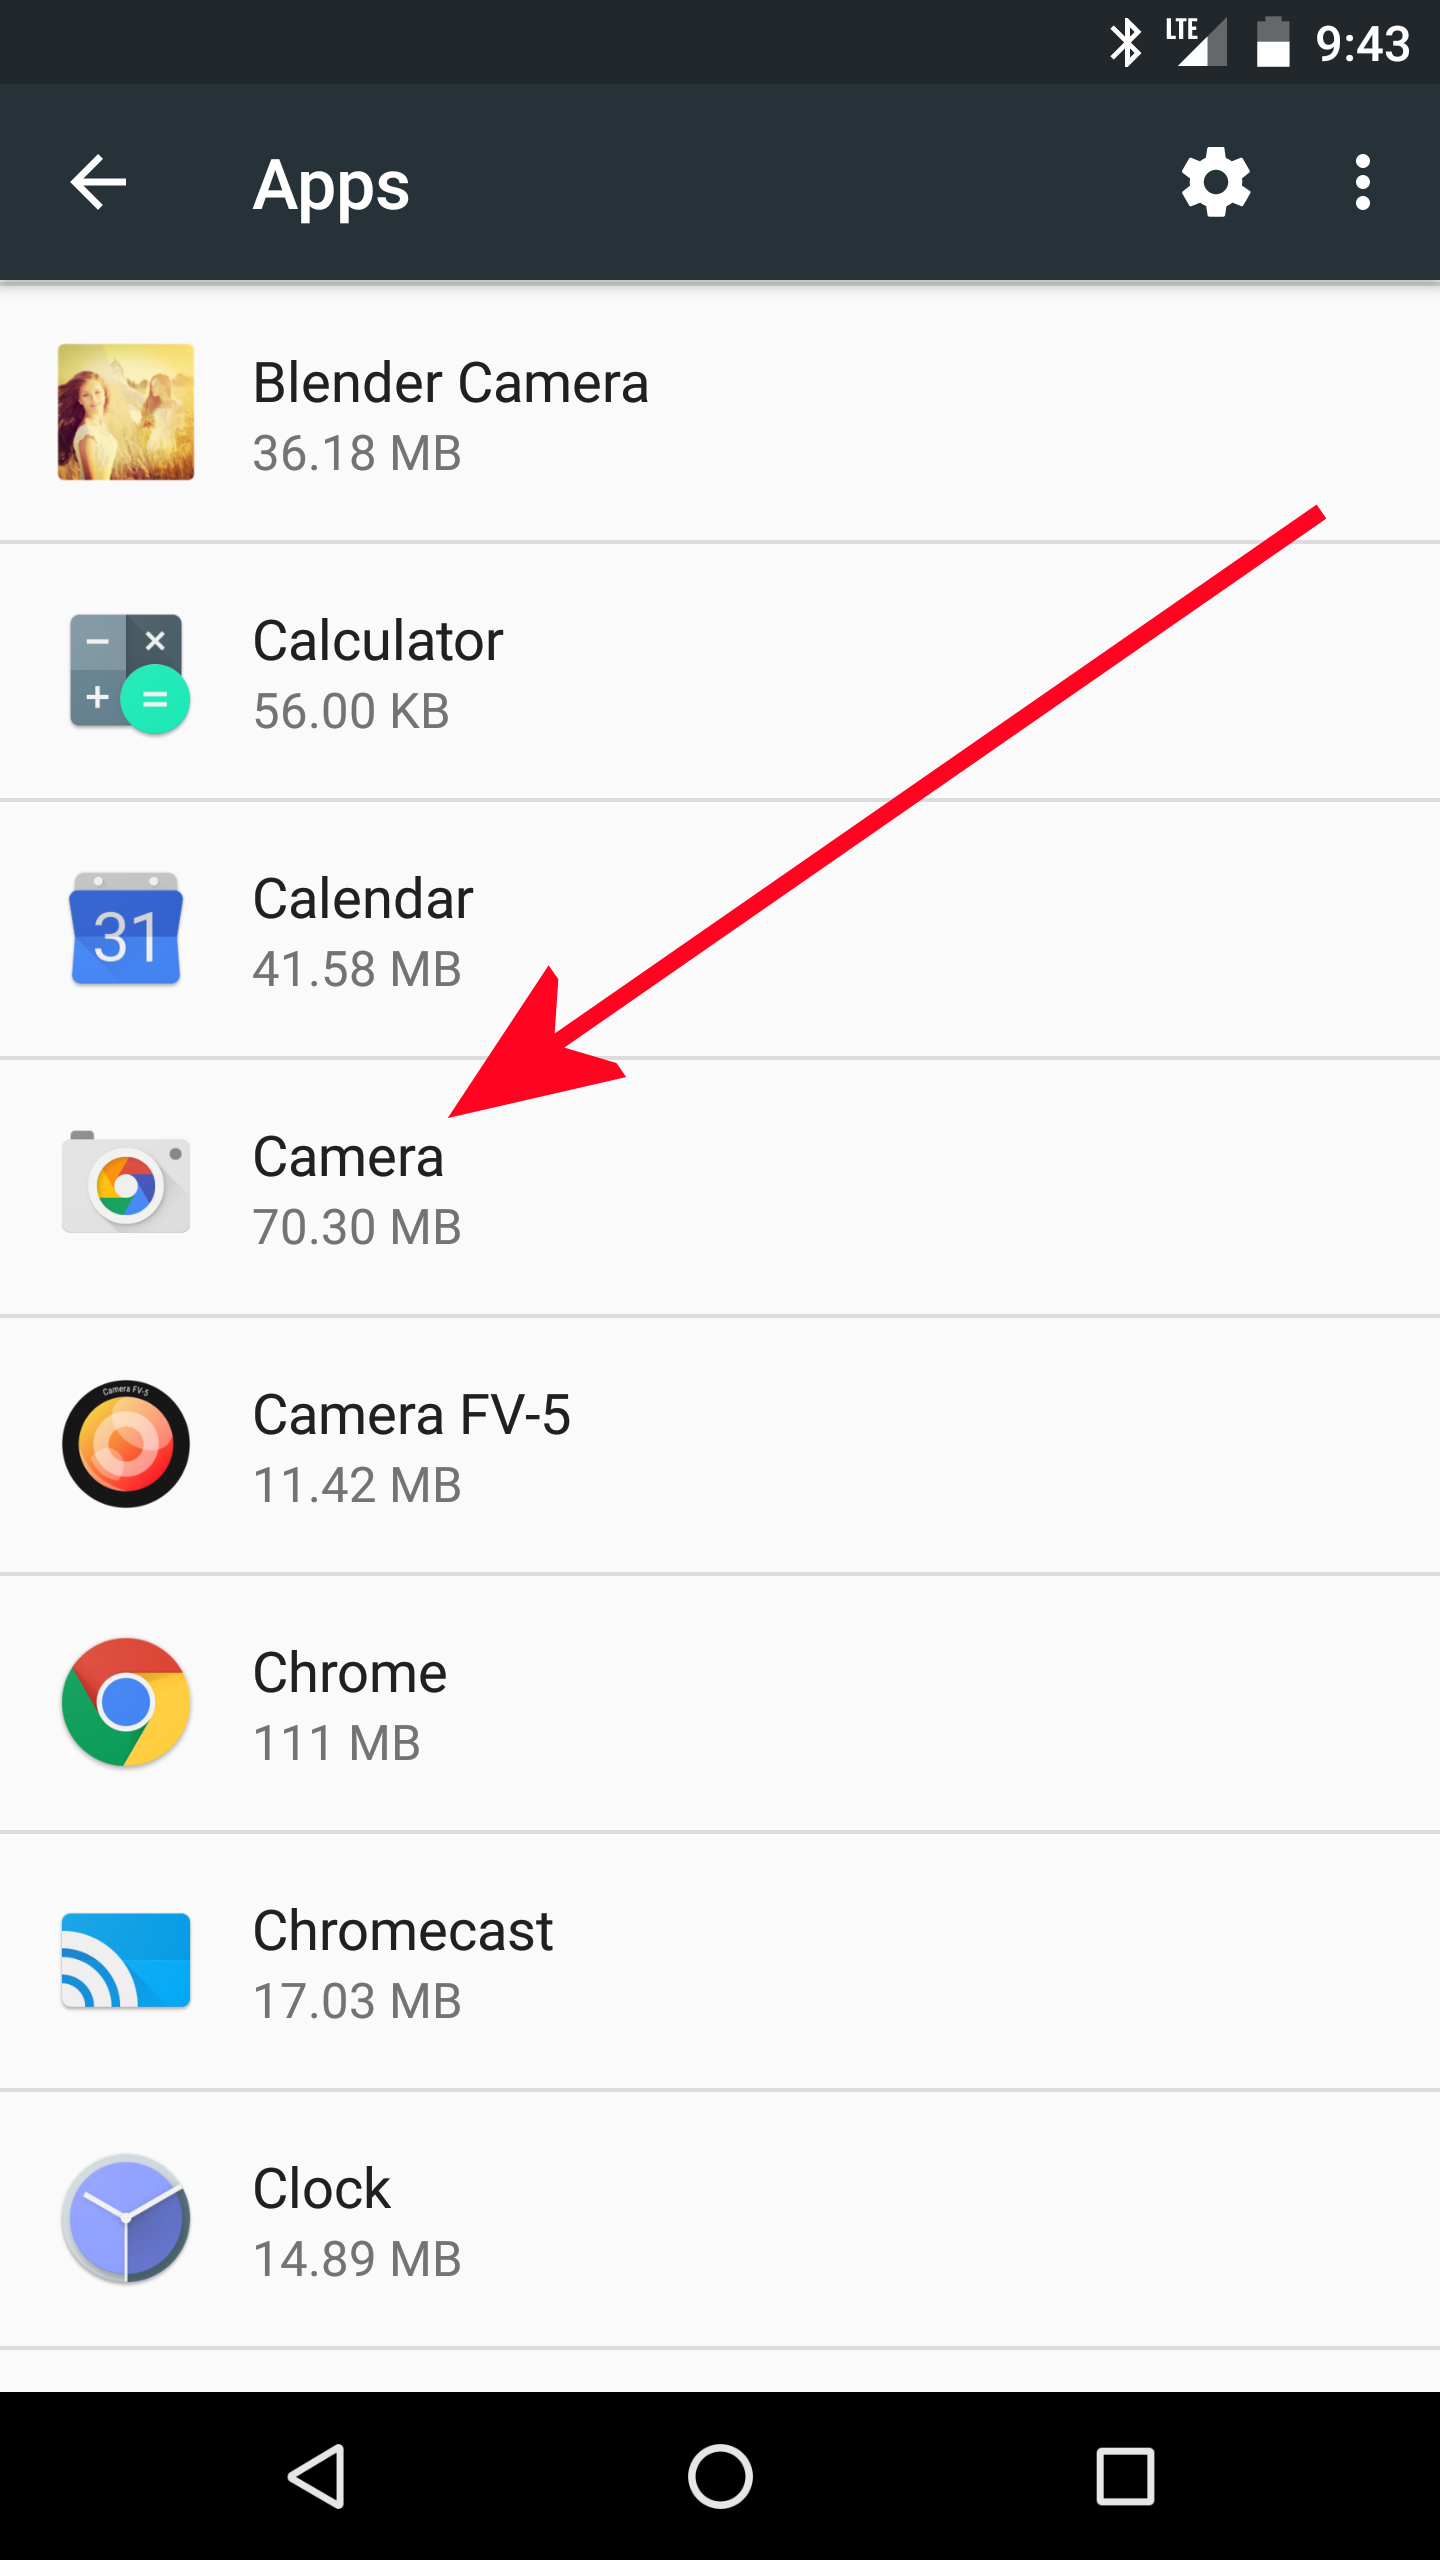
- Tap on the app called Camera.
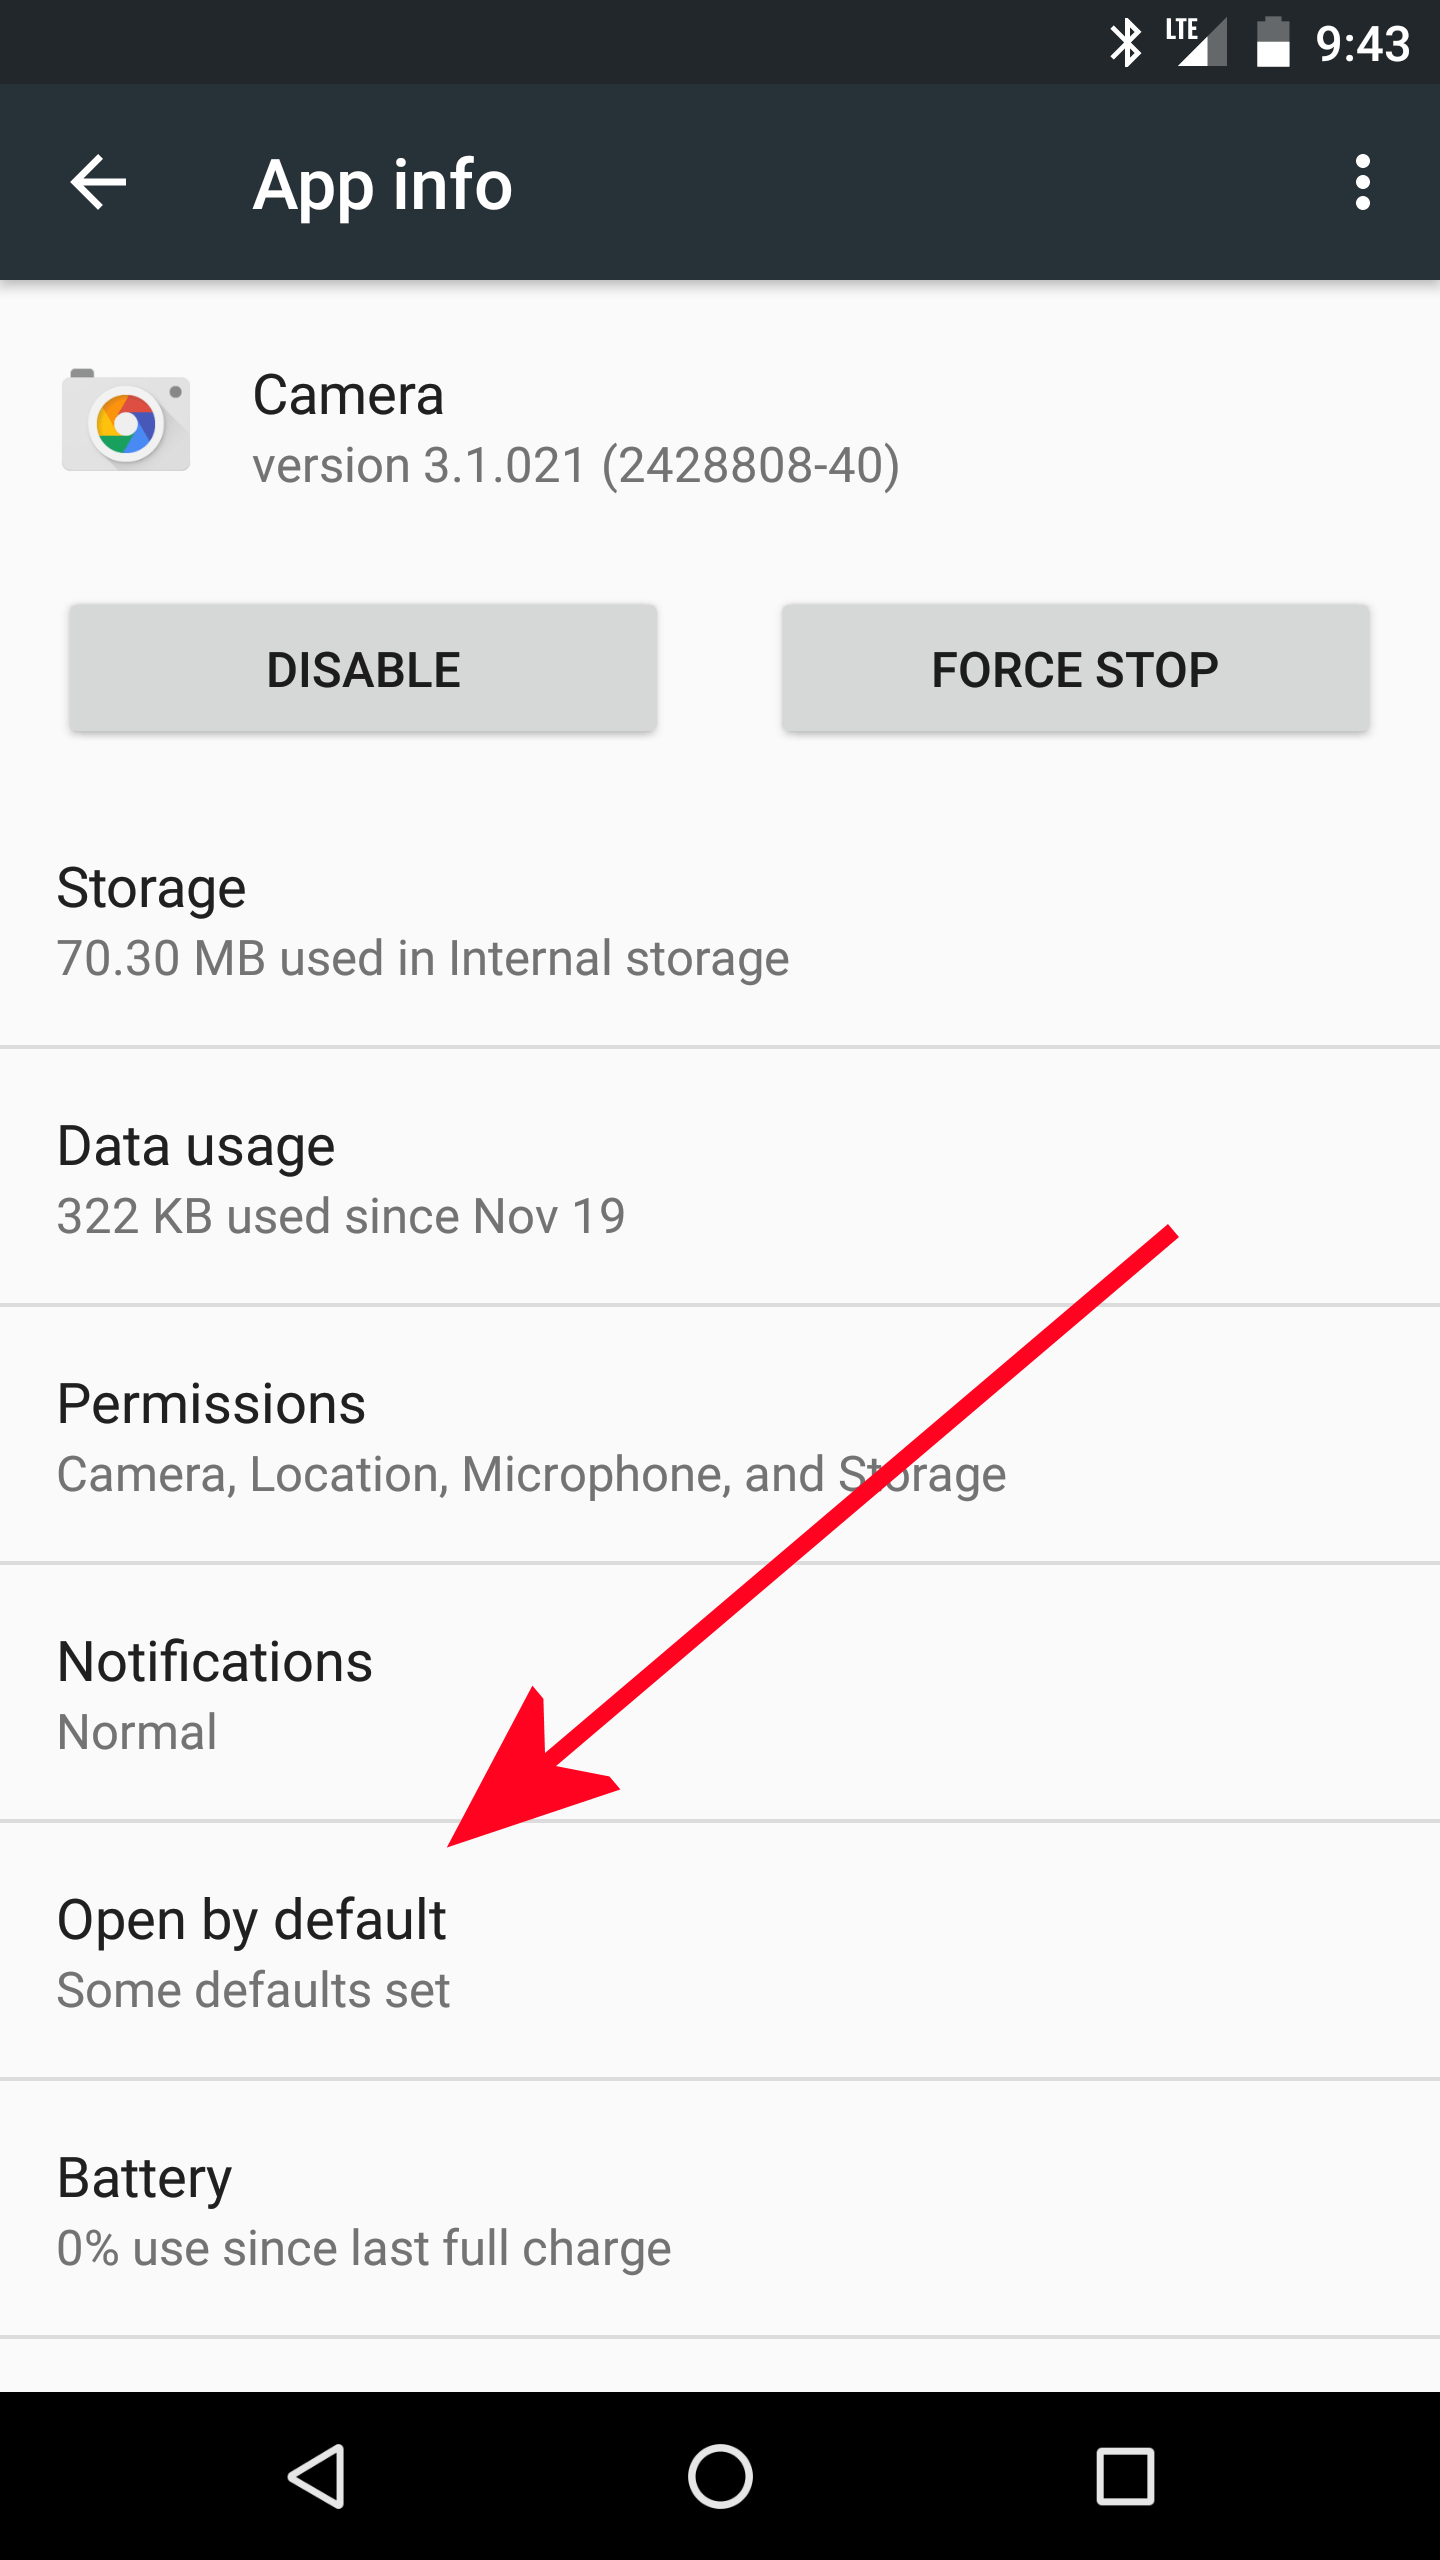
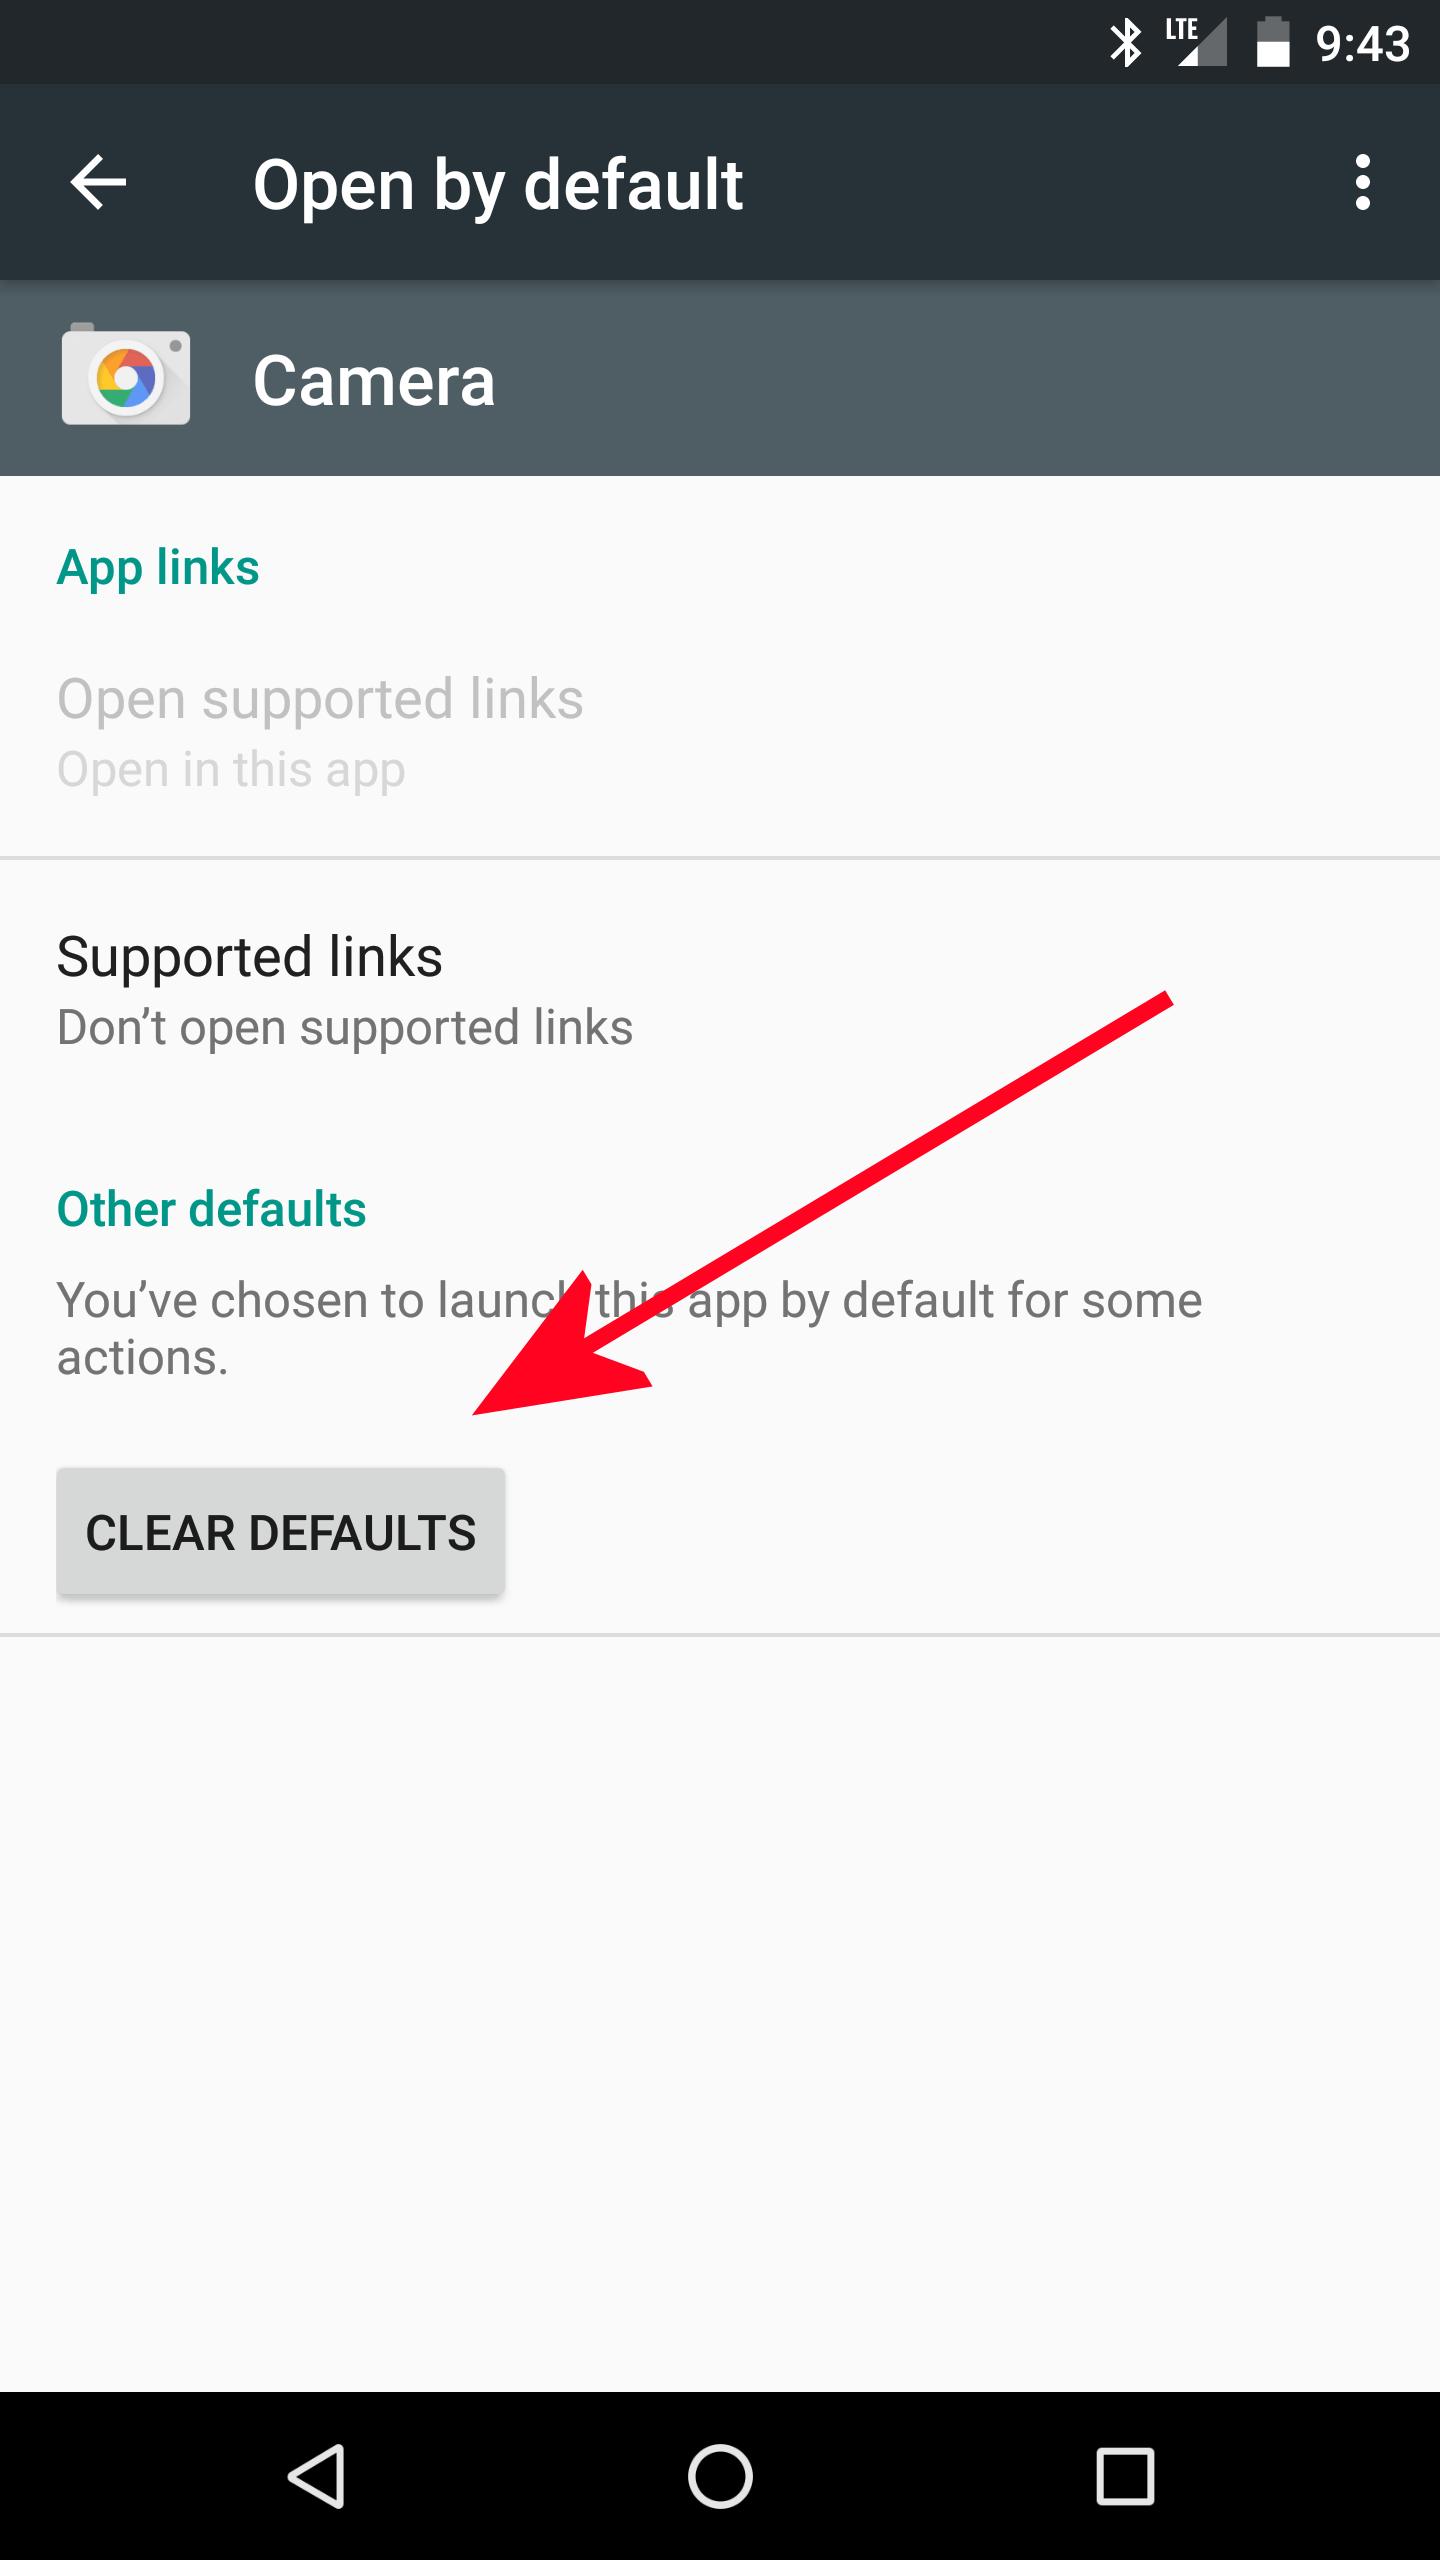
- Now choose Open By Default.
- Tap on Clear Defaults.
- The next time you double tap the power button, you will be asked to select a new default camera app.
Use the charger that came in the box for fast charging
The Nexus 6P has fast charging, but it’s not the same technology as Qualcomm’s Quick Charge feature that is on many other phones. Unfortunately, fast charging on the Nexus 6P only works with the charger that comes with the phone. Other Quick Charge compatible chargers will charge your phone, but it won’t be as quick as the Google charger.
As an example, we tested an Aukey Quick Charge 2.0 certified charger (with the USB Type-C to Type-A adapter) when the Nexus 6P was at 54 percent. After 25 minutes, it was at 73 percent. We did the same exact test using the Google charger, and it was at 84 percent after the same 25 minutes.
The bottom line is that if you want extra chargers that also quick charge your Nexus 6P, you’re going to have to buy them from the Google store. We recommend using one of your older chargers on your nightstand because it doesn’t matter how fast your Nexus 6P charges while you’re sleeping. Use the Google charger at the office or somewhere else that is more important to get fast charging. Unfortunately, there is no car charger that will rapid charge your Nexus 6P at that time of this post.
Next page: Five more Nexus 6P tips
Click a page to jump to it:
- Fingerprint sensor, Google Pay, Camera app, quick camera, and fast charging
- Google Fit, notification light, charge devices, quick settings, and battery percentage
Use Google Fit to track your steps
Most people think of the Google Fit app as something that goes with Android Wear smartwatches. Google Fit does work well with them, but there’s a good chance that you don’t own an Android Wear watch. What you might not know is that the Nexus 6P has a built-in pedometer. This means that Google Fit will work on its own with your Nexus 6P to track your steps each day, as well as help you achieve your goals. You can even use other apps like Runtastic Pedometer Step Count if you wish.
You can download Google Fit here.
Turn on the notification light
Although the Nexus 6P has great onscreen notifications on the lock screen, you might still be yearning for the old fashioned notification light. The Nexus 6P has one, but it’s not turned on by default. Here’s how to turn it on:
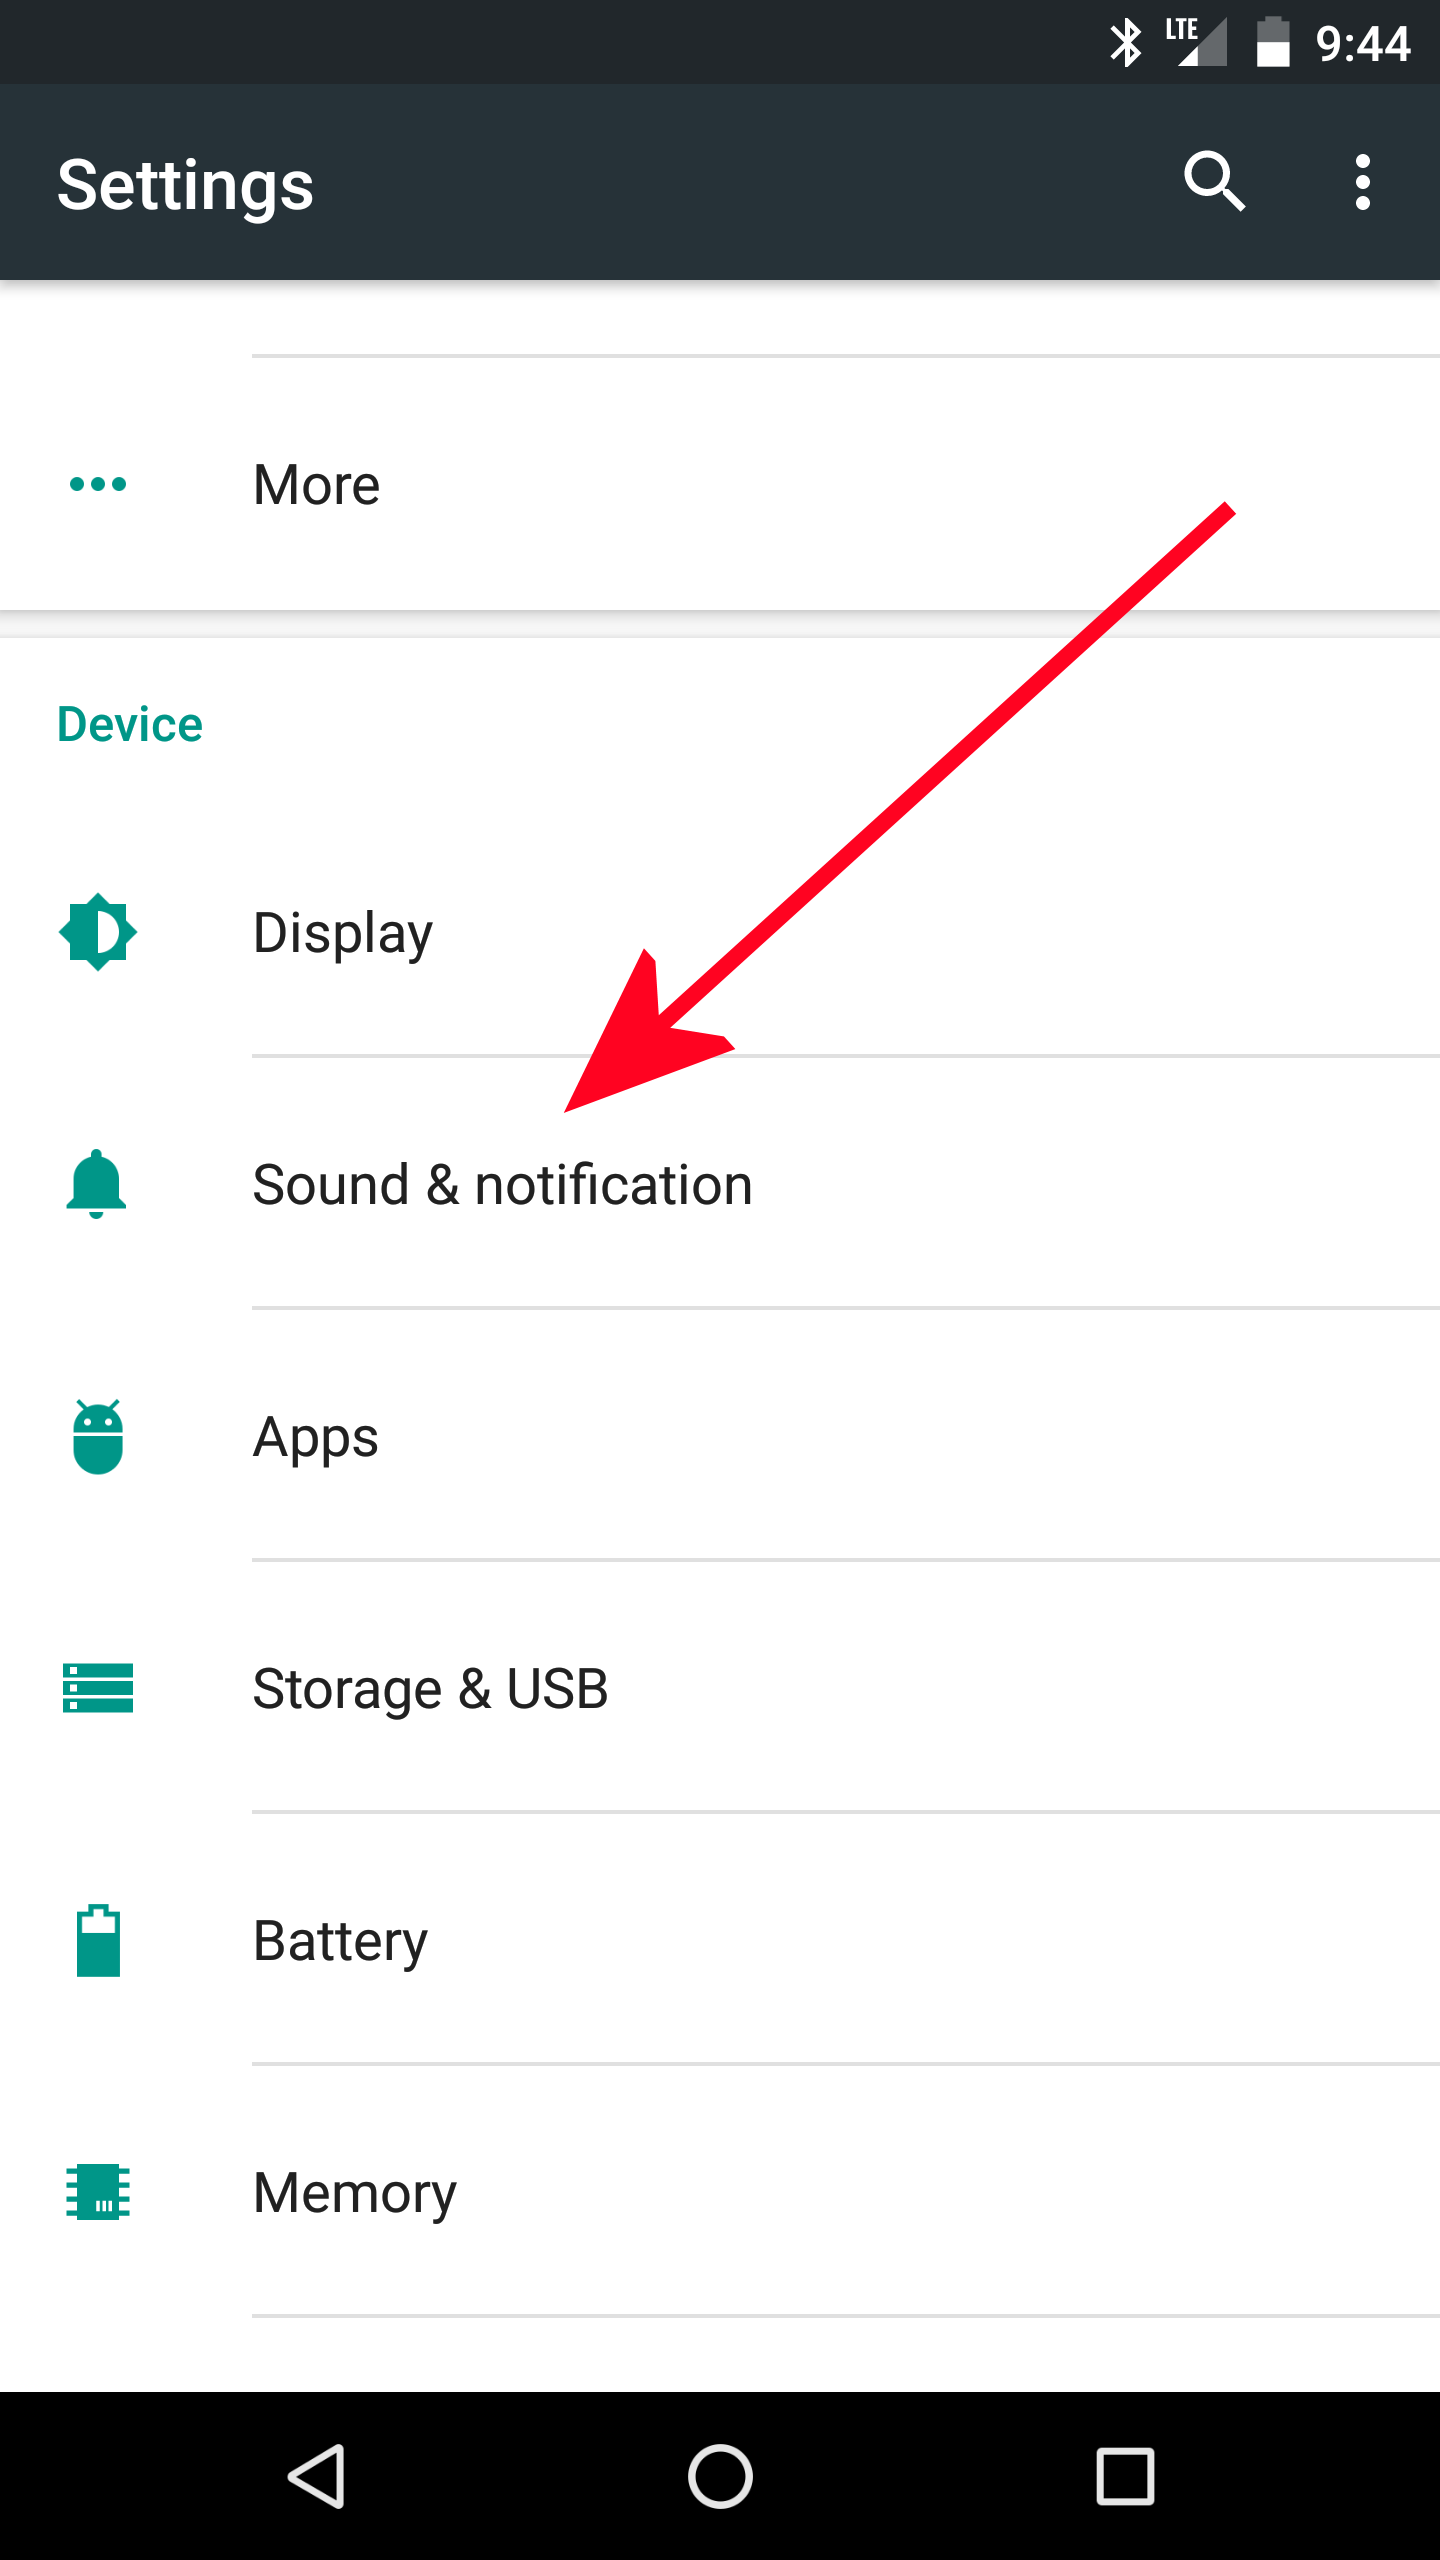
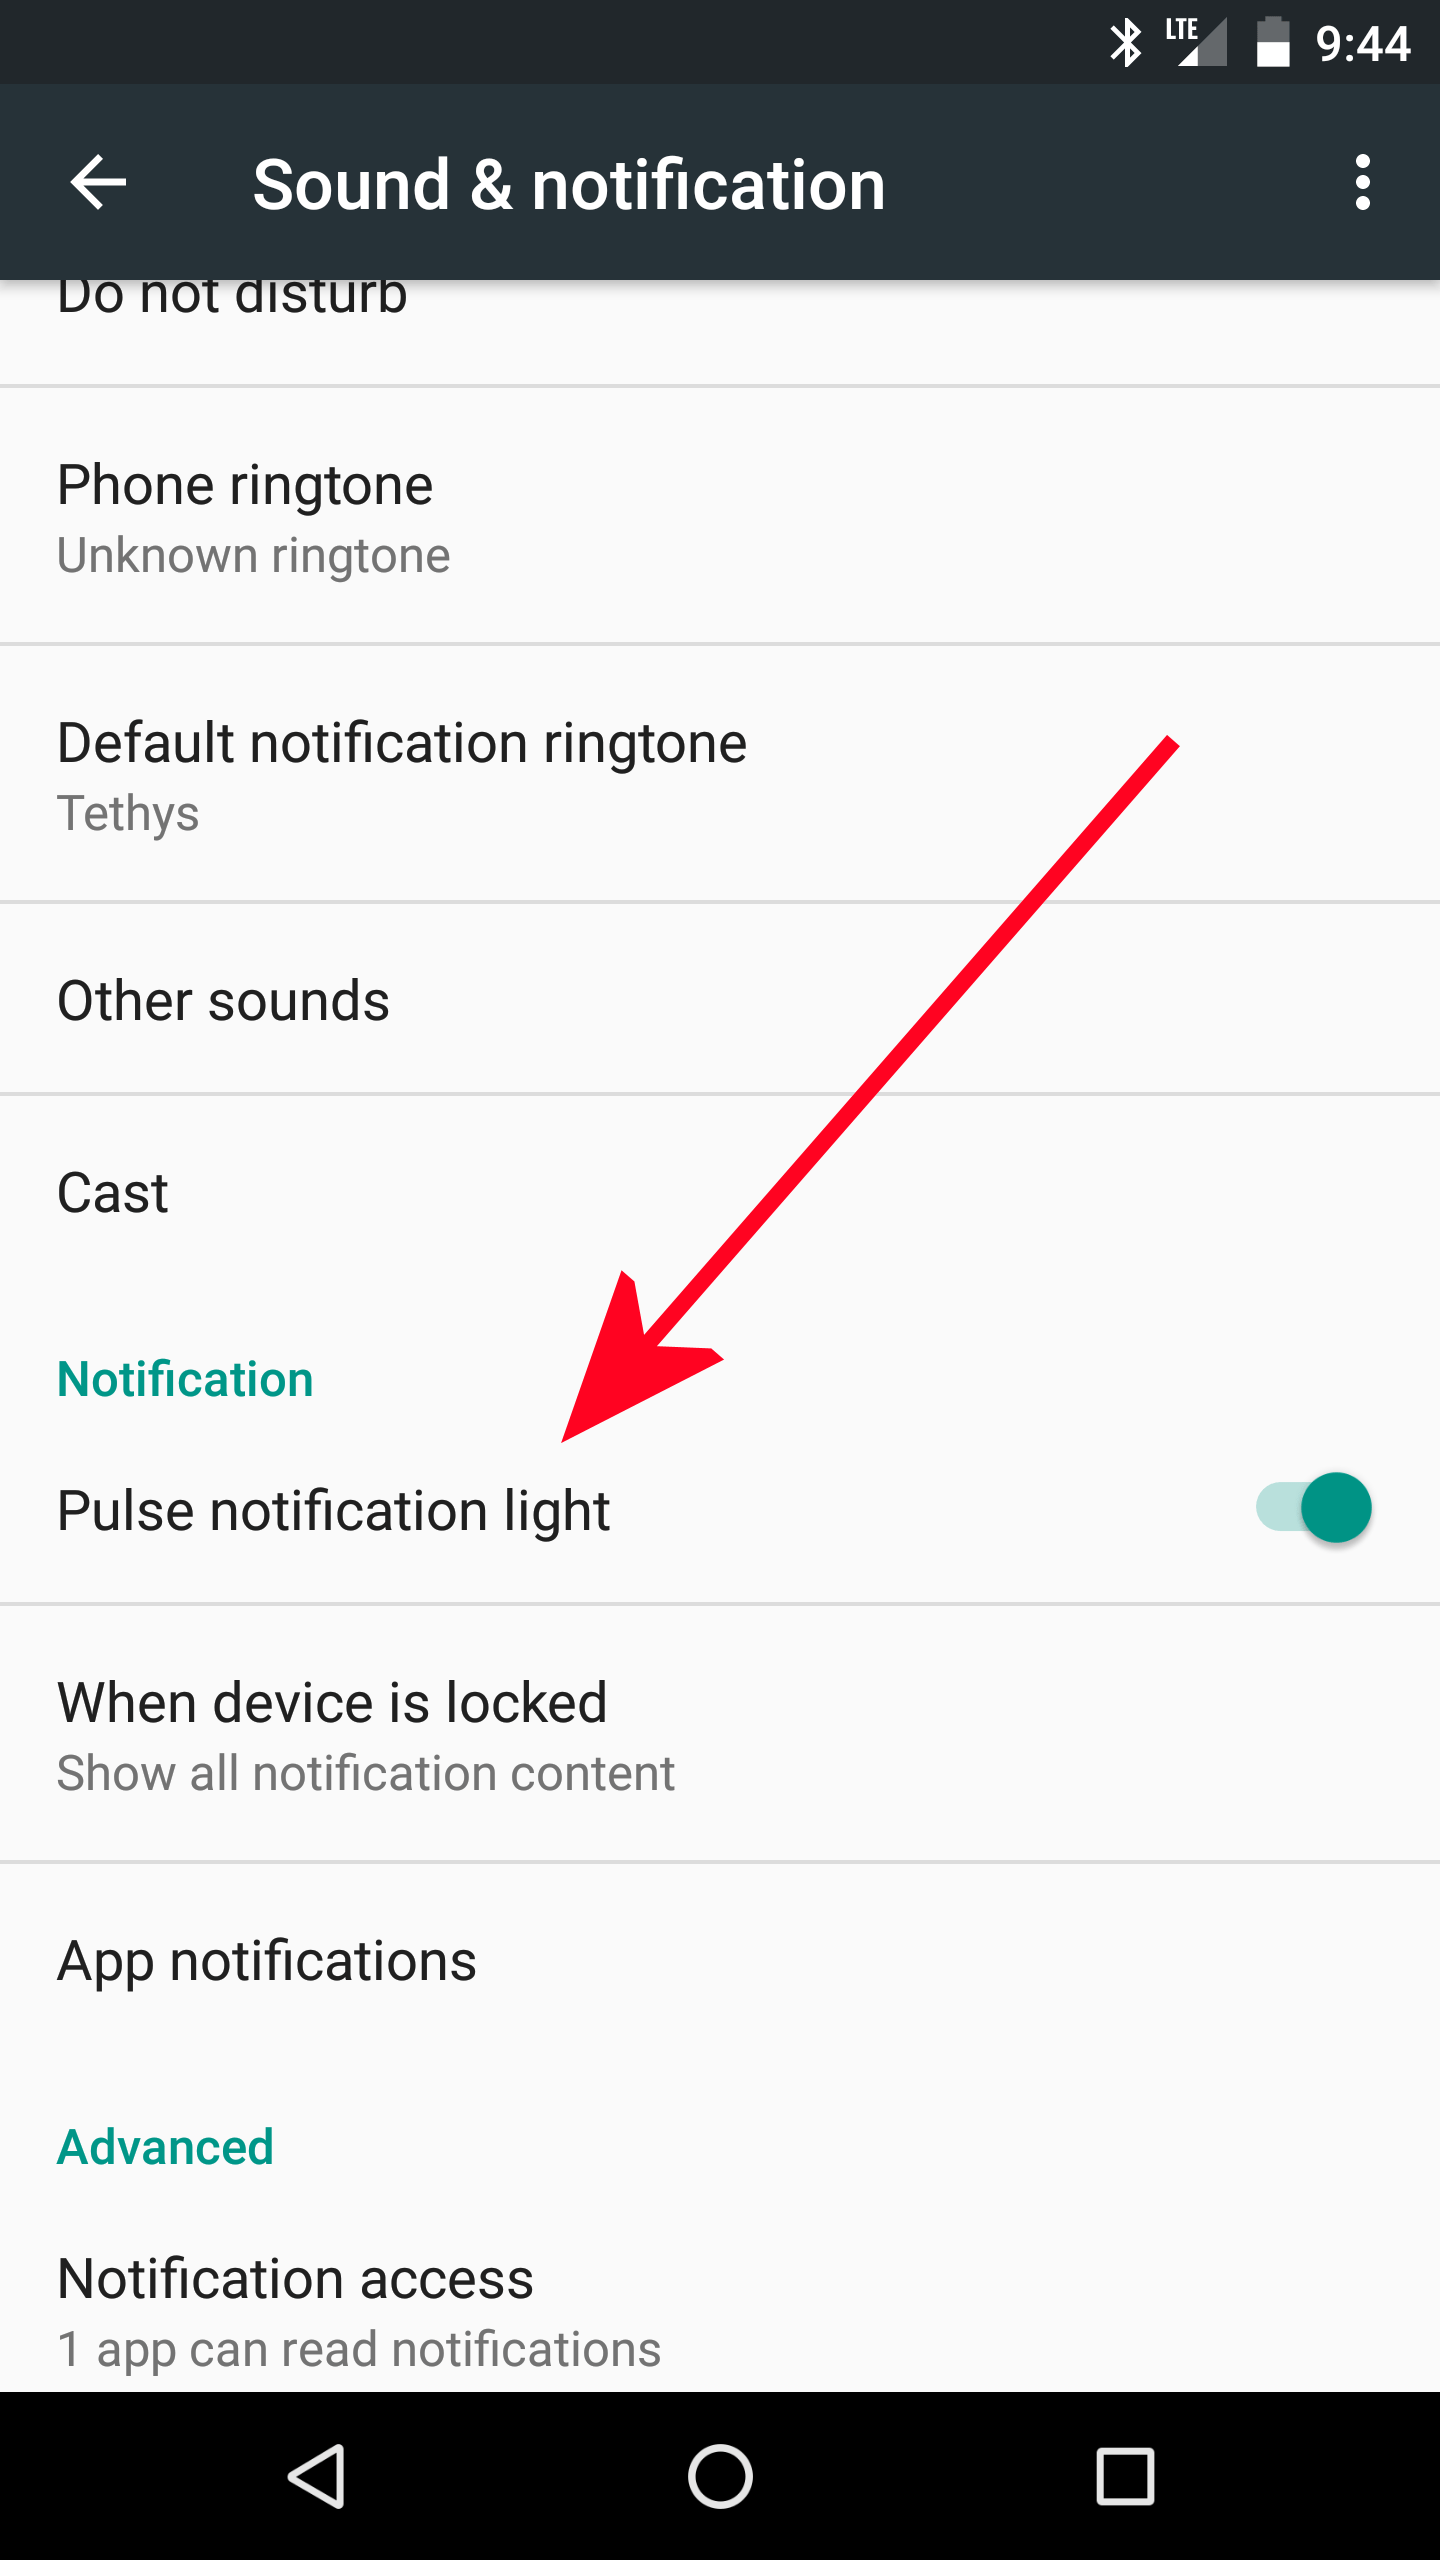
- Open Settings and select Sound & Notification.
- Scroll down to Pulse Notification Light and turn it on.
Use your Nexus 6P to charge other USB Type-C devices
One of the benefits of USB Type-C is that it works both ways. Normally when you insert a Type-C cable into your device, it’s for charging or transferring data. However you can insert a two-sided Type-C cable into your Nexus 6P and use it to charge other Type-C devices (phones or tablets) when you plug the other end of the cable into another device.
You will see a notification that says USB For Charging on your Nexus 6P once you attach both devices to the cable. Just tap on the notification on your Nexus 6P and choose Power Supply. Your Nexus 6P will use its internal battery to charge the other device. We need to point out that this will deplete the Nexus 6P battery much more quickly, but if you happen to have a lot of juice, it can come in handy if a friend’s phone needs a quick pick-me-up.
Don’t forget, this works both ways … we see this as being the most useful with a tablet, such as the upcoming Google Pixel C. You could use the Pixel C to charge your Nexus 6P. Tablets generally have much bigger batteries and can afford to give up a little juice to help another device.
In theory, this feature should work with all Type-C devices, but it appears that it works best with Nexus devices. Other Type-C devices such as the Asus ZenPad S and OnePlus 2 have some incompatibility in that they only charge one way or the other. For example, Android Police found that the ZenPad S would only charge Nexus devices, while the OnePlus 2 could only be charged. This is probably related to Android 6.0 Marshmallow being on Nexus devices and not on the others. Hopefully this will get cleared up as more devices get updated to Marshmallow.
Customize the Quick Settings menu
You probably already know that the Quick Settings menu is revealed when you swipe down with two fingers from the status bar. What you might not know is that you can actually customize it, giving you more power and efficiency. All you need to do is unlock the System UI Tuner in the Settings. Then you can customize the menu to your liking. Here’s how:
- Swipe down with two fingers from the status bar to reveal the Quick Settings menu.
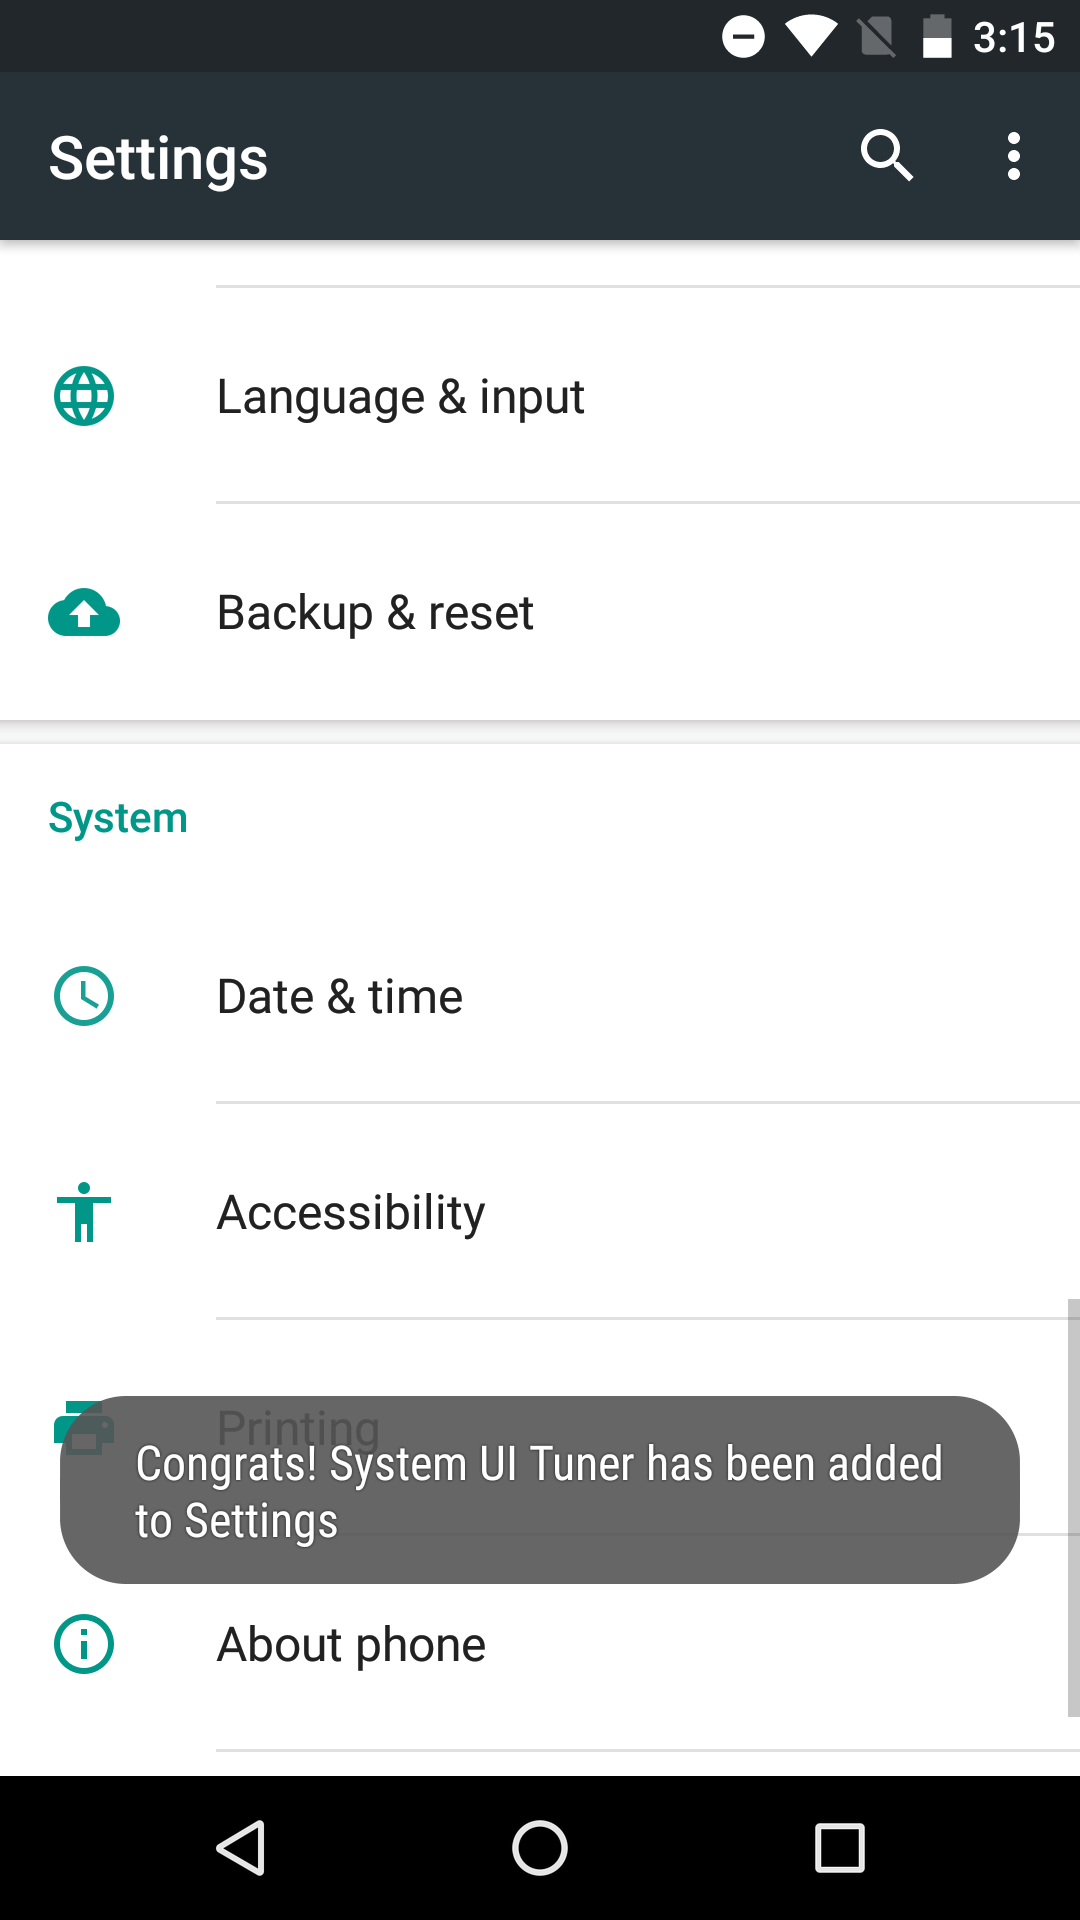
- Tap and hold on the Settings icon at the top right for a few seconds.
- Release your finger and the settings will open along with a popup at the bottom saying, “Congrats! System UI Tuner has been added to settings.”
- Tap on System UI Tuner at the bottom of the Settings screen.
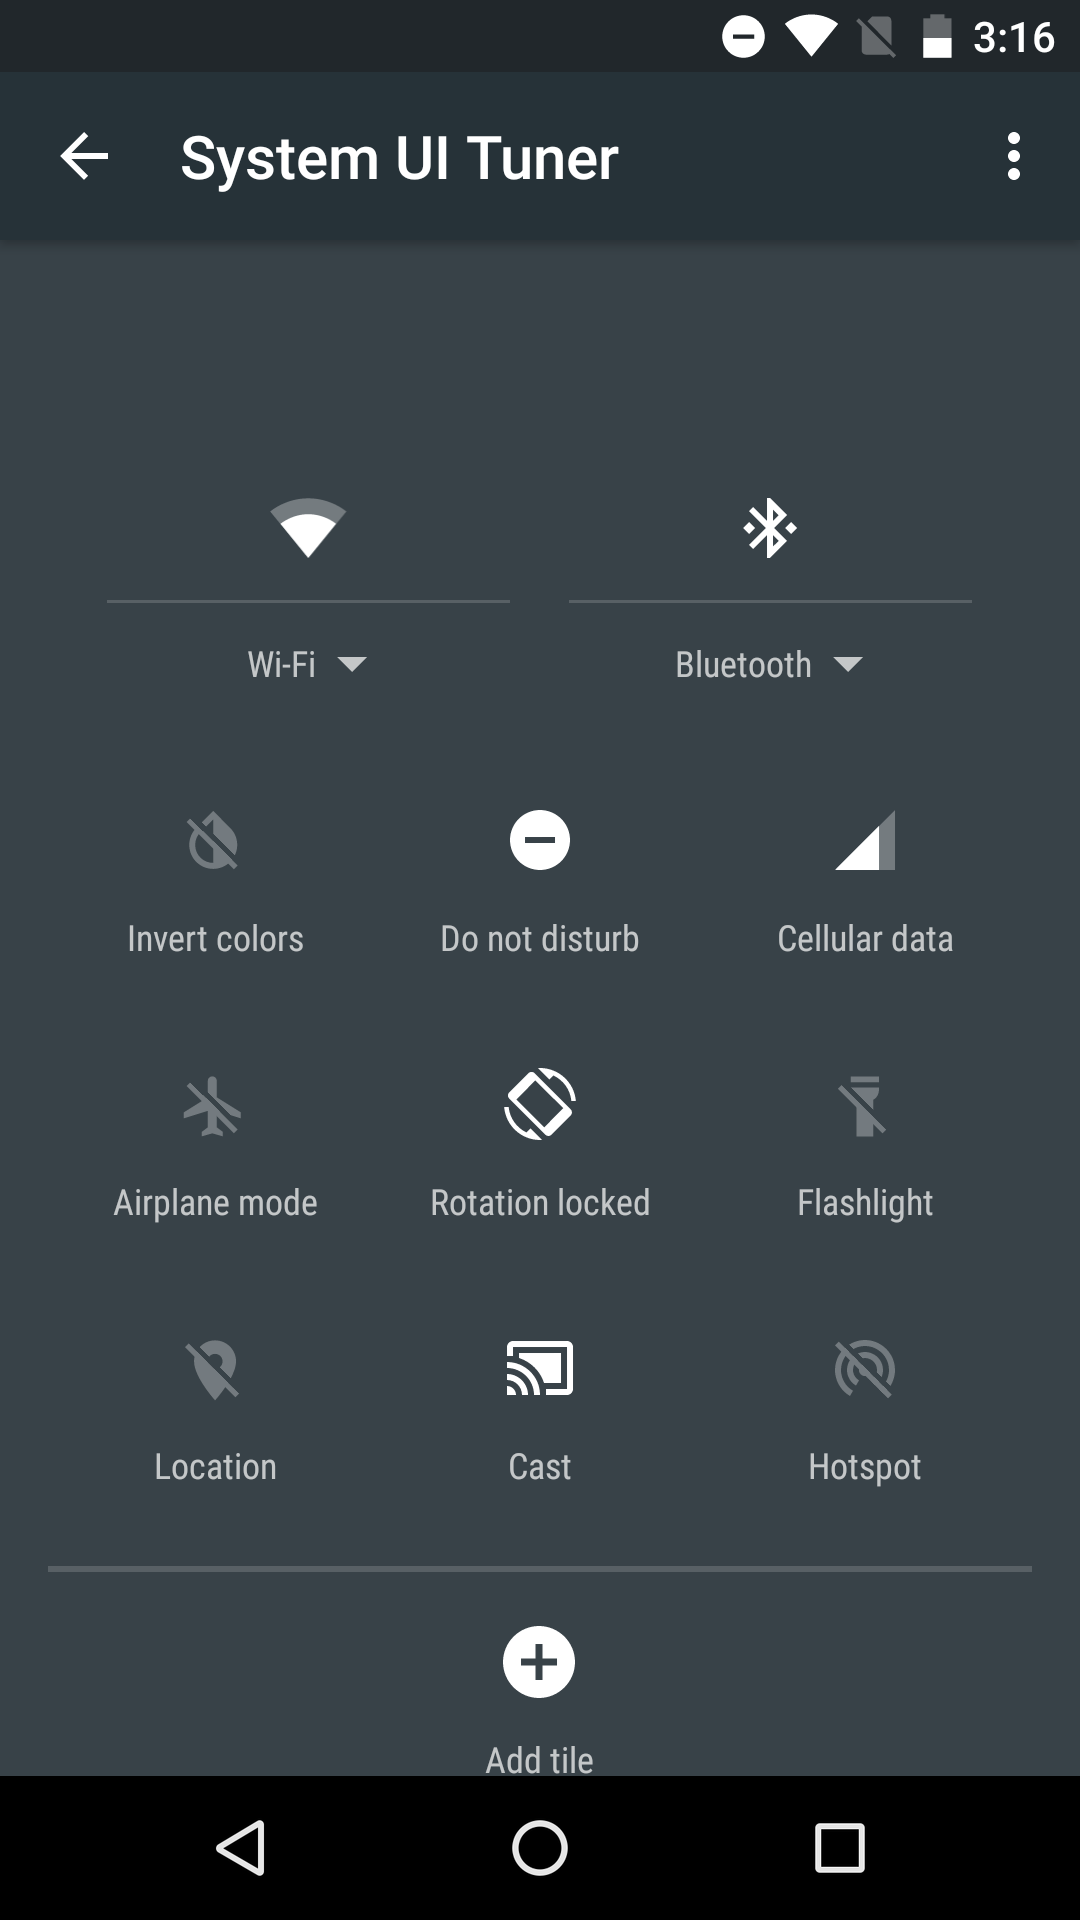
- Tap on Quick Settings
From here you can tap and hold any of the tiles to move them around or remove them from the menu. You can can also choose the Add Tiles option at the bottom to add tiles that you previously removed.

Show the battery percentage in the status bar
You can quickly see how much battery life is left by looking at the battery icon in the status bar, but, unfortunately, the exact percentage doesn’t show. You can see your percentage with a quick two finger swipe down, but you can save that step and display the percentage all the time in the status bar. You just need to unlock the System UI Tuner in Settings in order to turn this feature on. Here’s how to do it:
 Note: Skip to Step 4 if you already turned on System UI Tuner in the last tip.
- Swipe down with two fingers from the status bar to reveal the Quick Settings menu.
- Tap and hold on the Settings icon at the top right for a few seconds.
- Release your finger and the settings will open along with a popup at the bottom saying, “Congrats! System UI Tuner has been added to settings.”
- Tap on System UI Tuner at the bottom of the Settings screen.
- Turn on Show Embedded Battery Percentage.
That’s all the Nexus 6P tips we have for now, but definitely check back soon because we will add more tips and tricks as we discover them. Did we miss any? Please let us know in the comments.
Editors' Recommendations
- Google Pixel 3 and Pixel 3a: 10 amazing tips and tricks
- Huawei may bring back the P30 Pro to cure our thirst for Google apps
- Asus Zenfone 6: Key settings to change on your new phone