Rotating your tires is a must if you want them to last for as long as possible. There’s no reason not to: It’s easy, it requires no special tools, and it only takes a few minutes. Here’s why you need to swap your wheels around every now and then, and what you need to know before you put a jack under your car.

Why rotate?
Rotating tires is one of the most straightforward car maintenance tasks — and it’s also one of the most essential. Tires wear at different rates, and switching their positions periodically ensures that they wear more evenly. That means you won’t have to buy new tires prematurely. If tires all wear at the same rate, it also means they respond the same way, ensuring your car’s handling characteristics stay safe and consistent.
Tire rotations should be done once every 6,000 miles or so, and it’s a good idea to check the tread and pressure with a tire pressure gauge while you’re at it. You can time tire rotations to correspond with other maintenance like oil changes, and have them done while the car is in the shop. That’s probably the more convenient route for most people, but it’s a snap to rotate your own tires at home.
Know your tires
The way tires are rotated varies depending on the vehicle, so consult your owner’s manual to find the exact procedure. You may want to mark the tires with chalk to help keep track of them, too. Write “front left” or “right rear” on the inside part of the tire to know which corner it comes from.
Assuming all four wheels are the same size and the tires are non-directional, you’ll want to rotate the tires in a “rearward cross” pattern for rear-wheel drive or four-wheel drive/all-wheel drive cars. In this pattern, the front tires move diagonally, so that the left front tire is mounted in the right rear position, and the right front tire is moved to the left rear position. The rear tires are moved to the front, but stay on the same side.
The pattern for front-wheel-drive cars is the opposite. You do a “forward cross” where the rear tires are moved to the front and change sides. Alternatively, you can shuffle the tires in an “X” pattern, where each tire is moved diagonally, regardless of which wheels are driven.
Some cars have directional tires (you can usually tell by the V-shaped tread pattern), and these can only be rotated back-to-front, front-to-back, not side-to-side. If your car’s front wheels and rear wheels are different sizes, you can only rotate side-to-side. If your tires are directional and the wheels are different sizes, the tires have to be removed from the rims and remounted, which is not really something you can do at home unless you have a tire-mounting machine.
Most modern cars have four full-size tires and a compact spare tire, typically called a donut or a space-saver. That donut tire should only be driven on in emergencies, but you can use it as a placeholder while rotating your tires. If your car has a full-size spare (meaning it’s identical to the four tires you drive on), you might want to institute a five-tire rotation so that it wears at the same rate as your other tires. Make sure it’s not ancient, though.
Finally, dually pickup trucks — which have two sets of rear wheels — have their own rotation pattern. Again, this can vary if the front and rear wheels are different sizes, so check your owner’s manual for specific details.
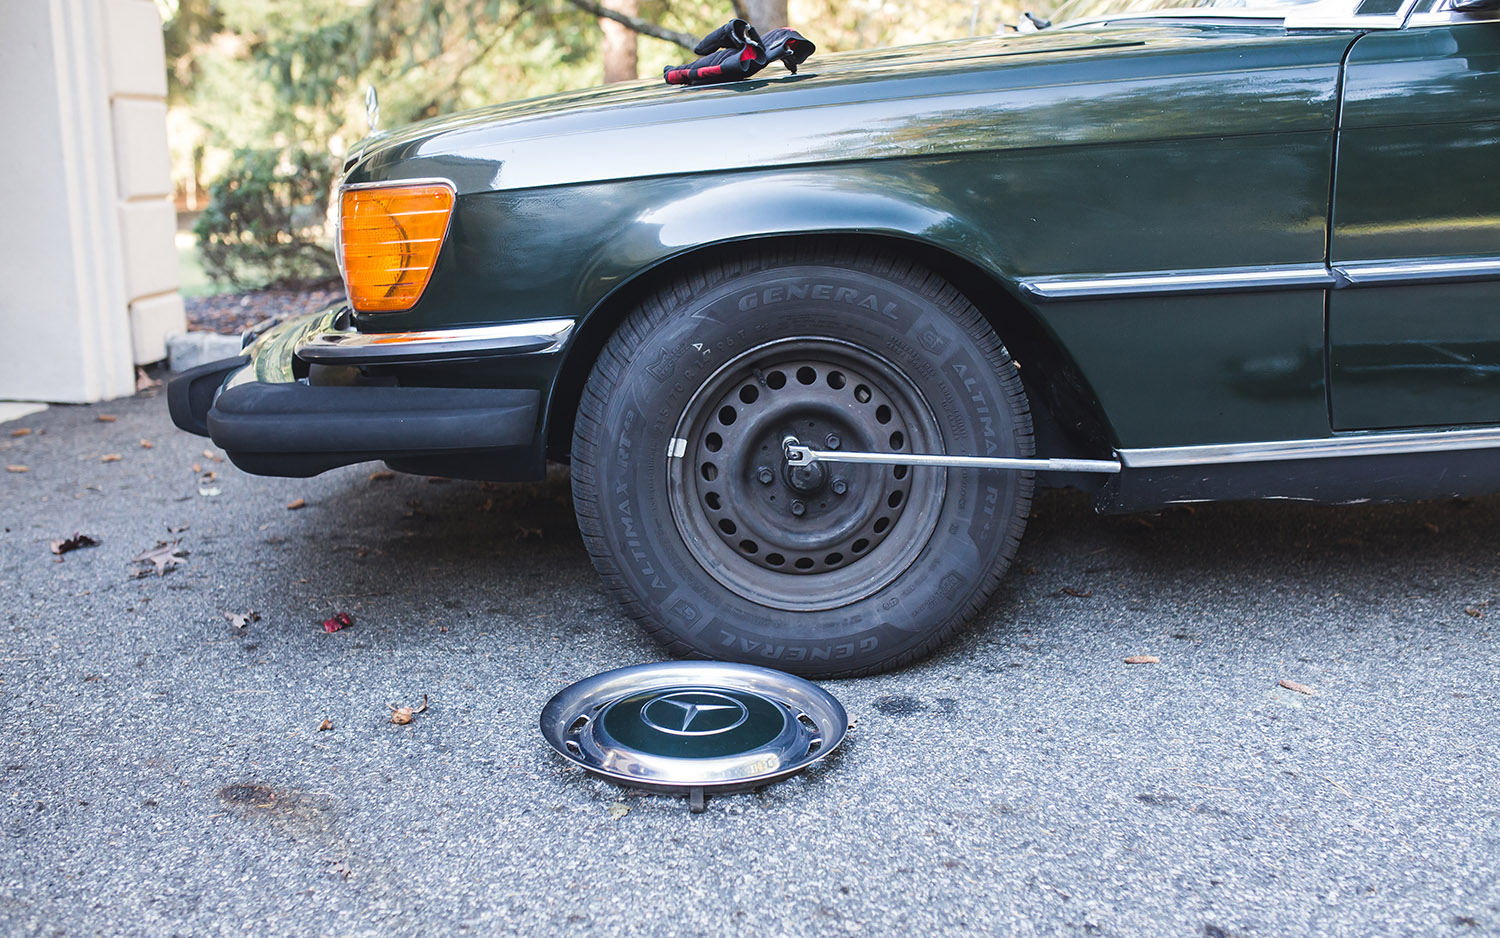
Step 1: Loosen the lug nuts
First, prepare to jack up your car. Find a flat piece of ground to work on, apply the parking brake, make sure the car is in park if it’s an automatic or in gear if it’s a manual. Also, place chocks in front of the front wheel and behind the rear wheel on the opposite side of the one you’re working on (the wheels on that side will be off the ground).
Before jacking up the car, you’ll want to loosen the lug nuts, without removing them completely. The ground will provide resistance, allowing you to get them off more easily. If you try this while the wheel is in the air, it will be much more difficult, and because the drive wheels are free to spin, you could strain the transmission.
Most modern cars have a five-lug pattern. The correct way to loosen them is in a star pattern, meaning you should start at the top and loosen them in a pattern that draws a star. This prevents the rims from getting warped, and is especially crucial for aluminum or magnesium wheels, which are more fragile than steel rims. If your car has a four-lug pattern, just loosen the nut diagonally across from the one you just loosened.
Lug nuts can be difficult to loosen. One trick is to place your foot on the handle of the wrench and kick it once to crack the lug, then loosen it the rest of the way in a normal manner. You can also use a breaker bar to facilitate the process.
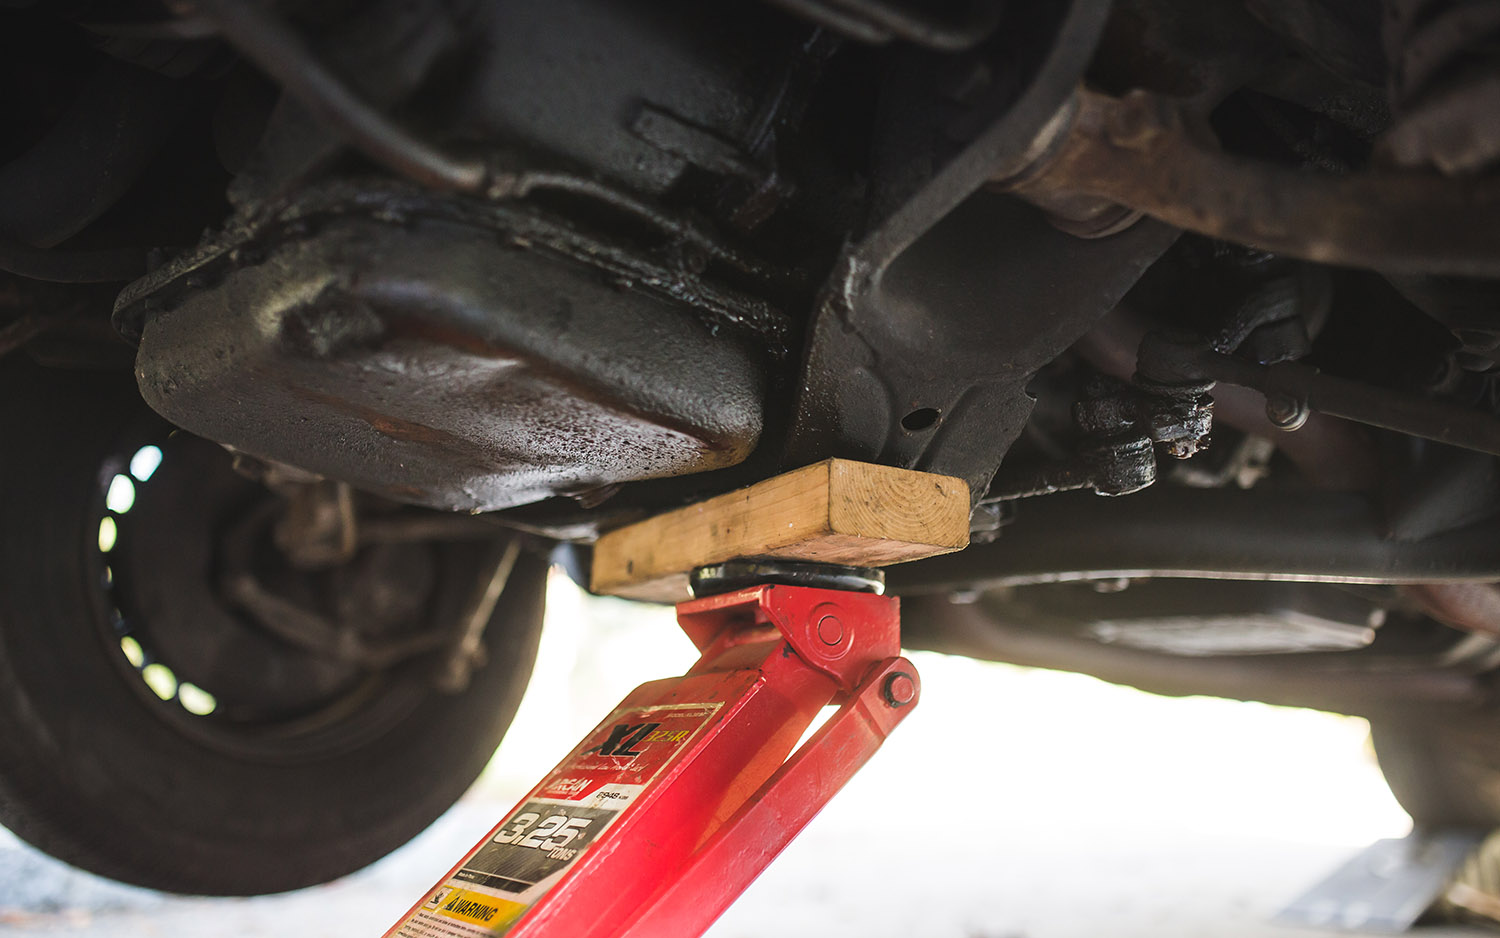
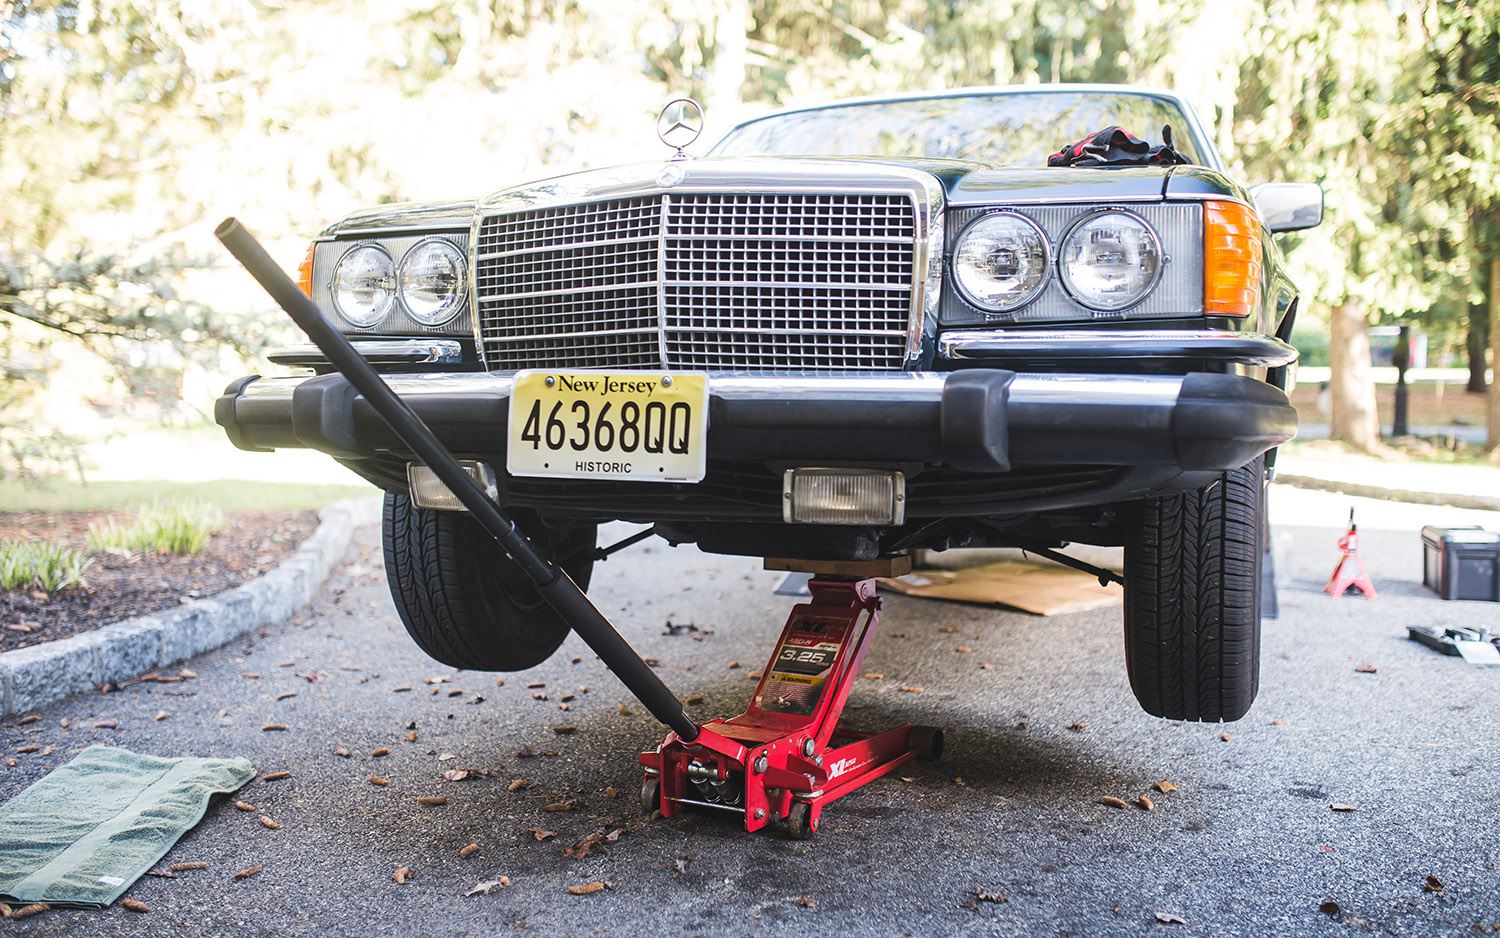
Step 2: Jack up your car
With the lugs loosened but still on their threads, place the jack in the correct position under the car. Every car has specific locations where a jack can safely be placed. Consult your owner’s manual to find the jacking point, and do not place the jack in just any old spot. A seemingly solid surface may not be able to support the weight of the car, or may allow the car to slide off the jack. You don’t want the jack to crush the underbody — or your rib cage.
You’ll need something to hold up the car while you’re moving tires around. Jack stands are the most straightforward solution, but you can also mount the spare tire on any hub that’s missing a tire as a placeholder. If your car has a full-size spare, you may want to rotate it anyway.
Step 3: Remove and refit the wheels
Once the tire you want to remove is in the air, you can remove the lug nuts with your fingers. If you’re using the spare tire as a placeholder, get it mounted. Two lug nuts tightened enough to keep the wheel seated on the hub, should be sufficient, since you won’t be driving on it. Move on to the next wheel and repeat the process.
When you’re putting a wheel back on for real, reinstall all lug nuts and tighten them enough to keep the rim seated on the hub. Then lower the car back onto the ground and tighten them some more. Strictly speaking, you should use a torque wrench to ensure the lugs are tightened to the specific torque specifications listed in the owner’s manual. But doing it by feeling with a conventional wrench should work fine. Tighten the lugs until the level of resistance sharply increases. Don’t over-tighten them as that can damage the rims. Again, this is especially important for aluminum or magnesium rims, which are fragile and expensive to replace.
Once the tires are in their new positions, you’re all set. Since you’re already playing with your tires, this is a good opportunity to check their pressures and tread depths.
Editors' Recommendations
- Don’t get stranded: The best portable tire inflators in 2024
- Is your check engine light on? Here are 10 possible reasons why
- How to charge your electric car at home
- How to jack up your car
- How to fix squeaky brakes